- Mac os mavericks vmdk
- VMDK Mounter for Mac OS X
- Key Features and Benefits
- Resources
- Установка macOS на VMware Workstation
- Как разблокировать VMware для macOS
- Как создать виртуальную машину для macOS
- Как отредактировать файл .VMX
- Как установить macOS на VMware Workstation
- Download macOS Catalina Image file for Virtualbox and VMWare
- Overview of macOS Catalina Image file for Virtualbox and VMWare
- About Catalina Virtual Image (MacOS 10.15)
- Downloading process of macOS Catalina Image file for VirtualBox and VMware
- Downloading process of Catalina Virtual Image
- Guidelines to Install Mac OS Catalina on Virtual Box on Windows (Desktop or Laptop)
- Conclusion
Mac os mavericks vmdk
Многие, в том числе и студенты Web Academy, задаются вопросом как установить Xcode на Windows? Так как для программирования под iPhone/iPad/Mac, Вам обязательно нужна программа Xcode, которая работает только на MacBook и не у всех изначально есть возможность приобрести себе MacBook. Как программировать на Objective-c под iPhone/iPad/Mac без Macbook?
Для решения проблемы с Xcode на Windows есть два варианта:
- Установка виртуальной машины с операционной системой OS X
- Установка хакинтош (тут важны параметры Вашей машины).
В данной статье мы рассмотрим первый вариант.
Выполните следующие действия для установки рабочей OS X 10.9 Mavericks. Для этого будем использовать образ VMware OS X 10.9 Mavericks для Windows 7, 8 или 8.1, данный мануал подходит для машин с процессорами Intel. Сам процесс установки чистой OS X 10.9 является сложным, по этому мы и будем использовать метод несколько попроще. Мы просто скачаем образ VMware OS X 10.9 Mavericks, которая была раннее установлена на другую VMware Workstation и подключим ее к нашей VWware Workstation.
Пошаговая инструкция для использования образа VMware OS X 10.9 Mavericks на Windows 8 (7, 8.1):
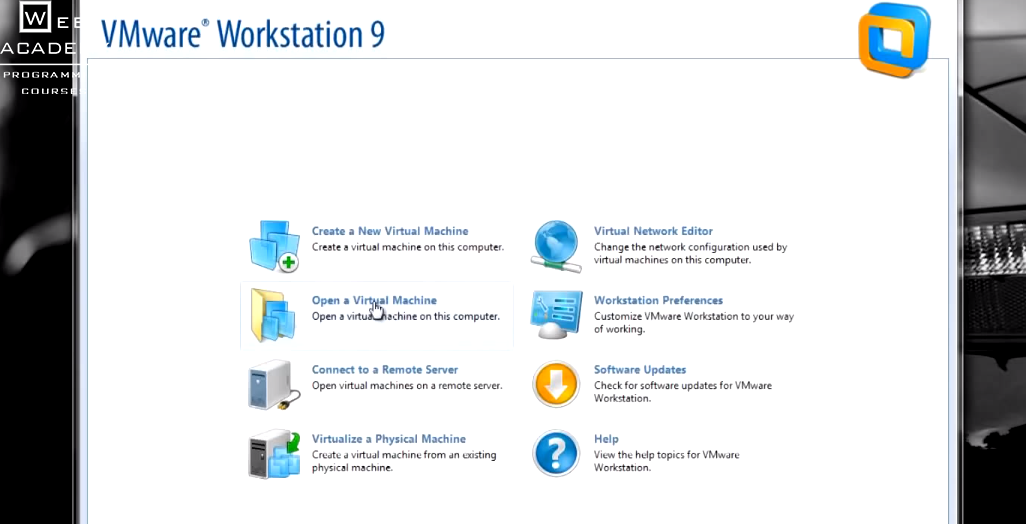
1) Первым делом нужно убедится, что Ваша физическая машина поддерживает hardware virtualization technology ( vt-x). В большинстве случаев эта опция включена по-умолчанию, в противном варианте ее нужно включить в BIOS. Устанавливаем на Windows 8 (7, 8.1) VWware Workstation http://goo.gl/GOl6I8
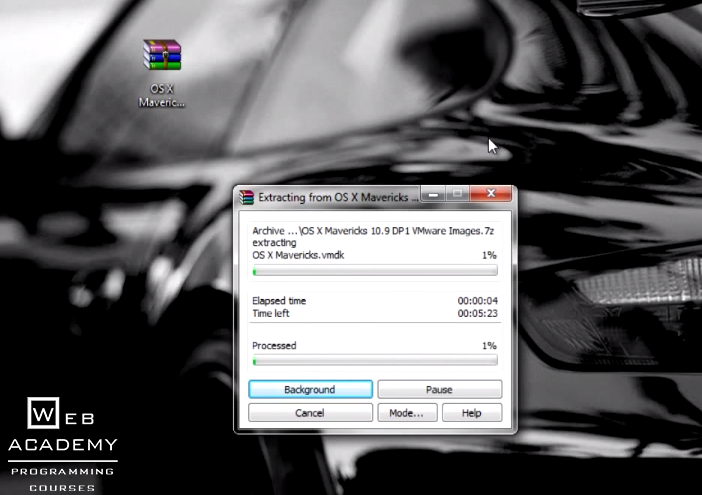
2) Скачиваем и распаковываем образ VMware OS X 10.9 Mavericks http://goo.gl/8H6AYP (торрент файл)
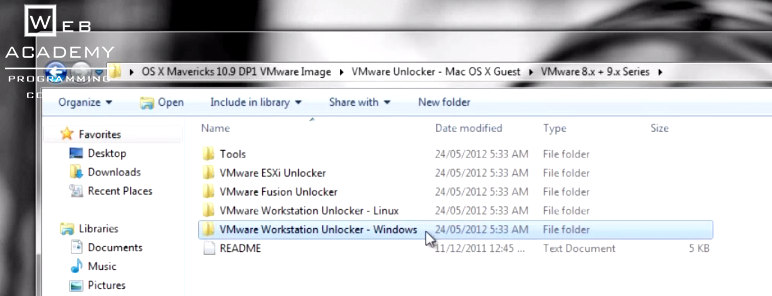
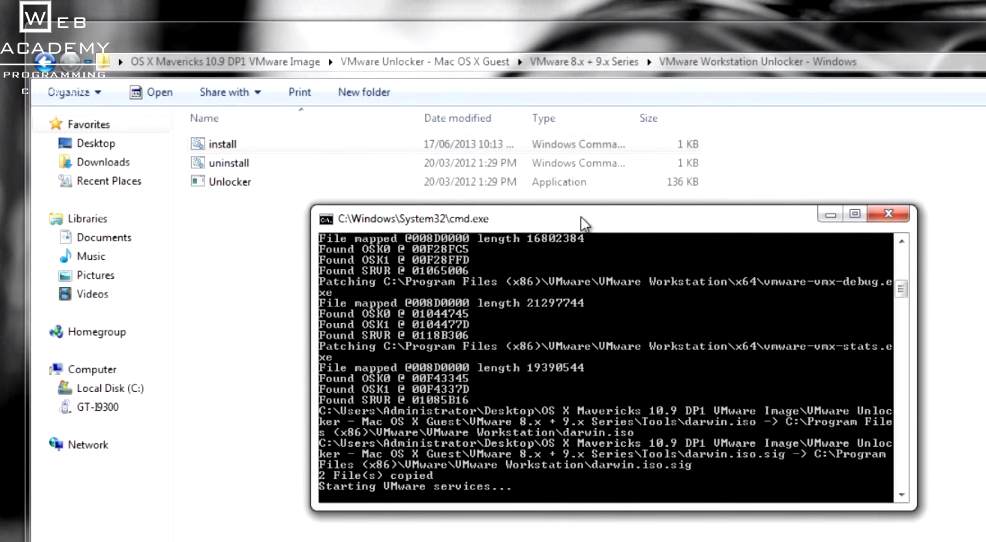
3) Нужно использовать Unlocker patch, что бы VMware Workstation поддерживала OS X 10.9 Mavericks, как geust OS. Для этого запускаем скрипт, которые лежит в папке (см. ниже)
4) Подключаем образ VMware OS X 10.9 Mavericks к вашей VMware Workstation (см. ниже):

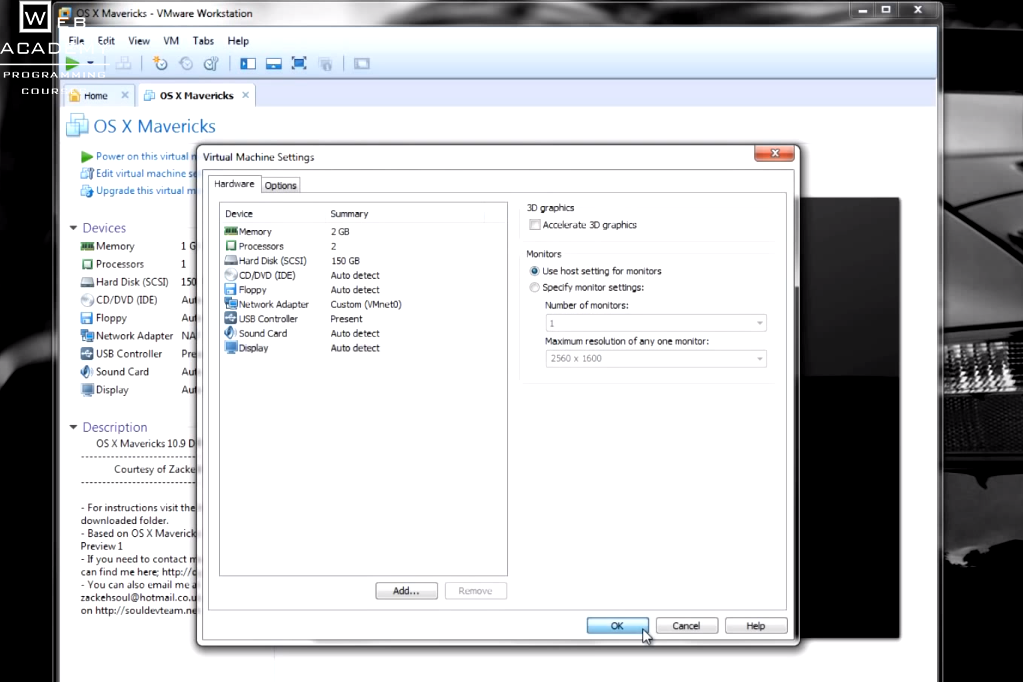
5) Перед запуском виртуальной машины, кликнем Edit virtual machine settings (желательно изменить ее настройки), нужно минимум 2 Gb ОЗУ и количество процессоров увеличить к 2 (см. ниже):
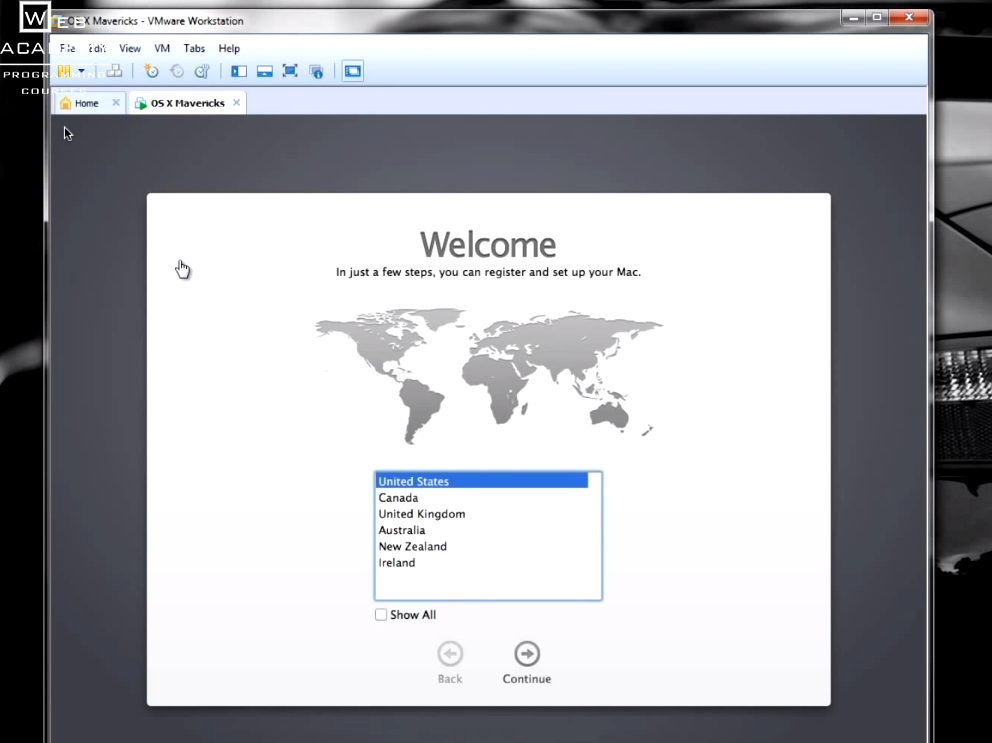
6) Запускаем виртуальную машину, если все ок, должны увидеть заставку выбора языка для установки OS X 10.9 (см. ниже):
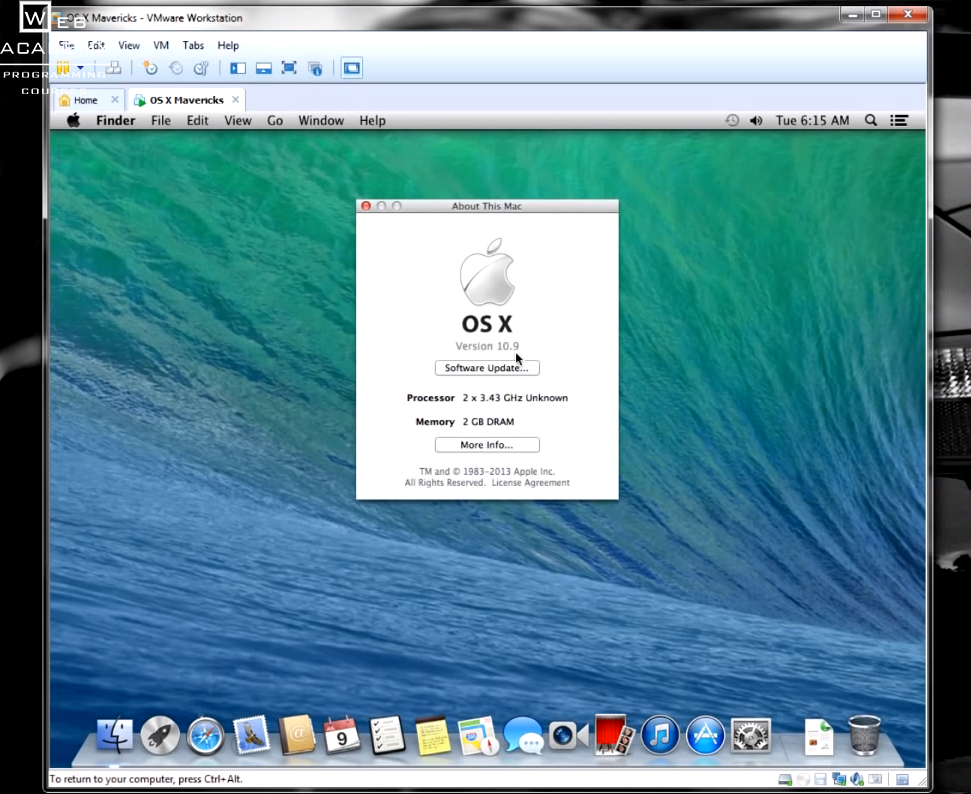
7) Проходим установку заполняя нужную информацию в соответствующих полях в конце должен загрузиться рабочий стол OS X 10.9, клацаем Apple>About this Mac(см.ниже):
N.B. Помните эта установка OS X 10.9 Mavericks только для целей тестирования и обучения. В виртуальной среде вы не получите все плюшки OS X, они доступны только на Apple Hardware устройствах. Но для запуска, например, Xcode (среда разработки под iOS, OS X) вполне хороший вариант.
8) Установка VMware Tools for OS X 10.9 Mavericks
Хочу отметить, что звук и сеть работают даже без установки VMware Tools, по этому не вижу смысла устанавливать их, но если нужно сделать общую папку для OS X 10.9 и Windows, то VMware Tools обязательно нужны.
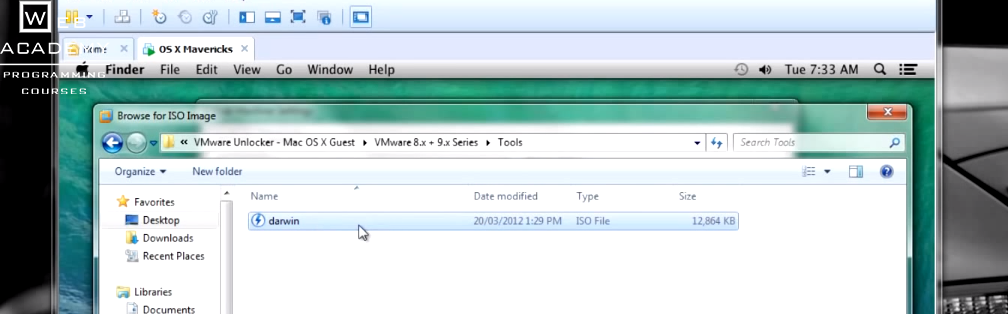
Заходим в настройки виртуальной машины и выбираем CD/DVD привод и клацаем Use ISO image file>Browse (см. ниже):

Находим файл установки VMware Tools (darwin.iso):
Далее, как мы подключили darwin.iso в настройках VMware, нужно запустить этот образ, справа внизу клацаем connect (см. ниже):

Дальше должна запуститься установка VMware Tools (проходим установку по заданному алгоритму установки) (см.ниже):

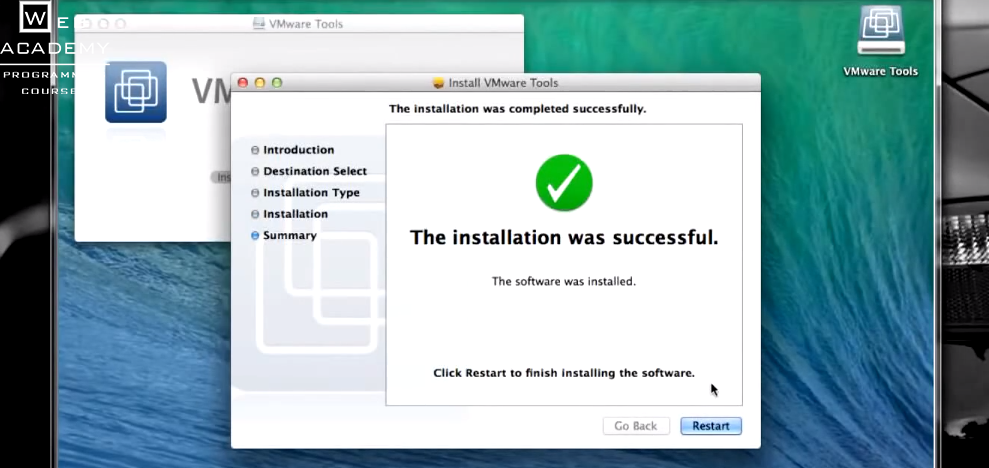
Далее клацаем Restart, после перезагрузки пакет VMware Tools должен работать и вы сможете подключать общие папки.
N.B. После прохождения этого мануала вы сможете использовать OS X 10.9 Mavericks для тестирования или обучения.
Теперь Вы можете работать, программировать в Xcode на своей виндусовой машине.
Также Web Academy предоставляет услугу ВИРТУАЛЬНЫХ СЕРВЕРОВ С Xcode. То есть Вы сможете работать в программе Xcode в интернете, фактически Вы получаете виртуальный доступ к Xcode. За более подробной информацией обращайтесь по адресу Этот адрес электронной почты защищён от спам-ботов. У вас должен быть включен JavaScript для просмотра.
Источник
VMDK Mounter for Mac OS X
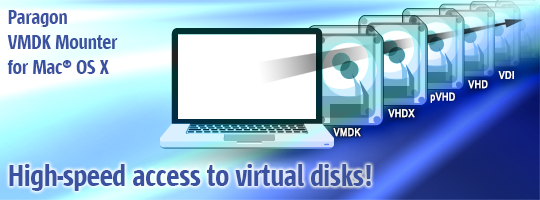
Need to access data on your virtual disk or dreaming about fast and easy data exchange between the host and guest OS on a Mac? We’ve got you covered! Introducing new Paragon VMDK Mounter for Mac OS X – the first and only solution on the market which gives you full high-speed read/write access to virtual disks under Mac.
Key Features and Benefits
Very easy to use
mount a virtual container by double clicking or using Finder’s “Open With…” context submenu.
Alternatively a powerful CLI (Command Line Interface)
utility allows you to create and mount a virtual container.
high speed access to virtual disk content and high-speed data exchange between host and guest OS.
The first and only solution
with full read/write access to virtual disks on OS X.
larger than 2TB.
Supported Virtual Disks Formats
- VMDK – VMware Virtual Disk
- VDI – VirtualBox Virtual Disk
- VHD – Microsoft Virtual PC
- pVHD – Paragon Virtual Disk
- VHDX – Microsoft Hyper-V Virtual Disk
- OS X 10.7 Lion (64-bit only)
- OS X 10.8 Mountain Lion
- OS X 10.9 Mavericks
- OS X 10.10 Yosemite
- OS X 10.11 El Capitan
Resources
Download Paragon VMDK Mounter for Mac OS X
Download Paragon VMDK Mounter for Mac OS X User Manual
We offer
Our websites
Stay connected
Copyright © 1994–2021
Paragon Technologie GmbH.
Источник
Установка macOS на VMware Workstation
В этой статье мы расскажем, как проходит установка macOS на компьютер через VMware Workstation Player. Для работы вам понадобится готовый ISO-образ операционной системы. На VMware mac OS устанавливается в 4 этапа:
- Установка патча для разблокировки возможностей работы VMware с macOS.
- Создание виртуальной машины.
- Редактирование конфигурационного файла для запуска на процессорах Intel или AMD.
- Установка macOS на виртуальную машину.
Как разблокировать VMware для macOS
Поскольку VMware Workstation официально не поддерживает MacOS в качестве гостевой ОС, для запуска macOS нужно установить неофициальный патч. Он подойдет как для Workstation Player, так и для Workstation Pro.
Чтобы установить патч для разблокировки macOS:
Готово, при создании виртуальной машины в списке поддерживаемых гостевых ОС появится Apple Mac OS X:
Как создать виртуальную машину для macOS
После установки патча можно приступить к установке macOS. Для работы вам понадобится готовый ISO-образ операционной системы.
Нажмите Create a New Virtual Machine, чтобы создать новую виртуальную машину:
Нажмите Browse и в локальной папке компьютера выберите ISO-образ Mac OS. После этого кликните Next:
Выберите «Apple Mac OS X». Выбор версии зависит от того, какую ОС вы хотите установить:
- Big Sur — macOS 11.1,
- Catalina — macOS 10.15,
- Mojave — macOS 10.14.
Затем нажмите Next:
Если вы хотите оставить название и директорию по умолчанию, нажмите Next. Если вы хотите изменить их, в поле «Virtual machine name» введите имя новой виртуальной машины. Затем нажмите Browse, чтобы выбрать папку, в которой будет храниться виртуальная машина. После этого нажмите Next:
«Maximum disk size» — это максимальный размер дискового пространства, которое будет выделено для гостевой операционной системы. Мы рекомендуем выбрать объём — 80 ГБ.
Если хотите, чтобы виртуальный диск хранился в одном файле, выберите Store virtual disk as a single file. Это не повлияет на производительность операционной системы.
Проверьте количество выделенных ресурсов. Для этого нажмите Customize hardware:
- Memory (оперативная память) — рекомендуемый объём составляет 4 ГБ. Если у вашего компьютера установлено 16 ГБ оперативной памяти, выделите 8 ГБ.
- Number of processor cores (количество ядер процессора) — минимальное рекомендуемое количество — 2. Если процессор вашего компьютера имеет 8 и более ядер, выделите минимум 4 ядра.
Кроме оперативной памяти и ядер процессора необходимо включить виртуализацию. Для этого нажмите Processors, отметьте галочкой пункт «Virtualize Intel VT-x/EPT or AMD-V/RVI» и кликните Close:
Готово, виртуальная машина создана.
Как отредактировать файл .VMX
Перед запуском гостевой ОС нужно внести изменения в файл с расширением .VMX.
Откройте директорию, в которой хранятся файлы виртуальной машины. Это директория, которую вы выбирали на 5 шаге. Если вы выбрали директорию по умолчанию, перейдите в Документы — Virtual Machine. Вам нужен файл с расширением .VMX:
Кликните по файлу правой кнопкой мыши и выберите Открыть с помощью — Блокнот.
В зависимости от процессора вашего компьютера вставьте в конец файла нужный текст:
Готово, виртуальная машина готова к запуску.
Теперь запустим виртуальную машину и установим операционную систему macOS.
Как установить macOS на VMware Workstation
В инструкции мы устанавливаем версию macOS Big Sur. Процедура установки версий macOS Mojave и Catalina практически не отличается.
Чтобы установить macOS на VMware Workstation:
Запустите созданную ранее виртуальную машину:
Дождитесь загрузки операционной системы с установочного диска:
Выберите язык и нажмите на стрелку в правом нижнем углу:
Отформатируйте виртуальный диск. Для этого выберите Дисковая утилита и нажмите Продолжить:
Выберите виртуальный жёсткий диск VMware Virtual SATA Hard Drive Media и нажмите Стереть:
Введите название диска и нажмите Стереть:
Дождитесь завершения процедуры и нажмите Готово.
После этого вверху страницы нажмите Дисковая утилита — Завершить дисковую утилиту:
Выберите Установка macOS Big Sur и кликните Продолжить:
Примите условия лицензионного соглашения:
Выберите диск, название которого вы указывали на 6 шаге, и нажмите Продолжить. На этот диск будет установлена ОС.
Дождитесь окончания установки. Гостевая операционная система перезагрузится несколько раз:
Выберите регион и продолжите установку. Следуйте подсказкам системы:
На этапе «Ассистент миграции» в левом нижнем углу нажмите Не сейчас:
Чтобы пропустить «Вход с Apple ID» нажмите Настроить позже в левом нижнем углу:
Заполните поля, задайте пароль и нажмите Продолжить:
Готово, вы установили macOS на виртуальную машину VMware Workstation Player.
Источник
Download macOS Catalina Image file for Virtualbox and VMWare
Apple has an updated Operating System (OS) called Catalina, especially designer under Mac. It is considered as one of the best and most recommended innovations Apple ever had. Catalina has introduced advanced new features that are available in MacOS 10.15. It has the ability to transform an iPad into its display. It includes a new feature of web recording where a user can easily record the browser and keep it as a data.
Other available features Catalina includes are music, application of books, and some attachments of security. It also controls the voice over the device of Mac. Moreover, it also has sidebars’ availability and iPad external display. The latest application this software has introduced is the voice control panel, apple watch, and Siri shortcuts. If the user operates Mac from their desktop then they have to use it through a virtual machine. Some examples of these machines are VMware, VirtualBox, or Hyper-V.
The user can easily download macOS 10.15 Catalina Virtual Image by using the procedure of downloading. In this article we are discussing the downloading process and why it is important as well as useful to the user.
Virtualization is the process where a user can create a virtual or actual image of something. It can be said that it is a copy of the original one. Using a desktop virtualization process users can operate more than one (two) operating systems using only one desktop (computer or laptop). Out of those two one is an actual operating system and another one is virtual. Windows, Linux, and other operating systems also allow this type of virtualization. It will help to create a virtual PC for the user.
There are many types of virtual machines and software is available. Users can use a Virtual Box and VMWare for getting the best experiences. They have to download and install it from the authenticated site.
For RAR file password visit our forum post.

File Type VMDK Installer
Developer Apple Inc.
Overview of macOS Catalina Image file for Virtualbox and VMWare
For testing applications, virtual machines are the best choice. Using this, users can also test the software as well as the operating system. This virtual platform allows the user to run multiple programs on their PC. The user also can install any program which they want.
Users can run programs in the sandbox environment. it is the actual frame of working. If the user-facing any kind of problems regarding the virtual machine they can easily remove this from their PC. For that, it has to be VMware or Virtual Box.
With regards to entering or testing applications, Software or Operating Systems, virtual machines are the ideal choice to go with. They permit you to run diverse, one of a kind operating systems, run programs on them or have a go at installing whichever applications you like.
For introducing any new operating system the best process is to install it in VirtualBox first. For installing macOS Catalina on VirtualBox users need some files which are very much essential for installing it. This VirtualBox also needs some images. It also wants the support of Virtual Disk Image. The user must have to download the file of VirtualBox Image of macOS Catalina when they want to install it in their system.
About Catalina Virtual Image (MacOS 10.15)
VMDK is Virtual Machine Disc. This is for virtual images and VMware. This VMDK is used to run the user’s virtual machine. It is a hard disk basically which is used for virtual purposes. This virtual disk will help to make a duplicate copy of that version and after that use them in the case of VirtualBox. Also, the duplicate copy for VMware is utilized.
One important thing is that the user can not use a virtual image for installing. Because when they use the virtual image in a virtual machine the settings will be automatically changed by the machine.
Downloading process of macOS Catalina Image file for VirtualBox and VMware
Mac OS 10.15 Catalina is named because of a special kind of update for Apple and for its operating system which is known as Mac. It has some outstanding features, applications, and a voice record facility which we already discussed earlier. The price currency is USD and the operating system is macOS Catalina 10.15. The category of application for this is Virtual Machine Image.
VMDK is the extension of the virtual image which is mainly for VMware. The virtual hard disc that is VMDK is a virtual machine disk. It can be used by the user for running the virtual machine. It is also required to run macOS on VMware.
Downloading process of Catalina Virtual Image
We have come up with the process by which the user can fix the error of Downloading. Let’s learn it in detail.
Sometimes the Downloading link will not work properly. It happens because there are huge amounts of users in the traffic. Sometimes users face the problem because of the large size of the file. This large file is shared within many users and which is why that’s why users face the problem very often. To fix these problems users must have to follow the below-mentioned process.
- First, visit Google drive and log in with their account.
- Click the download link > click on the image file. (Press the Right-click) > Click on the option “make a copy”. At this time Google will automatically create a copy of that which will save the user’s drive (“my drive”).
- Next, the user needs to go to the file and press the option “Download ” for Downloading the image file.
- At this time users have to decide whether they use VMware or VirtualBox. Then they can download the image file.
The user can also download other required software.
Guidelines to Install Mac OS Catalina on Virtual Box on Windows (Desktop or Laptop)
The updated next version of macOS is macOS Catalina. It has various improved features than the previous one. With the help of macOS Catalina ISO, it can be done easily. If you are a subscriber of ISO River you can easily find the downloading links to install macOS Catalina or if not then please get the link by dropping your query in the comment section.
For Mac users, it will be easier to use previous versions of Mac OS. Now, we are discussing how the user installs macOS Catalina on their Windows. For that user must have to confirm that all the features are available along with it. So that they can be used as per requirement. The process is mentioned below:
- Downloading the macOS Catalina related ISO file
- Installation of Virtual Box (oracle) on the user’s PC(Windows)
- Installation of Virtual box extension package
- Creation of a new virtual machine
- Settings of the virtual machine
- Application of various commands in the command prompt
- Installation of macOS Catalina in VirtualBox
VirtualBox is nothing but a virtual machine app. In this app, all the required things are gathered. With the help of a virtual box, the process seems easy to operate. The VMware workstation is the preliminary requirement for the installation. VirtualBox extension is also required. Virtual Box guest tools help users run virtual machines appropriately and smoothly. It also offers customization options to the users. Thus, the user is not required to install a patch like an unlocker.
Installing the first required thing is the operating system installer file. Users can install this file anywhere in their operating system. At this time macOS Catalina VMDK file is compulsorily required. VMWare and VirtualBox consist of two different downloading processes. The downloading process of the Catalina is quite easy. Users must have to follow the pieces of information on the screen and they have to click on the particular options.

Now, the VirtualBox installation process is required.
- To run a setup, the user needs to have to click on the option “Windows hosts”.
- The user can open the downloaded file.
- The virtual Box setup file is then opened and the user can process it for installation.
- The user must have to install the VirtualBox extension package. It will help to enable the mouse and the keyboard.
- The user has to click on the supportive Windows they can see on the screen. At this time users will see a virtual box window from which they have to click on the install option.
- Click on the option “expert mode”. It will appear at the end of the Window.
- Next, the user has to specify a name and a place for storing purposes. It will gather in the user’s memory.
- The user has to select the option “create virtual hard disk”.
- On the screen users also have to write “100GB” and click on the button “create”.
If you are going through this step, we would suggest you to be careful and alert while performing this exercise. As this is a simple process but a slight mistake can disturb the installation of a Virtual Machine.
Through this the user can quickly increase the number of processors. Moreover, it also increase the capabilities of the system. Video memory must have to be increased. Users must have to change the graphics to VMSVGA.
- Go to the Storage tab for the Empty Disk option. There is a down arrow.
- Click on the “virtual optical disk” option
- Select the “existing disk” option.
- Visit the settings Window, select the Controller and Press the “OK” button.
- Click on the close button for ending the installation process. Now they can close the tab.
- Next, the user needs to copy-paste the commands in the notepad.
- Press ‘Ctrl+H’ and type the virtual machine name and replace all the requisite files. This will help open the command prompt.
- This will take a moment to process.
- After opening, use disk Utility. The user can also erase names from their VirtualBox.
- Select the option ‘done’ and then ‘continue’.
- Click on the “terms and conditions” to make sure that they agree with that. They also have to select a disk for installing. It will take a few minutes only.
Conclusion
After completing all the mentioned steps correctly the macOS Catalina Image file for Virtualbox and VMWare will restart automatically or else users have to reboot the system. One more task is to remove the Catalina ISO from the settings of the virtual machine storage. After this user can start the virtual machine. The user can also update this Catalina when needed. They will also be able to take a snapshot. Users can also speed their MacOS Catalina.
Without any cost, users can easily download the macOS on their PC (Windows) by carefully following the instructions.
Источник


