- How Do I Download and Install macOS Monterey for Windows? Free
- How to Install MacOS 12 in Windows PC? in 2 Ways
- Method 1: Using VirtualBox App
- Method 2: Install macOS 12 on Windows 10 PC via VMware
- Conclusion:-
- Apple выпустила публичную macOS 12 Monterey. Как установить
- Какие Mac поддерживают macOS Monterey
- Что надо сделать перед установкой
- Как создать резервную копию в Time Machine
- Как установить публичную бета-версию macOS Monterey
- Как удалить профиль для установки бета-версии macOS Monterey
- Как создать загрузочный диск macOS 12 Monterey. Он поможет восстановить систему
- Что потребуется для установки
- Как создать установщик macOS 12 на внешнем накопителе
- Как установить macOS 12 с внешнего накопителя
- How to Install VMware Tools on macOS Monterey
- Steps to Install VMware Tools on macOS Monterey
- Step 1: Attach VMware Tools ISO to macOS Monterey
- Step 2: Install the VMware tools
- Step 3: Allow VMware Tools through macOS Monterey Security Settings
- Step 4: Reinstall VMware Tool if required
- Summary
How Do I Download and Install macOS Monterey for Windows? Free
Last Updated on Jun 5, 2021
Want to have experience with macOS 12 on Windows 10 PC? This is the right place for you; in this guide, we’ve mentioned two different methods to download and install macOS 12 on Windows PC, the first one by using VirtualBox, and another one is with VMWare Machine. You can quickly install the MacOS 12 on any Windows PC by following this procedure. Many users and developers need to test their developed apps on Mac, but they usually use the MacOS on Windows rather than buying a new Mac.
we are happy to help you, submit this Form, if your solution is not covered in this article.
Despite this, you can easily install the macOS in Windows using the VirtualBox and VMWare App. In this article, we’ve added both ways to download macOS 12 for Windows PC.
How to Install MacOS 12 in Windows PC? in 2 Ways
Method 1: Using VirtualBox App
We’ve broken this procedure into two parts; in the first part, you’ll learn to set up the VirtualBox for MacOS, and then in the second part, you’ll see how to install macOS 12 on Windows PC.
Part 1: Set Up VirtualBox for MacOS 12
- First of all, download the VirtualBox on your Windows PC. Ignore if already downloaded on your PC.
- Also, make sure to download the Extension Pack.
- Let the download complete, then locate the VirtualBox EXE file and double-click on it to start the installation.
- Once done, launch the VirtualBox on your PC.
- Click on the New button to create a new entry for macOS 12.
- Next, rename the OS as MacOS 12 or give it its full name.
- Click on the Expert Mode option.
- In the Create Virtual Machine window, give the name of OS such as MacOS 12.
- Select MachineFolder path, Type, and Version.
- Up next, ensure the Memory (RAM) size is set to 4GB.
- Under Hard Disk, select Create a virtual hard disk now.
- Once you’re done with selecting all the options, click Create.
- It’s time to import the macOS 12 DMG File, but first, you need to have macOS 12 DMG file on Windows PC, get it from the web.
- Keep the Memory size at 120GB.
- Look for the Hard Disk Type section, choose VHD (Virtual Hard Drive).
- Now, select Dynamically Allotted in the Storage section.
- Click on Create.
- Now, go to the new VirtualBox that you’ve just created and then click on the Settings icon.
- Find the Storage section, select Empty and click on the CD icon and select Choose/Create a Virtual Optical Disk from the dropdown menu.
- Next, add the macOS 12 DMG file in the VirtualBox.
- After that, click on the OpticalDrive dropdown and choose SATA Port 0 for macOS 12.
- Click OK and close VirtualBox.
Part 2: Install macOS 12 in VirtualBox
- Open VirtualBox App on your Windows PC.
- Choose macOS 12.
- Select Start.
- Wait for the Apple logo to appear. The same setup screen will appear as it does on Mac PC.
- Follow the on-screen instructions such as Language.
- Select Disk Utility.
- Select the Continue button.
- Next, wipe the VirtualBox hard drive to APFS with the GUID scheme. Select Erase and later close the Disk Utility window.
- Now choose the Install macOS option and click Continue.
- Agree to Terms & Conditions.
- Wait for the system to complete the macOS 12 installation. The next screen you would be seeing is the macOS 12 setup screen.
- Again follow on-screen instructions like set Country and region, Language, Time, etc. keep Continue after setting each option.
- You would have to set up the Accessibility part, Data and Privacy section, on the Mac, keep on clicking Continue, and proceed to the next page.
- Do you want to Migrate the data? If yes, then do it from the Migration Assistant window or click Not Now to skip the action.
- Enter the Apple ID and Password. To skip, select Setup Later and move on to the next page.
- Agree to Terms & Conditions.
- Create a new computer account.
- Lastly, choose the theme and complete the Setup.
Method 2: Install macOS 12 on Windows 10 PC via VMware
You can even try VMWare to get the macOS operating system on the Mac, MacBook.
- Download and install the VMWare Workstation on your Windows PC. Double-click on the downloaded file.
- In the New Virtual Machine Wizard window, choose Typical (recommended) and click Next.
- When you see the Hardware Compatibility section, select Workstation 15.x from the dropdown options.
- Up next choose ‘I will install the operating system later.
- When asked to select Guest Operating System, select Apple macOS X.
- While setting the processor number, select 3 or 4.
- Set the Memory to 4GB.
- In the Disk section, click Create a new virtual disk and set the size to 100GB.
- Select CD/DVD option from the left panel.
- Browse the file and import the macOS 12 installer file (DMG) and click OK.
- Open the VMX folder.
- Find and open the VMX file using Notepad. Add the following code in that Notepad file and save it.
- smc.version = “0”
- Open the VMWare Workstation.
- Go to the Disk Utility section.
- Erase the Virtual Drive, it is mentioned in the above method. Do it.
- Again refer to the above section and install macOS 12.
Conclusion:-
Since many years from now, Tech People are using Different OS on Different System that’s incompatible to setup on Environment. Just like Use android on PC or Mac using Bluestack! In the same way, This techniques helps to install macOS On Windows in free with Open source free software.
Thanks for visiting! Keep posting a comment if you have an issue while installing macOS on windows Desktop or PC.
Источник
Apple выпустила публичную macOS 12 Monterey. Как установить
Apple следом за публичной версией iOS 15 выпустила бету macOS 12 Monterey для всех желающих.
В системе исправили ошибки и улучшили производительность. Заметных изменений пока не нашли, но если они появятся, мы обязательно обновим этот пост.
Скачать обновление можно в меню Системные настройки → Обновление ПО. Для апдейта нужен сертификат разработчика.
Легкого апдейта!
Какие Mac поддерживают macOS Monterey
▪️ iMac 2015 и новее
▪️ iMac Pro 2017 и новее
▪️ MacBook 2016 и новее
▪️ MacBook Air 2015 и новее
▪️ MacBook Pro 2015 и новее
▪️ Mac Pro 2013 и новее
▪️ Mac mini 2014 и новее
Что надо сделать перед установкой
ВАЖНО: обязательно сделайте полную резервную копию Mac через Time Machine перед установкой!
Иначе вы не сможете вернуться на macOS Monterey или другую предыдущую версию macOS с сохранением данных.
Как создать резервную копию в Time Machine
1. Подключите внешний жесткий диск к Mac. Желательно, чтобы объем накопителя был не меньше, чем встроенного SSD. Так точно все данные сохранятся
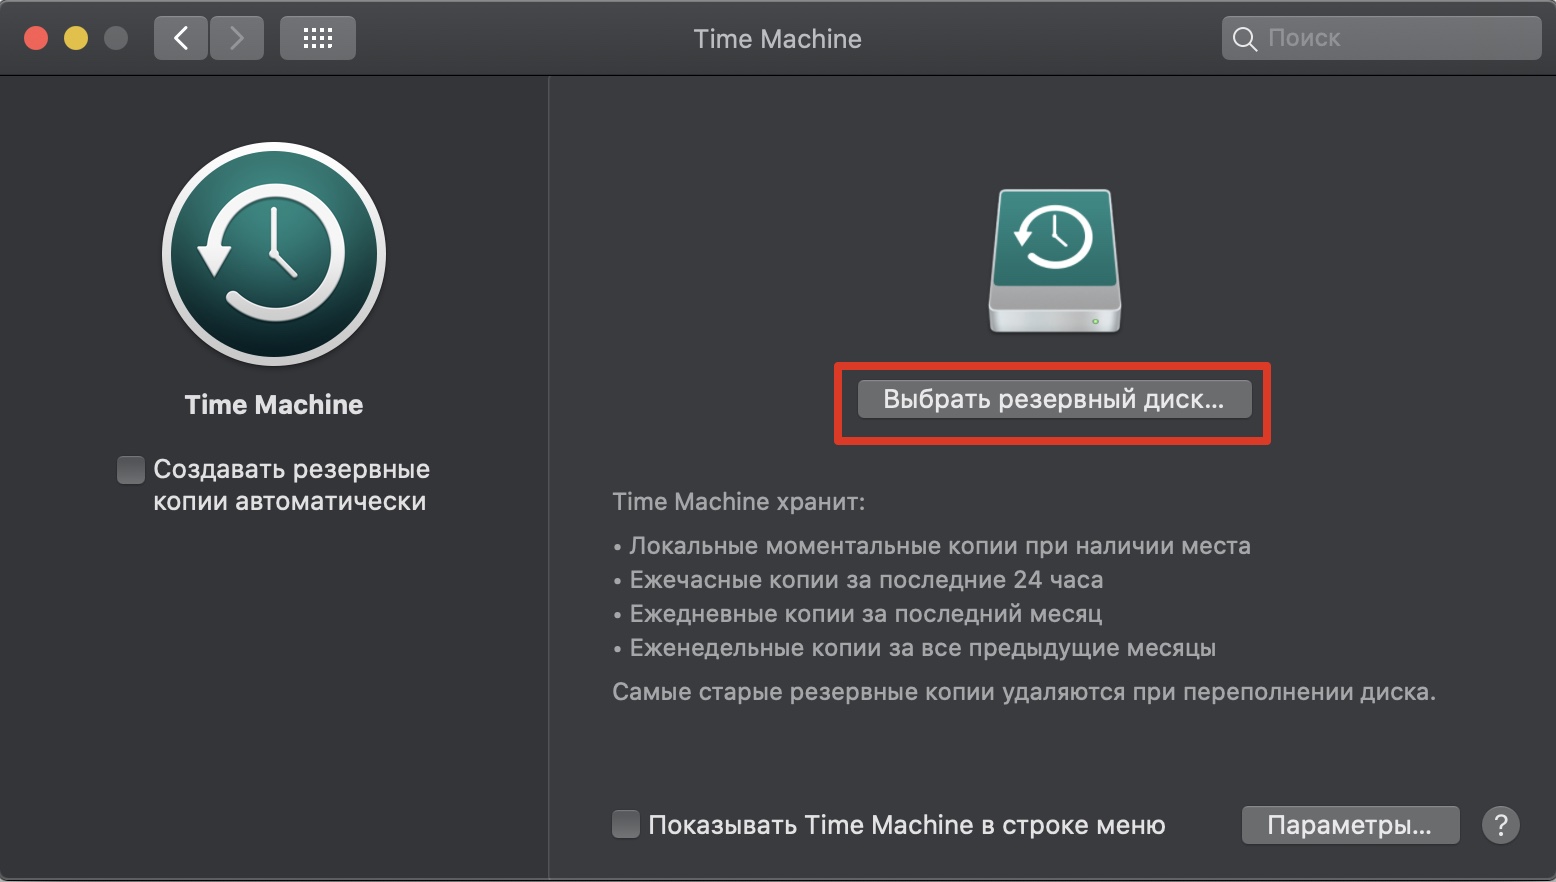
2. Откройте Системные настройки → Time Machine
3. Нажмите Выбрать системный диск
4. В открывшемся окне выберите ваш жесткий диск
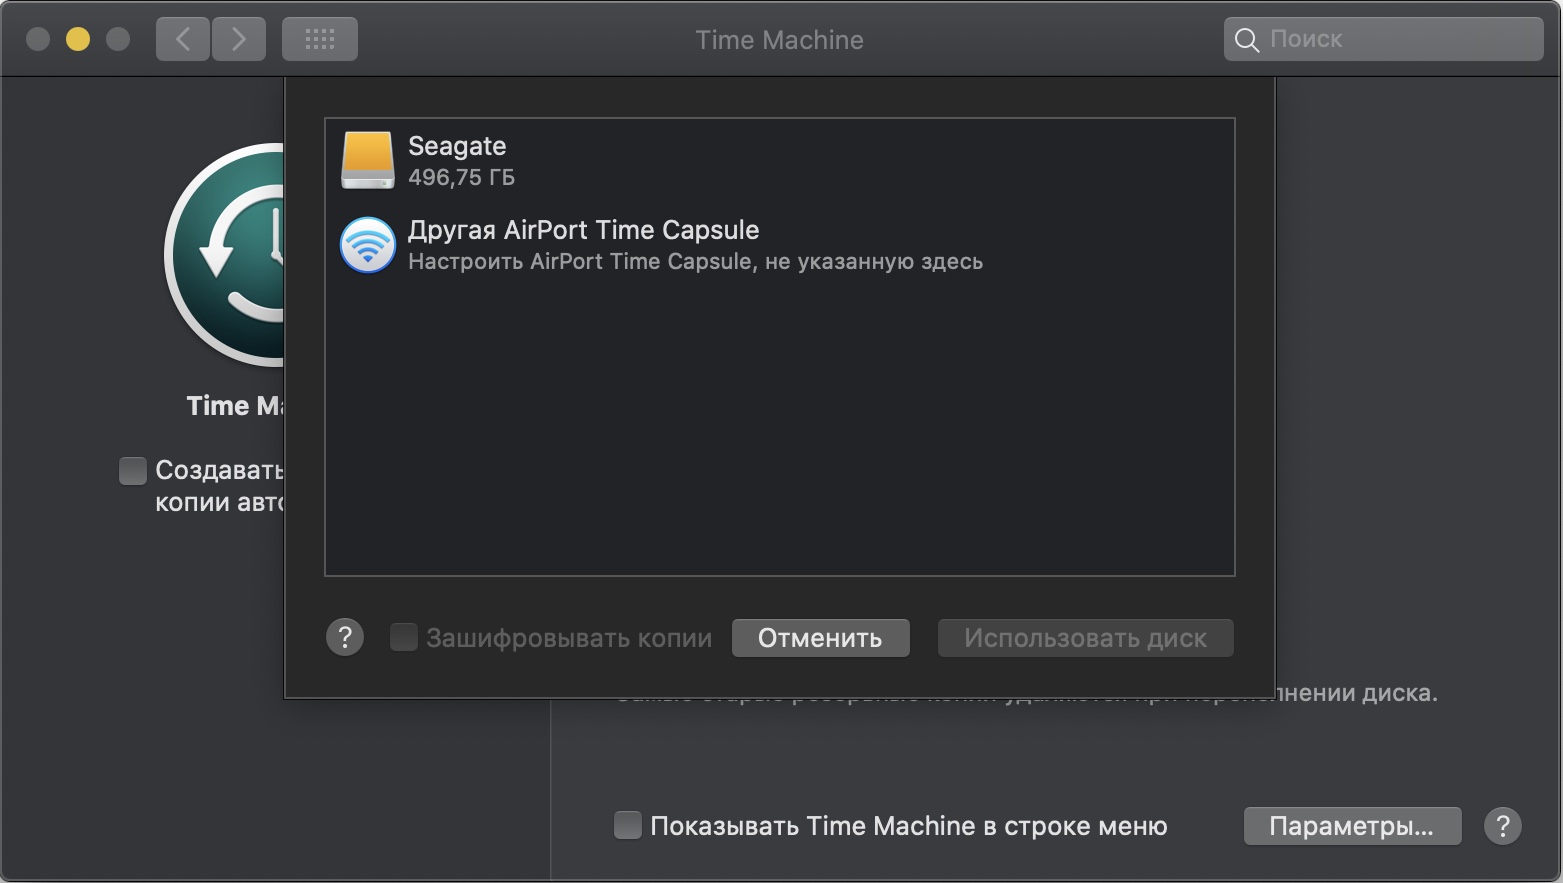
5. Система предложит отформатировать его. Согласитесь и нажмите кнопку Стереть
6. После этого macOS приступит к резервному копированию данных
Как установить публичную бета-версию macOS Monterey
2. Зарегистрируйтесь или войдите со своим Apple ID
3. Нажмите кнопку Зарегистрировать свои устройства
4. Нажмите на кнопку Загрузить утилиту доступа к общедоступной бета-версии macOS
5. Откройте и установите загруженный файл
6. Теперь откройте Системные настройки → Обновление ПО, там появится macOS Monterey. Осталось нажать кнопку Обновить сейчас, чтобы системы скачалась и установилась
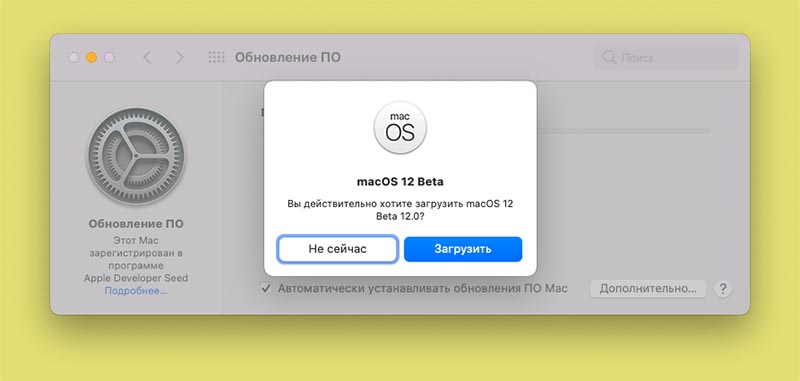
Как удалить профиль для установки бета-версии macOS Monterey
1. Откройте Системные настройки → Обновление ПО
2. Нажмите кнопку Подробнее… под надписью Этот Mac зарегистрирован в Программе бета‑тестирования Apple
3. В появившемся окне нажмите кнопку Настройки по умолчанию и введите системный пароль.
Источник
Как создать загрузочный диск macOS 12 Monterey. Он поможет восстановить систему
На прошедшей конференции WWDC 2021 купертиновцы показали несколько ключевых обновлений для своих актуальных систем. Одной из презентованных ОС стала новая macOS 12 Monterey.
Мы уже подробно разобрали все фишки системы, а сейчас расскажем, как иожно создать загрузочный диск с новой macOS 12.
Вы можете создать загрузочный диск для установки beta-версии macOS 12, чтобы произвести установку на другой Mac, чтобы иметь под рукой диск восстановления тестовой системы или установить ОС на несколько компьютеров Mac.
Что потребуется для установки
■ Внешний накопитель (флешка, SSD или HDD-диск, карта памяти) объёмом от 16 ГБ. Старайтесь выбирать такой накопитель, который сможете в дальнейшем подключить к компьютеру без адаптеров и лишних переходников.
■ Бета-приложение Install macOS 12, которое доступно всем авторизованным разработчикам на странице загрузок сервиса Apple Developer.
Как создать установщик macOS 12 на внешнем накопителе
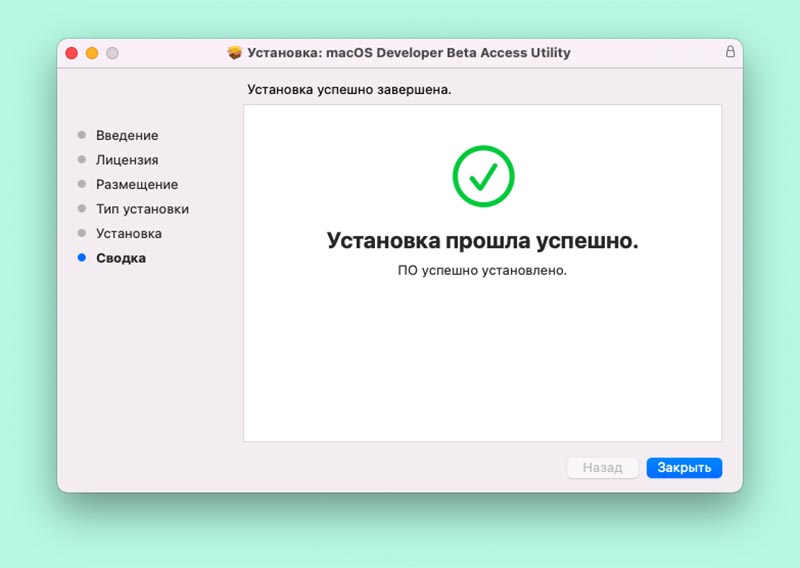
1. Загрузите приложение macOS Developer Beta Access Utility и запустите его на своем Mac.
2. Запустите утилиту, дождитесь загрузки и запуска установщика macOS 12. Саму установку начинать не нужно.
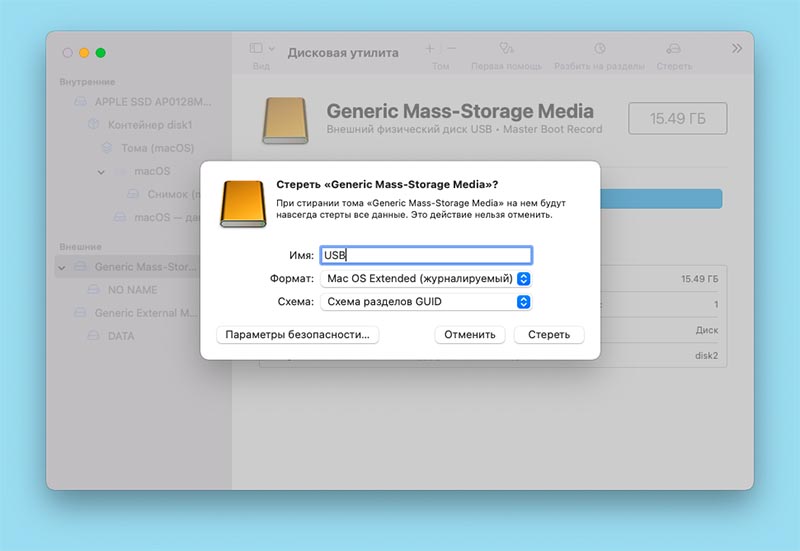
3. При помощи приложения Дисковая утилита отформатируйте подключённый накопитель с следующими параметрами:
▸ Формат: Mac OS Extended (журналируемый);
▸ Схема: Схема разделов GUID.
Внимание! Все данные на накопителе будут удалены.

4. В приложении Терминал введите такую команду:
sudo /Applications/Install\ macOS\ 12\ Beta.app/Contents/Resources/createinstallmedia —volume /Volumes/USB —nointeraction
Если при форматировании накопителя в Дисковой утилите указали другое название диска, введите его в команде вместо “USB”.
5. Нажмите Enter и подтвердите действие вводом пароля администратора.
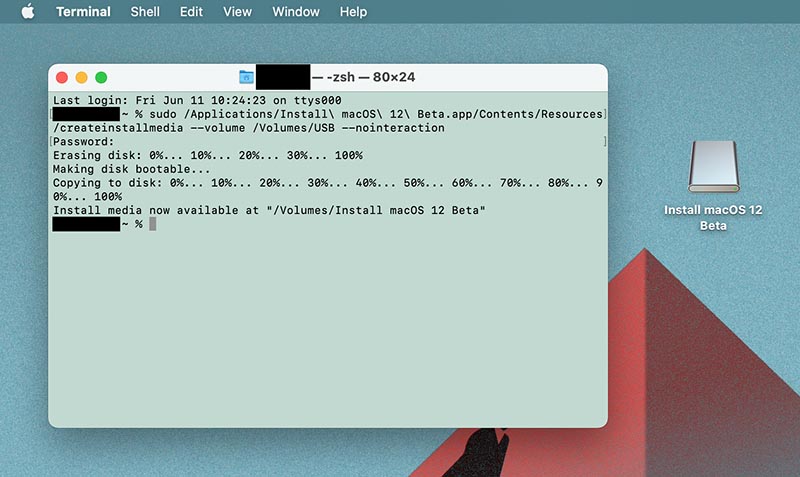
6. Дождитесь окончания процесса, который будет отображаться в Терминале.
В зависимости от скорости подключенного диска, на это может потребоваться от 15 минут до часа.
Как установить macOS 12 с внешнего накопителя
Когда накопитель готов, алгоритм действий для установки системы следующий:
Внимание! Мы не рекомендуем устанавливать систему на рабочий Mac в качестве основной.
◆ Выключите компьютер, на котором хотите произвести установку beta-версии macOS 12.
◆ Подключите подготовленный накопитель к компьютеру.
◆ Зажмите кнопку Option (Alt) на клавиатуре Mac и включите его.
◆ Увидите список дисков, с которых возможно произвести загрузку Mac, выберите накопитель Install macOS 12 Beta.
Теперь можете произвести чистую установку системы или установить тестовую версию на подключенный внешний диск.
Источник
How to Install VMware Tools on macOS Monterey
How to Install VMware Tools on macOS Monterey
In this article, I will show you how to install VMware Tools on macOS Monterey. If you want to make macOS Monterey responsive, work fast and enable the drag and drop feature. You need to install VMware tools. It’s the tool created by VMware to make Virtual Machines work smoothly and have all the benefits of macOS as a VM. Sometimes the VMware tools don’t work when you install, so If the VMware tool didn’t work, you need to reinstall it, to make it work. Follow the steps below.
You should have macOS Monterey installed on VMware if not then follow this guide to install macOS Monterey on VMware on Windows.
Steps to Install VMware Tools on macOS Monterey
- Attach VMware Tools ISO to macOS Monterey
- Install the VMware tools
- Allow VMware tools from macOS Security Settings
- Reinstall the VMware tools if required
Step 1: Attach VMware Tools ISO to macOS Monterey
In this guide, I will use the default VMware tools provided by VMware. Right-click on macOS Monterey Tab/Window then click Install VMware Tools.
Install VMware Tools macOS Monterey 01
Install VMware Tools macOS Monterey 01
Step 2: Install the VMware tools
#1. The VMware tools will automatically appear on your desktop. Double-click on Install VMware tools.
Install VMware Tools macOS Monterey 02
Install VMware Tools macOS Monterey 02
#2. On the Welcome to VMware tools Installer page, click Continue.
#3. Click on the Install button.
VMware Tools Installer
» data-medium-file=»https://www.wikigain.com/wp-content/uploads/2021/06/VMware-Tools-Installer-300×225.jpg» data-large-file=»https://www.wikigain.com/wp-content/uploads/2021/06/VMware-Tools-Installer.jpg»/> VMware Tools Installer  Steps to Install VMware Tools on macOS Monterey
Select Installation Disk
#4. Type your username and password then click Install Software.
Install Software Username Password
Install Software Username Password
Step 3: Allow VMware Tools through macOS Monterey Security Settings
#1. When System Extension Blocked appears, click Open Security Preferences.
#2. Click on the Padlock icon. Type your password then click Unlock. It allows you to make changes.
#3. Click Allow next to some system software was blocked from loading.
System Software from Developer VMware was Blocked
» data-medium-file=»https://www.wikigain.com/wp-content/uploads/2021/06/System-Software-from-Developer-VMware-was-Blocked-300×227.jpg» data-large-file=»https://www.wikigain.com/wp-content/uploads/2021/06/System-Software-from-Developer-VMware-was-Blocked.jpg»/> System Software from Developer VMware was Blocked  Steps to Install VMware Tools on macOS Monterey
Allow VMware tools through System Preferences
#4. On this Pop-up window click Not Now then close Security & Privacy window.
A restart is required before new system extensions can be used
A restart is required before new system extensions can be used
Restart the macOS Monterey VM
Restart the macOS Monterey VM
Make Full Screen the VM and you’ll get Full Resolution
Make Full Screen the VM and you’ll get Full Resolution
Step 4: Reinstall VMware Tool if required
Sometimes the VMware tools don’t work when you install it the first time, so If the VMware tools didn’t work, then you need to reinstall it, to make it work. So follow the steps below.
- Attach VMware tools.
- Click on Install VMware Tools.
- Click on Continue.
- Click on Continue Installation.
- Type your Username and Password and click Install Software.
- Click Restart.
- Login to macOS Monterey.
- Fullscreen your macOS Monterey to make sure it’s work properly.
Summary
That’s all about how to install VMware Tools on macOS Monterey. We covered the following:
- Attach VMware Tools ISO to macOS Monterey
- Install the VMware tools
- Allow VMware tools from macOS Security Settings
- Reinstall the VMware tools if required
If I left out something and didn’t mention please let me know by commenting down below this post. We have lots of new posts related to macOS Monterey so stay up to date with us.
Источник


