- Move and copy files in Terminal on Mac
- Move a file or folder locally
- Copy a file or folder locally
- Copy a file or folder remotely
- How to Move Files in Mac OS X
- How To Move And Copy Files On The Same Mac Drive
- How To Transfer Files To a Different Drive
- How To Move And Copy Files From Mac To iCloud
- Use The File Handling Keyboard Shortcuts
- File Handling Made Easy
- 3 Ways to Move Files & Folders on Mac
- How to Move Files & Folders on Mac with Copy-Paste
- Moving Files & Folders on Mac with Drag & Drop
- How to Move Files on Mac Using Title Bar
Move and copy files in Terminal on Mac
In Terminal, you can move and copy files locally or remotely using the mv , cp and scp command-line tools.
Tip: It’s easier to move and copy files using the Finder. See Organise files in folders.
Move a file or folder locally
In the Terminal app  on your Mac, use the mv command to move files or folders from one location to another on the same computer. The mv command moves the file or folder from its old location and puts it in the new location.
For example, to move a file from your Downloads folder to a Work folder in your Documents folder:
You can also change the name of the file as it’s moved:
Copy a file or folder locally
In the Terminal app on your Mac, use the cp command to make a copy of a file.
For example, to copy a folder named Expenses in your Documents folder to another volume named Data:
The -R flag causes cp to copy the folder and its contents. Note that the folder name does not end with a slash, which would change how cp copies the folder.
Copy a file or folder remotely
In the Terminal app on your Mac, use the scp command to copy a file or folder to or from a remote computer.
scp uses the same underlying protocols as ssh .
For example, to copy a compressed file from your home folder to another user’s home folder on a remote server:
You’re prompted for the user’s password.
The -E flag preserves extended attributes, resource forks and ACL information.
The -r flag, which isn’t used in this example, causes scp to copy a folder and its contents.
Источник
How to Move Files in Mac OS X
Its behavior depends on the destination
File handling on a Mac isn’t particularly tricky. For example, if sharing your files between PCs and smartphones is a skill you need to learn, learning to move files on Mac is an easy intuitive process.
Normally, you’d just select the file you’d like to move using the cursor, and then drag and drop it to the location of your choice. However, depending on your desired destination, your Mac can either copy or move that file altogether.

Here we’ll take you through all the different methods of file handling on a Mac, including moving them on the same and to a different drive, and moving and copying your files to the cloud.
How To Move And Copy Files On The Same Mac Drive
Understanding the way the file handling system works in Mac OS will help you make your workflow more efficient. Once you learn the different ways of moving the files around, backing up files on your Mac will become effortless.
Let’s start with the most basic move when it comes to file handling. Drag and drop a file on the same drive on your Mac. When you do that, your computer will automatically move that file rather than make a copy of it.
- Click on the file you’d like to move to select it.
- Hold down the mouse button while you drag the file to the new location.
- When you drop it to the new folder you’ll see that the file has moved from its original place to the new destination.
If your goal is to keep the file in its original location, as well as have a copy of it in the new destination folder, you’ll need to use this keyboard trick to do it.
- Click on the file you’d like to move to select it.
- Hold down the Option key (or Alt) on the keyboard while moving the file to its new location.
You’ll see that instead of moving the file, your Mac will automatically copy it to the new destination folder. Now you can see that two identical files exist on your computer.
How To Transfer Files To a Different Drive
The default file handling behaviour of your Mac changes when you transfer files between the Macintosh HD and another drive. No matter whether it’s an external or an internal drive, the system’s automatic response is to copy a file rather than move it. That’s because your Mac assumes you’re backing up your files.
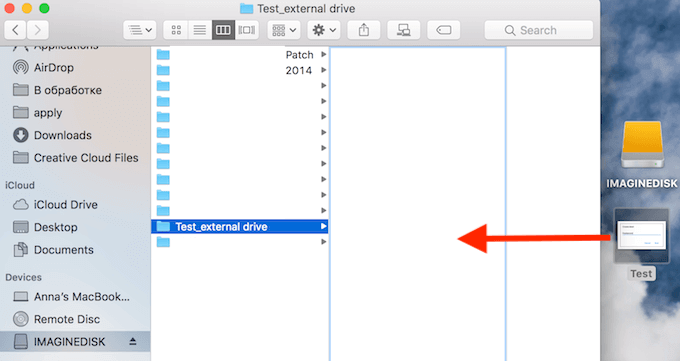
- Click on the file or folder to select it.
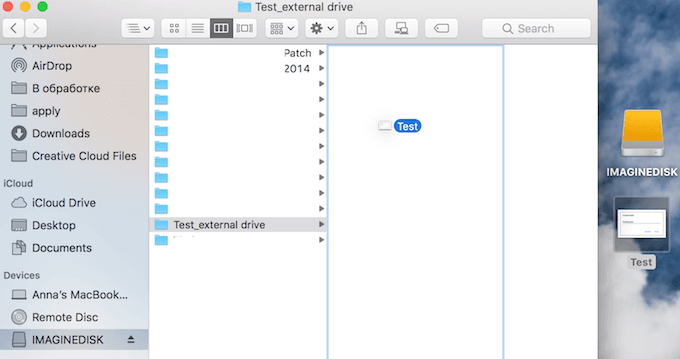
- Move it to a different location by dragging it to a different drive.
- When you drop it, you will see that Mac will create a copy of it in the new drive rather than move it there.
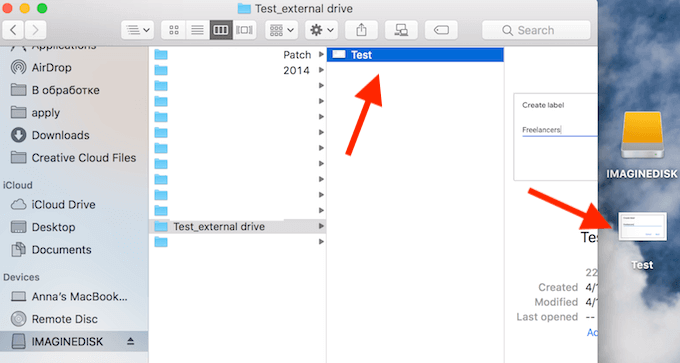
If you want to only keep the newly created copy of your file, you can trash the original to remove it. Or you can use this trick to move your file to another drive in the first place instead of copying it.
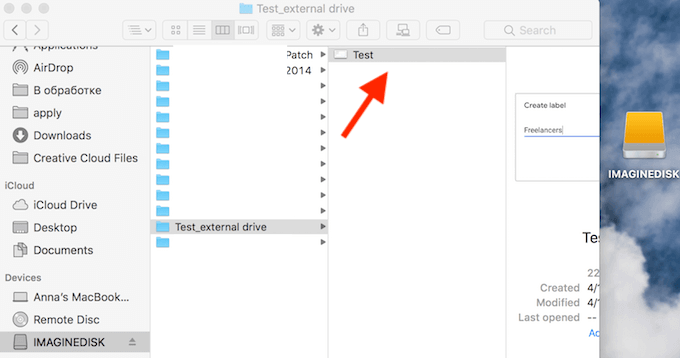
Before you drag and drop your file, hold down the Cmd (Command) key when you select the file. After you drop it in the new destination, you’ll see there’s only one file on your computer now. This saves you time and memory space.
How To Move And Copy Files From Mac To iCloud
If you’re choosing to transfer and store your files online, it’s important to know that your Mac is equipped with a great alternative for services like Google Drive, DropBox, and others. iCloud Drive is a built-in option that you can use to store and access your files by other iOS devices under the same Apple ID. Plus, since it’s already a part of your Mac, it doesn’t require any third-party logins or downloads.
Moving and copying files to and from the iCloud Drive is just as easy as transferring your files elsewhere on your Mac.
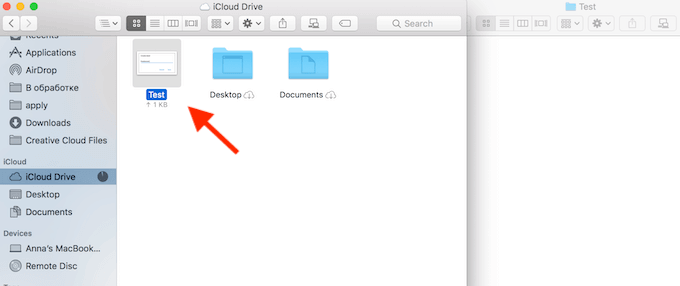
When you drag and drop a file from Macintosh HD to the iCloud, your computer’s default response will be to move it there.
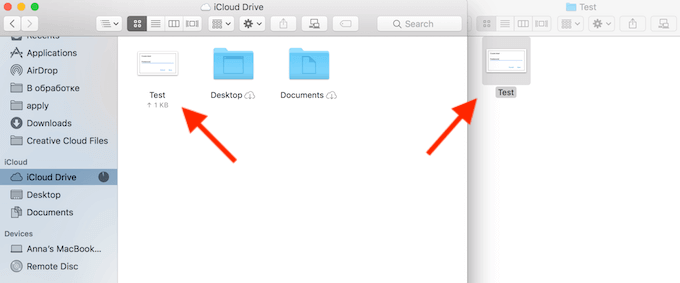
If you want to keep the original file, as well as have a copy of it on the iCloud Drive, hold down the Option key (or Alt) on the keyboard while moving the file to its new location. That way, you will copy your file to iCloud.
Use The File Handling Keyboard Shortcuts
A great way to upgrade your user experience and to become a more efficient Mac user is to learn the essential Mac keyboard shortcuts. When it comes to file handling, there are two keyboard shortcuts that will quickly turn you into a power user.
- Cmd + C & Cmd + V
The ultimate keyboard shortcut that most users will have known since day one of using a computer. You can use it to copy and paste any file anywhere on your Mac without touching your mouse or a touchpad.
- Cmd + C & Option + Cmd + V
This shortcut is a little less-known. Just add the Option key to the second part of the copy-paste action and you will move your file to the new destination instead of creating a copy of it.
File Handling Made Easy
Moving your files on Mac is rather simple. Once you understand how it works, you can move on to learning how to move files between different devices. A useful skill when you need to migrate files from Windows PC or transfer your data from Android to Mac.
Have you struggled moving files to and from your Mac before? Share your experience with us in the comments below.
Anya is a freelance technology writer. Originally from Russia, she is currently a full-time Remote Worker and Digital Nomad. With a background in Journalism, Language Studies, and Technical Translation, Anya couldn’t imagine her life and work without using modern technology on a daily basis. Always looking out for new ways to make her life and location-independent lifestyle easier, she hopes to share her experiences as a tech- and internet-addict through her writing. Read Anya’s Full Bio
Источник
3 Ways to Move Files & Folders on Mac

Ever wondered how you can move files and folders around on a Mac? If you’re using your first Mac and are new to macOS, one of the first things you may be interested in learning is file organization, especially if you’re switching from Windows.
The first step to properly managing files is knowing how to relocate files and store them in various folders. On Windows, you may be used to cutting and pasting files in a different location. However, on macOS, you cutting and pasting a file or folder works differently. Regardless, there are multiple ways to move files to a specific location of your choice.
Although relocating a file or folder on macOS is pretty easy, you’ll need some time getting used to it if you’re coming from the Windows world and are a new Mac user. In this article, we’ll be discussing three different ways that you can move files and folders around in Finder on Mac.
How to Move Files & Folders on Mac with Copy-Paste
This is just one of the three ways that you can use to seamlessly move your files from one location to another. Simply follow the steps below to get started.
- Launch Finder on your Mac from the Dock.
Browse and find the file or folder that you want to move. Now, simply right-click or Control-click on the file and click “Copy”.
Next, use Finder to head over to the location you want to move the file to and Control-click (right-click) on the empty area. Choose “Paste Item” and the file will show up here immediately.
That’s it. You’ve successfully moved the file. However, keep in mind that the file is also still stored in its original location since you copied and pasted it. You can manually remove the file by its original location and move it to Trash.
Moving Files & Folders on Mac with Drag & Drop
This might be the easiest way to move files on Mac especially if you’re coming from Windows, as it’s pretty similar. So, without further ado, let’s take a look.
- Launch Finder from the Dock and browse for the file that you want to move.
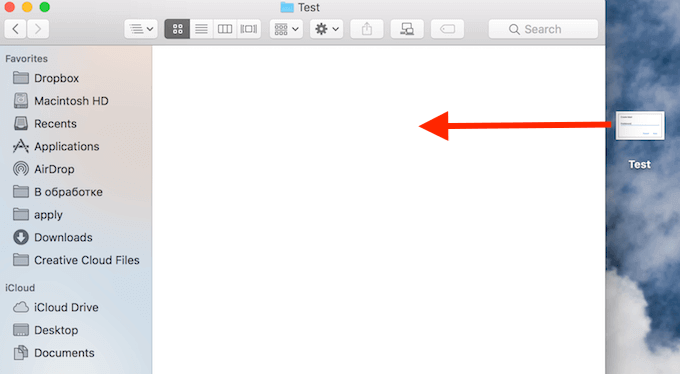
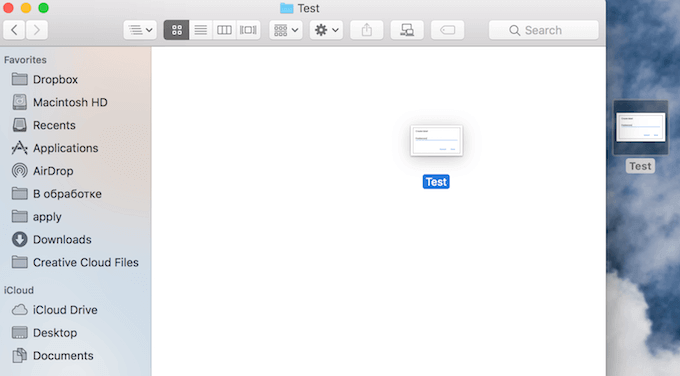
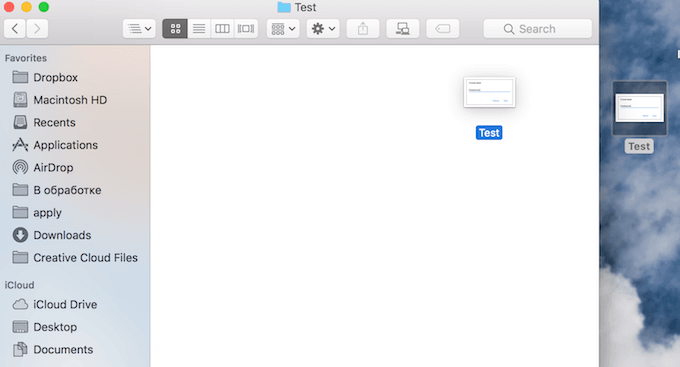
The various locations on your Mac show up on the left pane in Finder. Simply drag and drop the file or folder in the location you desire. This drag and drop method can be used to move and store files in folders.
As you can see, it works just like the drag and drop method in modern versions of Windows.
How to Move Files on Mac Using Title Bar
This is a unique way to move files on macOS and it’s useful especially if you already have the file opened on your screen. Just follow the steps below to learn how to move a file using the title bar.
- You’ll need to first open the file on your Mac. Now, if you hover your cursor over the filename in the title bar, you’ll notice a chevron icon pop up as shown below.
Clicking on the chevron icon will bring up a pop-up menu that allows you to change the file name and destination. You can click on the current destination as shown below to move the file somewhere else.
Now, choose your preferred location from the dropdown menu and the file will be relocated immediately.
That’s all there is to it. Unfortunately, you cannot move folders using this method.
As you can probably see, there are three unique ways to move files and folders on macOS. Drag and drop might just be the fastest and easiest way to relocate files for new Mac users until they learn and get a hang of the Mac keyboard shortcuts.
Although macOS doesn’t offer a direct way to cut and paste files, you can take advantage of a keyboard shortcut that basically does the same thing. Press Command+C after selecting a file to copy it to your clipboard. Next, head over to the location where you want to move the file and press Command+Option+V. This will paste the file here and remove it from its original location. You can also cut and paste files and folders with menu options.
By the way, the methods covered here work in basically every version of macOS and Mac OS X ever released, so whether you’re on the latest macOS release or a much older version, you will find file management is the same with Finder.
We hope you were able to learn the different ways to move the files and folders stored on your Mac. Which one of these methods are you likely to use the most? Have you tried out the keyboard shortcuts method to move files quicker? Do share your valuable opinions and experiences in the comments section down below.
Источник


