- Вики IT-KB
- Инструменты пользователя
- Инструменты сайта
- Боковая панель
- Работа с сетевыми ресурсами по протоколу NFS в macOS
- macOS X Mount NFS Share / Set an NFS Client
- macOS X Mount NFS Share / Set an NFS Client
- How Do I Find Out Shared Directories?
- Mac OS X Nfs mount Command
- Tip: Operation not permitted Error
- Verify: NFS Is Working or Not
- How Do I Copy Files?
- Using the Finder
- Recommend mount Command Options
- GUI Method: HowTo Set Mac OS X As an NFS Client
- Optional
- See also:
- How to mount NFS share on Mac
- Mount NFS share on Mac OS X:
- Very that is working
- Automount NFS share
- Extras
- Mac os nfs mount
- Mac os nfs mount
Вики IT-KB
Пошаговые руководства, шпаргалки, полезные ссылки.
Инструменты пользователя
Инструменты сайта
Боковая панель
Работа с сетевыми ресурсами по протоколу NFS в macOS
 Поддержка протокола NFS в macOS принципиально ничем не отличается реализаций на базе Linux. В каждой macOS уже есть встроенный NFS клиент и сервер, который включен в конфигурации по умолчанию.
Для того, чтобы сделать каталог общедоступным, необходимо создать конфигурационный файл /etc/exports . В этом файле следует перечислить локальные каталоги, для которых мы хотим разрешить доступ из сети, а также обозначить параметры предоставления общего доступа.
В данном примере каталог Projects на съёмном накопителе Files будет доступен для всех пользователей сети в режиме чтения.
Начиная с macOS 10.14 (Mojave), демону nfsd необходимо разрешить работу с диском. В противном случае он не сможет получить доступ к этому диску. Предоставить такой доступ можно через:
«Настройки» → «Защита и безопасность» → «Конфиденциальность» → «Доступ к диску».
Здесь следует добавить исполняемый файл /sbin/nfsd .

Такую же операцию необходимо выполнить и для брандмауэра, если он включен.
Выполним перезапуск демона nfsd:
Теперь поговорим о настройке NFS-клиента.
Чтобы всякий раз не выполнять подключения NFS-шары вручную (⌘+K), можно настроить механизм автоматического монтирования.
Создадим конфигурационный файл:
Разберёмся с точкой монтирования и ключами:
Имя удалённого каталога не может быть на кириллице, иначе automount не сможет смонтировать каталог.
В заключении отредактируем конфигурационный файл /etc/auto_master , добавив в конец этого файла подключаемый конфиг автомонтирования NFS
Для проверки автомонтирования выполним:
Теперь при каждой перезагрузке macOS NFS-шара будет автоматически монтироваться для любого пользователя.
Проверено на следующих конфигурациях:
| Версия ОС |
|---|
| Apple macOS High Sierra (10.13) |
| Apple macOS Mojave (10.14) |
| Apple macOS Catalina (10.15) |
 Автор первичной редакции:
Виталий Якоб
Время публикации: 24.03.2020 13:11
Источник
macOS X Mount NFS Share / Set an NFS Client
H ow do I access my enterprise NAS server by mounting NFS filesystem onto my Mac OS X based system using GUI and command line based tools?
Network File System (NFS), a distributed file system protocol developed by Sun Microsystems. NFS is the common for file sharing on NAS server and Linux / UNIX systems like, HP-UX, Solaris, Mac OS X, and
| Tutorial details | |
|---|---|
| Difficulty level | Intermediate |
| Root privileges | Yes |
| Requirements | OSX 10.6.x/10.7.x |
| Est. reading time | 10m |
others. Mac OS X can be setup as an NFS client to access shared files on the network. Mounting NFS volumes in OS X can be done using following methods:
a] Command line option.
macOS X Mount NFS Share / Set an NFS Client
Our sample setup for macOS client and nfs server:
How Do I Find Out Shared Directories?
To mount an NFS file system, the resource must be made available on the NAS or NFS server. To verify that resource available open the terminal and type the following command:
$ showmount -e nas01
$ showmount -e nfs-server-ip-address-here
$ showmount -e nas01.lan.nixcraft.net.in
Sample outputs:
Fig.01: UNIX showmount command lists all clients that have remotely mounted a filesystem from NFS server
The showmount command show remote NFS mounts (resources).
Mac OS X Nfs mount Command
First, create a directory to mount an nfs share, enter:
$ sudo mkdir /private/nfs
$ sudo mkdir /private/mp3
To mount an NFS file system, enter:
$ sudo mount -t nfs nas01:/mp3 /private/nfs
OR
$ sudo mount -t nfs 192.168.3.1:/mp3 /private/nfs
To mount an NFS file system in read/write mode, enter:
$ sudo mount -o rw -t nfs nas01:/mp3 /private/nfs
Tip: Operation not permitted Error
If you get an error which read as follows:
Try to mount it as follows with -o resvport command:
$ sudo mount -t nfs -o resvport 192.168.3.1:/mp3 /private/nfs
OR mount an NFS in read/write mode, enter:
$ sudo mount -t nfs -o resvport,rw 192.168.3.1:/mp3 /private/nfs
From the man page:
resvport
Use a reserved socket port number. This is useful for mounting
servers that require clients to use a reserved port number on the
mistaken belief that this makes NFS more secure. (For the rare
case where the client has a trusted root account but untrustwor-
thy users and the network cables are in secure areas this does
help, but for normal desktop clients this does not apply.)
Verify: NFS Is Working or Not
Type the following commands:
$ df -H
$ cd /private/nfs
$ ls -l
Sample outputs (note I’ve mounted it at /private/mp3/ dir):
Fig.02: UNIX df command which displays information about total space and available space for NFS
How Do I Copy Files?
Using the Finder
Note: The following entry “NFS mounts” in the Disk Utility does NOT exist in MAC OS X v10.8+. The following discussion only applies to the older Mac OS X version
The Finder is the default file manager used on the Mac OS and Mac OS X operating systems that is responsible for the overall user-management of files, disks, network volumes and the launching of other applications. Open Finder > Shared (select from the left sidebar) > NFS server (nas01 or 192.168.3.1):
Fig.03: The Finder in action (browse an NFS share)
Recommend mount Command Options
I suggest that you run the mount command it as follows to get better a performance:
$ sudo mount -t nfs -o soft,intr,rsize=8192,wsize=8192,timeo=900,retrans=3,proto=tcp nas01:/sales /private/sales
OR
$ sudo mount -t nfs nfs -o soft,timeo=900,retrans=3,vers=3, proto=tcp nas01:/sales /private/sales
See mont_nfs(8) for more information.
GUI Method: HowTo Set Mac OS X As an NFS Client
To mount an NFS share from OS X using GUI tools, follow these steps:
[1] Start Finder, and go to Applications / Utilities / Disk Utility:
Fig.04: Starting Disk Utility
- No ads and tracking
- In-depth guides for developers and sysadmins at Opensourceflare✨
- Join my Patreon to support independent content creators and start reading latest guides:
- How to set up Redis sentinel cluster on Ubuntu or Debian Linux
- How To Set Up SSH Keys With YubiKey as two-factor authentication (U2F/FIDO2)
- How to set up Mariadb Galera cluster on Ubuntu or Debian Linux
- A podman tutorial for beginners – part I (run Linux containers without Docker and in daemonless mode)
- How to protect Linux against rogue USB devices using USBGuard
Join Patreon ➔
Fig.05: Click the ‘Mounts’ icon at the top of the Directory Utility panel
Fig.07: OS X NFS Mounts to set it as an NFS Client
Fig.08: Setting up an NFS mount options in the dialog box
You need to set mount location as follows:
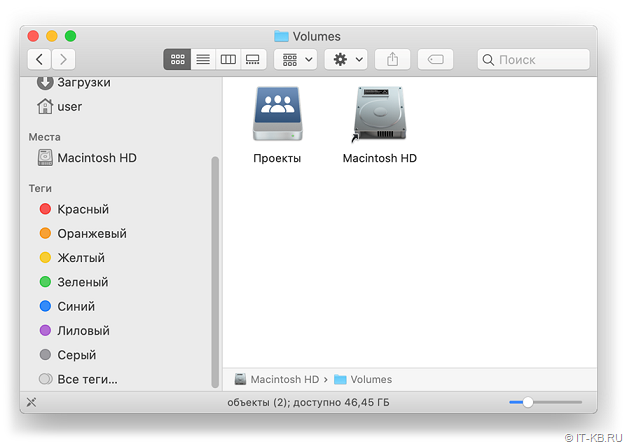
/Volumes/mp3
/Volumes/mp3 is nothing but the mount location. This is a convenient place. In this example, you entered the URL as nfs://192.168.3.1/mp3, enter /Volumes/mp3 as the mount location. Please note that don’t create the subdirectory (mp3); it will be created dynamically when the share is mounted.
Optional
Click the arrow in front of “Advanced Mount Parameters”. A new text entry box is displayed. Enter: resvport (this is only required if you get some sort of error [see above for more info or read mount_nfs man page]).
[4] Finally, click “Verify” button at the bottom right:
Fig.09: Verify NFS mount configuration which only checks that your NFS server is enabled and working correctly.
Fig.10: NFS Share mounted
You can access /Volumes/mp3 using the Finder:
Fig.11: The finder in action
See also:
🐧 Get the latest tutorials on Linux, Open Source & DevOps via
Источник
How to mount NFS share on Mac
To mount NFS in our OS X the first thing we need is know where is the server and where is the directory, to do that we can use the command showmount :
Example:
Note: merlin.lan is my router name with NFS.
Mount NFS share on Mac OS X:
The first step is to create a mount point, in this case, we will use /private/nfs :
Now we can mount the NFS share in the path create previously:
You also can use the IP instead of the hostname, for example:
If you see an error similar to this one:
You can try mount the NFS share with this option -o resvport :
Another useful option is to write on the NFS share rw and not only read the files:
Very that is working
Automount NFS share
Edit the file /etc/auto_master and add to the end of the file /- auto_nfs -nobrowse,nosuid :
Now we have to create a file on /etc/auto_nfs :
Is possible use /Volumes as a mount point, we only need to create the directory this way:
Note: the /../ before Volumes is because the system deletes everything inside /Volumes every time the system start.
Execute this command to apply the updates:
Extras
One thing that is annoying are the hidden files generated by OS X .DS_Store to prevent the creation of this files is possible to disable for all network devices and for one user with this command:
To disable for all users:
And if we want delete the files already generated:
Источник
Mac os nfs mount
Задача: монтировать nfs-ресурсы в макоси.
В принципе, в макоси уже встроена поддержка nfs и соответствующие сетевые ресурсы можно монтировать через Finder (⌘K), однако чтобы это работало для обычного юзера, требуется некоторое шаманство на стороне linux-сервера.
И заодно важный момент: я монтирую только на чтение, поскольку если разрешить запись, то макось загадит диск своими служебными файлами.
На линукс-машине в /etc/exports прописываем что-то вроде:
Здесь адрес 192.168.13.12 — это айпишник макосной машины. После чего в Finder стандартным образом (через ⌘K или меню Go → Connect to Server. ) монтируем ресурс, адрес указываем в виде nfs://nfs-server.name/home/user/downloads .
Опция insecure как раз и нужна, чтобы можно было простым юзером монтировать, без неё будет выдаваться маловразумительная ошибка.
Ещё одна вредная и очень трудноуловимая проблема связана с макосной интерпретаций кодирования «составных» букв в именах файлов, например, «й» или «ё», или «ü». Если имя файла (или вообще где-то в пути до файла встречается) содержит такую букву, то файл просто не откроется, причём с невразумительной ошибкой типа “The application can’t be found.” Я в детали не хочу вдаваться, можете сами погуглить по ключевым словам “mac os x nfc nfd unicode”.
Решение достаточно простое: нужно изменить опции монтирования nfs-ресурсов по умолчанию, для этого добавьте в файл /etc/nfs.conf такую строчку:
Теперь можно монтировать через Finder и всё будет в порядке.
Ну и команда для всяких тестов, вдруг пригодится:
Источник
Mac os nfs mount
SMB v2 by default requires full user credentials, meaning name and a password. It is best to use the «Add a network location. » option when creating a video/music source. No idea if SMB v1 or v2 is used ni MacOS X.
NFS is a different animal from SMB, I don’t know if MacOS X has default support for it, or that you even installed an NFS server already.
![]()
shindou1
Newbie
![]()
![]()
sobarber
Newbie
![]()
If you are wanting anonymous access, you may have to use SMBv1 as I believe it is not possible to do this using SMBv2 or SMBv3 with the default settings.
I have not tried using other options, but I may investigate that.
![]()
sobarber
Newbie
![]()
Ok, I looked at this more deeply and here is what I have done.
1. I have set up the normal file sharing on my Mac running Mojave. I have set it up to allow guest usage. https://support.apple.com/guide/mac-help. usr001/mac has the details under the section called «Let occasional users log in as guests»
2. I have applied the changes to concerning the server side of things as outlined here: https://support.apple.com/en-us/HT205926
3. I have used the basic Kodi configuration without changes. I have mounted the various sources in the Video menu using the SMB network.
4. I have had to format the file names per the normal approach to get the directory scanning to work as expected, but this is pretty much a given for working in Kodi (or MrMC, if you use that on tvOS)
![]()
![]()
![]()
shindou1
Newbie
![]()
![]()
![]()
![]()
desepticon
Senior Member
![]()
I have found that, on Mac, NFS is the best and fastest for remote sources in a local network. To enable nfs on your mac, and start at boot, use Terminal.app to enter (note that sudo command requires an admin password. Press return key after each command):
Edit the file to look something like this:
/Volumes/wd.3tb.1/ -mapall=nobody -alldirs
/Volumes/qwerty.5tb/ -mapall=nobody -alldirs
/Volumes/azerty.7tb/ -mapall=nobody -alldirs
/Volumes/dvorak.8tb/ -mapall=nobody -alldirs
Then press ctl-x to save and exit. Each line represents a different Volume that you want to share. Change the volume names to whatever yours are.
Then in terminal:
This will reload nfsd and pickup the new shares you added. If you want, NFSManager is also good GUI front end for managing nfs shares.
In Kodi, on your player device, you can locate the sources at:
replace with your mac’s IP address and with the name of the Volume. You probably also want to enable MAC (different from Mac. lol) based IP reservations on your router, so your iMac always has the same local ip address.
![]()
![]()
(2018-11-30, 23:29) Klojum Wrote: SMB v2 by default requires full user credentials, meaning name and a password. It is best to use the «Add a network location. » option when creating a video/music source. No idea if SMB v1 or v2 is used ni MacOS X.
NFS is a different animal from SMB, I don’t know if MacOS X has default support for it, or that you even installed an NFS server already.
Mac Mojave has support for all versions of SMB (1,2,3). It defaults to 3 and with Leia I have it set to force SMB3 as minimum. You do not need name/password to work with KODI. You do have to add location based on the network address (net bios style browsing has never worked with Apple’s SMB here, only the older Samba from Mountain Lion and before). Once you add the network location, you can use that to add as many of the drives/shares set up in the «sharing» preference pane in macOS. Those drives do need to be set there to be read enabled for «everyone» to work and some media files can get set by some programs to not allow everyone to read them (that’s easily set in the media drive a whole folder or even drive at a time with Finder for permissions for read only access). Everything then works as expected save for a music glitch (described below).
And yes, macOS does have and still has NFS installed (possibly part of their UNIX certification as they seem to carry a lot of stuff they don’t offer via GUI), but to get it to work with KODI, the SIP security integrity protocol so you can edit the files need to add -boot to the configuration file (actually Mojave seemed to remove my config file period, but I copied it back over from El Capitan and it worked fine).
The issue I keep having is that playing music from KODI (whether Krypton 17.6 with SMB1 or 18.3 Leia with SMB3) over the network share results in a «skip» every so many songs for reasons unknown. It even locked up through one song until its time was up for the next one tonight. I need to do more testing with Windows 10 that I recently installed as an alternate OS on the same machine (set up with MacDrive so it can read my HFS+ media drives and KODI isn’t the more wise for wear and accesses them exactly the same as from the Mac OS), but thus far it hasn’t skipped on a song yet using Leia 18.3 and SMB3 (oddly video files have always seemed unaffected with MacOS serving; it’s always just been music files that have an issue). I fear Apple’s home brew SMB has some kind of an issue in it. I just tried disabling packet signing and directory sorting by database file (someone claimed this really speeds it up in MacOS), but it’ll have to wait for another day to play a bunch of music files to test it (and Windows 10) as I have to work tomorrow. I recently created a new database via NFS I can swap out as well to test music through that as well.
Источник


