- How to Share Directories over NFS with Mac OS X
- Contents
- Why Do This?
- Step One: Patch or Replace the NFS Startup Script
- Explanation of the Patch
- Applying the Patch
- 1. Copying My Version
- 2. Using My Patch
- How to mount NFS share on Mac
- Mount NFS share on Mac OS X:
- Very that is working
- Automount NFS share
- Extras
- Включение общего доступа к сетевому (NFS) в Mac OS X
- Проблема
- Решение
- Вики IT-KB
- Инструменты пользователя
- Инструменты сайта
- Боковая панель
- Работа с сетевыми ресурсами по протоколу NFS в macOS
- macOS X Mount NFS Share / Set an NFS Client
- macOS X Mount NFS Share / Set an NFS Client
- How Do I Find Out Shared Directories?
- Mac OS X Nfs mount Command
- Tip: Operation not permitted Error
- Verify: NFS Is Working or Not
- How Do I Copy Files?
- Using the Finder
- Recommend mount Command Options
- GUI Method: HowTo Set Mac OS X As an NFS Client
- Optional
- See also:
How to Share Directories over NFS with Mac OS X
NOTE: NONE OF THAT WHICH FOLLOWS APPLIES TO LEOPARD—NONE of it. Using NFS in Leopard is almost fall-over easy:
Add a line like the following (presuming your home network is using the 192.168 private network. You could also use 172.17 or 10.):
That last command should show that nfsd is sharing the directory you told it to export. Any NFS client on your network should now be able to mount /Users from your Mac, via mount -t nfs, or via autofs or amd. Other Macs on your network that are running Leopard will automatically be able to mount your new NFS share via either shift-cmd-G in the Finder and typing «/net/MyOtherMac/Users» in the text box, or via cd /net/MyOtherMac/Users in Terminal.
Using NFS between Macs is really just an exercise now, as afp sharing is a lot better in Leopard (though I don’t know if the password exchange is encrypted—it wasn’t in Tiger). If that matters to you, use NFS, though the security caveats mentioned in the following article still apply: all data is sent in the clear unless you tunnel through ssh.
Interestingly, using Howl on your non-Mac NFS servers should enable you to browse to them in the Finder, though I have not personally tried this.
As Mac OS X has evolved, it has become more UNIX-like in many ways. In some respects, that convergence is incomplete, and in other respects, the divergence is deliberate. The ability of a Mac OS X notebook or workstation to share directories over NFS is an example of the incomplete convergence. Storage of configuration information in the NetInfo database is an example of deliberate divergence. This article shows you how to address the NFS side of the world, providing you with a way to flexibly share directories on your hard disk with other machines in your network, while still allowing a powerful and flexible means of access control. In my experience, using NFS works a lot better than using Apple File Sharing when you are not using OS X Server.
But first, a word of caution:
THE INSTRUCTIONS IN THIS ARTICLE REQUIRE YOU TO MAKE CHANGES IN YOUR /System FOLDER, WHICH YOU ARE ORDINARILY NEVER, EVER, SUPPOSED TO TOUCH. I STRONGLY RECOMMENDED THAT YOU SAVE A COPY OF EACH ORIGINAL SYSTEM FILE BEFORE YOU EDIT IT.
THESE INSTRUCTIONS WERE WRITTEN FOR MAC OS X TIGER. THEY ARE NOT GUARANTEED IN ANY WAY, AND THEY MOST LIKELY WILL NOT WORK AT ALL WITH ANY OTHER VERSION OF OS X. PROCEED AT YOUR OWN RISK—REMEMBER, YOU ARE MODIFYING A SYSTEM STARTUP FILE. IF YOU TURN YOUR COMPUTER INTO A BRICK, IT IS ALL YOUR FAULT. I WILL HELP YOU AS I CAN, BUT I OFFER YOU NO WARRANTY OF ANY KIND.
FINALLY, NFS IS NOT BY NATURE A SECURE PROTOCOL. DATA PASSES IN THE CLEAR BETWEEN CLIENT AND SERVER. IT IS INTENDED TO BE USED ONLY WITHIN A PRIVATE NETWORK, BEHIND A FIREWALL. YOU ARE ADVISED NOT TO ACCESS SENSITIVE DATA OVER NFS, UNLESS YOU CAN TUNNEL IT THROUGH SSH, OR UNLESS YOU CAN USE A SECURE, KERBERIZED VERSION OF NFS (OS X DOES NOT SHIP WITH THIS).
CONSIDER YOURSELF WARNED.
With that out of the way .
Contents
Why Do This?
In my home, I have two Mac OS X computers (a Powerbook and an iMac) as well as a FreeBSD server on which I have for years kept my email, personal files, source code, etc. My goal is to be able to access files on any of them from any other of them (e.g., access files on the iMac from the PowerBook or from the FreeBSD server). At work, I experience a mixed-UNIX environment, with OS X, FreeBSD, and many Linux machines, most of which speak NFS, but very few of which speak Apple protocol. I’d like my PowerBook to be able to access their files seamlessly, and I’d like to be able to access my PowerBook’s files from them.
Even if your needs are not as complex, if you have more than one UNIX-like computer in your home or office (Mac OS X counts!), you may find, as I have, that using NFS is much more flexible and convenient than trying to share home directories around using Apple File Protocol (afp://). If you have a machine running OS X Server, then afp:// may offer you advantages that NFS does not, and some discipline (keep files that you want to protect or share on the server box, not on the client boxes) will pay off; however, most home users and many small businesses are not in that position.
Step One: Patch or Replace the NFS Startup Script
As of this writing, OS X Tiger is up to version 10.4.8, with Leopard (10.5) due out soon. In Tiger, the NFS system startup script needs some changes to allow it to decide how to allow clients to connect, to decide which clients it will allow to connect, and to allow configuration changes to become visible without a reboot. Those of you who are more advanced can look at my changes directly here. I’ll assume that you know what to do with the patch command.
Those of you who are not so much with the geek stuff can simply download my version of the NFS startup script here, and skip to «Applying the Patch.»
IMPORTANT! SAVE A COPY OF YOUR ORIGINAL, AS-INSTALLED VERSION OF THE NFS STARTUP SCRIPT BEFORE YOU APPLY THE PATCH!
Explanation of the Patch
Wherever possible, I’ve tried to be “Apple-licious” and store and retrieve configuration data from NetInfo instead of the traditional UNIX way of storing it in a gazillion different flat files. Some of Apple’s inherited BSD utilities do not yet know to look in NetInfo; however, so I reach into NetInfo and generate the utility’s configuration file on the fly. In some cases, I make use of NetInfo directories and properties that do not exist in an as-installed copy of OS X Tiger. I will show you how to add them on the following pages.
For those of you who are new to the UNIX world, the NFS startup script is just a Bourne shell script that gets executed by the SystemStarter utility when OS X boots. In addition to adding functionality, my changes allow you to use the script in the more traditional UNIX /etc/init.d sense, in that you can make changes and restart NFS to make those changes visible without having to reboot. I’ll tell you more about that farther down the page.
The first section just gathers together some common filenames that we are going to use throughout the script:
Applying the Patch
IMPORTANT! SAVE A COPY OF YOUR ORIGINAL, AS-INSTALLED VERSION OF THE NFS STARTUP SCRIPT BEFORE YOU APPLY THE PATCH!
You have two choices for getting these changes onto your computer:
- Download my complete version of the NFS startup script and copy it in place of Apple’s version. Use this option if you have not personally made any changes to the existing NFS startup script that you care to preserve.
- Download the patch and use the patch utility to merge my changes with your own. Carefully verify that the changes make sense before putting them into production.
Whichever option you choose, you must use an account that has administrative privileges on your computer. If you are prompted for a password, type that account’s password to authorize the action.
1. Copying My Version
Download my NFS startup script here, then open a Terminal window and execute the following commands, exactly as shown:
You should see the same differences I discussed above, in my explanation of the patch.
2. Using My Patch
Download my NFS.patch file. Open a Terminal window and execute the following commands exactly as shown:
As with the copy method, you should see the same differences I discussed, although the line numbers in the patch might not match up exactly.
[I have received a report of using the above patch command reporting the following error:
patch: **** File NFS.orig seems to be locked by somebody else under Perforce
You are not yet ready to start serving files. You need to do some frobbing in NetInfo Manager to add the properties that the patched NFS script expects to be able to read. Continue on to the next page.
Источник
How to mount NFS share on Mac
To mount NFS in our OS X the first thing we need is know where is the server and where is the directory, to do that we can use the command showmount :
Example:
Note: merlin.lan is my router name with NFS.
Mount NFS share on Mac OS X:
The first step is to create a mount point, in this case, we will use /private/nfs :
Now we can mount the NFS share in the path create previously:
You also can use the IP instead of the hostname, for example:
If you see an error similar to this one:
You can try mount the NFS share with this option -o resvport :
Another useful option is to write on the NFS share rw and not only read the files:
Very that is working
Automount NFS share
Edit the file /etc/auto_master and add to the end of the file /- auto_nfs -nobrowse,nosuid :
Now we have to create a file on /etc/auto_nfs :
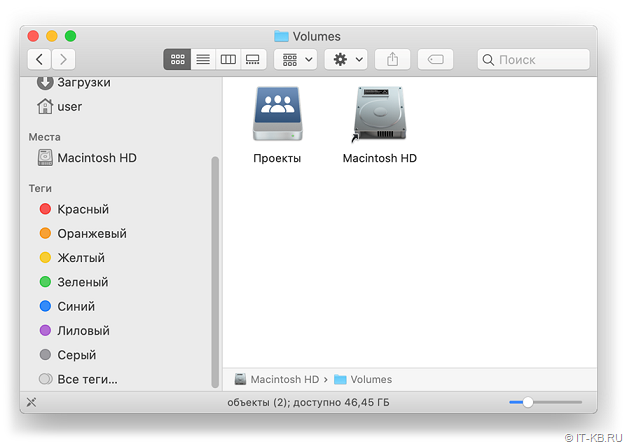
Is possible use /Volumes as a mount point, we only need to create the directory this way:
Note: the /../ before Volumes is because the system deletes everything inside /Volumes every time the system start.
Execute this command to apply the updates:
Extras
One thing that is annoying are the hidden files generated by OS X .DS_Store to prevent the creation of this files is possible to disable for all network devices and for one user with this command:
To disable for all users:
And if we want delete the files already generated:
Источник
Включение общего доступа к сетевому (NFS) в Mac OS X
Автор:
Проблема
NFS — лучший способ обмена файлами и папками через сеть между рабочими станциями Mac и Linux.
В этой статье представлены инструкции по созданию в ОС Mac OS X 10.5 или более поздней версии системы с общим доступом.
Решение
В этом примере мы сделаем папку /Users на компьютере Mac доступной для других компьютеров в сети.
- Откройте окно терминала в папке /Applications/Utilities .
- Введите следующую команду для редактирования файла /etc/export :
sudo nano /etc/export - При появлении запроса введите пароль.
- Добавьте строку в файл, как показано в следующем примере (измените IP-адрес и сделайте маску, используя адрес, используемый в сети. Обратитесь к сетевому администратору за этой информацией.):
/Users -network 192.168.0.0 -mask 255.255.0.0 - Нажмите CTRL+o, а затем ENTER для сохранения файла.
- Нажмите CTRL+x для выхода из текстового редактора.
- Введите следующую команду, чтобы включить nfsd :
включение и отключение - Введите следующую команду, чтобы проверить, что общий доступ включен правильно.:
Shotionmode -e
Результат выполнения этой команды должен быть аналогичен приведенным ниже:
/Users Everyone
Linux or Mac computer on your network should be able to be able to place the
/Users directory on this Mac.
(В Linux используется команда сборки -t nfs или автоматический ограничитель amd . В другом Mac откройте Finder, нажмите SHIFT+CTRL+G и введите /net/ /Users ).
Источник
Вики IT-KB
Пошаговые руководства, шпаргалки, полезные ссылки.
Инструменты пользователя
Инструменты сайта
Боковая панель
Работа с сетевыми ресурсами по протоколу NFS в macOS
 Поддержка протокола NFS в macOS принципиально ничем не отличается реализаций на базе Linux. В каждой macOS уже есть встроенный NFS клиент и сервер, который включен в конфигурации по умолчанию.
Для того, чтобы сделать каталог общедоступным, необходимо создать конфигурационный файл /etc/exports . В этом файле следует перечислить локальные каталоги, для которых мы хотим разрешить доступ из сети, а также обозначить параметры предоставления общего доступа.
В данном примере каталог Projects на съёмном накопителе Files будет доступен для всех пользователей сети в режиме чтения.
Начиная с macOS 10.14 (Mojave), демону nfsd необходимо разрешить работу с диском. В противном случае он не сможет получить доступ к этому диску. Предоставить такой доступ можно через:
«Настройки» → «Защита и безопасность» → «Конфиденциальность» → «Доступ к диску».
Здесь следует добавить исполняемый файл /sbin/nfsd .

Такую же операцию необходимо выполнить и для брандмауэра, если он включен.
Выполним перезапуск демона nfsd:
Теперь поговорим о настройке NFS-клиента.
Чтобы всякий раз не выполнять подключения NFS-шары вручную (⌘+K), можно настроить механизм автоматического монтирования.
Создадим конфигурационный файл:
Разберёмся с точкой монтирования и ключами:
Имя удалённого каталога не может быть на кириллице, иначе automount не сможет смонтировать каталог.
В заключении отредактируем конфигурационный файл /etc/auto_master , добавив в конец этого файла подключаемый конфиг автомонтирования NFS
Для проверки автомонтирования выполним:
Теперь при каждой перезагрузке macOS NFS-шара будет автоматически монтироваться для любого пользователя.
Проверено на следующих конфигурациях:
| Версия ОС |
|---|
| Apple macOS High Sierra (10.13) |
| Apple macOS Mojave (10.14) |
| Apple macOS Catalina (10.15) |
 Автор первичной редакции:
Виталий Якоб
Время публикации: 24.03.2020 13:11
Источник
macOS X Mount NFS Share / Set an NFS Client
H ow do I access my enterprise NAS server by mounting NFS filesystem onto my Mac OS X based system using GUI and command line based tools?
Network File System (NFS), a distributed file system protocol developed by Sun Microsystems. NFS is the common for file sharing on NAS server and Linux / UNIX systems like, HP-UX, Solaris, Mac OS X, and
| Tutorial details | |
|---|---|
| Difficulty level | Intermediate |
| Root privileges | Yes |
| Requirements | OSX 10.6.x/10.7.x |
| Est. reading time | 10m |
others. Mac OS X can be setup as an NFS client to access shared files on the network. Mounting NFS volumes in OS X can be done using following methods:
a] Command line option.
macOS X Mount NFS Share / Set an NFS Client
Our sample setup for macOS client and nfs server:
How Do I Find Out Shared Directories?
To mount an NFS file system, the resource must be made available on the NAS or NFS server. To verify that resource available open the terminal and type the following command:
$ showmount -e nas01
$ showmount -e nfs-server-ip-address-here
$ showmount -e nas01.lan.nixcraft.net.in
Sample outputs:
Fig.01: UNIX showmount command lists all clients that have remotely mounted a filesystem from NFS server
The showmount command show remote NFS mounts (resources).
Mac OS X Nfs mount Command
First, create a directory to mount an nfs share, enter:
$ sudo mkdir /private/nfs
$ sudo mkdir /private/mp3
To mount an NFS file system, enter:
$ sudo mount -t nfs nas01:/mp3 /private/nfs
OR
$ sudo mount -t nfs 192.168.3.1:/mp3 /private/nfs
To mount an NFS file system in read/write mode, enter:
$ sudo mount -o rw -t nfs nas01:/mp3 /private/nfs
Tip: Operation not permitted Error
If you get an error which read as follows:
Try to mount it as follows with -o resvport command:
$ sudo mount -t nfs -o resvport 192.168.3.1:/mp3 /private/nfs
OR mount an NFS in read/write mode, enter:
$ sudo mount -t nfs -o resvport,rw 192.168.3.1:/mp3 /private/nfs
From the man page:
resvport
Use a reserved socket port number. This is useful for mounting
servers that require clients to use a reserved port number on the
mistaken belief that this makes NFS more secure. (For the rare
case where the client has a trusted root account but untrustwor-
thy users and the network cables are in secure areas this does
help, but for normal desktop clients this does not apply.)
Verify: NFS Is Working or Not
Type the following commands:
$ df -H
$ cd /private/nfs
$ ls -l
Sample outputs (note I’ve mounted it at /private/mp3/ dir):
Fig.02: UNIX df command which displays information about total space and available space for NFS
How Do I Copy Files?
Using the Finder
Note: The following entry “NFS mounts” in the Disk Utility does NOT exist in MAC OS X v10.8+. The following discussion only applies to the older Mac OS X version
The Finder is the default file manager used on the Mac OS and Mac OS X operating systems that is responsible for the overall user-management of files, disks, network volumes and the launching of other applications. Open Finder > Shared (select from the left sidebar) > NFS server (nas01 or 192.168.3.1):
Fig.03: The Finder in action (browse an NFS share)
Recommend mount Command Options
I suggest that you run the mount command it as follows to get better a performance:
$ sudo mount -t nfs -o soft,intr,rsize=8192,wsize=8192,timeo=900,retrans=3,proto=tcp nas01:/sales /private/sales
OR
$ sudo mount -t nfs nfs -o soft,timeo=900,retrans=3,vers=3, proto=tcp nas01:/sales /private/sales
See mont_nfs(8) for more information.
GUI Method: HowTo Set Mac OS X As an NFS Client
To mount an NFS share from OS X using GUI tools, follow these steps:
[1] Start Finder, and go to Applications / Utilities / Disk Utility:
Fig.04: Starting Disk Utility
- No ads and tracking
- In-depth guides for developers and sysadmins at Opensourceflare✨
- Join my Patreon to support independent content creators and start reading latest guides:
- How to set up Redis sentinel cluster on Ubuntu or Debian Linux
- How To Set Up SSH Keys With YubiKey as two-factor authentication (U2F/FIDO2)
- How to set up Mariadb Galera cluster on Ubuntu or Debian Linux
- A podman tutorial for beginners – part I (run Linux containers without Docker and in daemonless mode)
- How to protect Linux against rogue USB devices using USBGuard
Join Patreon ➔
Fig.05: Click the ‘Mounts’ icon at the top of the Directory Utility panel
Fig.07: OS X NFS Mounts to set it as an NFS Client
Fig.08: Setting up an NFS mount options in the dialog box
You need to set mount location as follows:
/Volumes/mp3
/Volumes/mp3 is nothing but the mount location. This is a convenient place. In this example, you entered the URL as nfs://192.168.3.1/mp3, enter /Volumes/mp3 as the mount location. Please note that don’t create the subdirectory (mp3); it will be created dynamically when the share is mounted.
Optional
Click the arrow in front of “Advanced Mount Parameters”. A new text entry box is displayed. Enter: resvport (this is only required if you get some sort of error [see above for more info or read mount_nfs man page]).
[4] Finally, click “Verify” button at the bottom right:
Fig.09: Verify NFS mount configuration which only checks that your NFS server is enabled and working correctly.
Fig.10: NFS Share mounted
You can access /Volumes/mp3 using the Finder:
Fig.11: The finder in action
See also:
🐧 Get the latest tutorials on Linux, Open Source & DevOps via
Источник


