- [Советы и трюки] Меняем звук уведомлений в OS X
- Лонгриды для вас
- Как изменить или отключить звук уведомлений OS X
- Change the Notification Center Alert Sound in Mac OS X
- How to enable and disable notification sounds on your Mac
- To turn off notification sounds on your Mac
- Apple manufacturers ‘scrambling’ to combat power supply issues in China
- The Apple Store is down ahead of Apple Watch Series 7 pre-orders!
- ‘Ted Lasso’ producer again teases that a fourth season could happen
- Grab one of the best iPhone 13 cases to protect that gorgeous new phone
- How to change notification sounds on Mac and PC
- It might seem confusing to do this on Windows, but it’s not too hard
- macOS
- Windows 10
[Советы и трюки] Меняем звук уведомлений в OS X
«Центр уведомлений» появился на наших Mac вместе с выходом OS X 10.8 Mountain Lion. Честно говоря, востребованность такого новшества в OS X до сих пор остается непонятной. Но одно ясно точно: пользуются им намного меньше, чем «Центром уведомлений» на iOS-устройствах. Возможно, даже в разы. Тем не менее забывать про уведомления в OS X не стоит, тем более, что их можно настроить так. Вот, например, буквально за пару минут можно поменять звук уведомлений на тот, который придется вам по душе, сделав свой Mac еще более уникальным.
Итак, прежде всего нам нужен музыкальный файл формата .aiff. Преобразовать файл в такой формат можно как при помощи стандартных инструментов в OS X, так и при помощи множества сторонних приложений, которые без особых проблем можно найти в Mac App Store. Большая часть из них, кстати, доступна совершенно бесплатно.
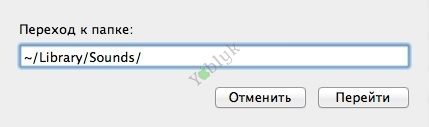
После того, как файл будет подготовлен, нужно открыть Finder и, воспользовавшись командой cmd + shift + G, открыть окно, с помощью которого, введя адрес, можно перейти в нужную вам папку. Нас интересует папка с системными звуками, поэтому вводим в появившемся окне следующий адрес (без точки в конце):
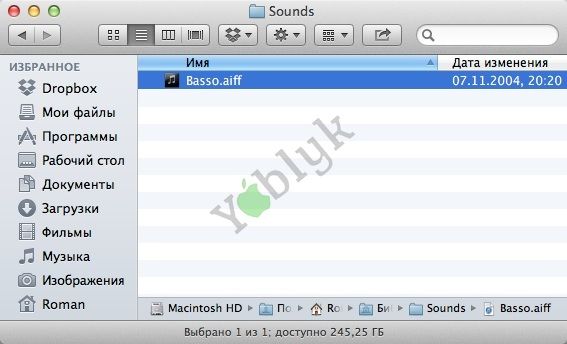
/Library/Sounds/. В открывшуюся папку перенесите подготовленный заранее файл. После этого нужно переименовать его в Basso.aiff.
Для того, чтобы изменения вступили в силу, нужно перезапустить «Центр уведомлений». Для этого открываем «Терминал» и вводим туда следующую команду:
Теперь, при появлении в правом верхнем углу нового уведомления, вы услышите подготовленный вами звук. Если он вам надоест, заменить его можно будет аналогичным способом.
По материалам osxdaily.com

Новости, статьи и анонсы публикаций
Свободное общение и обсуждение материалов


Лонгриды для вас

Быстрая зарядка убивает аккумулятор iPhone — вопрос, который волнует многих. Мы разобрались в этом и готовы рассказать, как работает беспроводная зарядка, почему лучше не разряжать iPhone до нуля и кто виноват в быстро падающей емкости батареи

Пожалуй, главный недостаток iPhone по сравнению с любыми Android-смартфонами заключается в том, что его можно заблокировать по iCloud. Рассказываем о том, как это происходит, где злоумышленники берут данные ваших аккаунтов и как с этим бороться

Студия Parallels выпустила обновление утилиты Parallels Desktop с поддержкой процессора M1. Теперь владельцы Mac на Apple Silicon смогут запускать ARM-версию Windows почти без проблем
Источник
Как изменить или отключить звук уведомлений OS X
Как Вы знаете, OS X автоматически проигрывает звук при поступлении новых уведомлений в Центре Уведомлений. Этот стандартный звук называется «Basso». Если он Вам не нравится или надоел, его легко можно отключить или заменить.
Что бы отключить звук уведомлений для конкретной программы:
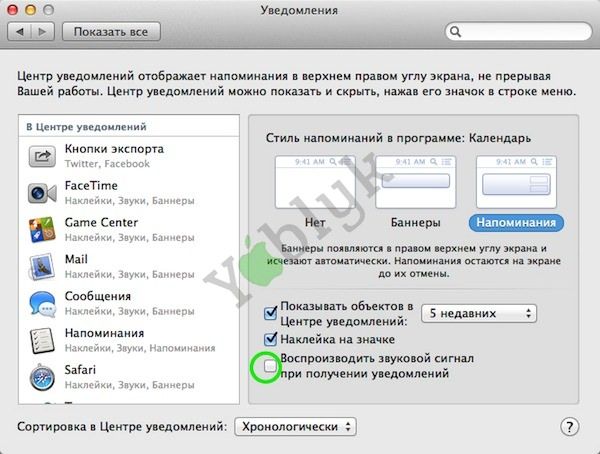
- Откройте Системные настройки и перейдите во вкладку Уведомления.
- Снимите галочку у пункта «Воспроизводить звуковой сигнал при получении уведомлений».
- Повторите действие для всех приложений, которые Вы хотите сделать беззвучными.
Что бы изменить стандартный звук Центра Уведомлений нужно переместить другой аудиофайл в формате .aiff в системную папку.
- Для начала Вам потребуется новый звук в формате .aiff. Вы можете переконвертировать любой файл в этот формат или скачать из интернета. Например, архив звуков из старых компьютеров Apple.
- Теперь откройте Finder и перейдите к папке
/Library/Sounds. Для этого используйте сочетание клавишCommand+Shift+G.
- Перенесите нужный файл в эту папку и переименуйте его в “Basso.aiff”
- Теперь необходимо перезапустить Панель уведомлений для применения изменений. Сделать это можно с помощью простой команды для терминала: killall NotificationCenter.
Для того, что бы убедиться, что звук изменен, Вы можете настроить напоминание через 1 минуту или просто дождаться какого-либо уведомления.
Источник
Change the Notification Center Alert Sound in Mac OS X
 As you know, OS X plays a sound when a new Notification pops up in Notification Center. That default sound is called “Basso”, a low toned sound effect that is kind of like a short tap on a low note piano key. CultOfMac hilariously describes the sound as a “frog fart”, and if you aren’t a fan of that alert sound and you don’t want to mute the sound effects for Notifications manually (or mute all system UI sounds, for that matter), you can easily change the alert sound yourself by tossing another .aiff file into a specific directory found in the user library folder. It’s not particularly complicated, but it can be a fun additional way to customize your Mac experience, so if you’re interested here is what you’ll need to do:
- Locate any .aiff audio file, either by converting an existing audio file or downloading a collection of AIFFs like that found in the retro Mac sound pack (you can get those directly here)
- Now go to the OS X Finder and we’ll use the Go To feature to jump to the users Sounds folder, hit Command+Shift+G and enter the following path:
/Library/Sounds/
Next, we need to relaunch Notification Center, you can do it through Activity Monitor but it’s faster through the command line, so launch Terminal and type:
At this point you can either trust the change has taken place, or set up a Reminder or alert to go off in a minute or two to confirm the sound effect has changed. Nonetheless, the next time you see one of these alerts pop up in OS X:
The sound that will now play is no longer the default Basso, but the newly renamed Basso.
Источник
How to enable and disable notification sounds on your Mac

Sometimes it’s best for your Mac to be seen and not heard. Applications and services often make a sound associated with their notification, but did you know that sound can be deactivated? Here’s how.
First of all, you can always mute the audio on your Mac all together — and sometimes that’s a good idea. But other times you may want to hear audio from some apps (like iTunes, for example), but you may want to selectively shut off notification noises from others.
It’s pretty easy to tailor these sorts of sounds, though it can be an arduous process. Here’s how to get started.
To turn off notification sounds on your Mac
- Click on the menu.
- Select System Preferences. .
- Click on Notifications.
- Click on the name of the app whose behavior you’d like to modify.
- Uncheck Play sound for notifications.

That’ll do it. Now you’ll continue to get alerts from the application, but you’ll be free of any annoying notification noises associated with it.
I said it’s an arduous process up front. That’s because Notification Center in OS X doesn’t give a global setting to shut off audio notifications from all apps. You’ll need to click on each individual application in that list inside the Notifications system preference and uncheck the Play sound for notifications preference to shut them all up. But this does give you fine control over what can and can’t make noise at you while you’re using your Mac.
This won’t shut off all sound from those applications — if they’re active, and sound is part of what they do, they’ll continue to make noise. But if you find the constant «ding» of incoming mail to be distracting, for example, this is an easy way to shut that off without taking away from the auditory experience of the rest of your Mac.
Any questions? Let me know!
![]()
Apple manufacturers ‘scrambling’ to combat power supply issues in China
A new report says major suppliers of companies like Apple are «scrambling» to keep production on track as China is hit by power shortages.
![]()
The Apple Store is down ahead of Apple Watch Series 7 pre-orders!
The Apple Store is now offline as everyone gets ready for the Apple Watch Series 7 pre-order push.
![]()
‘Ted Lasso’ producer again teases that a fourth season could happen
Ted Lasso fans rejoice! There might be a fourth season after all.
![]()
Grab one of the best iPhone 13 cases to protect that gorgeous new phone
You’re getting the stunning new iPhone 13? Be sure keep it looking great with one of the best iPhone 13 cases.
Источник
How to change notification sounds on Mac and PC
It might seem confusing to do this on Windows, but it’s not too hard

Our computers and phones are pretty much constantly beeping at us, but did you know that you can change these sounds to make them a lot less grating?
On Mac, this process is super easy, and Windows 10 isn’t that much harder, so anyone can do it if they feel like making all those beeps into something a little more soothing.
macOS
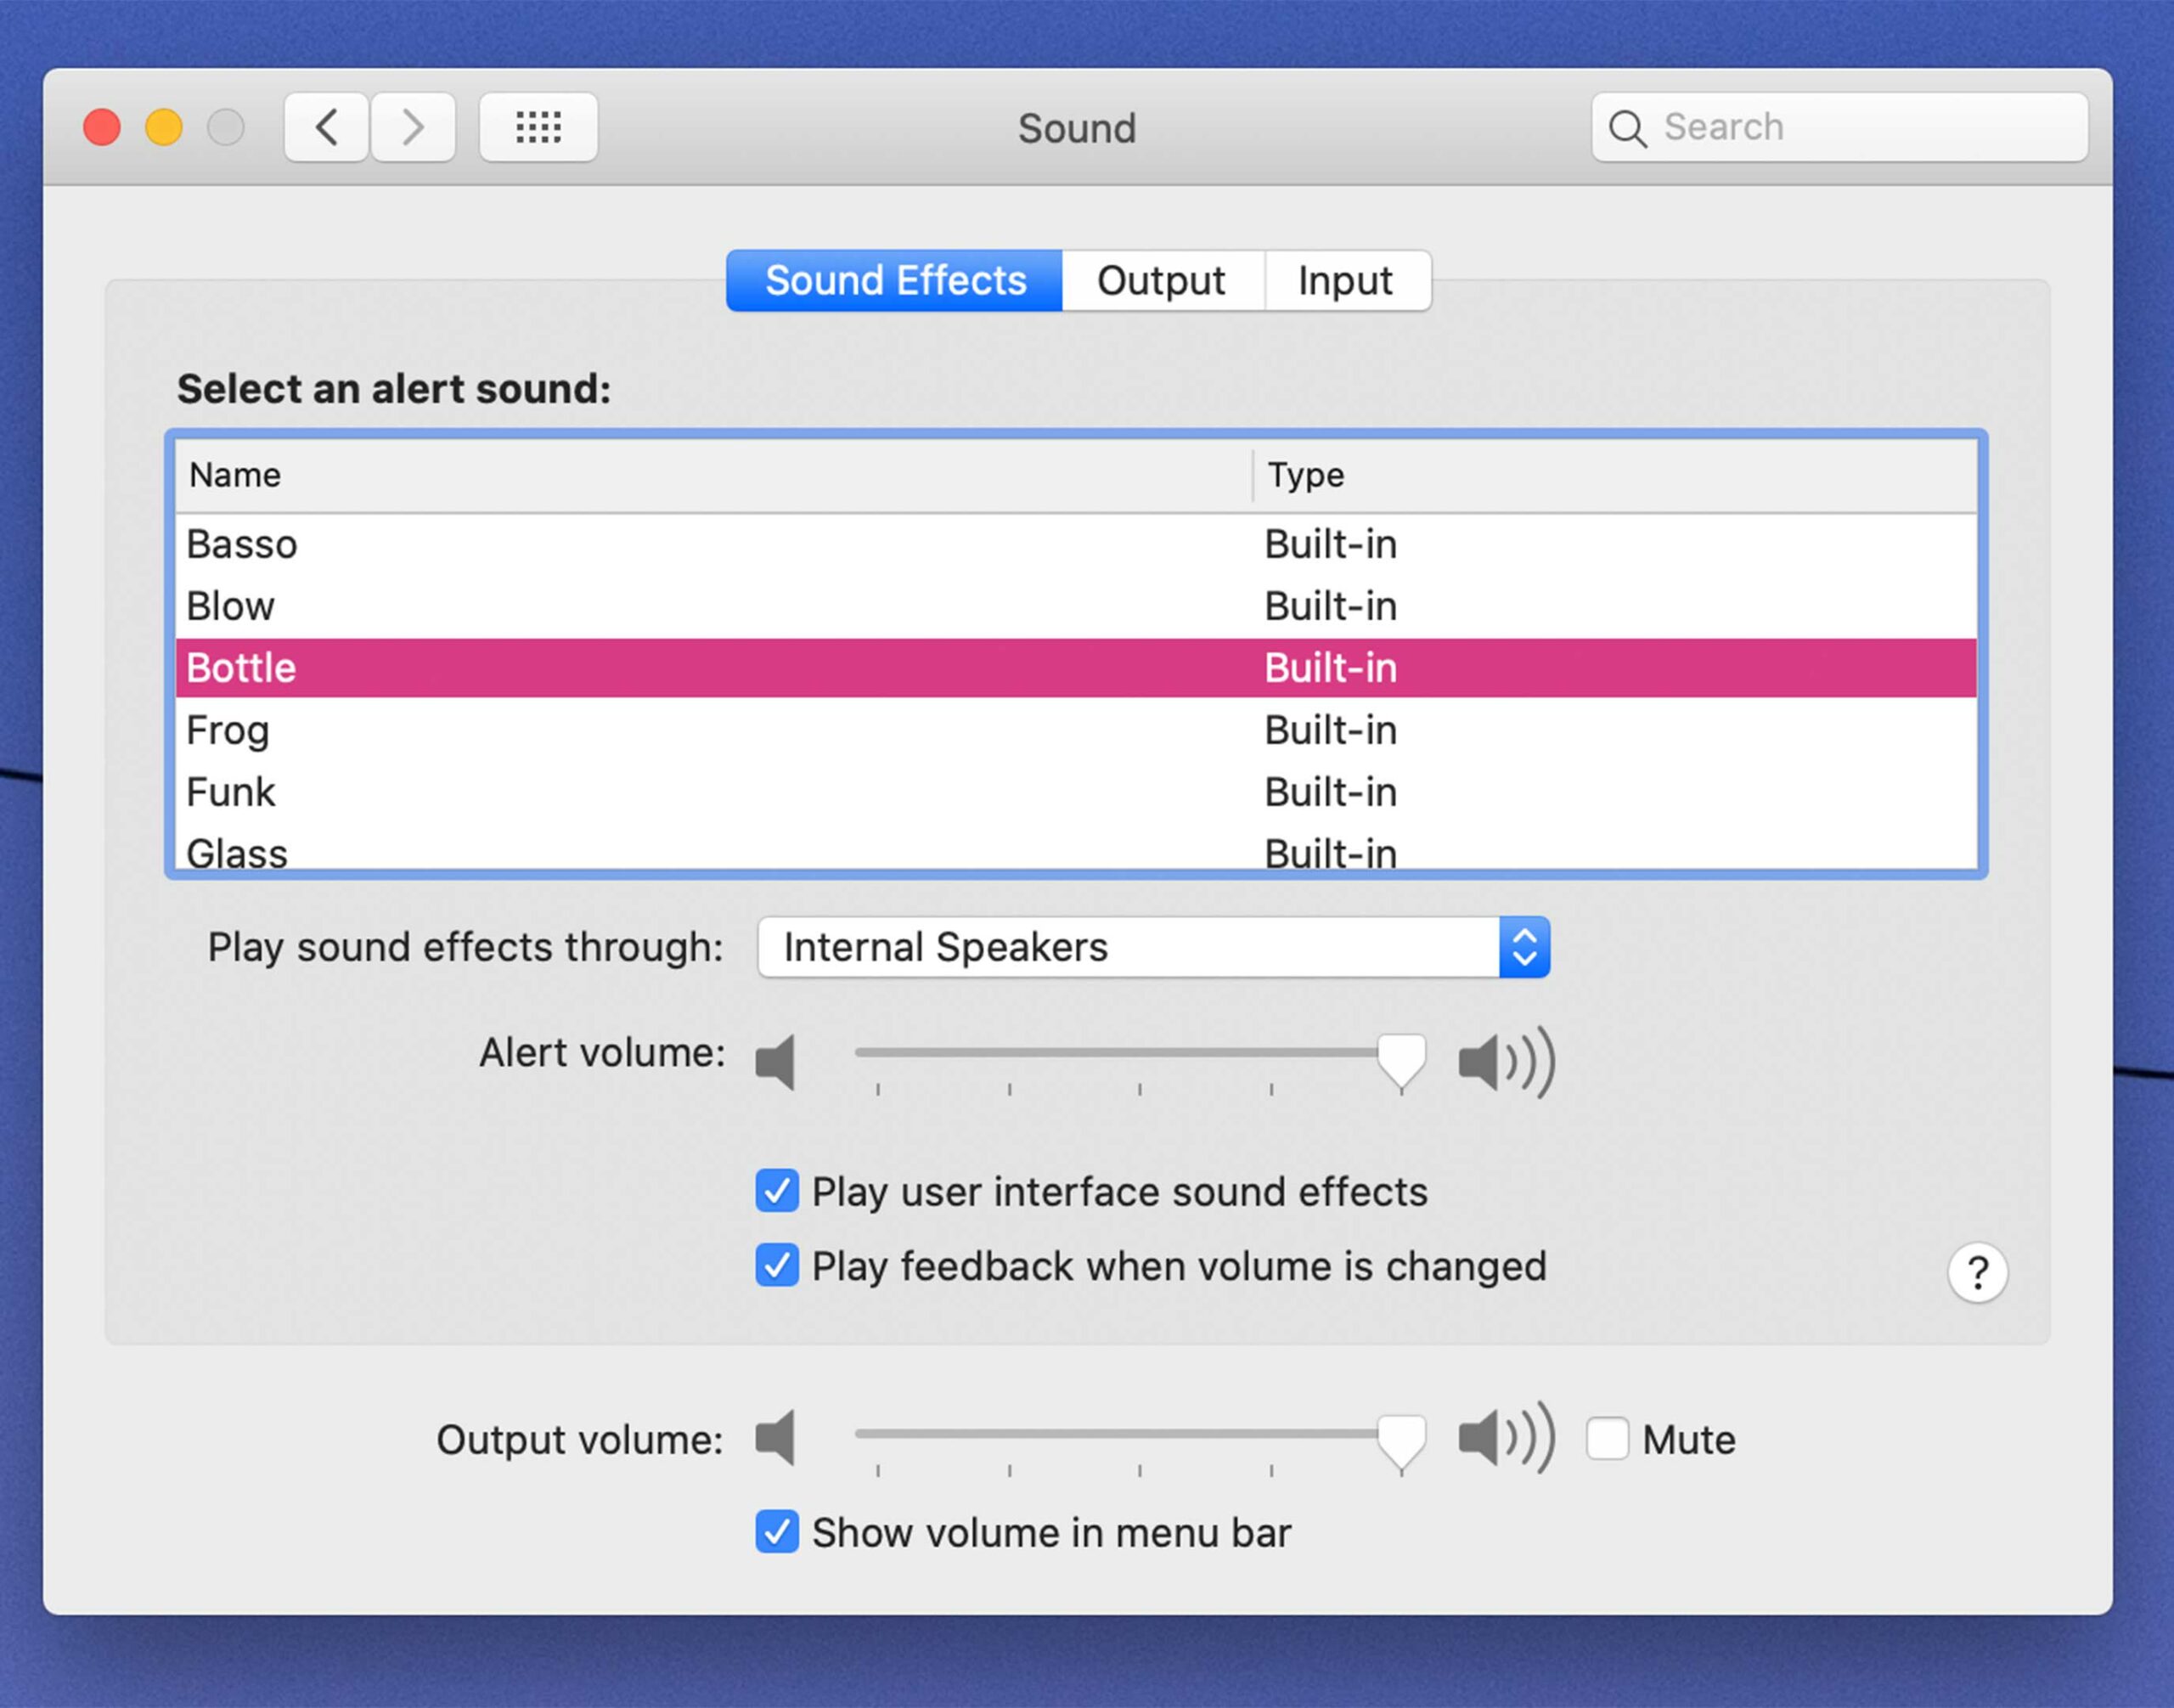
To change the default alert sound, you need to enter into the ‘System preferences’ app and select ‘Sounds.’ Then, at the top of that window, select the option ‘Sound effects.’
From there, you can choose a sound you like and it will become your default notification tone.
The second step is figuring out what apps and services that sound applies too. For instance, the email app Spark has its own notification sound, but you can disable it if you’d rather the default. Slack, on the other hand, has a few custom sounds of its own.
Sadly that’s the state of notification sounds on Mac, but generally, if you go into an app’s settings, it will have some sort of notifications section to give you some options. Everything else that doesn’t will use the base tone you set earlier.
Windows 10
As I stated above, things are a tiny bit trickier with Windows, but you do get some more customization options, so that’s a plus.
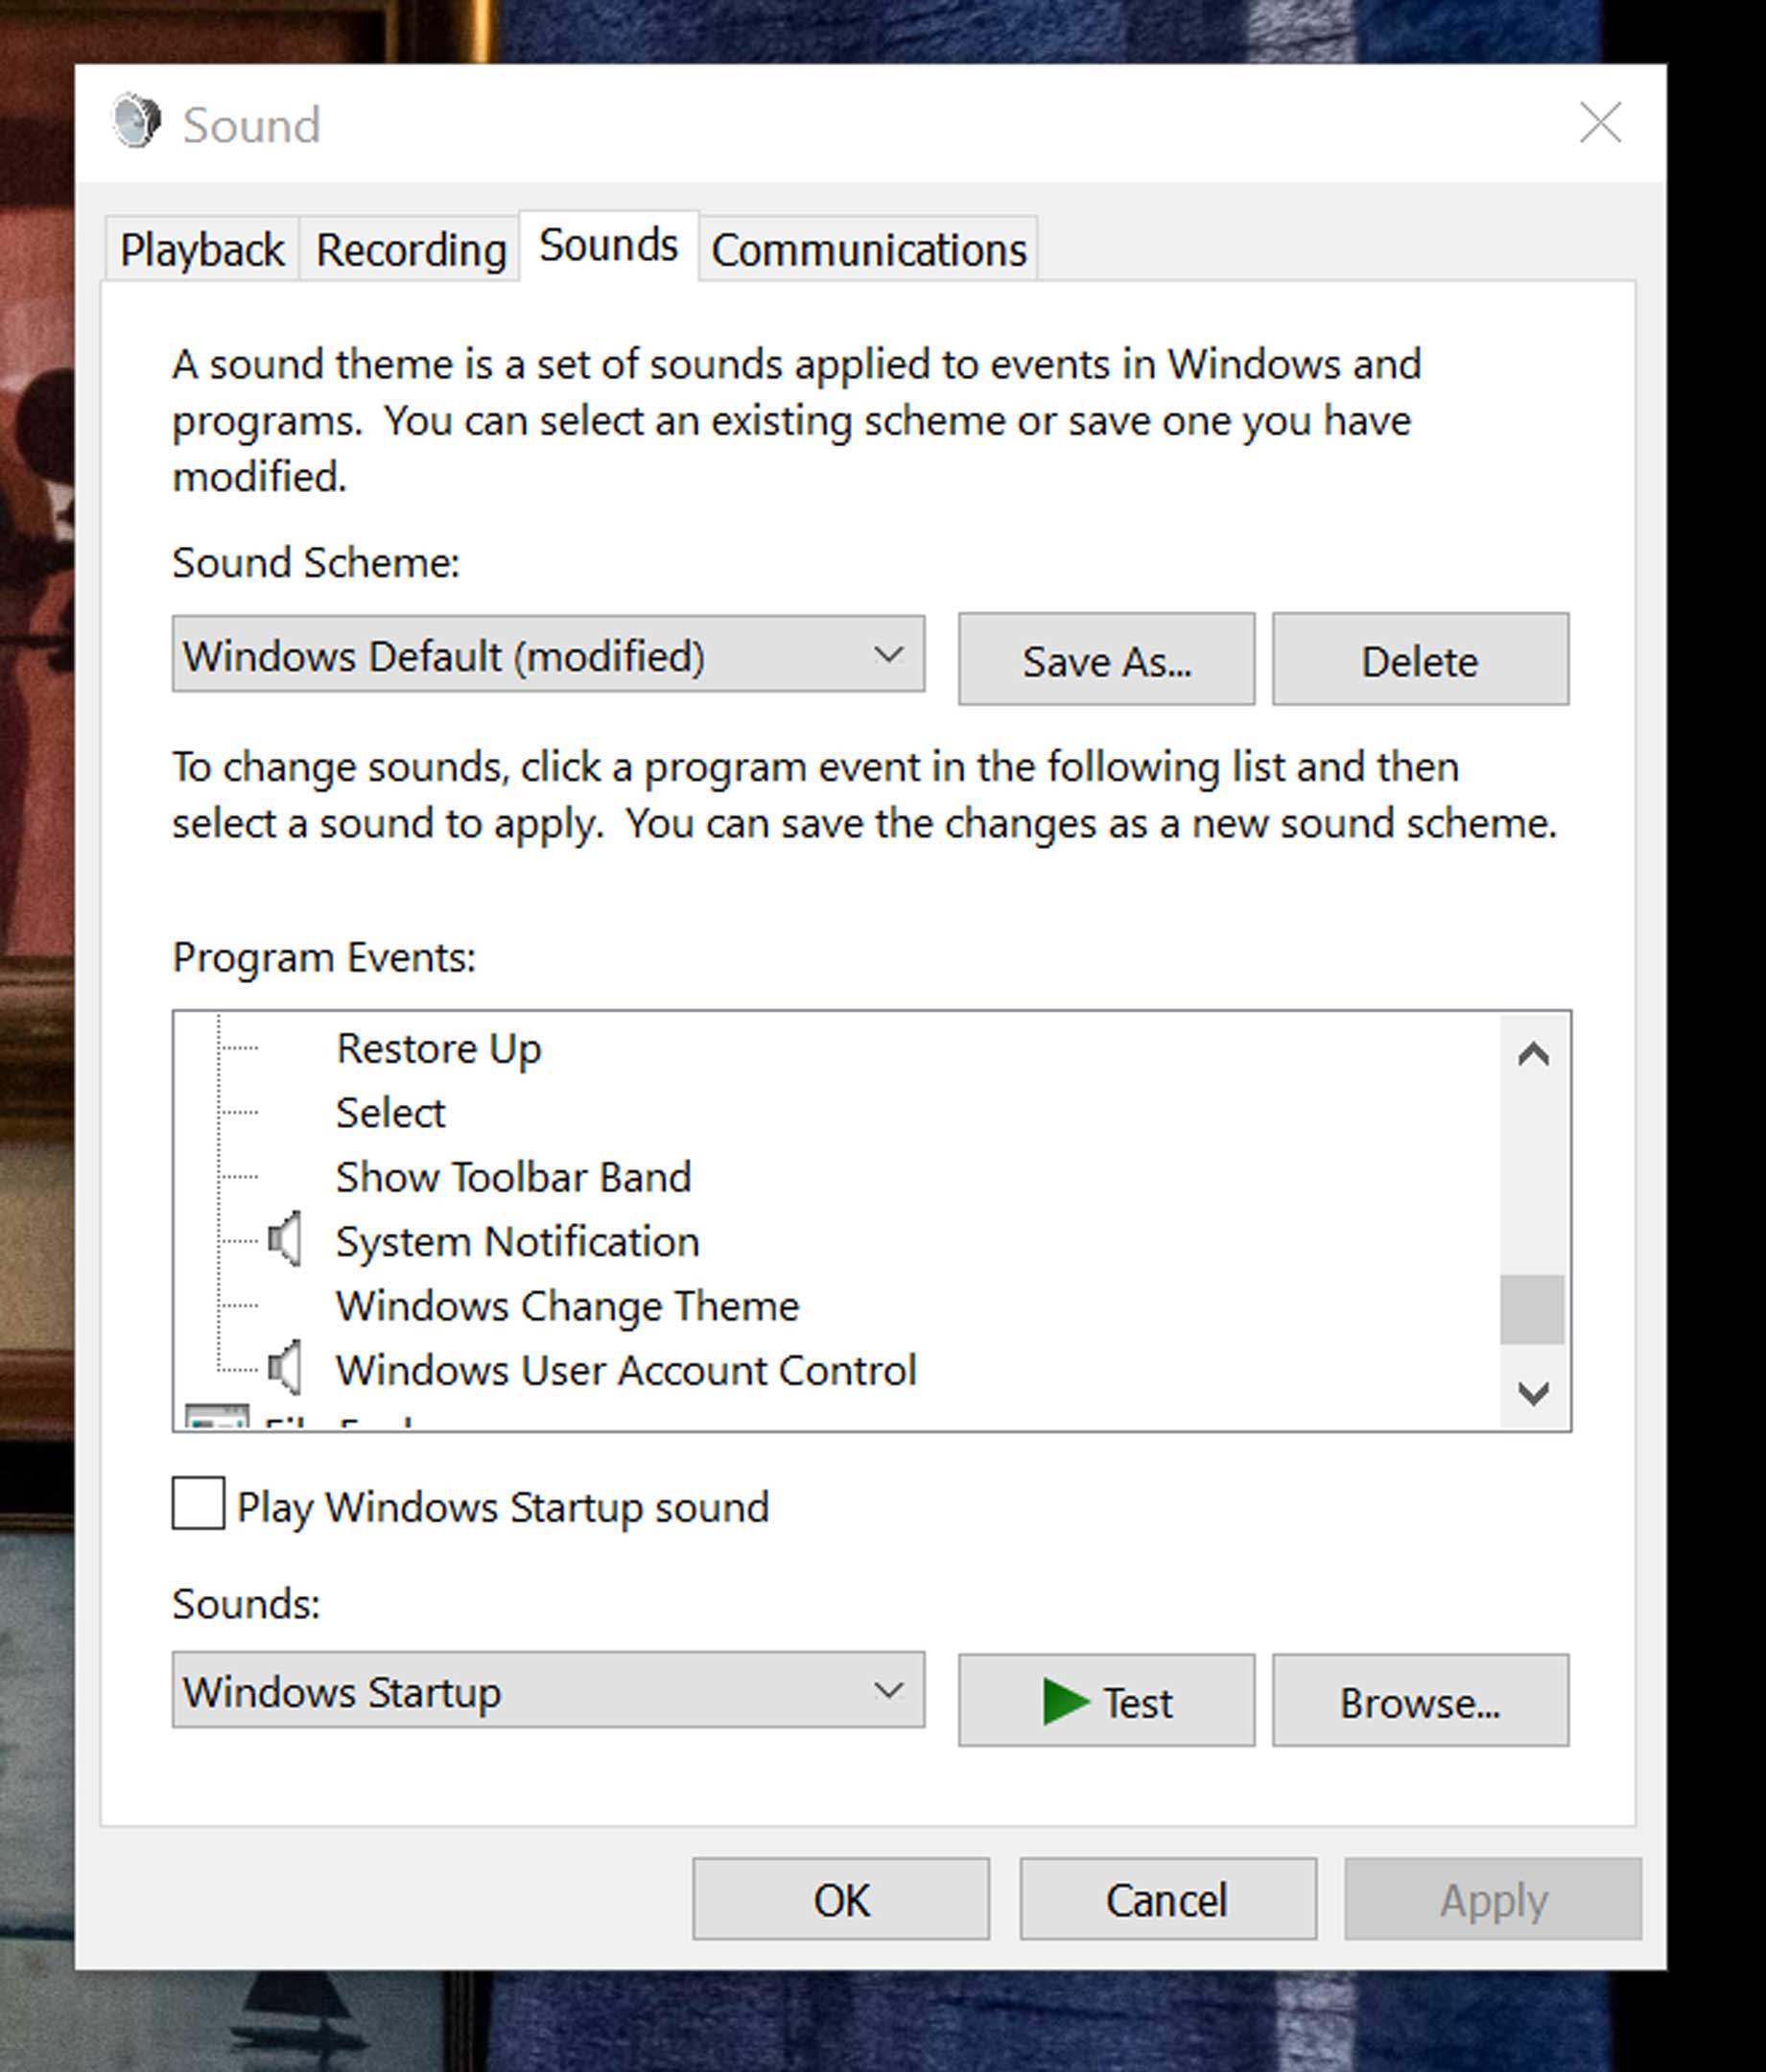
The first thing you need to do is open the sound preferences. The quickest way to do this is to click on the search button on the Taskbar and looks for ‘change system sounds.’ Once it appears, click on the option and a little window will appear that looks like the picture above.
This is where things get a little confusing. When you want to change a sound, you need to find that ‘Event’ in the list and then select a new sound for it from the drop-down menu below.
The main sounds I change on my computer are as follows:
- Asterisk
- Calendar reminder
- Critical battery alarm (laptop users only)
- default beep
- desktop mail notification
- device connect/disconnect
- Exclamation
- New mail
- New text
- Notification
- System notification
You can change more, but I find these to be the ones that pop up often for me. The first few times I did this, I was worried applying the default windows sounds options to these events would confuse me, but I find that I get back into the new sounds after about a day of work, so that shouldn’t be a huge concern.
Alternatively, you can upload your own sounds to the service or some that you’ve downloaded from online by clicking ‘Browse’ and choosing your custom sounds.
Once you’re done, I recommend saving your sound setup so you can easily switch back to this pre-set in the future and then hit ‘Apply’ and ‘Ok.’
But wait there’s more…
Just like on macOS, many apps take notification sounds into their own hands, often you’ll need to go into the individual preferences or settings of the apps you use frequently and change what you can there.
Источник


