- Enabling NTFS write in macOS the Open source way
- How to access Windows disks from Mac
- Why can’t macOS just write NTFS?
- How can macOS write NTFS?
- Enabling NTFS write in macOS
- Are there alternatives to NTFS?
- Which macOS does it work on?
- How to read-write to Microsoft NTFS drives on Mac?
- Can macOS read NTFS?
- How to read-write to Microsoft NTFS drives on Mac?
- Option 1: Free but complicated NTFS driver for Mac
- Option 2: Commercial but easy-to-use NTFS driver for Mac
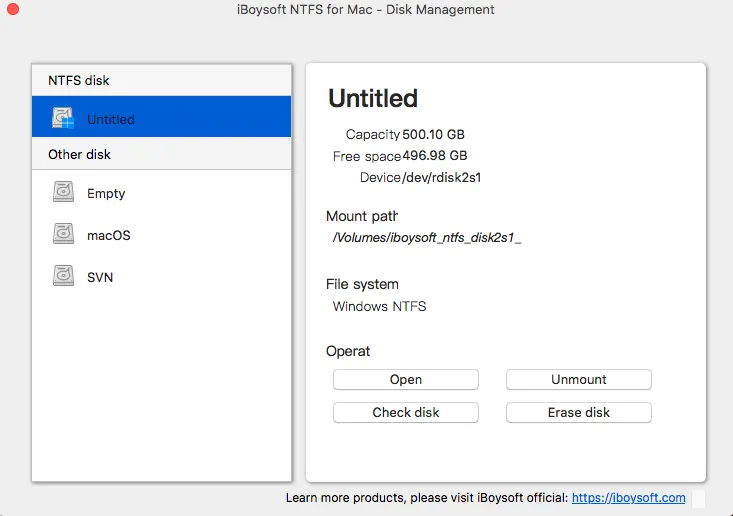
- iBoysoft NTFS for Mac — a comprehensive NTFS manager
- Best NTFS for Mac — iBoysoft NTFS for Mac
- Option 3: Enable NTFS write support using command line
Enabling NTFS write in macOS the Open source way
How to access Windows disks from Mac

Do you have an old Windows external HDD or do you share your data with Windows computers and your macOS is unable to write NTFS file system? You can change it in several ways.

Why can’t macOS just write NTFS?
NTFS is a proprietary file system standard from Microsoft used in Windows since the early 90s. It was first used in Windows NT 3.1 and is present since.
Microsoft is not providing a full specification of NTFS as open source standards and it is quite possible that Apple would need to pay pricey licenses in order to fully use it in their systems. And why would they support the protocol of their main competitor?
How can macOS write NTFS?
There are several ways to do so. You can use paid software like Paragon NTFS for Mac or Microsoft NTFS for Mac by Tuxera. There is also freeware iBoyosft NTFS for Mac. Or you can use open source software. But open source solution requires some messing in terminal. Let’s have a look at this option.
Enabling NTFS write in macOS
Then you will need to download and install the latest version of macFUSE (osxFUSE) either using installer from GitHub releases page.
Reboot your maxOS. After that, install package ntfs-3g from Terminal.
Since OS X 10.11 El Capitan you need to disable System Integrity Protection for a while. Restart or shut down your Mac and while starting, press Command + R key combination. This will get you to Recovery mode.
In Recovery mode, open Terminal application from Utilities in the top menu. Disable System Integrity Protection with command:
Restart your Mac and go to your normal macOS.
Since macOS 10.15 Catalina, you have to do one extra step. Apple is trying to protect you more by making some crucial parts of the file system read-only and we have to make it writable again. Until next restart. Enter this command into your Terminal:
After that, we can just back up the old NTFS handler and replace it with the new one.
If NTFS write doesn’t work yet, you can try to add one additional parameter to NTFS mount script. Open it in your favourite console editor, for example nano.
Find flag “-o allow_other \” and add “-o auto_xattr \” as next flag. Save using “ctrl+x” and “yes”.
After that, you have to go to Recovery mode again and enable System Integrity Protection again. You will also have your read-only parts of system protected again.
That’s it. Enjoy writing to NTFS.
Unfortunately, you have to repeat this procedure every time you update to a new major release of macOS. So you’re good until next October.
Are there alternatives to NTFS?
Yes, if you want to share external HDD between Mac and PC, you can format your HDD to exFAT file system. You will lose all the data on disk during format but otherwise, it’s usable.
If you want to stick with the Apple ecosystem, you are free to use Apple APFS or HFS+.
If you want to be compatible with everybody and everything, use old FAT32. But you will be able to place there files of maximum size
Which macOS does it work on?
This article was originally written for macOS 10.15 Catalina. Now I am running macOS 11.0 Big Sur and things are still working well. According to macFUSE, this should work for 10.12+.
Источник
How to read-write to Microsoft NTFS drives on Mac?
Summary: Guide to enable NTFS writing on Mac. The safest and most effective method is to download iBoysoft NTFS for Mac to read and write to Microsoft NTFS drives on your Mac.
Cross-platform incompatibility has been a huge roadblock for people who have to move back and forth between Windows and macOS, especially when you need to share files between Windows and Mac using an NTFS drive.
After you connected an NTFS drive to the Mac, you found that you could view the files stored on your NTFS-formatted drive on Mac, but you couldn’t edit, rename, copy, paste, delete, move or create files on it.
Any ways that you can read-write to NTFS drives on Mac running either macOS or Mac OS X? This article will introduce three solutions for you to solve Mac external hard drive read only.
And the simplest solution only takes 3 steps:
- 1. Download, install, and launch iBoysoft NTFS for Mac.
- 2. Restart your Mac, then connect your NTFS drive to your Mac.
- 3. Read-write your NTFS drive on Mac freely.
Can macOS read NTFS?
Yes, you can read Windows NTFS-formatted USB flash drives, SD cards, memory sticks and external hard drives without any problem.
No matter what Mac you are using, either a desktop or a laptop, and no matter which Mac operating system is running on your Mac, macOS or Mac OS X, you are able to read NTFS drives on Mac.
You can view your files by opening them. Files will appear the same quality as they do on a PC. If you have used Boot Camp Assitant to create a Windows BootCamp partition on your Mac SSD formatted with NTFS. Therefore, you have read support to Bootcamp partition on your Mac SSD as well.
However, your files will show read-only or locked beside the file name. You can’t make any changes to those files nor create/save/move any files on the NTFS drives on Mac. Sharing files between NTFS drives and Mac looks impossible.
Want to have full read-write access to NTFS drives or BootCamp partition on Mac? Keep reading to learn how to enable NTFS write support on Mac and access BootCamp files from Mac.
How to read-write to Microsoft NTFS drives on Mac?
In this section, three options are introduced:
- Free NTFS drivers for Mac
- Cost-effective NTFS for Mac software
- Apple’s native NTFS support
Option 1: Free but complicated NTFS driver for Mac
NTFS for Mac software that can help you read-write to NTFS drives on Mac. For example, FUSE for macOS is an open-source project. It can mount NTFS drives in read-write mode.
The process will be very technical and please follow the guide very carefully.
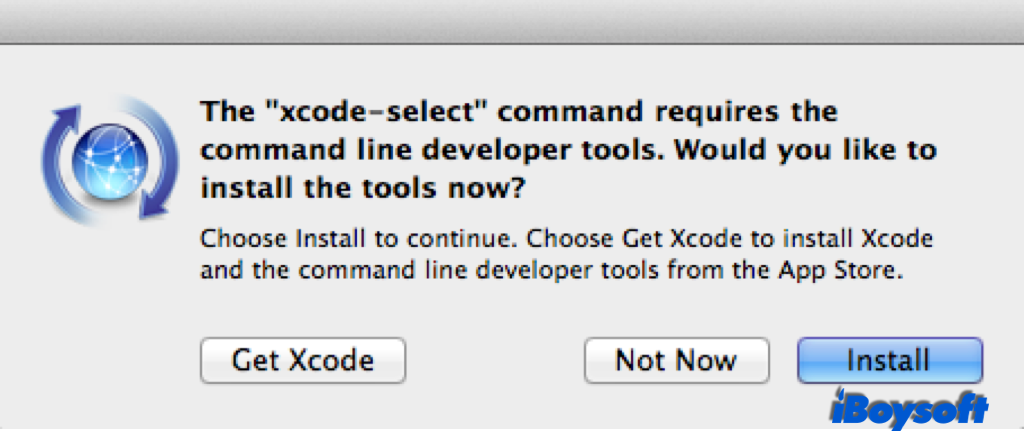
Step 1: Download and install Xcode.
- 1. Go to Finder > Applications > Utilities > Terminal and run the following command line: xcode-select —install.
- 2. Click «install» when you are asked to install the Apple’s command line developer tools.
Step 2: Download and install Homebrew.
- 1. Go to the Terminal window and run the following command line:
- /usr/bin/ruby -e «$(curl -fsSL https://raw.githubusercontent.com/Homebrew/install/master/install)».
- 2. Hit Enter to install it (provide password when prompted).
Note: If you have installed Xcode and Homebrew before, messages will pop up in Terminal window telling you have installed them before. You just ignore the messages, keep doing the next steps.
Step 3: Download and install FUSE for macOS.
Use default options when installing it.
Step 4: Install NTFS-3G.
- 1. Go to Terminal window and run the following command line: brew install homebrew/fuse/ntfs-3g.
- 2. Hit Enter.
Step 5: Disable SIP (System Integrity Protection).
SIP exists to protect the operating system from unauthorized changes.
- 1. Restart your Mac and hold down Command + R immediately until you see the Apple logo.
- 2. Open Terminal from the Utilities menu.
- 3. Run the command line: csrutil disable.
- 4. Hit Enter.
- 5. Reboot the Mac.
Step 6: Read and write to NTFS on Mac.
- 1. Go to Finder > Applications > Utilities > Terminal.
- 2. Run the following command line:
- sudo mv /sbin/mount_ntfs /sbin/mount_ntfs.original
- sudo ln -s /usr/local/sbin/mount_ntfs /sbin/mount_ntfs
- 3. Hit Enter.
Note: It is recommended that you enable SIP after you finish using NTFS drives on Mac to better protect your Mac. To enable SIP, you just need to follow the Step 5 and run command line «csrutil enable» in Terminal window, hit Enter and restart the Mac.
Other than FUSE for macOS, Mounty for Mac, NTFS-3G, SL-NTFS are other free NTFS drivers for Mac. Like NTFS-3G, they are free but all of them require a good bit of work to install and use.
If you feel uncomfortable with this method which involves so many command lines and rebooting the Mac, here is an easier solution for you to read and write to NTFS drives on Mac.
Option 2: Commercial but easy-to-use NTFS driver for Mac
A commercial NTFS driver for Mac is the alternative to make an external hard drive compatible both with Mac and PC without the need to format external hard drive for Mac and PC.
iBoysoft NTFS for Mac is one of the best. They might cost you a little money, but they offer high reliability, fast write speed, excellent compatibility and free technical support, which you probably won’t get from a free NTFS driver for Mac.
In this section, we’ll introduce the most cost-effective NTFS app for Mac: iBoysoft NTFS for Mac to help you read and write to NTFS on Mac computer.
iBoysoft NTFS for Mac — a comprehensive NTFS manager
iBoysoft NTFS for Mac can enable NTFS write support on Mac automatically after NTFS drives are detected. You can create, save, copy, paste, delete and modify files on NTFS drives on Mac freely.
iBoysoft NTFS for Mac has fast NTFS write and file transferring speed. You won’t feel any difference between using an NTFS drive on Mac or using an drive with the format that is fully supported by macOS. And now, it also supports write to NTFS drives on ARM-based M1 Mac.
Best NTFS for Mac — iBoysoft NTFS for Mac
- Read and write NTFS volumes on Mac
- Mount and unmount NTFS volumes
- Repair NTFS file system errors
- Erase data on NTFS disks
- List and open all attached external drives
- Reformat other file systems to NTFS
- Support macOS 11/10.15/10.14/10.13
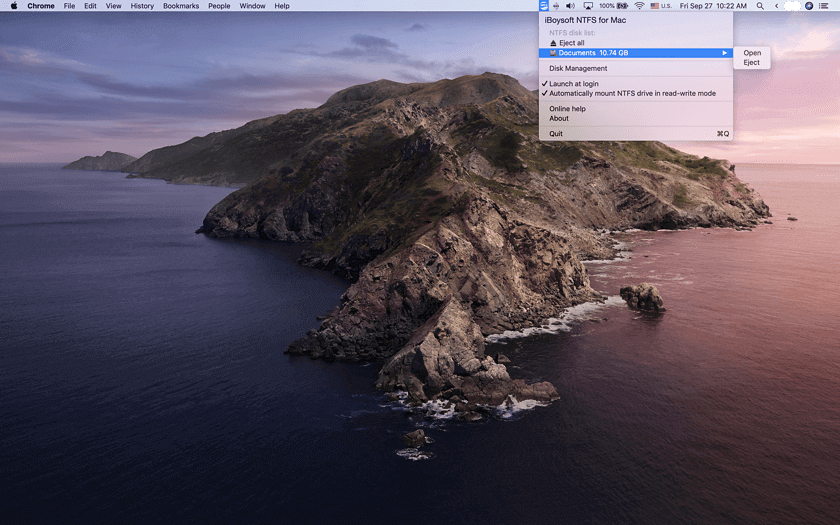
Besides, iBoysoft NTFS for Mac offers other NTFS management features to help users better manage NTFS drives and other external drives. It allows you to open, unmount, eject or erase the NTFS volumes with one click. You can utilize it to repair the NTFS file system errors.
Also, the software will list all conencted USB flash drives, SD cards, external drives and memory sticks. You can open them in the main window too. Moreover, iBoysoft NTFS for Mac supports erasing the data on NTFS disks and reformatting other file systems to NTFS.
Steps to read and write to NTFS drives on Mac:
- 1. Free download and install iBoysoft NTFS for Mac on Mac. Then, restart your Mac.

- 2. Connect your NTFS drive to your Mac computer.
- 3. After your drive is mounted successfully, you can manage your drives and read-write to NTFS drives.
Option 3: Enable NTFS write support using command line
I bet most people don’t know that the Mac operating system includes the experimental NTFS write support, but it is disabled by default. You can run some command lines in Terminal to enable it.
However, Apple hasn’t officially supported NTFS-writing ability yet. It is proven to be unstable and risky. It may cause disk corruption and permanent data loss. If you accidentally couldn’t access your NTFS drives or lost data from them, try iBoysoft Mac Data Recovery to recover important files.
This solution is not recommended, but if you are curious about how to enable Apple NTFS write support, follow the steps below:
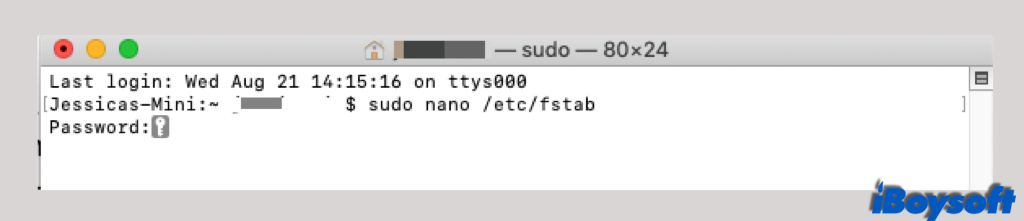
- 1. Go to the Applications > Utilities > Terminal to launch the Terminal program.
- 2. Input «sudo nano /etc/fstab» to edit the fstab file (provide your password when prompted). No letters will show up when you type in password.
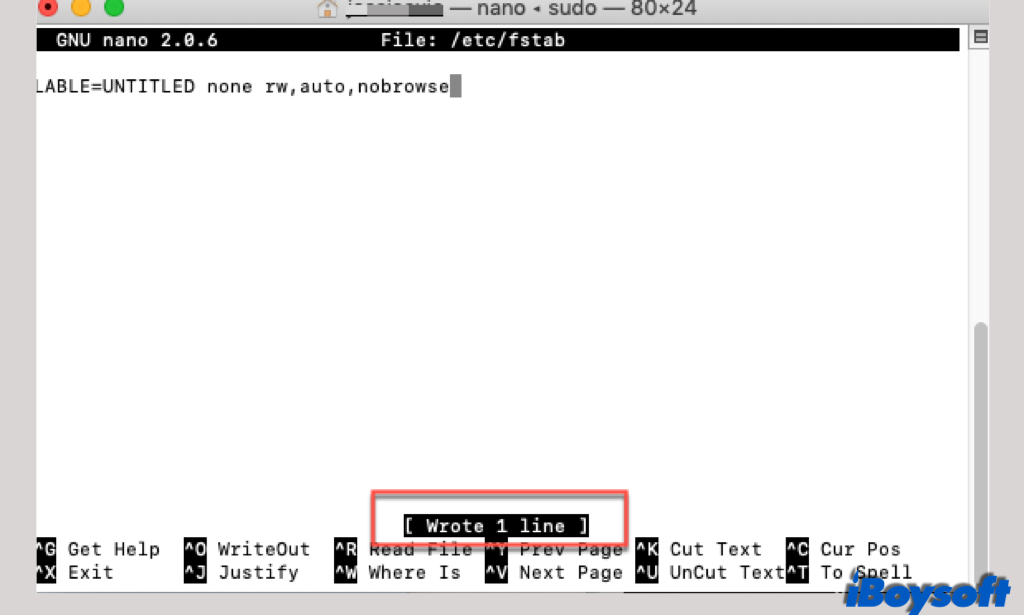
- 3. Type «LABEL=VOLUME_NAME none ntfs rw,auto,nobrowse» in the editor window for the fstab file and press «Control + O» to write. (Be sure to change the word VOLUME_NAME to the name of your NTFS volume)
Tips: If you have multiple NTFS drives you want to write to, write different line for each NTFS drive.
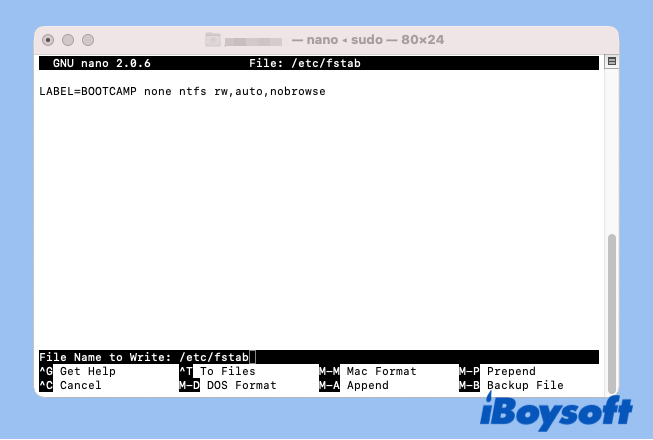
- 4. Hit Enter and press «Control + X» to exit.
- 5. Re-connected the NTFS drive to the Mac.
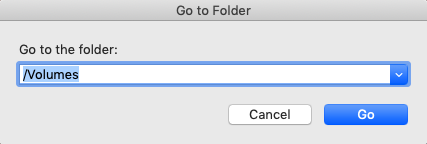
- 6. Click «Go» at the top left menu bar and choose «Go to Folder».
- 7. Type in /Volomes and hit Enter.
- 8. Find the NTFS volume or drive and drag it to sidebar for easy access.

Tips: If you want to undo the change, follow the step 1 and step 2, then delete the command line. Save your change and exit.
Writing to NTFS drives on Mac is totally possible. You have several options to choose from — free NTFS drivers, cost-effective NTFS drivers and Apple’s native NTFS support.
Free NTFS drivers for Mac and Apple’s NTFS support are free but take extra amount of work to mount NTFS drive on Mac in read-write mode. They are risky and very unstable. Even though iBoysoft NTFS for Mac is not completely free, it saves you a lot of time and effort for its excellent reliability and ease of use.
If you want to use external drives for file transferring between Windows and Mac frequently, it is a good idea to format NTFS to exFAT or FAT32. If you will use this Microsoft NTFS drive on Mac later, you can also choose to convert NTFS to APFS.

Amanda Wong is one of the main columnists at iBoysoft. she loves exploring new technologies and writing technical articles to help people out of problems.
Источник


