- MacOS: Set / Change $PATH Variable Command
- macOS (OS X): Change your PATH environment variable
- Method #1: $HOME/.bash_profile file
- Method #2: /etc/paths.d directory
- Conclusion
- How to find a full file path on a MacBook
- Before we start
- How to get a file path on a Mac?
- How to copy the file path
- How to find the file path using Terminal
- A shortcut to see unlisted (grayed out) files
- How to find other hidden files on Mac?
MacOS: Set / Change $PATH Variable Command
I need to add dev tools (such as JDK and friends) to my PATH. How do I change $PATH variable in OS X 10.8.x? Where does $PATH get set in OS X 10.8 Mountain Lion or latest version of macOS?
| Tutorial details | |
|---|---|
| Difficulty level | Easy |
| Root privileges | No |
| Requirements | Apple macOS or OS X with Bash |
| Est. reading time | 3 mintues |
Here is what I see
Fig.01: Displaying the current $PATH settings using echo / printf on OS X
macOS (OS X): Change your PATH environment variable
You can add path to any one of the following method:
- $HOME/.bash_profile file using export syntax.
- /etc/paths.d directory.
Method #1: $HOME/.bash_profile file
The syntax is as follows:
In this example, add /usr/local/sbin/modemZapp/ directory to $PATH variable. Edit the file $HOME/.bash_profile , enter:
vi $HOME/.bash_profile
OR
vi
/.bash_profile
Append the following export command:
Save and close the file. To apply changes immedialty enter:
source $HOME/.bash_profile
OR
. $HOME/.bash_profile
Finally, verify your new path settings, enter:
echo $PATH
Sample outputs:
Method #2: /etc/paths.d directory
Apple recommends the path_helper tool to generate the PATH variable i.e. helper for constructing PATH environment variable. From the man page:
The path_helper utility reads the contents of the files in the directories /etc/paths.d and /etc/manpaths.d and appends their contents to the PATH and MANPATH environment variables respectively.
(The MANPATH environment variable will not be modified unless it is already set in the environment.)
Files in these directories should contain one path element per line.
Prior to reading these directories, default PATH and MANPATH values are obtained from the files /etc/paths and /etc/manpaths respectively.
To list existing path, enter:
ls -l /etc/paths.d/
Sample outputs:
You can use the cat command to see path settings in 40-XQuartz:
cat /etc/paths.d/40-XQuartz
Sample outputs:
To set /usr/local/sbin/modemZapp to $PATH, enter:
- No ads and tracking
- In-depth guides for developers and sysadmins at Opensourceflare✨
- Join my Patreon to support independent content creators and start reading latest guides:
- How to set up Redis sentinel cluster on Ubuntu or Debian Linux
- How To Set Up SSH Keys With YubiKey as two-factor authentication (U2F/FIDO2)
- How to set up Mariadb Galera cluster on Ubuntu or Debian Linux
- A podman tutorial for beginners – part I (run Linux containers without Docker and in daemonless mode)
- How to protect Linux against rogue USB devices using USBGuard
Join Patreon ➔
OR use vi text editor as follows to create /etc/paths.d/zmodemapp file:
sudo vi /etc/paths.d/zmodemapp
and append the following text:
Save and close the file. You need to reboot the system. Alternatively, you can close and reopen the Terminal app to see new $PATH changes.
Conclusion
- Use $HOME/.bash_profile file when you need to generate the PATH variable for a single user account.
- Use /etc/paths.d/ directory via the path_helper tool to generate the PATH variable for all user accounts on the system. This method only works on OS X Leopard and higher.
See also:
- Customize the bash shell environments from the Linux shell scripting wiki.
- UNIX: Set Environment Variable
- Man pages – bash(1), path_helper(8)
🐧 Get the latest tutorials on Linux, Open Source & DevOps via
| Category | List of Unix and Linux commands |
|---|---|
| Documentation | help • mandb • man • pinfo |
| Disk space analyzers | df • duf • ncdu • pydf |
| File Management | cat • cp • less • mkdir • more • tree |
| Firewall | Alpine Awall • CentOS 8 • OpenSUSE • RHEL 8 • Ubuntu 16.04 • Ubuntu 18.04 • Ubuntu 20.04 |
| Linux Desktop Apps | Skype • Spotify • VLC 3 |
| Modern utilities | bat • exa |
| Network Utilities | NetHogs • dig • host • ip • nmap |
| OpenVPN | CentOS 7 • CentOS 8 • Debian 10 • Debian 8/9 • Ubuntu 18.04 • Ubuntu 20.04 |
| Package Manager | apk • apt |
| Processes Management | bg • chroot • cron • disown • fg • glances • gtop • jobs • killall • kill • pidof • pstree • pwdx • time • vtop |
| Searching | ag • grep • whereis • which |
| Shell builtins | compgen • echo • printf |
| Text processing | cut • rev |
| User Information | groups • id • lastcomm • last • lid/libuser-lid • logname • members • users • whoami • who • w |
| WireGuard VPN | Alpine • CentOS 8 • Debian 10 • Firewall • Ubuntu 20.04 |
Comments on this entry are closed.
thank you for this.
to append multiple executables in one group, e.g ‘modemZapp2’:
sudo -s ‘echo “/usr/local/sbin/modemZapp2” >> /etc/paths.d/zmodemapp’
Thank you for your useful article! It helped me a lot!
I cannot get this to work. You write “Save and close the file”. How do I do this please?
The author does not explain this but the commands ‘vi’ in the terminal starts an editor called vim. According to the link below you can just type ‘:x’ (without the ‘) and then enter to save and close at the same time
I would like to be able to use gcc to compile a file.
I see gcc-4.0 and gcc-4.2 in /Developer/usr/bin/
echo “$PATH” gives me this:
/usr/bin:/bin:/usr/sbin:/sbin:/usr/local/bin:/usr/local/MacGPG2/bin:/usr/X11/bin
If I need to set the path also to /Developer/usr/bin/ where my gcc is (I mean I guess I have to do that, not even sure) I am kind of lost. I append this:
vi $HOME/.bash_profile
Then I see in he Terminal many line breaks with
in front, the cursor is before all these breaks and at the bottom I read “”
/.bash_profile” [New File]” (in my firs attempts it was written “INSERT”).
If I paste “export PATH=$PATH:/Developer/usr/bin” there, I don’t know how to go further. If I then paste “source $HOME/.bash_profile” after, I get a mess: I had to re-install xcode everytime I messed up with the Terminal which kept on scrolling and scrolling with error messages.
Actually as soon as I paste “export PATH=$PATH:/Developer/usr/bin”, he word “INSERT” comes up at the bottom replacing ”
/.bash_profile” [New File]”
So I guess from now on I should save my new bash_profile, bu I do not know how.
I got it to work. gcc never worked, but g++ did.
Now the ./a.out command form the script I want to create is not working. Nerverending story. FIle not found no matter where my source file is.
When I did echo “$PATH”, I got
/usr/bin:/bin:/usr/sbin:/sbin:/usr/local/bin:/usr/local/bin:/usr/bin:/bin:/usr/sbin:/sbin
In my .bash_profile file, I have put
PATH=”/usr/bin:/bin:/usr/sbin:/sbin:/usr/local/bin:$PATH”
export PATH
But, when ever I execute a command, I need to give the full path in the command. For example,
when I take update in SVN. The command should be “svn update” but in my case i need to give “/usr/local/bin/svn update”. It happens for me in every command.
FYI: I am using OS X Yosemite, 10.10.3
Is there anything I need to change in resolving this issue ? Thanks in advance.
The reason why this is happening is because you are not pointing your “$PATH” to a folder with ONLY Mach-O 64-bit executable x86_64. In order to do this, please follow this tutorial: https://www.objc.io/issues/6-build-tools/mach-o-executables/. Long story short, to make for example an executable file from a C file “.c”, use the terminal tool xcrun with clang as an argument followed by the name of your “.c” file…This will look something like xcrun clang helloworld.c. This in turn will generate the desired “Mach-O 64-bit executable x86_64”. The file will look something like: a.out (“The file is called ‘a’ because it is the default name if given no parameters for such”). Now you can take this “a.out” file and rename it to whatever you want your command to be when you are calling it from terminal. Now after renaming your file, put it in a folder where ONLY Mach-O 64-bit executable x86_64 will be located and put this folder in your “$PATH” using any of the options listed in this article and finito!. Now you can call your file with the desired named from the terminal.
Conclusion : If you want additional values to your path for all users, you just have to create a new file in /etc/paths.d and put, on per line, additional paths that are required.
Conclusion : Specific roles taken up from time to time by users could need different environment settings. Ex – Dev role by the administrator could need the XAMP stack, and access to executing Apache, MySQL and PHP. Though Apache and PHP come built-in along with Yosemite, their bin directories are not set in the PATH variable.
Hence, we can have .bash_profile_dev in the HOME of the administrator, with all the PATH settings and command line conveniences for starting / stopping servers, etc as the need arises. This can be executed whenever the user needs to change their role, by running
Worked on my M1 MacBook Air too. Cheers mate.
Источник
How to find a full file path on a MacBook

Before we start
Having spent some years coding applications for macOS we’ve created a tool that everybody can use. The all-round problem fixer for Mac.

So here’s a tip for you: Download CleanMyMac to quickly solve some of the issues mentioned in this article. But to help you do it all by yourself, we’ve gathered our best ideas and solutions below.
Features described in this article refer to the MacPaw site version of CleanMyMac X.
When you’ve got loads of files — hundreds or even thousands isn’t unusual after a couple of years using the same Mac — it can be difficult to get the correct file path. We attempt to solve this problem in this article for those tired of looking for files and file paths on a Mac.
After trying Spotlight Searches or browsing through files, you might be ready to give up. At times, not knowing the right name can cause software conflicts. But don’t despair. There is always a way to locate a file path.
How to get a file path on a Mac?
To get a basic understanding of where your file is located, just right-click the file.
Look up what’s written under Where:
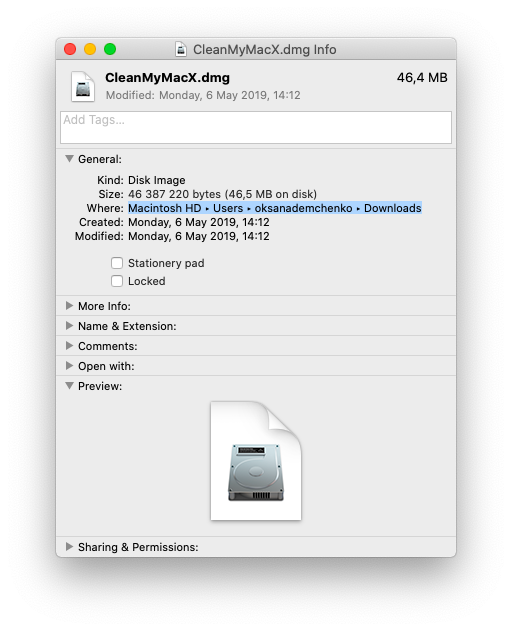
The selected area shows the enclosed folder of your document.
How to copy the file path
Copying any text from the previous window isn’t easy, obviously. But still, you need a complete file address that you can copy and paste anywhere. So you do one extra step:
- Click on Finder
- Click View in the upper bar
- Click Show Path Bar
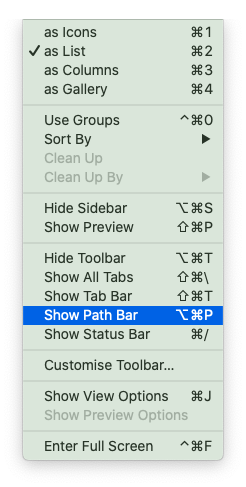
Interestingly, the file path will immediately appear underneath the Finder window.
- Now, Control + Click the file you want the location for
- Hold the Option key
You will see the new command that has appeared in the context menu — Copy …. as Pathname
- Click on the selected command
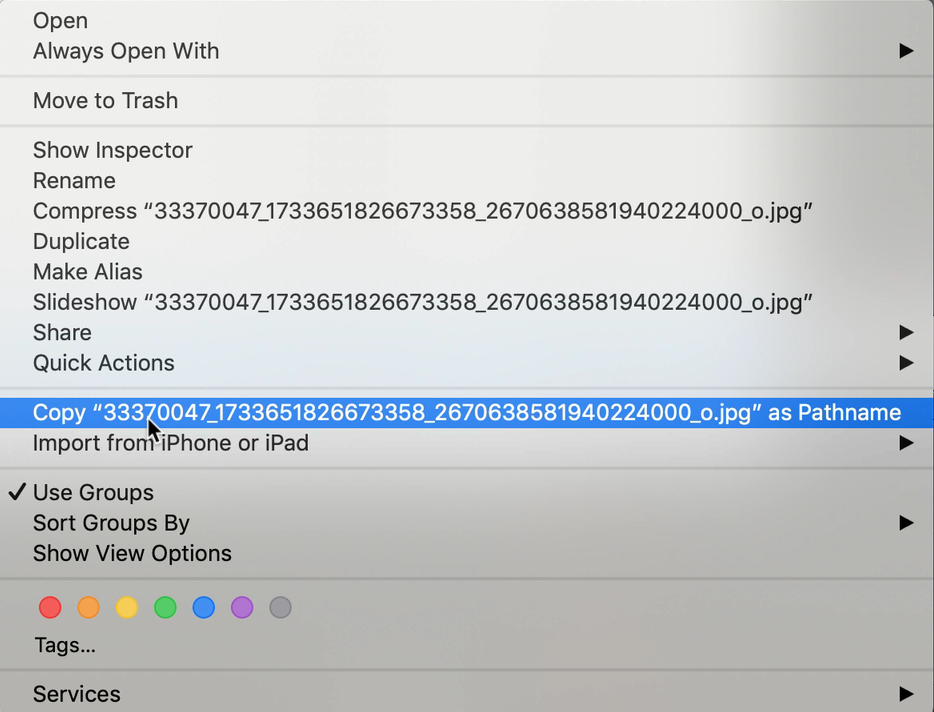
You are now ready to paste. This information is pasted into the Clipboard. Make sure to complete pasting/moving it elsewhere, or this will be lost and you will need to find the folder again.
And that is how to get folder path in Mac. Nice and simple.
How to find the file path using Terminal
Also known as a folder path, or directory path, they aren’t always easy to find. When every other method has failed, turn to Terminal as your solution.
- Go to Applications > Utilities.
- Launch Terminal.
- Make sure you are using it as a Super User (which means being logged in as an Admin), so type in sudo su — then press Return.
- Now you need to have something of an idea of what this file might be called, so once you do, type in the following (the name in the middle is where you’d put a file name): find / -name randomfilename
- Give it time to process the query, which could take several minutes.
- A list of names should appear, some or many of which you can ignore as they will be followed by file-end names, such as “operation not permitted”; so focus on the ones that make the most sense, such as: /Library/Application Support/randomfilename/settings/
- Now copy and paste the full name and drop it into Finder or Spotlight Search.
Alternatively, you can drag and drop the file onto the Terminal window, and it will show the full path. Hopefully, this will bring you to the file you need.
A shortcut to see unlisted (grayed out) files
For those who love Apple, which for many is more than a tech company, it’s a representation of a lifestyle, a brand that has many fans, we’ve got a fun fact for you. Did you know there is a shortcut combination to see hidden files?
This shortcut should work for anyone running macOS Mojave, High Sierra, and Sierra, and anything beyond OS 10.12. Here is how you access the shortcut:
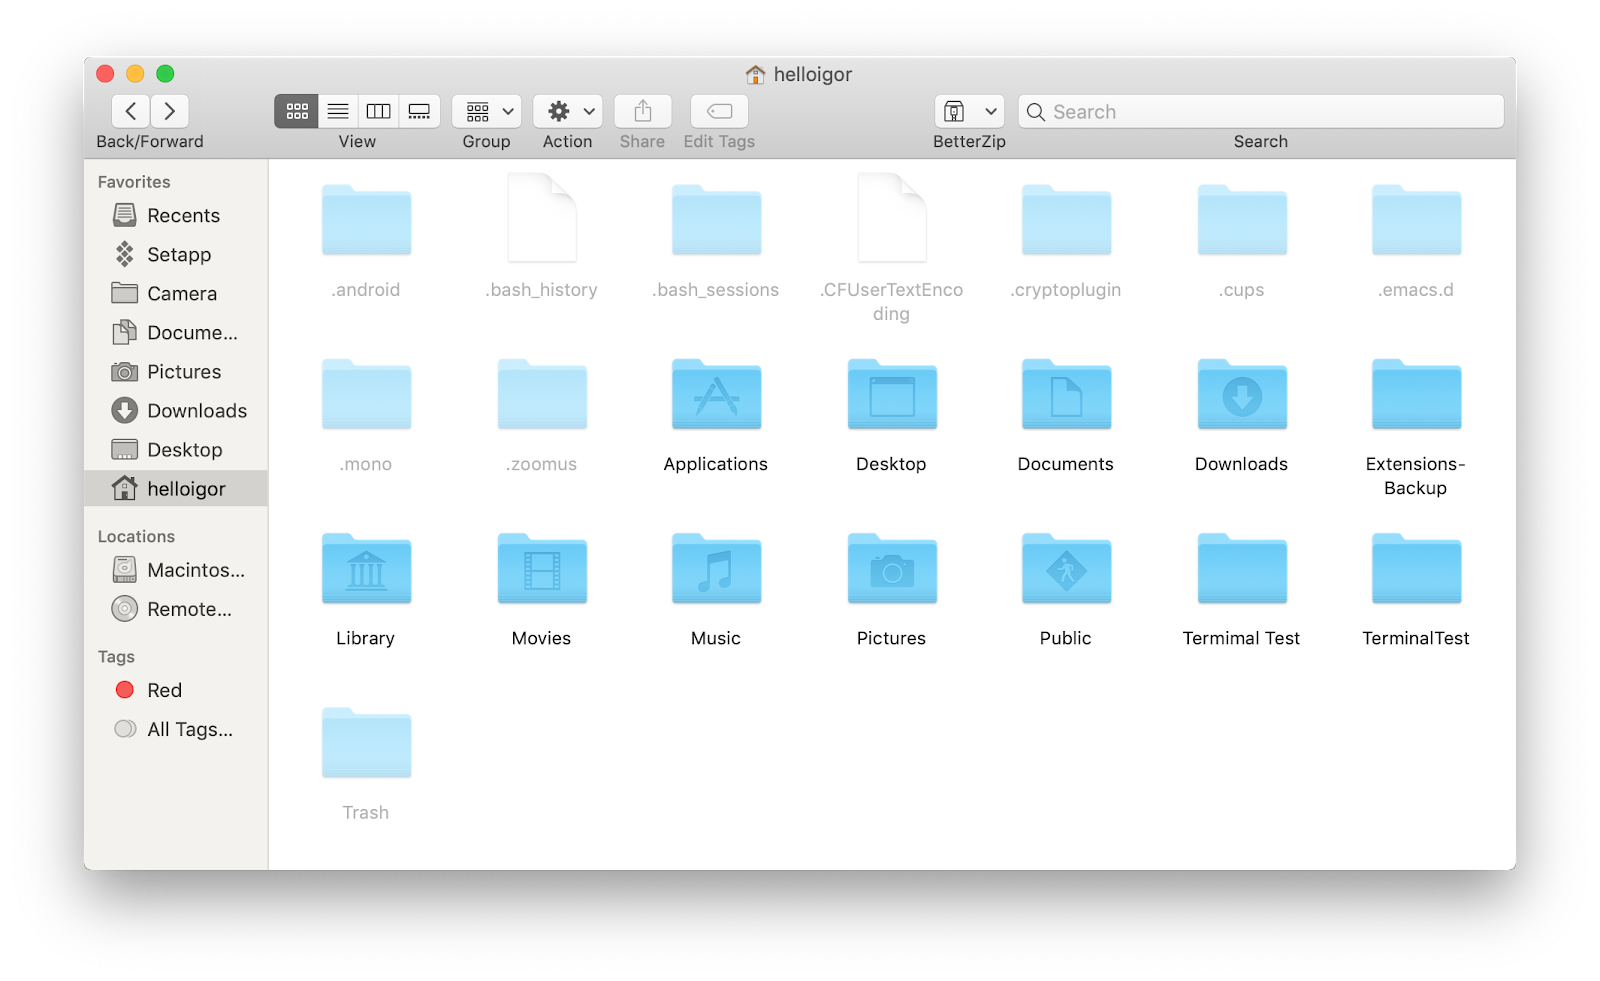
- From Finder, go anywhere where you suspect there are hidden files, such as the Macintosh HD root directory, or Home folder
- Next, press down the Command + Shift + Period keys, which should toggle to show hidden files in that folder.
- As you press the shortcut the keys are visible: when you switch it off, they disappear again.
Any hidden files that have been made visible will have greyed out names and icons.
How to find other hidden files on Mac?
It isn’t always easy to know where you’ve put every file on your Mac.
After a couple of years of constant use, a Mac can start to resemble a cluttered old-school file cabinet. Files in places that once make sense, but are now in the wrong place. Files and folders that should be in the right place, but have been put somewhere else. Files that seemingly don’t exist, or are floating around elsewhere.
One solution to this is to download CleanMyMac X. It’s a handy and easy-to-use Mac performance improvement app. It comes with a few tools for finding unlisted, hidden, and large old files that have slipped through the cracks. Here is how you use it:

These blue bubbles represent all your documents in relation to their size. You can dive into each of these folders to reveal their contents — a more visual alternative to Finder.
You can also use the Large & Old files scanner (in the same app). Either or both features will highlight a few gigabytes worth of space you can free up, uncovering files that can easily slip through the cracks and become forgotten. By the way, CleanMyMac X is notarized by Apple, which means this app is malware-free and safe to use on your Mac.
For those with a lot of files, or Mac users badly in need of making more hard drive space, CleanMyMac X is an invaluable tool. We hope you found this article useful about how to locate and copy the file path details when searching for what you need.
Источник


