- Download & Install MacOS Sierra Public Beta Right Now
- How to Download & Install MacOS Sierra Public Beta
- Инструкция по установке беты macOS Sierra 10.12
- Внимание! Attention! Achtung!
- Устанавливаем бету правильно
- Необходимые требования
- Создание загрузочной флешки
- Пустите обратно
- Дмитрий Черенков
- Как установить mac OS Sierra и iOS 10 Public Beta
- Installing Apple Beta Software
- Overview
- iOS Beta Software
- Installation Using the Configuration Profile
- Installation Using the Restore Image
- macOS Beta Software
- tvOS Beta Software
- Installation Using the Configuration Profile
- Installation Using the Restore Image for Apple TV (4th generation) Only
- Installation Using the Restore Image for Apple TV (3rd generation) Only
- watchOS Beta Software
- Support for Apple Watch
- Providing Feedback
- Feedback Assistant
- Apple Beta Software Program
- Apple Developer Forums
Download & Install MacOS Sierra Public Beta Right Now

MacOS Sierra Public Beta is now available to download and install for any Mac user interested in testing the upcoming operating system. Remember that beta system software is less stable and notoriously buggy, so this experience is recommended for more advanced users or those with a secondary computer they don’t mind running beta system software on.
This guide will walk through how to enroll in the macOS Sierra public beta program, as well as how to download and install macOS Sierra 10.12 public beta onto a Mac.
Be sure the Mac is compatible with MacOS Sierra, and that you make a fresh backup with Time Machine before beginning.
How to Download & Install MacOS Sierra Public Beta
- Back up the Mac with Time Machine before anything else, do not skip making a backup or you may lose your stuff and ability to downgrade
- Visit the official Apple Beta Program page for Mac OS Sierra here and log in to your Apple ID
- Scroll down to the “Install MacOS Sierra Public Beta” section and click on the blue “Redeem Code” button to launch the Mac App Store
The code should automatically redeem and MacOS Sierra Public Beta installer should start downloading
You can check the progress of the download in the Purchases tab of the App Store:
Once macOS Sierra has downloaded, the installer will launch itself. If you want to create a bootable USB installer for macOS Sierra beta, quit the installer and do that first, otherwise you would have to re-download it again.
The safest way to test out beta system software on a single machine is to install macOS Sierra public on a separate partition on a Mac and dual boot, thus preserving the primary operating system. It is not recommended to update an existing Mac OS X release to a beta version, as it will be less stable than expected. Another option would be to install the public beta onto a secondary Mac. Regardless, always back up a Mac first, skipping a backup made lead to data loss or worse.
If you don’t care about making a boot installer or partitioning the drive first, you can go ahead and run the installer to install or update to macOS Sierra public beta.
Once MacOS Sierra 10.12 has been installed, the Mac will automatically reboot and the computer will be running Mac OS X 10.12 public beta. Future public beta builds will come through the App Store “Updates” tab as usual.
If you’re interested in beta software, you may also want to download and install iOS 10 public beta on iPhone or iPad too.
Источник
Инструкция по установке беты macOS Sierra 10.12

Простая инструкция для тех, кому хочется, но колется.
Внимание! Attention! Achtung!

Сейчас доступна лишь ранняя бета macOS Sierra. Она полна багов и других неприятностей, которые вряд ли вам понравятся. Если очень хочется попробовать новую версию ОС и пощекотать нервишки — welcome. Но помните, все, что вы делаете — вы делаете на свой страх и риск. Ну а теперь, когда самые нерешительные разбежались, перейдём к делу.
5 июля Apple выпустила вторую бету macOS Sierra, которая хоть и сыровата, но уже работает вполне стабильно. Поэтому если хочется опробовать новую систему, пообщаться с Siri на Mac, а до осени ждать мучительно долго — держите инструкцию по установке.
Устанавливаем бету правильно

Есть два варианта: обновление из текущей ОС или чистая установка с загрузочной флешки. Настоятельно рекомендую выбрать второй способ. Во-первых, в бете и так полно багов, поэтому чистая установка предпочтительнее. Во-вторых, Apple использует только цифровую дистрибуцию ПО и это не всегда хорошо. Имея несколько Mac, придётся для каждого скачивать установочный файл из интернета. Здесь и пригодится загрузочная флешка, которую мы сейчас создадим.
Но прежде чем что-то ставить, убедитесь, что ваш Mac поддерживает новую ОС. Список поддерживаемых устройств выглядит так:
MacBook Pro (от 2010 года)
MacBook Air (от 2010 года)
Mac mini (от 2010 года)
Mac Pro (от 2010 года)
MacBook (от 2009 года)
iMac (от 2009 года)
Ну и соответственно более новые модели. Нашли свой Mac в списке? Круто, едем дальше.
Необходимые требования
1. Флешка объёмом не менее 16 ГБ.
2. Образ macOS Sierra 10.12 Beta Installer, который можно скачать здесь.
3. Компьютер с операционной системой OS X El Capitan.
4. Запастись терпением и временем.
Создание загрузочной флешки

Шаг 1: Скачиваем образ macOS Sierra и копируем из него файл «Install 10.12 Developer Preview.app» в папку «Программы».
Шаг 2: Подключаем флешку к Mac. Проверьте, чтобы на ней не осталось важных данных, так как она будет отформатирована.
Шаг 3: Переименовываем флешку в SierraInstaller. Можно любое другое название, лишь бы латиницей и без пробелов.
Шаг 4: Открываем «Терминал» и копируем туда следующую команду:
Подтверждаем выполнение, введя пароль администратора.
Шаг 5: Процесс создания загрузочного диска запущен, осталось подождать минут 15.
Erasing Disk: 0%… 10%… 20%… 30%…100%…
Copying installer files to disk…
Copy complete.
Making disk bootable…
Copying boot files…
Copy complete.
Done.
Шаг 6: На экране появится уведомление, что процесс завершён. Поздравляю, ваша загрузочная флешка готова! 🙂
Теперь перезагружаем Mac, удерживая при этом Alt (Option, ⌥), выбираем среди загрузочных дисков флешку с macOS Sierra и следуем подсказкам.
Пустите обратно
Наигрались? Приложения вылетают и, вообще, как-то все сыро? Не беда, возвращаемся назад. И для этого нам снова понадобится загрузочная флешка, только с OS X El Capitan (ваш кэп). Создаётся она абсолютно таким же способом, держите инструкцию.
Вот и все, те, кто поставил macOS Sierra, как вам? Пользуетесь Siri, что нравится, что не очень?
Дмитрий Черенков
Пишу об этом. И о том. Яблочник, консольщик, фанат технологий и металла. Генератор коротких новостей, клац-клац и в продакшн.
Источник
Как установить mac OS Sierra и iOS 10 Public Beta
7 июля вышла первая публичная версия macOS Sierra и iOS 10 Public Beta. Любой желающий может её установить прямо сейчас. Замечу, что Apple немного поменяла способ установки macOS.
Шаг 1.
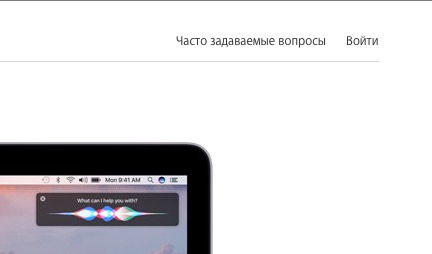
Заходим на сайт https://beta.apple.com. В правом верхнем углу нажмите кнопку Войти.
Шаг 2.
Логинимся со своим Apple ID и паролем.

Если у вас включена двухфакторная авторизация, то с помощью вашего телефона пройдите авторизацию, следуя указаниям в браузере.
Шаг 3.
Перейдите во вкладку “Зарегистрируйте свои устройства”.

В ней видим две инструкции для macOS и iOS 10 по установке, которые переключаются через специальные кнопки:

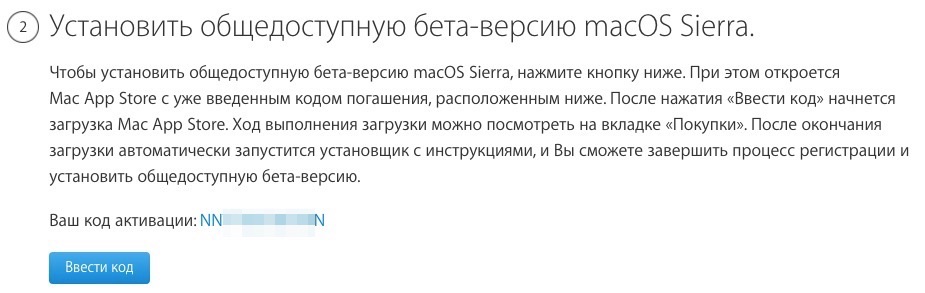
Шаг 4А. Установка macOS Sierra
Принцип установки немного упростился. После создания резервной копии в Time Machine (если вы используете её) нужно нажать кнопку “Ввести код”. Вас перебросит в Mac App Store и macOS Sierra будет загружаться (а затем установиться). Второй вариант – взять код активации и ввести его в Mac App Store, там где вводятся все промо-коды.

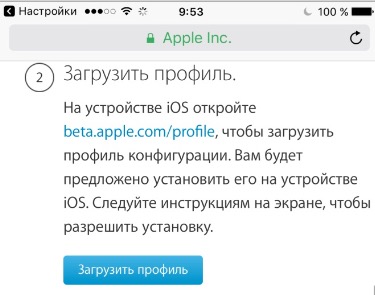
Шаг 4Б. Установка iOS 10 Public Beta
На устройстве iOS нужно будет установить специальный профиль. На iДевайсе будет доступна кнопка Загрузить профиль.
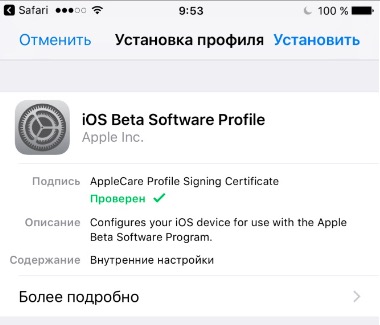
После установки профили заходите в: Настройки->Основные->Обновление ПО и обновляйте систему до iOS 10 Public Beta по Wi-Fi.
FAQ по обновлению на публичную бета-версию
Можно ли будет откатить публичную бета-версию iOS 10 и macOS Sierra?
Да. Откат возможен до iOS 9. Опция отката будет доступна вплоть до выхода финальной версии iOS 10 (+одна-две недели после этого события). macOS Sierra можно откатить до последних версий OS X (Mavericks, Lion и т.п.). В обоих случаях желательно иметь резервную копию, сделанную до прошивки.
Какие устройства могут обновиться до iOS 10 public beta 1?
- iPad 4, iPad Air, iPad Air 2, iPad Pro 12’9, iPad Pro 9’7
- iPad Mini 2, iPad Mini 3, iPad Mini 4
- iPhone 5, iPhone 5C, iPhone 5S, iPhone 6, iPhone 6 Plus
- iPod Touch (6-е поколение)
Какие устройства могут обновиться до macOS Sierra public beta 1?
- MacBook (выпуска конца 2009 года и более новые).
- iMac (выпуска конца 2009 года и более новые).
- MacBook Air (выпуска конца 2010 года и более новые).
- MacBook Pro (выпуска конца 2010 года и более новые).
- Mac Mini (выпуска конца 2010 года и более новые).
- Mac Pro (выпуска конца 2010 года и более новые).
iOS 10 Public Beta 1 и iOS 10 beta 2 — в чём разница?
Ни в чём — это две идентичные системы. iOS 10 beta 2 выпущена чуть раньше для разработчиков и любознательных людей.
Я любознательный чайник — ставить или нет iOS 10 Public Beta 1 и macOS Sierra?
Если интересно, то ставьте, только помните:
- делаете вы это на свой страх и риск и от багов не застрахованы. А багов пока хватает, что на компьютерах, что на планшетах и телефонах.
- сделайте резервную копию iOS 9.3.2 или OS X до обновления. Будет возможность откатиться.
Если будут какие-то вопросы — задавайте! 🙂 Всем удачи с обновлением.
Источник
Installing Apple Beta Software
Beta versions of iOS, macOS, tvOS, and watchOS are available to members of the Apple Developer Program. Members can develop apps that take advantage of the latest features of Apple platforms and test existing apps for compatibility.
Overview
Beta software, including previews and seeds, refers to a version of software that’s still under development and not yet released to the public. This software is intended only for installation on development devices registered under your Apple Developer Program membership. Registered development devices can be upgraded to future beta releases and the public version of the software. Attempting to install beta software in an unauthorized manner violates Apple policy and could render your device unusable and necessitate an out-of-warranty repair. Make sure to back up your devices before installing beta software and install only on devices and systems that you’re prepared to erase if necessary.
iOS Beta Software
Installation Using the Configuration Profile
- Download the configuration profile from the download page.
On your iOS device: Download the configuration profile directly onto your iOS device and follow the installation instructions.
On your Mac or PC: Save the file to your hard disk and email it to an account on your iPhone. Tap the configuration profile in Mail and follow the installation instructions.
Installation Using the Restore Image
- Download the iOS beta software restore image for your device from the download page.
- Open the Finder on your Mac.
- Connect your iOS device to your computer with the cable that came with your device.
- If you’re prompted for your device passcode or to Trust This Computer, follow the onscreen steps. If you forget your passcode, help is available.
- Select your iOS device when it appears in the Finder sidebar.
- In the Summary panel, hold the Option key and click the Check for Update button.
- Select the iOS beta software restore image and click Open to start the installation.
- After installing the beta, your device will reboot and will require a network connection to complete activation.
macOS Beta Software
The macOS Developer Beta Access Utility requires macOS 10.8 or later.
- Download the macOS Developer Beta Access Utility from the download page.
- Open the macOS Developer Beta Access Utility and follow the instructions.
- Once installation is complete, you’ll be presented with the macOS beta in the Mac App Store. Click the Download button to install the beta.
- When a new macOS beta becomes available, you’ll receive a notification. You can install the beta in the Software Update section of System Preferences.
tvOS Beta Software
tvOS 14 beta supports Apple TV 4K and Apple TV (4th generation) only.
Installation Using the Configuration Profile
- Download the tvOS beta software configuration profile for the Apple TV 4K from the download page on your Mac.
- Make sure you’re running the latest version of Xcode 12 or later on your Mac as well as macOS 10.13.4 or later.
- Check that your Apple TV is plugged in and turned on.
- Connect your Apple TV and Mac to the same network.
- In Xcode, choose Window > Devices and Simulators, then in the window that appears, click Devices.
- On Apple TV, open Settings, then choose Remotes and Devices > Remote App and Devices. Apple TV searches for possible pairing devices.
- In Xcode, select your Apple TV in the left column under Discovered. The status of the Apple TV connection request appears in the detail area.
- Enter the verification code displayed on Apple TV and click Connect. Xcode pairs with Apple TV and a network icon appears next to your Apple TV in the left column.
- Make sure your Mac is running the latest version of Apple Configurator.
- Open Apple Configurator.
- To set up an Apple TV for the first time, click Prepare and follow the onscreen instructions. To add profiles for an Apple TV that you’ve previously set up, click Add, then select Profiles. You can also drag a profile from the Finder and drop it on the icon of your Apple TV.
Installation Using the Restore Image for Apple TV (4th generation) Only
- Download the tvOS beta software restore image for Apple TV (4th generation) from the download page on your Mac.
- Open the Finder.
- Connect your Apple TV (4th generation) to your Mac with a USB-C cable.
- Select your Apple TV when it appears in the Finder.
- In the Summary panel, hold the Option key and click the Restore Apple TV button.
- Select the tvOS beta software restore image and click Open to start installation.
- After installing the beta, your device will reboot and will require a network connection to complete activation.
- NOTE: If the Finder does not recognize your Apple TV, place Apple TV in recovery mode:
- Make sure Apple TV is connected to your Mac.
- Using the included remote, press and hold MENU + Play/Pause for 6 seconds until the indicator light flashes rapidly.
- Proceed with step 6 to restore Apple TV.
Installation Using the Restore Image for Apple TV (3rd generation) Only
- Identify your Apple TV model. You can find it in Settings > General > About.
- Download the corresponding Apple TV beta software restore image from the download page to your computer.
- Open the Finder.
- Connect your Apple TV to your computer with a micro USB cable. Ensure your Apple TV is also plugged into a power source. NOTE: An HDMI connection is not required for the install process.
- Select your Apple TV when it appears in the Finder.
- In the Summary panel, hold the Option key and click the Restore Apple TV button.
- Select the Apple TV beta software restore image and click Open to start installation. While your Apple TV is restoring, don’t unplug anything. The time it takes to restore your Apple TV depends on the speed of your internet connection.
- When your Apple TV has finished restoring, disconnect the micro USB connection from your computer, then disconnect and reconnect the power cord to restart your Apple TV.
watchOS Beta Software
watchOS 7 beta requires Apple Watch Series 3 or later and iPhone 6s or later running iOS 14 beta.
- To update the software on Apple Watch, you’ll need to:
- Make sure your Apple Watch has at least a 50 percent charge.
- Connect your iPhone to Wi-Fi.
- Keep your iPhone next to your Apple Watch to make sure they’re in range.
- Make sure your iPhone is running iOS 14 beta.
- Download the configuration profile from the download page.
On your iPhone: Download the configuration profile directly onto your iPhone and follow the installation instructions.
On your Mac or PC: Save the file to your hard disk and email it to an account on your iPhone. Tap the configuration profile in Mail and follow the installation instructions.
Support for Apple Watch
If your Apple Watch displays a red “!” icon, force restart your Apple Watch. Simultaneously press and hold the side button and Digital Crown for at least 10 seconds, then release when you see the Apple logo.
If force restarting your Apple Watch doesn’t resolve the issue, or if your Apple Watch restarts in recovery mode or exhibits other issues that require it to be restored with the current version of watchOS, you may need to send it in to Apple to be serviced. Apple Authorized Service Providers and Apple retail stores cannot perform this service. Once your device is received, it may take up to three business days to be serviced. You will get back the same device you sent in. This service is currently available in Australia, Canada, France, Germany, Italy, Japan, Switzerland, the United Kingdom, and the United States.
Providing Feedback
Feedback Assistant
If you encounter any problems with beta software or if you would like to request enhancements to frameworks or API, please submit a report through Feedback Assistant. Make sure to include the build number in the bug title and description so your issue can be processed quickly.
Apple Beta Software Program
The iOS and macOS public betas available through the Apple Beta Software Program come with the built-in Feedback Assistant app. If you’re running the tvOS public beta, you can submit feedback through the Feedback Assistant app on an enrolled iOS device. When you experience an issue or something does not work as expected, send your feedback directly to Apple with Feedback Assistant.
Apple Developer Forums
You can visit the forums to find information or post about issues you encounter during app development.
Feedback Assistant
Submit bug reports and request enhancements to APIs and developer tools.
Send us feedback
Developer Forums
Ask questions and find answers by Apple engineers and other developers.
Contact Us
Tell us how we can help and we’ll find a solution by phone or email.
Источник


