- macOS Sierra 10.12 (Образ для VMware)
- Установка macOS на VMware Workstation
- Как разблокировать VMware для macOS
- Как создать виртуальную машину для macOS
- Как отредактировать файл .VMX
- Как установить macOS на VMware Workstation
- MacOS Sierra v10.12 VMWare Image Free Download
- MacOS Sierra v10.12 VMWare Image Overview
- Features of MacOS Sierra v10.12 VMWare Image
- MacOS Sierra v10.12 VMWare Image Technical Setup Details
- System Requirements For MacOS Sierra v10.12 VMWare Image
- MacOS Sierra v10.12 VMWare Image Free Download
- How to Install macOS Sierra on VMware using VMDK on Windows 10 – PC
- Install macOS Sierra on VMware using VMDK
- Step 1: Download the prerequisites
- Step 2: Install the Prerequisites
- Step 3: Install VMware Unlocker for macOS Sierra
- Step 4: Create a New Virtual Machine
- Step 5: Edit the new Virtual Machine
- Step 6: Edit macOS Sierra VMX File (Optional)
- Step 7: Wait for macOS Sierra Installation
- Step 8: Complete Basic macOS Account Settings
- Step 9: Install VMware Tools (Optional)
- Summary
- 31 Comments
- Leave a Reply Cancel reply
macOS Sierra 10.12 (Образ для VMware)

Виртуальная машина VMware с установленной macOS. Перед началом работы с машиной обязательно примените от имени администратора VMware Unlocker. Нужное разрешение экрана должно установиться автоматически в соответствии с настройками компьютера, на котором запускается виртуальная машина. Остальные параметры (количество ядер ЦП, памяти и прочее) выбирайте согласно своему оборудованию.
Способ установки
- Устанавливаем VMware Workstation или VMware Player. Распаковываем архив OS X El Capitan.7z
- Применяем от имени администратора патч из архива VMware Unlocker (см. строку Таблетка в шапке темы)
- Открываем файл OS X El Capitan.vmx через File->Open
- Настраиваем виртуальную машину под свое железо.
- Запускаем
[quote]Перед запуском проверяем совместимость оборудования этой программой
ПАРОЛЬ АДМИНИСТРАТОРА: 123
Для запуска машины процессор должен поддерживать виртуализацию и D.E.P
Если виртуализация и D.E.P отключены, включите их через BIOS
Для уменьшения тормозов рекомендуется запускать в VMware Player
Внимание! Данный образ рассчитан на работу с 12-й версией VMware Workstation
Внимание! Работа приложений для OS X, требующих 3D-ускорения (ОpenGL), невозможна из-за отсутствия необходимых драйверов
В качестве клавиши ⌘ (Command) по-умолчанию выступает клавиша ⊞ (Windows)
Если возникают ошибки, прочтите информацию под спойлером «Ошибки, возникающие при работе OS X в VMware Workstation»[/quote]
[quote]1.1 Если возникает такая ошибка:
Значит у вас в BIOS отключена виртуализация или процессор ее не поддерживает.[/quote]
[quote]3. Если возникает такая ошибка:
Значит необходимо прописать строку smc.version = «0» в файл конфигурации *Название*.vmx (запускайте блокнот от админа).[/quote]
4. Если возникает такая ошибка:
Значит необходимо сделать откат конфигурации оборудования до нужной версии. Делаем следующее:
1. Запускам VMware Workstation (НЕ VMware Player).
2. Заходим в меню «VM» (Виртуальная машина).
3. Ищем пункт «Manage» (Управление).
4. Далее выбираем «Change Hardware Compatibility» (Изменить совместимость оборудования).
5. В открывшемся диалоговом окне выбираем из списка Hardware Compatibility (Совместимость оборудования) нужную версию VMware Workstation и нажимаем Next (Далее).
6. Будет предложено применить изменения к клонированной копии машины или же изменить конфигурацию без создания копии.
7. Выбираем подходящий вариант и жмем «Next» (Далее), затем «Finish» (Завершение)
8. Готово[/quote]
[quote]6. Если возникает такая ошибка:
Значит в BIOS необходимо включить Execute Disable Bit. Обратите внимание — в разных версиях BIOS эта опция может называться по-разному:
Также существует видео о данной проблеме
YouTube: wfe8bw973X8[/quote]
7. Если возникает такая ошибка:
Значит вы выделили слишком много оперативной памяти для работы машины[/quote]
8. Если возникает такая ошибка:
Значит нужно удалить из папки с машиной файлы .lck[/quote]
9. Если есть какие-либо проблемы с подключением USB периферии, в том числе iOS девайсами, переключите в настройках виртуальной машины, в разделе USB-контроллер совместимость на USB 2.0. При этом необходимо в файле *Название*.vmx иметь такие параметры
Также должно помочь обновление iOS до актуальной версии.[/quote]
Источник
Установка macOS на VMware Workstation
В этой статье мы расскажем, как проходит установка macOS на компьютер через VMware Workstation Player. Для работы вам понадобится готовый ISO-образ операционной системы. На VMware mac OS устанавливается в 4 этапа:
- Установка патча для разблокировки возможностей работы VMware с macOS.
- Создание виртуальной машины.
- Редактирование конфигурационного файла для запуска на процессорах Intel или AMD.
- Установка macOS на виртуальную машину.
Как разблокировать VMware для macOS
Поскольку VMware Workstation официально не поддерживает MacOS в качестве гостевой ОС, для запуска macOS нужно установить неофициальный патч. Он подойдет как для Workstation Player, так и для Workstation Pro.
Чтобы установить патч для разблокировки macOS:
Готово, при создании виртуальной машины в списке поддерживаемых гостевых ОС появится Apple Mac OS X:
Как создать виртуальную машину для macOS
После установки патча можно приступить к установке macOS. Для работы вам понадобится готовый ISO-образ операционной системы.
Нажмите Create a New Virtual Machine, чтобы создать новую виртуальную машину:
Нажмите Browse и в локальной папке компьютера выберите ISO-образ Mac OS. После этого кликните Next:
Выберите «Apple Mac OS X». Выбор версии зависит от того, какую ОС вы хотите установить:
- Big Sur — macOS 11.1,
- Catalina — macOS 10.15,
- Mojave — macOS 10.14.
Затем нажмите Next:
Если вы хотите оставить название и директорию по умолчанию, нажмите Next. Если вы хотите изменить их, в поле «Virtual machine name» введите имя новой виртуальной машины. Затем нажмите Browse, чтобы выбрать папку, в которой будет храниться виртуальная машина. После этого нажмите Next:
«Maximum disk size» — это максимальный размер дискового пространства, которое будет выделено для гостевой операционной системы. Мы рекомендуем выбрать объём — 80 ГБ.
Если хотите, чтобы виртуальный диск хранился в одном файле, выберите Store virtual disk as a single file. Это не повлияет на производительность операционной системы.
Проверьте количество выделенных ресурсов. Для этого нажмите Customize hardware:
- Memory (оперативная память) — рекомендуемый объём составляет 4 ГБ. Если у вашего компьютера установлено 16 ГБ оперативной памяти, выделите 8 ГБ.
- Number of processor cores (количество ядер процессора) — минимальное рекомендуемое количество — 2. Если процессор вашего компьютера имеет 8 и более ядер, выделите минимум 4 ядра.
Кроме оперативной памяти и ядер процессора необходимо включить виртуализацию. Для этого нажмите Processors, отметьте галочкой пункт «Virtualize Intel VT-x/EPT or AMD-V/RVI» и кликните Close:
Готово, виртуальная машина создана.
Как отредактировать файл .VMX
Перед запуском гостевой ОС нужно внести изменения в файл с расширением .VMX.
Откройте директорию, в которой хранятся файлы виртуальной машины. Это директория, которую вы выбирали на 5 шаге. Если вы выбрали директорию по умолчанию, перейдите в Документы — Virtual Machine. Вам нужен файл с расширением .VMX:
Кликните по файлу правой кнопкой мыши и выберите Открыть с помощью — Блокнот.
В зависимости от процессора вашего компьютера вставьте в конец файла нужный текст:
Готово, виртуальная машина готова к запуску.
Теперь запустим виртуальную машину и установим операционную систему macOS.
Как установить macOS на VMware Workstation
В инструкции мы устанавливаем версию macOS Big Sur. Процедура установки версий macOS Mojave и Catalina практически не отличается.
Чтобы установить macOS на VMware Workstation:
Запустите созданную ранее виртуальную машину:
Дождитесь загрузки операционной системы с установочного диска:
Выберите язык и нажмите на стрелку в правом нижнем углу:
Отформатируйте виртуальный диск. Для этого выберите Дисковая утилита и нажмите Продолжить:
Выберите виртуальный жёсткий диск VMware Virtual SATA Hard Drive Media и нажмите Стереть:
Введите название диска и нажмите Стереть:
Дождитесь завершения процедуры и нажмите Готово.
После этого вверху страницы нажмите Дисковая утилита — Завершить дисковую утилиту:
Выберите Установка macOS Big Sur и кликните Продолжить:
Примите условия лицензионного соглашения:
Выберите диск, название которого вы указывали на 6 шаге, и нажмите Продолжить. На этот диск будет установлена ОС.
Дождитесь окончания установки. Гостевая операционная система перезагрузится несколько раз:
Выберите регион и продолжите установку. Следуйте подсказкам системы:
На этапе «Ассистент миграции» в левом нижнем углу нажмите Не сейчас:
Чтобы пропустить «Вход с Apple ID» нажмите Настроить позже в левом нижнем углу:
Заполните поля, задайте пароль и нажмите Продолжить:
Готово, вы установили macOS на виртуальную машину VMware Workstation Player.
Источник
MacOS Sierra v10.12 VMWare Image Free Download
MacOS Sierra v10.12 VMWare Image Free Download Latest Version for Windows. Its full offline installer standalone setup of MacOS Sierra v10.12 VMWare Image.
MacOS Sierra v10.12 VMWare Image Overview
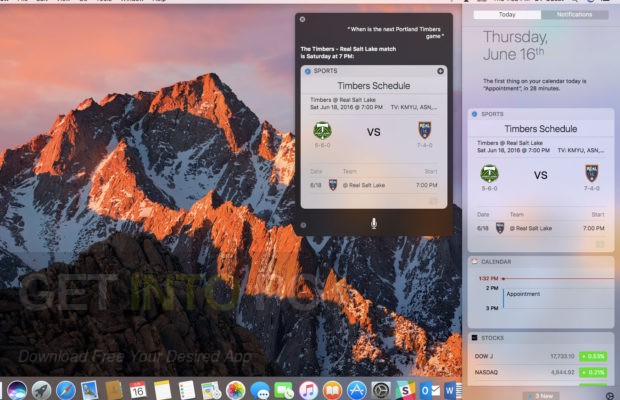
MacOS Sierra v10.12 VMWare Image is an awesome operating system where Siri has made its debut on Mac OS. With this operating system some of the new features have been introduced for desktop. Now you can ask Siri who is an intelligent assistant to get different things done easily. With this OS you can enjoy all of your favorite features from iOS plus some new features have been optimized for Mac. You can also download Niresh Mac OSX Yosemite 10.10.1 DVD ISO.
You can easily drag and drop as well as copy and paste the results of Siri into your different documents. You can also pin results of Siri in Notification Center and you can reference them later. It has got Auto Unlock feature by which you can log in to your Mac OS automatically with an Apple Watch and you don’t need to type in your password. It has got Apple Pay which will secure all of your payments whenever you will shop on Safari on your Mac. You can automatically store different files on your desktop as well as in your Document folder in iCloud. You can also download Niresh Mac OSX Mavericks 10.9.0 DVD ISO.

Features of MacOS Sierra v10.12 VMWare Image
Below are some noticeable features which you’ll experience after MacOS Sierra v10.12 VMWare Image free download.
- Awesome operating system where Siri has made its debut on Mac OS.
- Can easily drag and drop, copy and paste the result of Siri.
- Can pin results of Siri in Notification Center.
- Got Auto Unlock feature by which you can log in to your Mac OS automatically.
- Got Apple Pay which will secure all of your payments whenever you shop on Safari.
- Can automatically store different files on your desktop.
MacOS Sierra v10.12 VMWare Image Technical Setup Details
- Software Full Name: MacOS Sierra v10.12 VMWare Image
- Setup File Name: macOS_Sierra_v10.12_Multilingual_Image_For_VMware.rar, MacOS_VMware_Tools.rar
- Full Setup Size: 6.6 GB, 5.5 MB
- Setup Type: Offline Installer / Full Standalone Setup
- Compatibility Architecture: 32 Bit (x86) / 64 Bit (x64)
- Latest Version Release Added On: 24th Jan 2019
- Developers: MacOS Sierra Homepage
System Requirements For MacOS Sierra v10.12 VMWare Image
Before you start MacOS Sierra v10.12 VMWare Image free download, make sure your PC meets minimum system requirements.
- Memory (RAM): 1 GB of RAM required.
- Hard Disk Space: 6.6 GB of free space required.
- Processor: Intel Dual Core processor or later.
MacOS Sierra v10.12 VMWare Image Free Download
Click on below button to start MacOS Sierra v10.12 VMWare Image Free Download. This is complete offline installer and standalone setup for MacOS Sierra v10.12 VMWare Image. This would be compatible with both 32 bit and 64 bit windows.
Источник
How to Install macOS Sierra on VMware using VMDK on Windows 10 – PC
How to Install macOS Sierra on VMware using VMDK on Windows 10 – PC
In this article, I’m going to show you how to install macOS Sierra on VMware on using VMDK on Windows 10. Apple announced macOS Sierra 10.12 in WWDC 2016. This article will guide to download a pre-made VMDK which bootable with macOS Sierra 10.12.6 (latest at the time of writing). Then patch VMware with macOS unlocker, create & modify a VM (Virtual Machine) for macOS Sierra, attach the VMDK and boot into macOS and perform a basic macOS account settings. Follow the step by step to install macOS Sierra on VMware using VMDK.
Before we get started, let me mention that several versions of macOS have come out since macOS Sierra and we have already created step by step guides to install them on VMware or VirtualBox. So if you want to install the newer versions of macOS then please check out the link below:
Install macOS Sierra on VMware using VMDK
- Download the prerequisites
- Install the Prerequisites
- Install VMware Unlocker for macOS Sierra
- Create macOS Sierra VM
- Edit the macOS Sierra VM
- Edit macOS VM’s VMX file (Optional)
- Wait for macOS Sierra Installation to Complete
- Complete Basic macOS Account Settings
- Install VMware Tools (Optional)
Step 1: Download the prerequisites
To install macOS Sierra on VMware using VMDK, you need to download the virtualization software like VMware Workstation or VMware Player, macOS Sierra 10.12 VMDK file and macOS Unlocker for VMware. All the essential files are listed down below for download.
- Download VMware WorkstationPro 15.5.x or VMware Player 15.5.x.
- VMware Workstation 15 Pro or
- VMware Player 15
- Download VMware Unlocker for macOS Sierra
- macOS Unlocker – GitHub (Latest Version)
- macOS Unlocker – MediaFire (3.0.2)
- macOS Unlocker – MediaFire (2.0.8)
- macOS Unlocker – MediaFire (2.0.4)
- Download macOS Sierra VMDK
- macOS Sierra 10.12.6 (16G29)Latest
- macOS Sierra 10.12 (16A323)Stable
Step 2: Install the Prerequisites
Now install the following virtualization application, and if you already have it by any chance then you’re welcome to skip but make sure it works properly and updated to the latest version.
- Install VMware WorkstationPro15.5.x or VMware Player 15.5.x
Run the VMware Workstation Pro/Player setup and follow the prompt leaving all the options as default.
Note: From here the steps below will only mention VMware Workstation but you can do the same thing in VMware player as well since it is similar to Workstation.
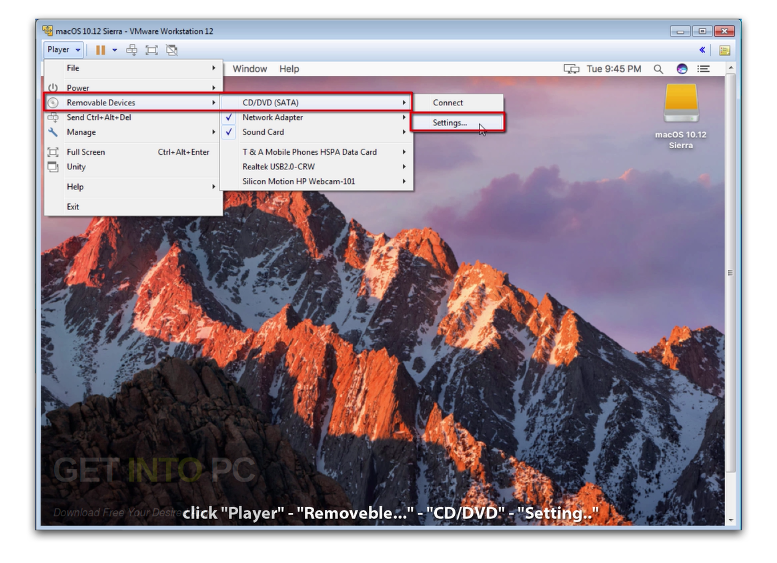
Step 3: Install VMware Unlocker for macOS Sierra
Firstly make sure VMware Workstation application is closed completely otherwise the VMware unlocker won’t work. You can do this by Clicking on File Tab > Exit.
Exit VMware Workstation
Exit VMware Workstation
You should have downloaded VMware Unlocker for macOS Sierra from GitHub or the direct link. So now extract the VMware Unlocker for macOS Sierra. Right-click on win-install.cmd and select Run as Administrator. This step is very important because you won’t see Apple Mac OS X on the Operating System list while creating a new VM unless you patch VMware with the Unlocker tool.
Note: You may always uninstall the previous version of the Unlocker before using a new release. Failure to do this could render VMware unusable. – David Parsons
Run win-install.cmd As Administrator
Run win-install.cmd As Administrator
Unlocker 3.0.2 for VMware Workstation
Unlocker 3.0.3 for VMware Workstation
Step 4: Create a New Virtual Machine
- Open VMware and click on Create a New Virtual Machine (Ctrl+N) then select Typical (Recommended) and click Next.
» data-medium-file=»https://www.wikigain.com/wp-content/uploads/2020/06/Create-macOS-Big-Sur-VM-300×220.png» data-large-file=»https://www.wikigain.com/wp-content/uploads/2020/06/Create-macOS-Big-Sur-VM.png»/> Create a VM  How to Install macOS Big Sur on VMware on Windows – PC
Select Typical (recommended)
Select Install the Operating System Later
» data-medium-file=»https://www.wikigain.com/wp-content/uploads/2020/06/macOS-11-Select-Install-the-Operating-System-Later-300×300.png» data-large-file=»https://www.wikigain.com/wp-content/uploads/2020/06/macOS-11-Select-Install-the-Operating-System-Later.png»/> Select Install the Operating System Later  How to Install macOS Sierra on VMware using VMDK on Windows 10 – PC
macOS Sierra 10.12 Version
Name and Save macOS Sierra VM
Name and Save macOS Sierra VM
Specify Disk Capacity
» data-medium-file=»https://www.wikigain.com/wp-content/uploads/2020/07/Specify-Disk-Capacity-Catalina-300×300.png» data-large-file=»https://www.wikigain.com/wp-content/uploads/2020/07/Specify-Disk-Capacity-Catalina.png»/> Specify Disk Capacity  How to Install macOS Sierra on VMware using VMDK on Windows 10 – PC
Create the macOS Sierra VM
Step 5: Edit the new Virtual Machine
- Click on Edit Virtual Machine Settings.
Edit macOS Sierra VM Settings
Edit macOS Sierra VM Settings
Remove the Hard Disk (SATA)
Remove the Hard Disk (SATA)
Add new Hard Disk
Add new Hard Disk
Select SATA Virtual Disk Type
Select SATA Virtual Disk Type
Select Use an Existing Virtual Disk
Select Use an Existing Virtual Disk
Browse macOS Sierra VMDK File
Browse macOS Sierra VMDK File
Add the macOS Sierra VMDK File
Add the macOS Sierra VMDK File
Save Changes to macOS Sierra VM
Save Changes to macOS Sierra VM
Step 6: Edit macOS Sierra VMX File (Optional)
- Do these 2 steps only if you can’t boot into macOS or have other issues. Navigate to the virtual machine folder which you select in step #4.3 of this guide. If you didn’t specify a new location, then the default location is in Document > Virtual Machine. Right-click on macOS Sierra.vmx then open it via Notepad or any third-party text editor of your choice.
- Scroll down to the bottom of texts and add the following code; then click on File >Save. After that, you may close it as you don’t need it anymore.
Open macOS Sierra VMX File
» data-medium-file=»https://www.wikigain.com/wp-content/uploads/2016/07/Open-macOS-Sierra-VMX-File-300×236.png» data-large-file=»https://www.wikigain.com/wp-content/uploads/2016/07/Open-macOS-Sierra-VMX-File.png»/> Open macOS Sierra VMX File  How to Install macOS Sierra on VMware using VMDK on Windows 10 – PC
Save macOS Sierra VMX File
Step 7: Wait for macOS Sierra Installation
- Open VMware and on the macOS Sierra VM window Click Power on this Virtual Machine.
Power on macOS Sierra VM
Power on macOS Sierra VM
Booting macOS Sierra
Booting macOS Sierra
Step 8: Complete Basic macOS Account Settings
Once the installation part complete, the VM will reboot, and after the reboot, you should see macOS Sierra Welcome page.
macOS Sierra Welcome Page
macOS Sierra Welcome Page
- Choose your Country and click on Continue.
- Choose a Keyboard Layout and click Continue.
- Select Don’t transfer any information now and click Continue.
- Click Continue then click Don’t Use on Enable Location Services page.
- On Sign in with your Apple ID page, select Don’t Sign in then click on Continue and click Skip.
- Agree to the macOS Software License Agreement.
- Fill out the Full name, Account name, Password, Hint and click on Continue to create your user account for macOS Sierra 10.12.
Create macOS Mojave User Account
Create macOS Sierra User Account
Select Your Time Zone
Select Your Time Zone
Setting Up Your Mac…
Setting Up Your Mac…
Successfully Installed macOS Sierra on VMware using VMDK
Successfully Installed macOS Sierra on VMware using VMDK
Step 9: Install VMware Tools (Optional)
So now you should have noticed that the resolution of macOS Sierra can’t be changed and it’s not working as smoothly as you expected. To fix macOS Sierra Resolution on VMware or Make it more responsive, you need to install something called VMware Tools. It’s quite easy and straightforward to work with any system. So to do that we have created a comprehensive guide. Please click the link below and follow the guide Step by step.
Summary
Basically, in this article, I’ve shown you the step by step pictorial guide on how to install macOS Sierra on VMware using VMDK on Windows. After reading and following this guide, you should have done the following:
- Download the prerequisites
- Install the Prerequisites
- Install VMware Unlocker for macOS Sierra
- Create macOS Sierra VM
- Edit the macOS Sierra VM
- Edit macOS VM’s VMX file (Optional)
- Wait for macOS Sierra Installation to Complete
- Complete Basic macOS Account Settings
- Install VMware Tools (Optional)
This was all about, how to install macOS Sierra on VMware using VMDK. If you faced any problem, tell us below by comment, feel free to tell us. We’re waiting for your suggestion.
![]()
Mukhtar Jafari
Mukhtar Jafari is the founder and CEO of wikigain.com. He is CISCO CCENT & CCNA Certified and has got his diploma in IT Networking from North Metro TAFE PERTH. He is currently working as a Help Desk Technician at DEEPTECH Perth Western Australia. In addition, he loves helping other tech enthusiasts so he is working part-time on wikigain.com. He shares his experience through this website for IT beginners.
31 Comments
Thanks for sharing! . followed the mentioned steps and it did work for me..
i have all the steps but when it comes to poering on the macos the apple logo appears and after a few seconds when the load bar appers it says that macos not yet setup
Thank you very much with your post!! I have the 15 version of VMware so your patch didn’t work for me, so i needed to find a recent version of it.
After that, everything fine!
Thanks
when I start the machine it just takes to boot configuration, nothing else….I guess I wasted my time downloading it
Really useful, thanks for the post
VMware Workstation unrecoverable error: (vcpu-0)
A log file is available in “C:\Users\shashank singh\Documents\Virtual Machines\Mac os High Seierra\vmware.log”.
You can request support.
To collect data to submit to VMware support, choose “Collect Support Data” from the Help menu.
You can also run the “vm-support” script in the Workstation folder directly.
We will respond on the basis of your support entitlement.
i am facing this error even after following your steps , so tell me what to do , plz help me
Hi, one question. I want to use Xcode etc on there to start building apps but it says I need a newer version of MacOS High Sierra for that. When I update the version via the updater from Apple the system fails to boot after that and I am forced to restore the .vmdk. any idea on how I can fix this?
Hello dear, Yes you can Install macOS High Sierra by this article: https://www.wikigain.com/install-macos-high-sierra-vmware-windows/
It is rebooting again and again while starting mac os
Try to add the code smc.version = “0” to vmx file
I also crossed with the same problem… I have added smc.version=”0″ to vmx line how to fix it?
![]() Mukhtar Jafari Post author December 7, 2017 at 11:02 PM
Mukhtar Jafari Post author December 7, 2017 at 11:02 PM
Once test without quotation mark. smc.version = 0
Thank you. You are great!!
How to change screen resolution on VmWare?
All you need to install VMware tools to get full screen and other features working.
Article Guide: https://www.wikigain.com/install-vmware-tools-macos-sierra/
Video Guide: /watch?v=iACjHKO9IKM
UPDATE: Sorry, the links are removed from YouTube. Sorry for the inconvenience.
sir i have sierra 10.12 file in .dmg file not in .vmdk file this causes i don’t install macOS sierra .
if u tell me to convert .dmg file to bootable .vmdk file or another method to insall sierra.dmg install in vmware.
and another quetion which boot option are correct for this one.
1. bios
2. EFI
PLS TELL ME URGENT.
what is the password to unzip patchtool.zip
The password is mentioned in the post but again I will tell you
Password for patch tool is: http://www.wikigain.com (Without Http)
Heh guys, GREAT step by step but I am getting hung up after I run the virtual machine. A little window pops up and says SMC value cant be 0 its going to use -1 and then I get an error message saying :
VMware Workstation unrecoverable error: (vcpu-0)
A log file is available in “C:\Program Files (x86)\MacOs\vmware.log”.
You can request support.
To collect data to submit to VMware support, choose “Collect Support Data” from the Help menu.
You can also run the “vm-support” script in the Workstation folder directly.
We will respond on the basis of your support entitlement.
Any ideas how to help me ?
Also any way I can get a free vm ware player. Really dont need it for anything else but running Mac OS ?
Please read step #6 once again. You might have forgotten to change the code
If it does not work let us know. Good luck 🙂
Hi Mukhtar,
Thanks for the reply, sorry, I did do that.
I redid everything and now it seems to have taken the SMC text step. but I still get an error message and the image wont load. Any ideas? Can I send you a log file ?
Error Message is :
VMware Workstation unrecoverable error: (vcpu-0)
A log file is available in “C:\Users\rick.hoedt\Documents\Virtual Machines\macOS 10.12\vmware.log”.
You can request support.
To collect data to submit to VMware support, choose “Collect Support Data” from the Help menu.
You can also run the “vm-support” script in the Workstation folder directly.
We will respond on the basis of your support entitlement.
Hurrah, that’s what I was looking for, what a data! existing
here at this blog, thanks admin of this site.
Welcome,dear, Hope that it must be helpful for you.
Hi
I was able to install it without any problems and was also able to make it full screen after reading another article of yours on that problem.
There are only 2 issues which I am facing and would like some help on them.
1. Scrolling function of my laptop touchpad is not working in macos sierra.
2. Mac OS Sierra is slow when I open any windows in it, it takes 4 – 5 seconds to open a window.
My laptop has i3 3110m processor and 6gb ram, is it sufficient to run mac os sierra smoothly or should I upgrade to new laptop ?
Please also inform how to fix the issues mentioned above
You can Enable the Trackpad from the settings. Just go to Apple icon> System Preferences> TrackPad
It says no track pad found and any solution to fasten the mac os sierra or do I need to upgrade laptop ?
Hi
I have downloaded the patch tools file from the mediafire link shared above.
The file is password protected, can you please provide the password for the patch tools file.
Thanks for all your efforts of providing very easy and useful tutorials on mac and various other platforms
Hi
I found the password on youtube link.
Once again thanks
Leave a Reply Cancel reply
This site uses Akismet to reduce spam. Learn how your comment data is processed.
Источник


