- SAMBA настройка подключения Windows, Mac OS X и Android
- SAMBA НАСТРОЙКА В АНДРОИДЕ
- ПРИЛОЖЕНИЯ ДЛЯ ANDROID
- Настройте CX Explorer или X-Plore с помощью SAMBA
- Подготовка ПК с Windows
- ПОДКЛЮЧАЕМ СЕТЬ SAMBA В MAC OS X.
- Предоставление общего доступа к файлам на Mac пользователям Windows
- Настройка общего доступа к файлам на Mac
- Предоставление информации, которая необходима пользователям Windows
- How to Set Up an SMB Server in OS X and Windows 8
- Screencast
- Before We Start
- Configuring Your Computers.
- Configuring Windows
- Configuring OS X
- Connecting to OS X on Windows
- Connecting to Windows on OS X
- Automatically Connect on Windows
- Automatically Connect in OS X
- Configuring Which Folders are Shared
- On Windows
- In OS X
- What’s Next?
SAMBA настройка подключения Windows, Mac OS X и Android

SAMBA настройка: мы хотим просто объяснить, как подключить любое из наших устройств Android к локальной сети через SAMBA . Самый распространенный протокол на компьютерах с Windows и Mac OS . С помощью этого метода мы можем воспроизводить мультимедийный контент или запускать файлы любого типа в нашем ТВ-БОКСЕ, смартфоне или планшете, хранящиеся на нашем ПК, из локальной сети. Очень практичная система, которая как мы увидим, не имеет особых сложностей, если мы настроим ее правильно.
SAMBA НАСТРОЙКА В АНДРОИДЕ
Протокол SAMBA является одним из наиболее распространенных. Когда речь идет о совместном использовании устройств или сетевых папок между компьютерами Windows. Который совместим со многими другими системами, такими как Android. Этот протокол по умолчанию активируется в версии SMB v.2 во всех установках Windows и других системах. Которые позволяют устанавливать его в качестве альтернативной сетевой системы.
ПРИЛОЖЕНИЯ ДЛЯ ANDROID
Для подключения к нашему ПК мы должны использовать файловый браузер Android, совместимый с SMB v2 , у многих администраторов есть этот способ или через дополнительный модуль, мы рекомендуем несколько простых вариантов.
- CX Explorer oX-plore — простой в использовании с основными функциями
- MiXplorer +аддон SMB v2 , без рекламы и функционала также на Android TV (рекомендуется)
— Платная версия MiXplorer Silver есть в Google Play, ссылки официального проекта MiXplorer + аддон SMBv2
Настройте CX Explorer или X-Plore с помощью SAMBA
Все эти приложения имеют одинаковую систему конфигурации, в меню вы должны найти раздел сети и добавить наш удаленный сервер, используя IP-адрес, где находится ПК, в дополнение к указанию имени пользователя и пароля, если они у нас определены.
- В CX Explorer выберите «Сеть»> «Удаленная»> «Локальная сеть»> «Выбрать компьютер», если он отображается в списке.
- В X-Plore перейдите в LAN> Добавить сервер> Вручную или сканируйте, если он обнаружит ПК.
- Мы добавляем IP (192.168.0.xxx) в дополнение к данным пользователя и пароля, если мы не оставляем их как анонимные.

CX Explorer
X-Plore
Подготовка ПК с Windows
Чтобы подключиться к ПК, на котором у нас есть файлы для совместного использования. Нам нужно выполнить несколько предварительных шагов, которые мы объясним. Необходимо идентифицировать наш компьютер в сети и дать ему необходимые разрешения, чтобы мы могли подключаться.
- Заходим в ПОИСК и набираем ПАНЕЛЬ УПРАВЛЕНИЯ. и заходим туда.
- Переходим в ПРОГРАММЫ И КОМПАНЕНТЫ
- И переходим во вкладку ВКЛЮЧЕНИЕ ИЛИ ОТКЛЮЧЕНИЕ КОМПОНЕНТОВ WINDOWS.
- В открывшемся окне находим и ставим галку SMB 1.0/CIFS File как на фото.
- НЕЗАБЫВАЕМ ПЕРЕЗАГРУЗИТЬ WINDOWS!
- После перезагрузки в разделе сеть появятся все гаджеты подключенные к SAMBA
ПОДКЛЮЧАЕМ СЕТЬ SAMBA В MAC OS X.
Чтобы напрямую подключиться к файловому серверу, используйте функцию «Подключение к серверу» в окне Finder. Выберите меню «Переход» > «Подключение к» и введите URL-адрес, IP-адрес или доменное имя.
- Вводим адрес например моей ТВ ПРИСТАВКИ UGOOS X3 CUBE где уже расшарен доступ.
Источник
Предоставление общего доступа к файлам на Mac пользователям Windows
Чтобы разрешить пользователям Windows подключаться к Вашему компьютеру Mac, включите общий доступ к файлам и общий доступ с помощью SMB.
Настройка общего доступа к файлам на Mac
На Mac выберите меню Apple

> «Системные настройки», затем нажмите «Общий доступ».
Установите флажок «Общий доступ к файлам», затем нажмите «Параметры».
Установите флажок перед «Предоставлением общего доступа к файлам и папкам с помощью SMB».
В списке «Общий доступ Windows» установите флажок рядом с учетной записью пользователя, которая будет использоваться для предоставления общего доступа к файлам с компьютеров с Windows, а затем введите пароль для этого пользователя и нажмите «OK».
Выберите «Вид» > «Сеть», выберите свое активное подключение, затем нажмите «Дополнения».
Выберите вкладку WINS, затем введите имя рабочей группы, используемой на компьютере Windows.
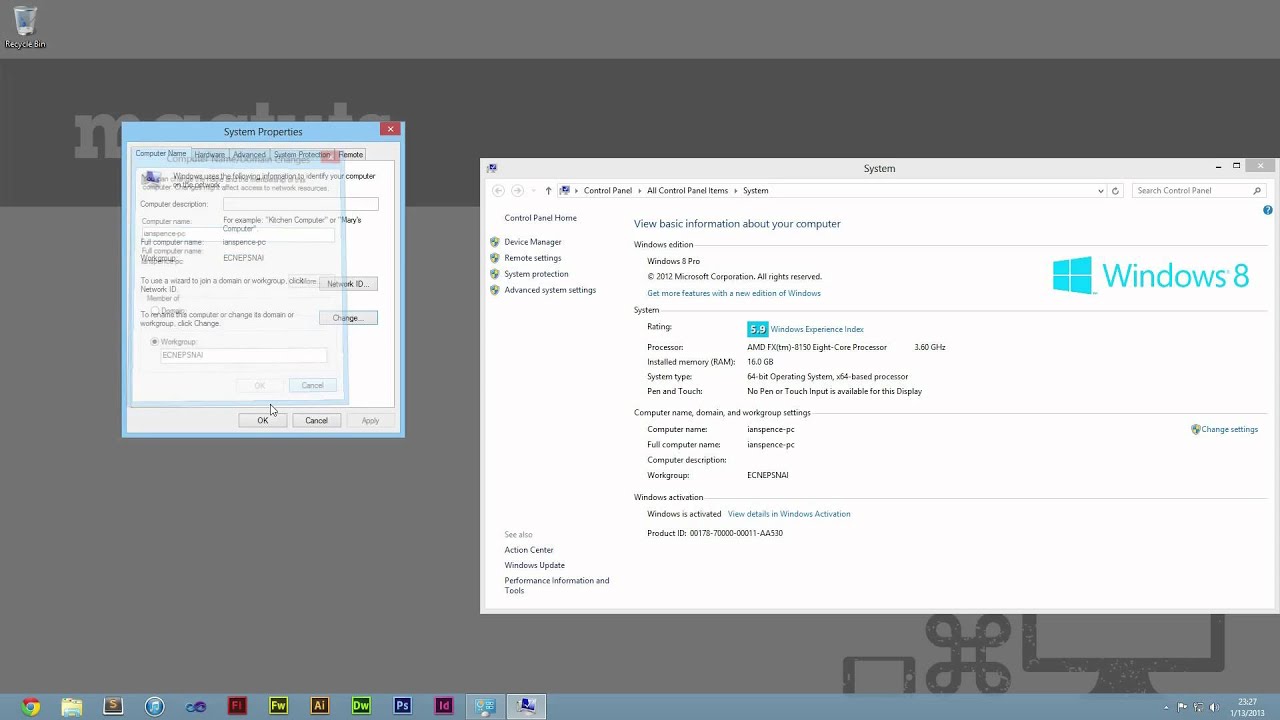
Если имя рабочей группы неизвестно, на компьютере Windows откройте «Панель управления» > «Система и безопасность» > «Система». (На компьютерах Windows обычно используется имя WORKGROUP или MSHOME.)
Нажмите «OK», затем — «Применить».
Предоставление информации, которая необходима пользователям Windows
Для подключения к компьютеру Mac пользователям Windows необходимы следующие данные: сетевой адрес компьютера Mac, а также имя пользователя и пароль для входа в систему Mac.
Чтобы посмотреть сетевой адрес компьютера Mac, выберите меню «Apple»
> «Системные настройки», нажмите «Общий доступ», затем выберите «Общий доступ к файлам». Адрес отображается под индикатором «Общий доступ к файлам: Вкл.» и имеет следующий вид: smb://17.212.167.33/.
Создайте учетную запись на Вашем компьютере Mac для каждого пользователя Windows. Чтобы создать учетные записи, выберите меню Apple > «Системные настройки», затем нажмите «Пользователи и группы».
Если Вы хотите использовать учетную запись, существовавшую до установки новейшей версии macOS, необходимо сбросить пароль учетной записи в настройках пользователей и групп.
Пароли учетных записей, используемых для общего доступа с компьютеров Windows, могут храниться менее безопасным способом, поэтому отключайте учетную запись, когда она не используется. До отключения «Общего доступа Windows» отключите все созданные Вами учетные записи. В ином случае уровень безопасности паролей станет еще ниже.
Источник
How to Set Up an SMB Server in OS X and Windows 8
Say you just upgraded from a Windows computer to a shiny new Mac. You’re quite excited, and after the euphoria of hearing the start-up sound for the first time has worn off you realize that you’re faced with quite a daunting task: «How do I move my files from my Windows computer to my Mac?» You could use a flash drive, but those are slow and have space restrictions. A external hard drive? Sure, but it needs to be formatted as FAT 32, which has size restrictions. But what if I told you that you can move files between computers using just your Internet connection?
Screencast
Just what the heck is a Samba or SMB server anyways? Well, a Server Message Block is just the protocol that defines how information is sent between two computers. Much like the Hyper Text Transfer Protocol, or https:// , it lets the computers send and receive information between each other without conflict. Think of it like a phone call. The protocol that is used to transfer information between the two people speaking on the ends is just the language they are using.
Lets break down what makes up a Samba URL:
- smb:// This defines the protocol used.
- ian The username for this session.
- secret The password for that user.
- 192.168.1.102 The location that will be contacted.
To put that request in words, you’re saying:
Hey, 192.168.1.102. It’s ian. My password is: secret. May I have permission to use your server?
If all goes well, the server will respond with:
Hey Ian, it’s 192.168.1.102. Sure you can!
Before We Start
There are a couple of things we need to go over before we can start. Think of this as a ‘Getting Started Checklist’.
- The two computers must be on the same network.
- It does not matter if the computers are wireless or wired.
- Do not use file sharing on a public network
- Always password protect your files
Now that we’ve gotten that out of the way, lets get started!
Configuring Your Computers.
Configuring Windows
This tutorial will cover how to set up folder sharing on Windows 8. The process is very similar for Windows 7 and Vista, but may differ for Windows XP and lower.
You will need to apply a password to your user to share files in Windows, if you already have a password set; skip to step 3
- Move your mouse to the top right corner to reveal the charms menu. Select the Settings button and click Change PC settings.
- Select Create Password and choose a new password.
- Move your mouse to the top right corner to reveal the charms menu. Select the Search button.
- Search for ‘Computer’
- Right click on Computer and select Properties
- Under ‘Computer Name, domain, and workgroup settings’ select Change Settings
- Enter an administrator password if you’re asked to at the UAC dialog
- Click the ‘Change’ below ‘Network ID’
Configuring OS X
- Click the Apple menu and select System Preferences
- Select Network to open Network Preferences
- Click the Advanced button in the bottom right
- Go to the WINS tab
Connecting to OS X on Windows
- Move your mouse to the top right corner to reveal the charms menu. Select the Search button.
- Search for ‘Network’
- Click on Network
- Under the Computers section your MacBook will appear with the name you chose when when configuring OS X (the NetBIOS name).
If you don’t see your Mac show up in Network, you can try a direct connection:
- Press the Windows Key and tap R. The run dialog box appears
- Type in \\ followed by the NetBIOS name of your Mac. For example: \\MACBOOKPRO-10CC .
- You can now browse the files of your Mac.
Connecting to Windows on OS X
Once you’ve gotten everything set up you can connect to the other computer and begin sharing files. Connecting to a server on OS X is easy!
- In Finder, select Go and Connect to Server (Command+K)
- On the Conntect to Server dialog, type in smb:// followed by the name of the computer you wish to connect to
Automatically Connect on Windows
To have your computer automatically connect to your Mac at startup, you need to Map that drive. It’s easy:
- Open Computer in File Explorer
- Bring down the Ribbon by clicking ‘Computer’ beside File at the top
- Click Map Network Drive
- Expand the shared folders for your Mac. Select a folder and click OK
- Make sure ‘Reconnect at sign-in’ is checked and click Finish
- Now in My Computer, you can have quick access to your Mac as if it was a hard drive on your computer.
Automatically Connect in OS X
If you Map the drive; Windows will automatically connect to your network drive when you log in, but OS X will not by default. To configure OS X to automatically connect to your network drive at log in:
- Connect to the server if you have not already.
- Open the User Preferences pane in System Preferences.
- Select the Login Items tab.
- Drag the Network Drive icon from your desktop to the Login Items list to add it.
OS X Will now automatically connect and mount that network drive at login.
Configuring Which Folders are Shared
By default, OS X and Windows will grant access to your entire user directory any maybe a few others depending on your OS. If you need to, you share any folder on the list with only a few clicks.
On Windows
- Find the folder you wish to share as a drive, right click it and select Properties
- Go to the Sharing tab and select Advanced Sharing
- Check «Share this folder» and customize the name if you wish
By default, you can’t edit any of the files in this shared folder unless logged in. To change this:
In OS X
- Find the folder you wish to share as a drive, right click it and select Get Info
- Check Shared
Sadly, there isn’t a way to hide that black notification bar alerting you that this folder is shared. Sorry!
What’s Next?
Now that you have your computers talking to each other, what’s next? One of the best things you can do if you use multiple computers is set up a local file server that you can store all of your pictures, movies, music, and documents on so that you don’t need to worry about multiple copies. If you’re a developer, you can set up a local Git or SVN server to keep track of your progress and roll back if you need to. But most importantly, sharing big files between computers is much easier now. No more need for a Flash Drive or DVDs.
Источник


