- How to unzip split zip files on Mac
- How can I unzip split zip files on Mac?
- 1. Use WinZip
- WinZip
- 2. Use the Terminal
- Mac os split zip archive
- Under Windows
- Under Mac OS X or Linux
- Under classic Mac OS (9, 8 or 7)
- How To Create A Split Zipped Archive From Mac OS X Terminal
- Создать многотомный архив на Mac
- Mac os split zip archive
- Hint Options
How to unzip split zip files on Mac

- Zip files have many advantages, but one of the best ones is the ability to split them for easier sharing.
- In today’s article, we’re going to show you how to easily unzip split files zip files on your Mac.
- Want to learn more about Zip files? This dedicated Zip article has all the information that you need.
- For more Mac guides like this one, we suggest that you visit our dedicated Mac Hub.

- Download and install Washing Machine X9.
- Wait for it to start an auto scan to find Mac OS issues.
- Click Clean to get rid of all possible troubles.
- Washing Machine X9 has been downloaded by 0 readers this month.
Zip files are great since they allow you to easily send multiple files, however, sometimes to send a zip archive you need to split it.
Since many users tend to split their zip files, in today’s article we’re going to show you how to unzip split ZIP files on Mac like a pro.
How can I unzip split zip files on Mac?
1. Use WinZip
When it comes to ZIP archives, WinZip is one of the best tools to use. The software works with 25 different archive file types including ZIP, RAR, 7Z, GZ, ISO, TAR, and many others.
The application is simple to use, and it can easily archive files, folders, images, PDF files, videos, and any other file type. The application can also extract multiple zip archives simultaneously, which can come in handy.
WinZip can also repair damaged ZIP files, and for extra protection, there are encryption and password protection features available.
The software also works as a file manager, and it even has a useful file sharing feature that can upload files directly to the cloud. Of course, the ability to split archives and work with split archives is also there.
Overall, WinZip is a great tool, and if you need to create or open zip archives, this is the best tool for the job.
Other great features:
- Support for 25 different archive formats
- Can extract multiple archives simultaneously
- Convert to PDF, Word to PDF
- File splitter
- File encryption
WinZip
WinZip is all-in-one archiver software that lets you split and unzip split zip files with ease.
2. Use the Terminal
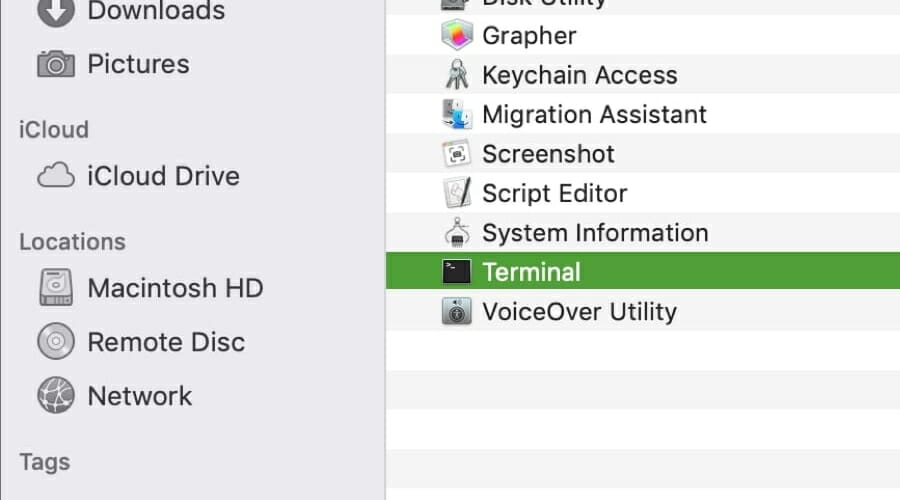
- Go to Applications > Utilities and start the Terminal.

- In the Terminal, navigate to the directory that holds the split archive files.
- Run the following command to combine the split archive files:
zip -s 0 split-file.zip —out unsplit-file.zip - Now you just to run the following command to extract the file:
unzip unsplit-file.zip
Alternatively, you can use the following command to combine the split zip files into a single file:
cat split-file.zip.* > unsplit-file.zip
To unzip split files on Mac, the best way is to use specialized software, such as WinZip, but if that doesn’t work, you can always use Terminal to unzip the files on your own.
Источник
Mac os split zip archive
When you come across split ZIP files that look like sequential part numbers, before extracting files out of the archive, you first need to join the split files together into a single, complete, ZIP file. A split ZIP file could look like this, for instance:
691-5088-A.zip_. 001
691-5088-A.zip_.002
691-5088-A.zip_.003
691-5088-A.zip_.004
NOTE: Just so it’s clear to everybody, this article talks about ZIP but it obviously works on ANY type of file. It doesn’t matter if it’s a ZIP or DMG or TEXT or any kind of file, that is irrelevant. It’s just a split file. It has nothing specific to do with ZIP. You can think of «ZIP» here in this article as «A FILE». e.g. ASD_ssps_004-0303-A.001.dmg + ASD_ssps_004-0303-A.002.dmg will become ASD_ssps_004-0303-A.dmg
Under Windows
Open a command prompt and navigate to the folder containing all the ZIP part files. Once you’re under that folder, adapt the following command (here based on the part files listed in example above) to your situation:
copy /B 691-5088-A.zip_. * 691-5088-A.zip
NOTE: Remember that «.zip» is only an example here. If your file is, e.g. a DMG, then it should end with «.dmg», not «.zip».
What this does is to create a combined file (copy) from all the ZIP parts and save it as 691-5088-A.zip which you can then expand normally.
Under Mac OS X or Linux
Open a Terminal window and navigate to the folder containing all the ZIP part files. Once you’re under that folder, adapt the following command (here based on the part files listed in example above) to your situation:
cat 691-5088-A.zip_. * > 691-5088-A.zip
NOTE: Remember that «.zip» is only an example here. If your file is, e.g. a DMG, then it should end with «.dmg», not «.zip».
What this does is to combine (cat) all the files into a single file named 691-5088-A.zip which you can then expand normally.
Under classic Mac OS (9, 8 or 7)
Use ChunkJoiner. Select all the .001, .002, .003, etc ZIP part files all at once then drag and drop the files selection onto the ChunkJoiner app icon and save the recombined output a file name. If dragging and dropping files onto the app icon doesn’t work, rebuild the desktop once before using this app so that the Finder knows that this app accepts all file types.


Disclaimer: All contents found on the Macintosh Repository website is uploaded by fans and is known to be abandonware but if you find copyrighted material on this archive, please let us know and a moderator will remove it.
- Macintosh Repository
- The community driven dawn of the Mac era preservationist effort
Источник
How To Create A Split Zipped Archive From Mac OS X Terminal
Apr 15, 2013
Comment
OS X comes with the aptly named Archive Utility that can be used to extract contents of compressed zip files, or create zipped archives of your own from your files and folders via the options provided in the right-click context menu. With no UI to speak of, the app works in the background and is fairly basic. What the default utility can’t do is create an archive of a folder that’s split into smaller zip files that can later be extracted as a whole into a single folder. There are several third-party apps available that allow you to do this but if you just want to quickly do it without using a third-party app, and don’t mind typing in a command for the purpose, you can easily do so from Terminal. In what follows, we are going to show you how to use a Terminal command to easily create split zip archives of the contents of any folder.
You need only run a simple command to create the split archive, but it’s important that you understand its syntax in order to customize it for your needs. The command is as follows:
As the name suggests, the MaximumSize part is the maximum possible size each split file should be. It is specified as a number and is in MB by default. If you want to change the file size but keep it in MB, simply change the number. If you would like the file size to be measured in other units, follow the number with k for KB, g for GB, and t for TB. ArchiveName.zip is the name that the primary zip file of the archive will be saved as, and FolderName/ is the folder containing everything you want to pack in this archive.
An example would be:
The above example will compress everything in FolderName/ into multiple split archives of 3GB maximum each, with the name of the main archive file being archive.zip.
You should not drag & drop the folder you want to archive on to the Terminal because it adds the folder’s entire path to the archive. This means that if you’ve decided to archive User/YourUserName/Desktop/pictures, the archive that’s created will be extracted in to a folder called User and it will follow the directory structure that was in the folder’s original path. To avoid this, type the name of the folder yourself, or delete the path after you’ve dragged & dropped the folder to Terminal. Unarchiving will be slightly tricky, since the Archive Utility will not be able to extract the zipped file. You can easily turn to free apps like The Unarchiver, which is very famous for the OS X platform. Make sure you do not extract the contents of the archive to the same location as the original folder.

There aer numerous apps available that allow you to create split archives, so if you think using this Terminal command is difficult, you can use iPackr instead.
Источник
Создать многотомный архив на Mac
У меня есть файл размером 6 ГБ, который нужно скопировать на USB-накопитель. Диск составляет 16 ГБ, но отформатирован в FAT, чтобы его могли прочитать компьютеры Windows и Mac. Жир ограничивает размер файла до 4 ГБ, поэтому я не могу скопировать мой файл. Мое решение было бы создать многочастный архив, в двух файлах 3 ГБ.
Как мне создать многочастный архив на osx?
Вы можете разделить любой файл с помощью команды split :
Чтобы объединить их снова:
Он также может быть использован в Windows с копией / B
Конечно, это на самом деле не архив из нескольких частей, это просто разрезание любого файла на части. Многокомпонентные архивы обычно знают, что они являются частью. Nb 5 — это серия, включающая проверку CRC для каждого файла и т. Д. Но это зависит от формата архива, который вы хотите использовать.
Используйте программы, такие как
- Keka (архиватор для Mac OS X)
- WinZip Mac
- встроенный архиватор в OS X плюс Split & Concat / hjsplit для Windows, Linux, Mac.
Чтобы разделить с внутренней командой zip на OS X, введите это в терминале:
Где 1g = разделить файлы в 1 ГБ максимального размера.
Результатом будет 6 файлов по 1 ГБ каждый.
Прочитайте man zip на терминале, чтобы увидеть другие варианты разделения размера с помощью внутренней команды zip.
Он может быть использован для создания сегментированных архивов.
Тар. Tar — это лицензированный GNU инструмент, способный создавать многотомные архивы. В Mac OS X вам нужно использовать терминал для доступа к командной строке.
В Mac OS X 10.4.11 * это работает следующим образом:
102400 — это размер в КБ или 100 МБ. -c создать, -M многотомный и -v подробный. —file указывает имя архива tar для создания,
Теперь, согласно моему источнику для этого решения ( http://hints.macworld.com/article.php?story=20090321124207437 ), следующая команда извлечения, но bash не покорно расширил скобки для меня, поэтому я разработать ручное решение для объединения tar-архивов.
То, что работало для меня, было этим:
Затем следует подсказка:
На этом этапе введите:
Предположительно это означает, что `имя следующего тома — tar-archive.tar-2 ‘
Теперь вам будет предложено:
В этот момент нажмите возврат.
Вам нужно будет повторить этот процесс для каждого файла в вашем многотомном архиве tar, помня каждый раз менять номер суффикса.
Конечно, теперь есть гораздо более простые способы сделать это, но мне пришлось удаленно использовать Mac OS X 10.4.11 с помощью TeamViewer 7 (удивительная программа, которая все еще работает и имеет доступ к серверам TeamViewer на Mac OS X 10.4.11! !!). Это был наименее разочаровывающий способ передачи образа диска 2 ГБ новой установки Mac OS X 10.4.11 через Интернет (если передача 200 МБ не удалась, это 20 минут, но, если передача 2 ГБ не удалась, это стоит дня планирования на ветер).
* Я предоставляю техническую поддержку моему отцу, который должен использовать Классическую версию Word 5.0, которая работает только в Mac OS X 10.4.11 (у него есть болезнь Альцгеймера, что означает, что он не может изучать новые вещи и разочаровывается в новых вещах). Я живу в другом городе, поэтому единственный способ помочь ему — это дистанционное управление.
Источник
Mac os split zip archive
It appears that OSX 10.8 removed the tar --tape-length flag, and I see no other way to create split tar archives as described in this hint.
One alternative is to create split zip files using the zip tool provided with OS X.
As described in man zip , the resulting files are not just one big zip file that has been split into pieces, and thus they cannot gracefully be concatenated back together as described in another hint, so this differs from simply using the split command. I needed to send files to a Windows user with 7zip, so split was probably out of the question.
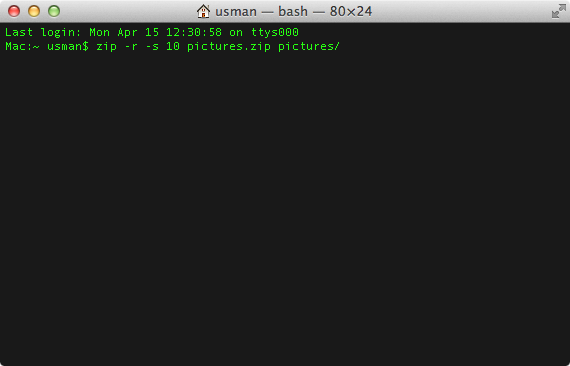
To get 4699717632 byte files that would fit on a DVD I used zip -s 4482m output.zip /source/directory
[kirkmc adds: I’m on the road with only my iPad, so I havent been able to test this.]
- Currently 2.33 / 5
You rated: 1 / 5 (6 votes cast)
Hint Options
The -s parameter splits the archive into multiple zipped files fine, but how do I unzip them? Using unzip from the command only looks at the very last file in the archive, and when you specify the first file (.z01), it errors out with:
$ unzip bws.z01
Archive: bws.z01
End-of-central-directory signature not found. Either this file is not
a zipfile, or it constitutes one disk of a multi-part archive. In the
latter case the central directory and zipfile comment will be found on
the last disk(s) of this archive.
unzip: cannot find zipfile directory in one of bws.z01 or
bws.z01.zip, and cannot find bws.z01.ZIP, period.
The Unarchiver (free in MAS), unzips the split zip just fine, but hell if I can’t find a way to get unzip at the command line to do the same thing.
Why not create the zip file and then use the split command to make your chunks? Those files can simply be concatenated and unzipped.
Exactly. The way to do this, after you create TheBigZipFile.zip (note that I am taking the size of each segment from the article, 4482 MB): That will leave you with several files called TheSegmentaa, TheSegmentab, etc. To concatenate on a Mac: And on the DOS prompt of a Windows machine (oh, the horror!): You can verify that all three big files are identical my getting the MD5 checksum or similar method (not sure how to do that on Windows without extra tools, though).
You and I could definitely do that, and that is certainly the way I would’ve gone if I wanted to split up a tgz file. My mom… not so much, especially not on Windows. If she were using a Mac I probably would’ve gone with a sparse bundle DMG file.
As I mentioned in the OP, the man page for zip explains the difference between that approach and using the split zip method.
Split zip is just one alternative to this problem, and it happens to have built in support on both Windows and OS X.
The rar command line tool can be downloaded as (never ending) trialware at rarlab.com. Unrar is free on all platforms. Usage: «rar a -m0 -v4700000 archivename filename(s)» where a = add (create archive), -m0 = no compression (-m5 = max compression, not useful for video plus it takes much longer), -v with max size in KB (1000 bytes, append ‘k’ for size in 1024 bytes: -v4589843k).
«It appears that OSX 10.8 removed the tar —tape-length flag»
Not really. Our fine friends at Apple have chosen to remind us there are other versions of software beside that provided by GNU. Mac OS X appears to have moved ‘tar’ to be ‘bsdtar’ and gnu tar is now ‘gnutar’. Actually, it’s a symlink. Do ‘ls -l /usr/bin/tar’ to see.
gnutar —tape-length=102400 -cMv —file=tar_archive.
Note, I would *NOT* change the link to gnutar. There be dragons.
That is very helpful! I was a little taken aback when I found that normal ‘tar’ didn’t have the —tape-length flag, even for historical purposes. Knowing about gnutar is very helpful, thanks for pointing it out!
Источник


