- How to Uninstall Adobe Creative Cloud Completely in 2021
- Part 1. Why Need to Uninstall Adobe Creative Cloud?
- Part 2. How Do I Completely Remove Adobe Creative Cloud?
- Step 1. Download, Install and Launch PowerMyMac
- Step 2. Choose Uninstaller And Click Scan
- Step 3. Choose Apps To Uninstall
- Step 4. Repeat For Creative Cloud
- Part 3. How To Uninstall Adobe Creative Cloud on Mac Manually
- 1. Log In Adobe CC And Remove Apps
- 2. Delete The Desktop App For Adobe CC
- 3. Delete All Folders Associated With Adobe
- Part 4. Remove The Adobe CC Desktop App (For Enterprise Versions)
- Step 1. Make A Folder And Place The Executable File
- Step 2. Create a New Package
- Step 3. Run The Program
- Part 5. Conclusion
- Как полностью удалить Adobe Creative Cloud в 2021 году
- Часть 1. Зачем нужно удалять Adobe Creative Cloud?
- Часть 2. Как полностью удалить Adobe Creative Cloud?
- Шаг 1. Загрузите, установите и запустите PowerMyMac.
- Шаг 2. Выберите Uninstaller и нажмите Scan
- Шаг 3. Выберите приложения для удаления
- Шаг 4. Повторите для Creative Cloud
- Часть 3. Как вручную удалить Adobe Creative Cloud на Mac
- 1. Войдите в Adobe CC и удалите приложения.
- 2. Удалите приложение для рабочего стола для Adobe CC
- 3. Удалить все папки, связанные с Adobe
- Часть 4. Удаление настольного приложения Adobe CC (для корпоративных версий)
- Шаг 1. Создайте папку и поместите исполняемый файл
- Шаг 2. Создайте новый пакет
- Шаг 3. Запустите программу
- Часть 5. Вывод
How to Uninstall Adobe Creative Cloud Completely in 2021

Written By Jordan Baldo Last updated: August 30, 2021
Almighty writing expert who is proficient in analyzing Mac issues and providing efficient solutions.
If you want to know how to uninstall Creative Cloud Mac, you probably realize that it’s not the same as doing it on a Windows PC. The process is different and somewhat more tedious compared to Windows operating systems.
Windows PCs usually come with uninstaller applications. However, with macOS, you usually have to move the application towards the Trash Bin. And after that, you have to delete leftover files by searching for them within the computer. If you don’t delete them, it will take up much space on your Mac and lead to your system running out of application memory.
Adobe Creative Cloud makes it harder to uninstall apps with its complicated process. That’s a double whammy! It’s difficult to remove apps with macOS and it’s made even more difficult with Adobe’s whole вЂanother process.
How do I completely remove Adobe Creative Cloud? Fortunately, if you’re looking for ways on how to uninstall Adobe Creative Cloud on Mac, you’re on the right page. We’ll let you go through our guide which will help you solve the problem in the first place. Let’s get started.
Part 1. Why Need to Uninstall Adobe Creative Cloud?
Are you a person working in the creative industry? Then, you have probably heard of Adobe’s new offering, the Creative Cloud. Essentially, Adobe Creative Cloud is a subscription-based service that can be paid on a monthly or annual basis. This subscription enables you to access creative software from Adobe. And, it allows you to transfer files among various desktop, mobile, and web applications.
If your subscription has lapsed and you have no plans to renew it, there doesn’t seem to be much point in keeping Creative Cloud on your Mac. Keeping it in the background is fine, but it could be taking up a lot of memory space, especially if you installed other apps and programs using Creative Cloud.
Another thing to consider is that even if they are not being used, Creative Cloud could be updated in the background taking up some much-needed processing space, which you definitely do not want happening. So there is necessary to know how to uninstall Adobe Creative Cloud on Mac.

Part 2. How Do I Completely Remove Adobe Creative Cloud?
As stated previously, uninstalling applications within macOS can be tedious. It’s not as easy as it may seem compared to Windows PCs. However, you can use third-party uninstallers and choose a good one for you.
Want to uninstall adobe creative cloud without login? We recommend that you use iMyMac PowerMyMac and its Uninstaller Module. The reason behind this is twofold. First, the program doesn’t contain sneaky ads that can point you to malicious sites. In addition, it doesn’t sneakily install other harmful software on your macOS computer.
PowerMyMac’s Uninstaller module can help you to automatically and completely uninstall applications within macOS devices. Plus, it can be used to delete unnecessary files within your system making your computer run faster.
Here’s how to use the this adobe uninstaller mac tool to help you understand how to uninstall Adobe Creative Cloud on Mac:
Step 1. Download, Install and Launch PowerMyMac
Download PowerMyMac from its official website here. Install the software on your Mac and follow the prompts on the screen to complete the process. Then, launch the tool on your computer device.
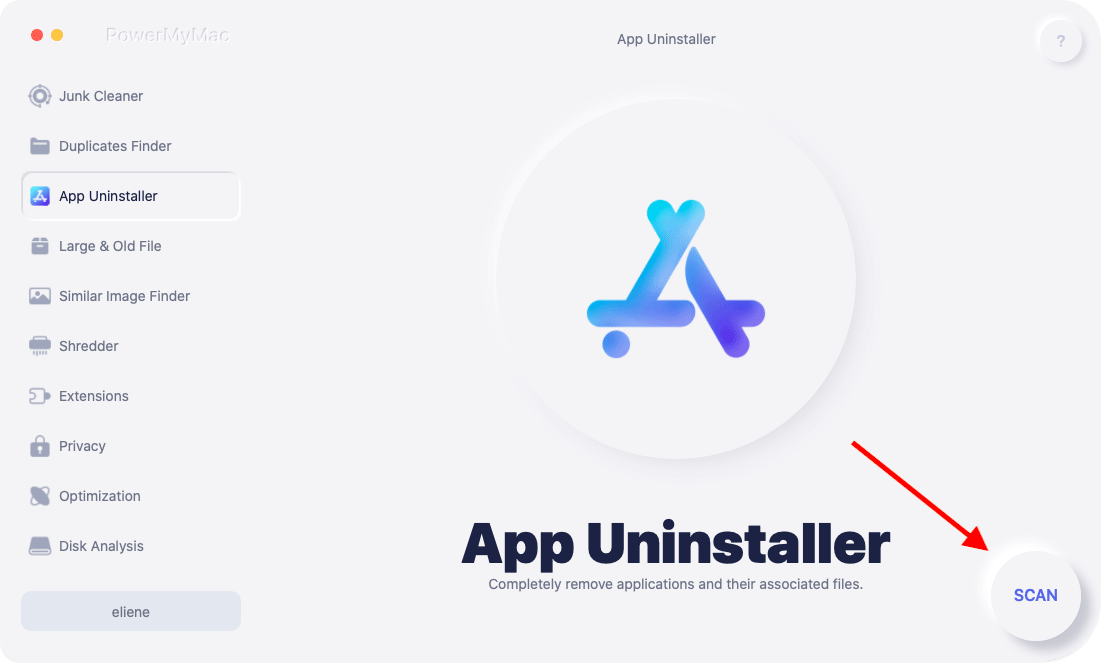
Step 2. Choose Uninstaller And Click Scan
After this, you have to choose “Uninstaller” on the left side of the panel. Then, click the “Scan” option to check out all the apps from your computer.
Step 3. Choose Apps To Uninstall
First, you have to choose apps to uninstall. In this case, you have to uninstall all programs associated with Creative Cloud first. These include Photoshop, Lightroom, Premiere Pro, etc. Click “Clean” to start the uninstallation process.

Step 4. Repeat For Creative Cloud
Repeat the steps in the process and uninstall “Adobe Creative Cloud” from the platform. After this is done, you have completely gotten rid of the entire Adobe suite of software from your macOS computer device.
Part 3. How To Uninstall Adobe Creative Cloud on Mac Manually
A lot of people run Adobe Creative Cloud from their Mac laptops and desktops. There are various steps you should follow (in a particular order) to remove Adobe Creative Cloud from your macOS computer.
Below are the steps to check out in order to remove the app completely from your computer:
1. Log In Adobe CC And Remove Apps
Similar to Windows PC, the first thing you have to do is to log in to the desktop application of Adobe Creative Cloud. This is done only if you’re not currently signed into the app. Then, go through every app within Adobe CC and delete each of them (or uninstall them). Make sure no app is left because it is necessary to remove them all before you can actually learn how to uninstall Adobe Creative Cloud on Mac.
2. Delete The Desktop App For Adobe CC
After you have gone through the first step, you should go to the official support website of Adobe CC here. Use your browser to do so. On this page, you should download the uninstallation software for Adobe CC. Make sure you get the macOS version.
Once you open the tool, it will ask you to input the login username and corresponding password for your system. Make sure you type them in. Another screen will pop up. It will warn you that the particular app was downloaded from the net. Press “Open”.

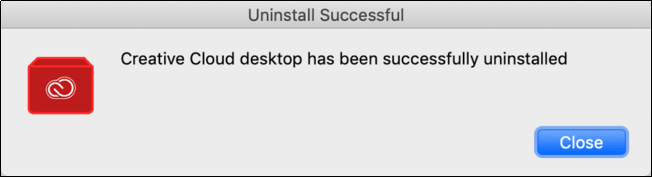
Another screen will be displayed. It will ask you if you are sure that you want to delete the Adobe CC desktop app. If you want to uninstall it, click “Uninstall”. This will start the process of removing the app. It takes a bit of time. However, if it is completed successfully, you should see the following pop-up on your screen:
3. Delete All Folders Associated With Adobe
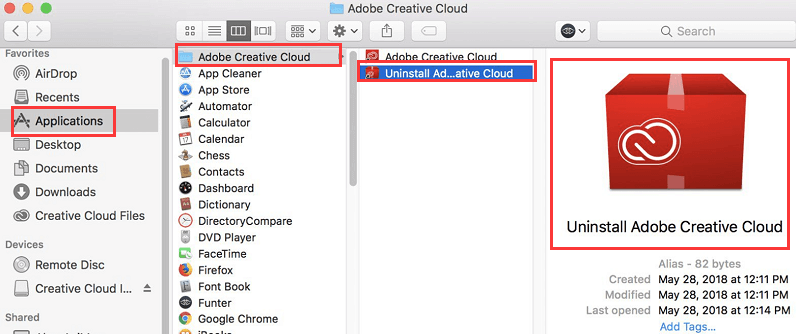
- When the desktop app has been deleted, go to the “Application” folder.
- Once there, you should move every Adobe folder you see. Drag them towards the Trash Bin. You should see these folders have the name “Adobe” within them.
- After removal, you have to delete Adobe applications located within the Utilities folder. This folder can be seen within the “Applications” main folder.
- Navigate towards that folder, then choose folders such as “Adobe Installers” and “Adobe Application Manager”.
- Move these associated folders toward the Trash Bin as well.
- Again, there are a lot of Adobe-associated folders within Application Support (under Library). And, there might be more in other locations. Before moving these folders and dragging them to the Trash Bin, ensure that no Adobe software is leftover on your Mac computer.
- Finally, you have to empty your Trash Bin to make sure everything is deleted from the system.
By this time you have finished on how to uninstall Adobe Creative Cloud on Mac. Congratulations! Your system is free from Adobe CC.
Part 4. Remove The Adobe CC Desktop App (For Enterprise Versions)
Couldn’t uninstall Creative Cloud for desktop Mac? This is a bonus guide on how to uninstall the Adobe CC app for enterprise versions. First, you have to make sure that all files have been synced or backed up before running the uninstallation software. Files that aren’t synced can possibly be lost due to uninstallation.
Here are the steps to uninstall enterprise versions of Adobe CC:
Step 1. Make A Folder And Place The Executable File
First, make a folder within the machine that contains the SCCM server. Put the executable file of the uninstaller within it. This executable file can be picked from any type of machine which contains the desktop app of Creative Cloud installed in it.
Usually, the executable file is contained within this place in your macOS:

Step 2. Create a New Package
Now, you have to make a brand new package. Utilize the folder you created in Step 1. Use it as a specific source. Now, make a program and then utilize the following command: Creative Cloud Uninstaller.exe -u . This is in order to uninstall the desktop app for Creative Cloud.
Step 3. Run The Program
Launch this program from its distribution point on every client machine you want the desktop app for Creative Cloud to be uninstalled.
It is important to note that you can only uninstall the desktop app for Creative Cloud if you have removed associated apps such as Photoshop, Illustrator, and Premiere Pro from the system. If not, do this first, and then go through the steps above again.
Part 5. Conclusion
We have given you two different methods on how to uninstall Adobe Creative Cloud on macOS computer versions (individual). In addition, the enterprise version of uninstalling the said software was also given.
As you can see, doing it manually is a tedious process. This is because you still have to look for leftovers within the computer. As such, you should use iMyMac PowerMyMac and its Uninstaller module to make sure you delete the app plus its leftovers (and associated files) within your computer.
If you wish to get PowerMyMac for free, you should do so here. Experience a faster macOS computer that runs in optimum performance!
Excellent Thanks for your rating.
Источник
Как полностью удалить Adobe Creative Cloud в 2021 году
Написано Джордан Бальдо Последнее обновление: Август 30, 2021
Всемогущий эксперт по написанию текстов, который хорошо разбирается в проблемах Mac и предоставляет эффективные решения.
Если вы хотите знать, как удалить Creative Cloud Mac, вы, вероятно, понимаете, что это не то же самое, что делать это на ПК с Windows. Этот процесс отличается и несколько более утомительный по сравнению с операционными системами Windows.
ПК с Windows обычно поставляются с приложениями для удаления. Однако в macOS вам обычно нужно переместить приложение в корзину. И после этого вы должны удалить оставшиеся файлы, выполнив поиск на компьютере. Если вы не удалите их, они займут много места на вашем Mac и приведут к системе не хватает памяти приложения.
Adobe Creative Cloud усложняет удаление приложений из-за сложного процесса. Это двойной удар! Это трудно удалить приложения с macOS и это еще более усложняет весь процесс Adobe.
Как полностью удалить Adobe Creative Cloud? К счастью, если вы ищете пути как удалить Adobe Creative Cloud на Mac вы находитесь на правильной странице. Мы дадим вам возможность ознакомиться с нашим руководством, которое в первую очередь поможет вам решить проблему. Давайте начнем.
Часть 1. Зачем нужно удалять Adobe Creative Cloud?
Вы человек, работающий в творческой индустрии? Тогда вы, вероятно, слышали о новом предложении Adobe — Creative Cloud. По сути, Adobe Creative Cloud — это услуга на основе подписки, которая может оплачиваться ежемесячно или ежегодно. Эта подписка дает вам доступ к программному обеспечению для творчества от Adobe. Кроме того, он позволяет передавать файлы между различными настольными, мобильными и веб-приложениями.
Если срок действия вашей подписки истек, и вы не планируете ее продлевать, похоже, нет особого смысла хранить Creative Cloud на вашем Mac. Сохранять его в фоновом режиме — это нормально, но это может занять много места в памяти, особенно если вы установили другие приложения и программы с помощью Creative Cloud.
Также следует учитывать, что даже если они не используются, Creative Cloud может обновляться в фоновом режиме. занимая столь необходимое пространство обработки, чего вы точно не хотите. Поэтому необходимо знать, как удалить Adobe Creative Cloud на Mac.
Часть 2. Как полностью удалить Adobe Creative Cloud?
Как указывалось ранее, удаление приложений в macOS может быть утомительным. Это не так просто, как может показаться по сравнению с ПК с Windows. Тем не менее, вы можете использовать сторонние деинсталляторы и выбрать подходящий для вас.
Хотите, чтобы удалить Adobe Creative Cloud без входа в систему? Мы рекомендуем вам использовать iMyMac PowerMyMac и его модуль удаления. Причина этого двоякая. Во-первых, программа не содержит скрытую рекламу, которая может указывать на вредоносные сайты. Кроме того, он не может незаметно устанавливать другие вредоносные программы на ваш компьютер MacOS.
Модуль удаления PowerMyMac может помочь вам автоматически и полностью удалить приложения на устройствах MacOS. Кроме того, его можно использовать для удаления ненужных файлов в вашей системе, чтобы ваш компьютер работал быстрее.
Вот как использовать этот инструмент для удаления Adobe для Mac, чтобы понять, как удалить Adobe Creative Cloud на Mac:
Шаг 1. Загрузите, установите и запустите PowerMyMac.
Загрузите PowerMyMac с его официальный сайт здесь, Установите программное обеспечение на свой Mac и следуйте инструкциям на экране для завершения процесса. Затем запустите инструмент на вашем компьютере.
Шаг 2. Выберите Uninstaller и нажмите Scan
После этого вы должны выбрать «Uninstaller» в левой части панели. Затем нажмите «Сканировать», чтобы проверить все приложения на вашем компьютере.
Шаг 3. Выберите приложения для удаления
Во-первых, вам нужно выбрать приложения для удаления. В этом случае вам необходимо сначала удалить все программы, связанные с Creative Cloud. К ним относятся Photoshop, Lightroom, Premiere Pro и т. Д. Нажмите «Очистить», чтобы начать процесс удаления.
Шаг 4. Повторите для Creative Cloud
Повторите шаги процесса и удалите Adobe Creative Cloud с платформы. После того, как это будет сделано, вы полностью избавитесь от всего пакета программного обеспечения Adobe с вашего компьютерного устройства MacOS.
Часть 3. Как вручную удалить Adobe Creative Cloud на Mac
Многие люди используют Adobe Creative Cloud со своих ноутбуков и настольных компьютеров Mac. Существуют различные шаги, которые вы должны выполнить (в определенном порядке), чтобы удалить Adobe Creative Cloud с вашего компьютера MacOS.
Ниже приведены шаги, чтобы проверить, чтобы полностью удалить приложение с вашего компьютера:
1. Войдите в Adobe CC и удалите приложения.
Как и в случае с ПК с Windows, первое, что вам нужно сделать, это войти в настольное приложение Adobe Creative Cloud. Это делается только в том случае, если вы в данный момент не вошли в приложение. Затем просмотрите все приложения в Adobe CC и удалите каждое из них (или удалите их). Убедитесь, что никаких приложений не осталось, потому что необходимо удалить их все, прежде чем вы действительно узнаете, как удалить Adobe Creative Cloud на Mac.
2. Удалите приложение для рабочего стола для Adobe CC
После того, как вы прошли первый шаг, вы должны перейти к Официальный сайт поддержки Adobe CC здесь, Используйте ваш браузер, чтобы сделать это. На этой странице вы должны загрузить программное обеспечение для удаления для Adobe CC. Убедитесь, что вы получили версию MacOS.
После того, как вы откроете инструмент, он попросит вас ввести логин и соответствующий пароль для вашей системы. Убедитесь, что вы ввели их. Появится другой экран. Он предупредит вас, что конкретное приложение было загружено из сети. Нажмите «Открыть».
Будет показан другой экран. Он спросит вас, уверены ли вы, что хотите удалить приложение Adobe CC для рабочего стола. Если вы хотите удалить его, нажмите «Удалить». Это запустит процесс удаления приложения. Это займет немного времени. Однако, если он успешно завершен, на экране должно появиться следующее всплывающее окно:
3. Удалить все папки, связанные с Adobe
- Когда настольное приложение будет удалено, перейдите в папку «Приложение».
- Оказавшись там, вы должны переместить каждую папку Adobe, которую вы видите. Перетащите их в мусорное ведро. Вы должны увидеть, что эти папки имеют название «Adobe» внутри них.
- После удаления необходимо удалить приложения Adobe, расположенные в папке «Утилиты». Эту папку можно увидеть в основной папке «Приложения».
- Перейдите к этой папке, затем выберите папки, такие как «Adobe Installers» и «Adobe Application Manager».
- Переместите эти связанные папки в корзину.
- Опять же, есть много папок, связанных с Adobe, в Application Support (в разделе «Библиотека»). И может быть больше в других местах. Прежде чем перемещать эти папки и перетаскивать их в корзину, убедитесь, что на вашем компьютере Mac нет программного обеспечения Adobe.
- Наконец, вы должны очистить корзину, чтобы убедиться, что все удалено из системы.
К этому времени вы закончили, как удалить Adobe Creative Cloud на Mac. Поздравляю! Ваша система свободна от Adobe CC.
Часть 4. Удаление настольного приложения Adobe CC (для корпоративных версий)
Не удалось удалить Creative Cloud для настольного компьютера Mac? Это бонусное руководство по удалению приложения Adobe CC для корпоративных версий. Во-первых, вы должны убедиться, что все файлы были синхронизированы или скопированы, прежде чем запускать программное обеспечение для удаления. Файлы, которые не синхронизируются, могут быть потеряны из-за удаления.
Вот шаги для удаления корпоративных версий Adobe CC:
Шаг 1. Создайте папку и поместите исполняемый файл
Сначала создайте на машине папку, в которой находится сервер SCCM. Поместите в него исполняемый файл деинсталлятора. Этот исполняемый файл можно выбрать с любого типа компьютера, на котором установлено настольное приложение Creative Cloud.
Обычно исполняемый файл содержится в этом месте в вашей macOS:
Шаг 2. Создайте новый пакет
Теперь вам нужно сделать новую упаковку. Используйте папку, созданную на шаге 1. Используйте ее как конкретный источник. Теперь создайте программу, а затем используйте следующую команду: Creative Cloud Uninstaller.exe -u . Это сделано для того, чтобы удалить настольное приложение для Creative Cloud.
Шаг 3. Запустите программу
Запустите эту программу из точки распространения на каждом клиентском компьютере, на котором вы хотите удалить приложение Creative Cloud для ПК.
Важно отметить, что приложение Creative Cloud для Creative Cloud можно удалить только при наличии удалены связанные приложения, такие как Photoshop, Illustrator и Premiere Pro из системы. Если нет, то сначала сделайте это, а затем повторите шаги, описанные выше.
Часть 5. Вывод
Мы предоставили вам два разных метода удаления Adobe Creative Cloud на компьютерных версиях macOS (индивидуально). Кроме того, была предоставлена корпоративная версия удаления указанного программного обеспечения.
Как видите, делать это вручную — утомительный процесс. Это потому, что вам все равно придется искать остатки внутри компьютера. Таким образом, вы должны использовать iMyMac PowerMyMac и его модуль удаления, чтобы убедиться, что вы удалили приложение и его остатки (и связанные файлы) на своем компьютере.
Если вы хотите получить PowerMyMac бесплатно, Вы должны сделать это здесь, Испытайте более быстрый компьютер MacOS, который работает с оптимальной производительностью!
Прекрасно Спасибо за ваш рейтинг.
Источник


