- Виртуальные машины для macOS
- VirtualBox
- VMware Fusion
- Parallels Desktop
- Boot Camp
- Заключение
- How to Install macOS on VirtualBox
- Everything You Need to Get Started with Installing macOS on VirtualBox
- Extract macOS Sierra
- Creating a mac Virtual Machine on Windows
- Configuring Your VirtualBox to Run macOS High Sierra
- Running VirtualBox and the macOS Installer
- About The Author
Виртуальные машины для macOS
macOS – отличная операционная система, которая, как и «конкурентная» Windows или открытая Linux, имеет свои достоинства и недостатки. Любую из этих ОС сложно спутать с другой, и каждая из них наделена уникальными функциональными особенностями. Но что делать, если при работе с одной системой, возникает необходимость использования возможностей и инструментов, которые есть только во «вражеском» лагере? Оптимальное решение в таком случае – установка виртуальной машины, и о четырех таких решениях для макОС мы расскажем в этой статье.
VirtualBox
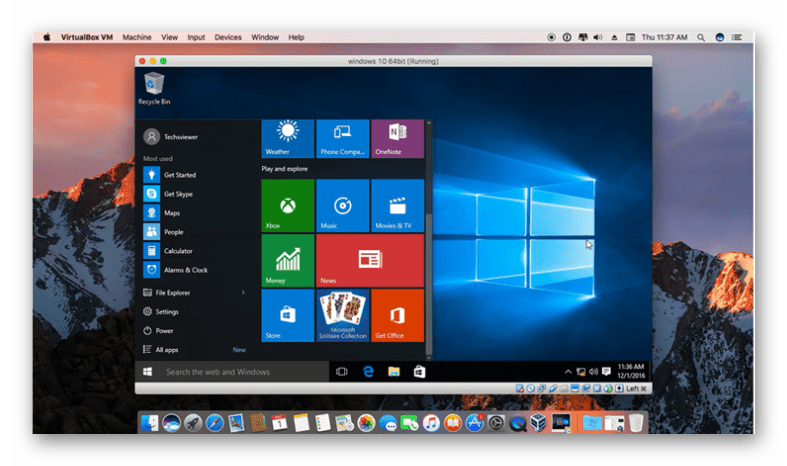
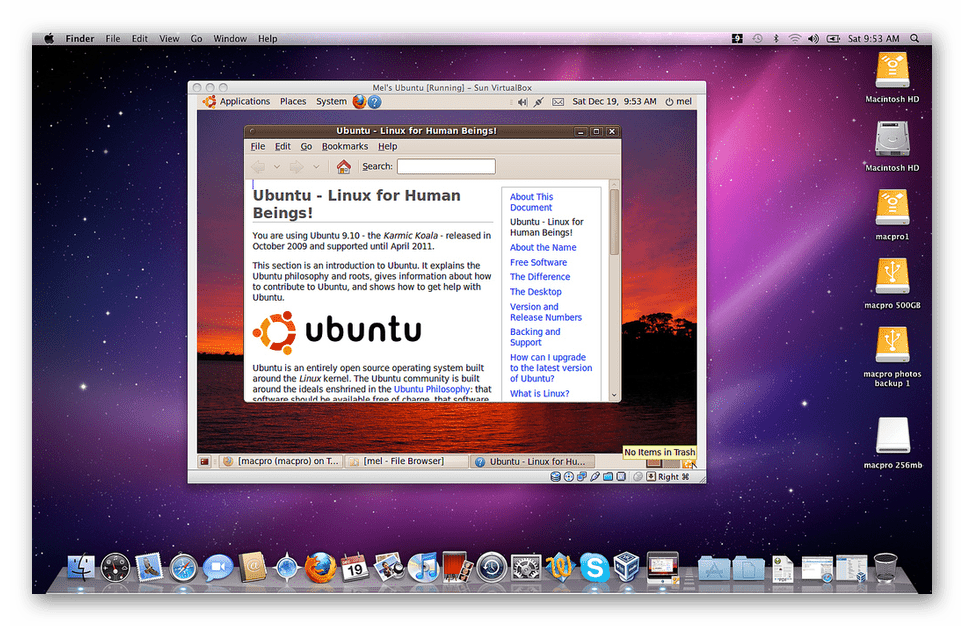
Кроссплатформенная виртуальная машина, разработанная компанией Oracle. Хорошо подойдет для выполнения базовых задач (работа с данными, документами, запуск нетребовательных к ресурсам приложений и игр) и простого изучения операционной системы, отличной от macOS. Распространяется VirtualBox на бесплатной основе, а в ее среде можно установить не только Windows разных версий, но и различные Linux-дистрибутивы. Эта машина – отличное решение для пользователей, которым хотя бы иногда нужно «обращаться» к другой ОС. Главное, не требовать от нее слишком много.

Достоинств у данной виртуалки, помимо ее бесплатности, немало – это простота использования и настройки, наличие общего буфера обмена и возможность доступа к сетевым ресурсам. Основная и гостевая операционные системы работают параллельно, что исключает необходимость перезагрузки. Кроме того, установленная на VirtualBox ОС Windows или, например, Ubuntu функционирует внутри «материнской» макОС, что исключает проблемы совместимости файловых систем и позволяет иметь общий доступ к файлам на физическом и виртуальном накопителе. Таким может похвастаться далеко не каждая виртуальная машина.
И все же, у VirtualBox есть недостатки, и основной из них вытекает из главного достоинства. Ввиду того что гостевая операционная система работает вместе с основной, небезграничные ресурсы компьютера делятся между ними, причем не всегда поровну. Из-за работы железа «на два фронта» многие требовательные (и не очень) приложения, не говоря уже о современных играх, могут довольно сильно подтормаживать, зависать. И, как ни странно, чем производительнее Mac, тем сильнее будет падать быстродействие обеих ОС. Еще одним, не менее критическим минусом является далеко не самая лучшая аппаратная совместимость. Программы и игры, которым необходим доступ к «яблочному» железу, могут функционировать не стабильно, со сбоями, а то и вовсе перестать запускаться.
VMware Fusion
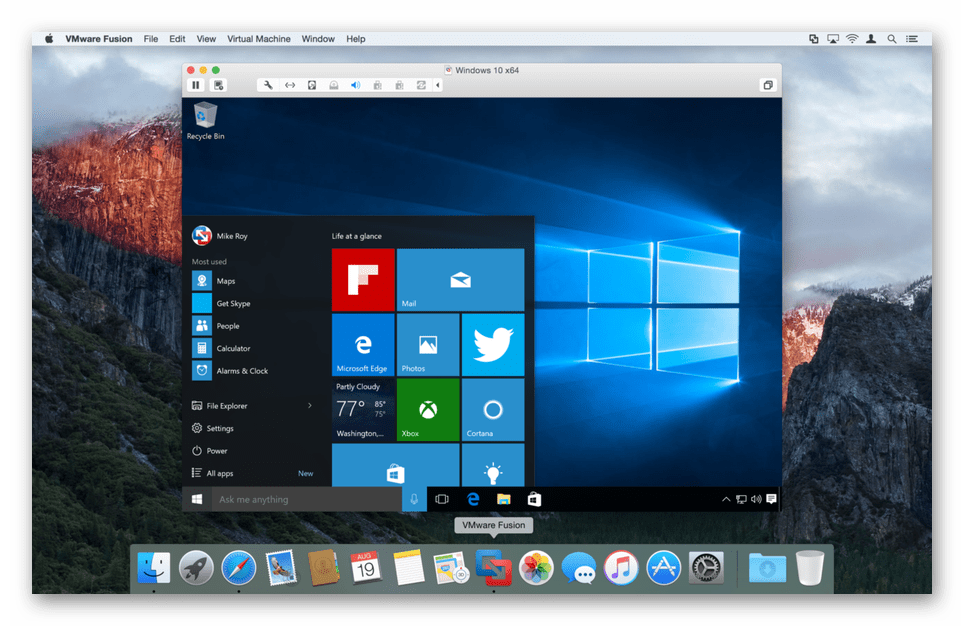
Программное обеспечение, которое позволяет не только виртуализировать операционную систему, но и буквально перенести уже готовую и настроенную Windows или Ubuntu с ПК в среду macOS. Для этих целей используется такой функциональный инструмент, как Мастер Обмена. Таким образом, VMware Fusion позволяет использовать приложения и запускать компьютерные игры, которые ранее были установлены на «донорскую» Виндовс или Линукс, что исключает необходимость утомительной ее инсталляции и последующей настройки. Помимо этого, имеется возможность запуска гостевой ОС из раздела Boot Camp, о котором мы далее еще поговорим.

Ключевые достоинства этой виртуальной машины заключаются в полной совместимости файловых систем и предоставлении доступа к сетевым ресурсам. Нельзя не упомянуть и о таком приятном нюансе, как наличие общего буфера обмена, благодаря чему можно без проблем копировать и перемещать файлы между основной и гостевой ОС (в обоих направлениях). Программы, перенесенные из Windows-ПК в среду VMware Fusion, интегрируются со многими важными функциями macOS. То есть непосредственно из гостевой ОС можно обращаться к Spotlight, Expose, Mission Control и другим «яблочным» инструментам.

Все хорошо, но есть у данной виртуалки и один недостаток, который способен отпугнуть многих пользователей, — это довольно высокая стоимость лицензии. К счастью, имеется и бесплатная пробная версия, благодаря которой можно оценить все возможности системы виртуализации.
Parallels Desktop
Если упомянутая в начале статьи VirtualBox является в целом самой популярной виртуальной машиной, то эта наиболее востребована именно среди пользователей macOS. Разработчики Parallels Desktop тесно общаются с пользовательским сообществом, благодаря чему регулярно обновляют свой продукт, устраняя всевозможные баги, ошибки и добавляя все больше новых, ожидаемых функций. Данная виртуалка совместима со всеми версиями Windows, позволяет запускать и дистрибутивы Ubuntu. Примечательно, что ОС от Microsoft можно скачать прямо из интерфейса программы, а ее установка займет не более 20 минут.
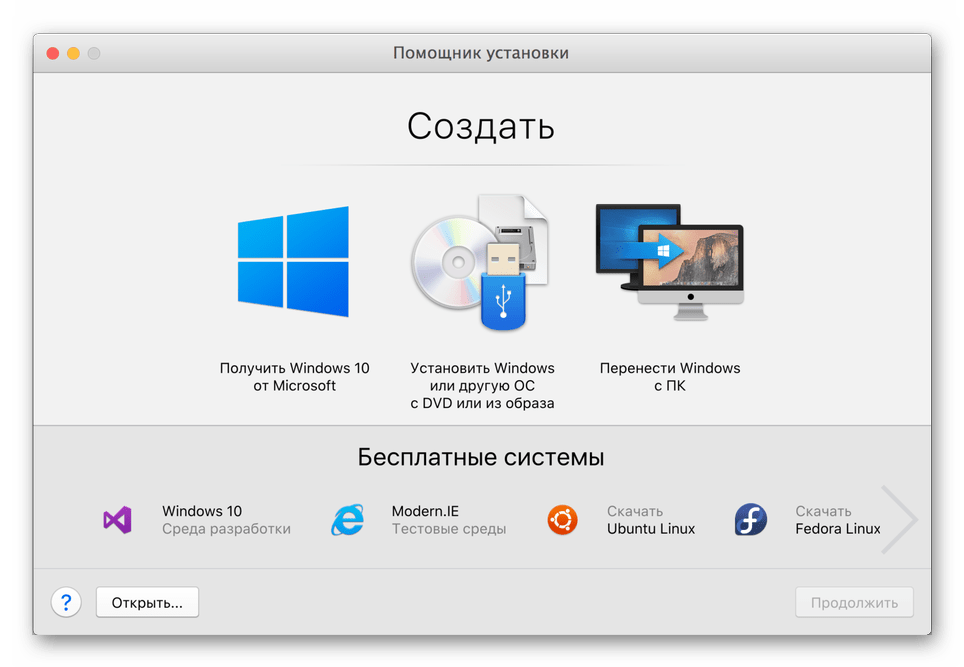
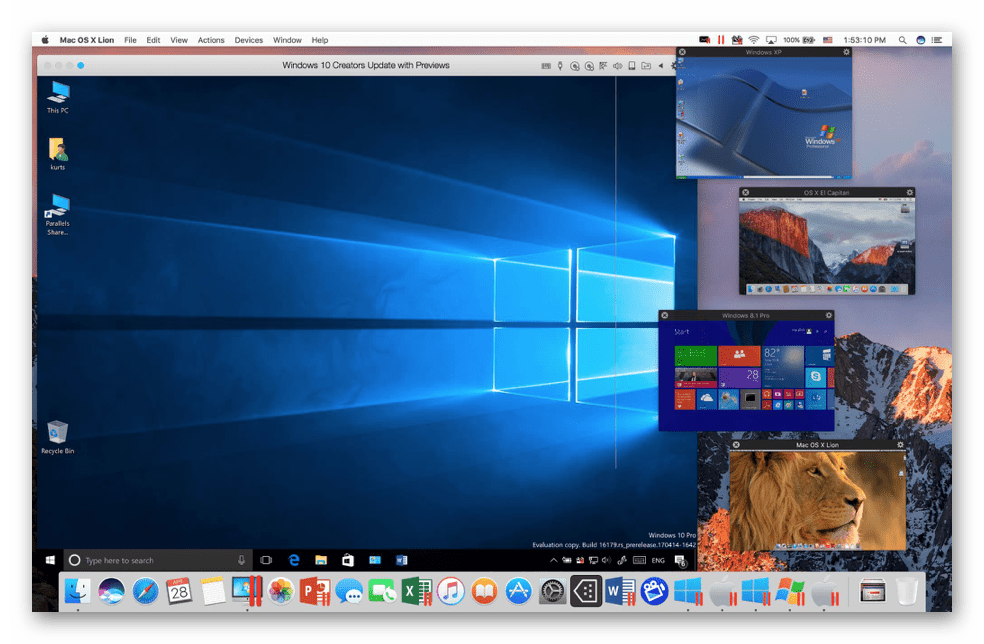
В Parallels Desktop присутствует полезный режим «картинка в картинке», благодаря которому каждую из виртуальных машин (да, их может быть больше одной) можно вывести в отдельное небольшое окошко и переключаться между ними. Оценят эту систему виртуализации и обладатели современных MacBook Pro, так как в ней реализована поддержка Touch Bar – сенсорной панели, пришедшей на смену функциональным клавишам. Ее можно легко настроить под себя, назначив на каждую из кнопок необходимую функцию или действие. Кроме того, для ленивых и тех, кто попросту не желает копаться в настройках, есть большой набор шаблонов, имеется и полезная возможность сохранения собственных профилей для тачбара в среде Windows.
Еще одно немаловажное достоинство этой виртуальной машины – наличие гибридного режима. Эта полезная функция позволяет использовать макОС и Виндовс параллельно, обращаясь к интерфейсу любой из них по необходимости. После активации данного режима обе системы будут отображаться на экране, а внутренние программы будут запускаться без оглядки на их тип и принадлежность. Как и VMware Fusion, Parallels Desktop позволяет запускать Windows, установленную посредством ассистента Boot Camp. Как и предыдущая виртуалка, эта распространяется на платной основе, правда, стоит немного дешевле.

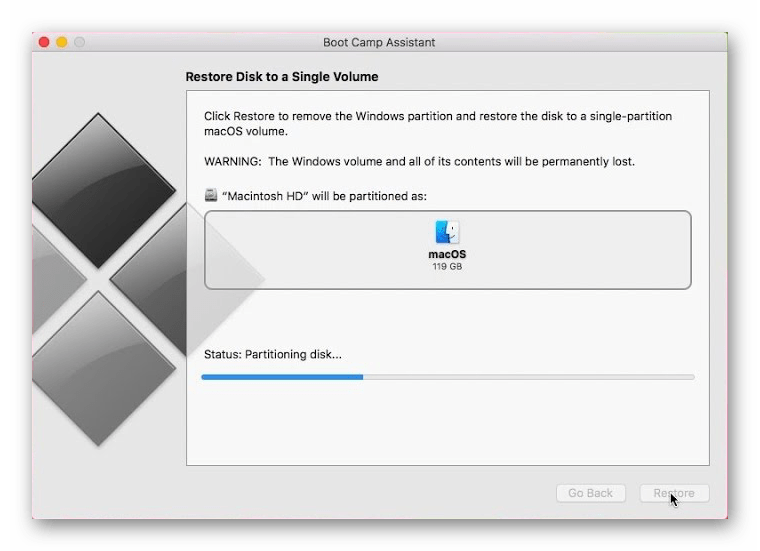
Boot Camp
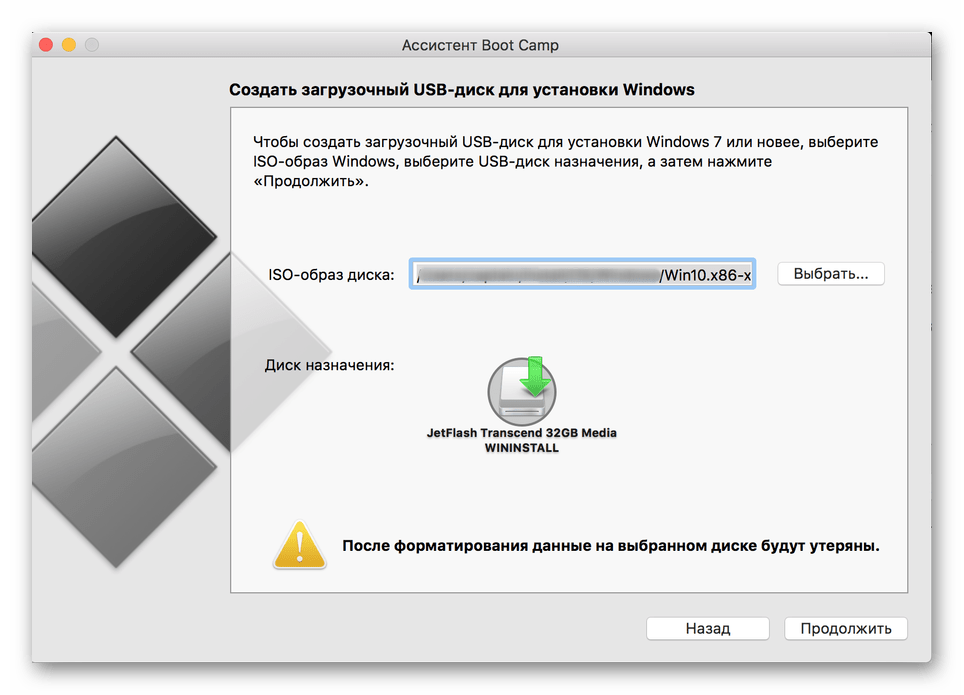
Несмотря на то, что разработчики Apple пытаются со всех сторон защитить и оградить своих пользователей от внешнего мира, целиком и полностью погружая их в собственную, замкнутую экосистему, даже они признают немалую востребованность Windows и потребность в ее наличии «под рукой». Ассистент Boot Camp, интегрированный во все актуальные версии macOS – прямое тому доказательство. Это своего рода аналог виртуальной машины, позволяющий установить полноценную Виндовс на Мак и в полной мере использовать все ее возможности, функции и инструменты.
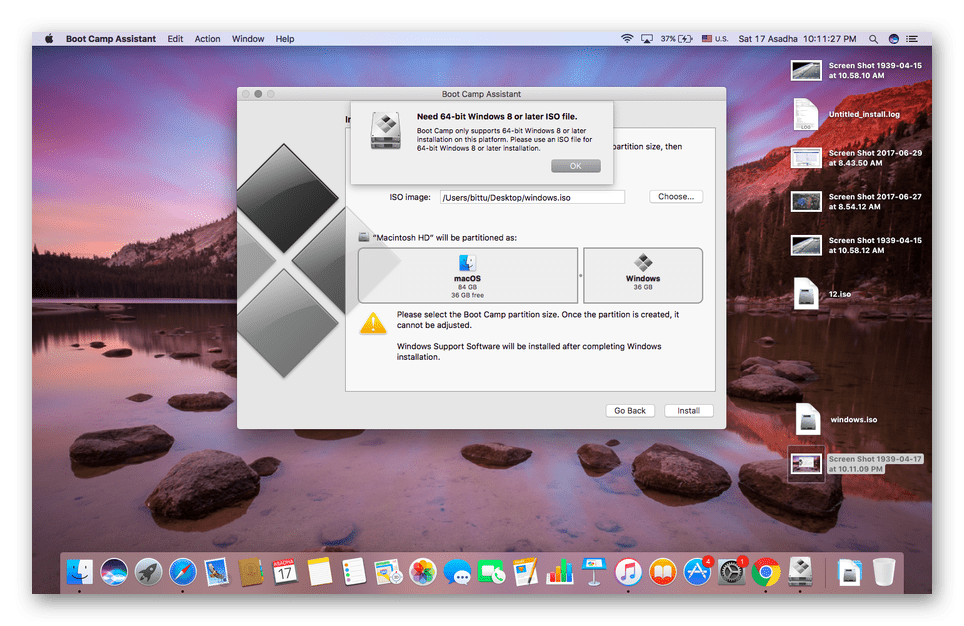
«Конкурентная» система устанавливается на отдельный дисковый раздел (потребуется 50 Гб свободного пространства), и из этого вытекают как достоинства, так и недостатки. С одной стороны, хорошо, что Виндовс будет работать независимо, используя необходимое ей количество ресурсов, с другой – для ее запуска, как и для возврата к macOS, потребуется каждый раз перезагружать систему. Рассмотренные в рамках данной статьи виртуальные машины в этом плане более удобны и практичны. К числу критических недостатков фирменной виртуалки от Apple стоит причислить и полное отсутствие интеграции с макОС. Windows, естественно, не поддерживает «яблочную» файловую систему, а потому, находясь в ее среде, невозможно получить доступ к файлам, сохраненным на Маке.
Однако, использование Виндовс через Boot Camp имеет и неоспоримые преимущества. В числе таковых высокая производительность, так как все доступные ресурсы расходуются на обслуживание исключительно одной ОС, а также полная совместимость, ведь это — полнофункциональная Windows, просто запущена она в «чужой» среде, на другом железе. К слову, Boot Camp позволяет устанавливать и Linux-дистрибутивы. В копилку достоинств данного ассистента обязательно следует причислить и то, что он полностью бесплатен, еще и встроен в ОС. Кажется, выбор более чем очевиден.
Заключение
В этой статье мы кратко рассмотрели наиболее популярные виртуальные машины для macOS. Какую из них выбрать, каждый пользователь должен решить сам, мы же просто предоставили ориентиры в виде достоинств и недостатков, уникальных особенностей и модели распространения. Надеемся, данный материал был полезен для вас.
Помимо этой статьи, на сайте еще 12315 инструкций.
Добавьте сайт Lumpics.ru в закладки (CTRL+D) и мы точно еще пригодимся вам.
Отблагодарите автора, поделитесь статьей в социальных сетях.
Источник
How to Install macOS on VirtualBox

Windows, macOS – which one do you want to use today? On a traditional setup, you’re stuck with one or the other. But with virtual box, you actually have macOS on a Windows PC.
It’s the freedom that computer users have enjoyed with Linux and other operating systems.
But Apple has made it difficult to install their operating system on anything other than their own hardware. All of that is changing, and Virtual Box is responsible for it and the rise of the Hackintosh.
New to hackintosh? Learn more about it in our what is hackintosh? overview.
Note: A lot of people will be able to get a mac virtual machine one Windows running smoothly, but sound doesn’t seem to work well. That’s really not an issue because you’ll still be able to access all of your apps and software.
I also recommend that you have access to a real Mac. You might be able to find some distributions of the High Sierra ISO online, but there is always a risk when downloading from an unofficial source. Instead, borrow a Mac from a friend, or use your own and download the High Sierra OS from the App Store.
Everything You Need to Get Started with Installing macOS on VirtualBox
Before we go through the steps on how to install macOS on Virtual Box, let’s get everything together that you’ll need to get started.
- Open up your Mac
- Go to the App Store
- Type in “High Sierra”
You’ll want to search for your desired operating system (we’ll be using High Sierra), and Download it.

Note: You’ll need a decent computer to be able to run Virtual Box. Your computer will need to meet these minimum requirements:
- Dual core processor
- 4GB Ram or higher
- 64-bit
If your computer doesn’t meet these requirements, you won’t be able to run macOS properly. You’ll be able to download VirtualBox from the official website. I’m not going to go through the installation process, as the website will have all of the information you need to be able to install VirtualBox.
I do recommend that you read all of the documentation and ask any questions that you have in the community section of the website.
VirtualBox 6.0 was just released, so it’s definitely a great time to get started with your own macOS.

Extract macOS Sierra
Make sure you’ve downloaded High Sierra, and then you’ll want to run a few commands from your terminal . You’ll be able to open the terminal at: Applications > Utilities > Terminal. Once inside of the terminal, you’ll want to run the following commands:
Go to your desktop and rename the file, removing the “.cdr” extension. You need this extension to read “.iso” for it to work properly.
You’ve successfully created your own ISO file so that you can bootup your macOS.
The next step is to copy the file over to your Windows machine (using a large USB drive seems to work best). This file will be mounted in your virtual machine later on in the article, so it’s very important that this step is completed successfully.
Creating a mac Virtual Machine on Windows
You’ll want to create a virtual machine, and this is really easy. You’ll open up VirtualBox and click New. You’ll want to have the following parameters selected or entered before clicking Next.
- Name: High Sierra
- Type: Mac OS X
- Version: Mac OS X (64-bit)
Pay attention when selecting the version because you may find that High Sierra is offered as a version when you go to install it. But if it’s not, you can just choose the settings I listed above and they should work fine.

You’ll then be proceeding through all of the settings.
When you come up to the RAM setting, you’ll want to be generous. VirtualBox requires a minimum of 4GB or RAM to run, but the more the better.

You’ll want to provide at least 4GB to your macOS, or 4096MB to be precise. A general rule of thumb is that if you can spare it, supply more RAM to your virtual machine. RAM will allow the operating system to put more information into memory and retrieve it faster.
For better overall performance, supply as much RAM as you can.
The next steps are also important, and they’ll include:
- Hard Disk: Choose the “Create a virtual hard disk now” setting.
- Choose VDI when choosing the hard disk type.
- Choose Fixed Size instead of Dynamic for added speed.
- Set the size of the drive to at least 25GB.
You’ll now have your virtual machine using the RAM and disk space properly, and you’ll have to work your way through a few screen prompts before having everything setup properly.

Configuring Your VirtualBox to Run macOS High Sierra
We’ve made a lot of progress so far, and now it’s time to configure your virtual machine properly. You’ll see in the main window of VirtualBox that “High Sierra” is listed. Click on this and then click on the “Settings” button.
You’ll want to go to “System” and make sure that the following are unchecked on the Motherboard tab:

Click on the Processor tab and make sure that you have 2 or more CPUs set for your virtual machine.

The next few settings are rather simple:
- Display: Video Memory with a minimum of 128MB
- Storage: Click “Empty” and then click on the CD at the top right. Choose your High Sierra ISO file
Now you’ll need to click “Ok,” and save all of the changes you’ve made. Close out your VirtualBox now.
Apple is very strict on the system that their operating system runs on, so it’s very important that you do your best to configure your virtual machine in such a way that it tricks the installer to thinking you’re on a retail machine.
We’ll now be going into the Windows command prompt.
You’ll do this by:
- Clicking the Start Menu
- Typing “Command Prompt”
- Right-clicking on the Command Prompt desktop app
- Choosing Run as administrator

It’s very important to follow all of the following command prompts exactly. Your goal is to run each command, one by one, hitting the Enter button and waiting for the command to complete successfully.
Remember that VirtualBox needs to be closed before running these commands, or it won’t work properly.
You have to make sure that the virtual machine is properly named “High Sierra” for this method to work. If not, you’ll be able to go back and make changes to the name to get everything to work properly.
Once all of the commands are completed, and there are no errors, you’ll then be able to open up your VirtualBox and get macOS High Sierra installed properly on VirtualBox.
It’s a long process, but we’re almost done with your installation.
Running VirtualBox and the macOS Installer
You’ve almost learned how to install macOS on VirtualBox entirely, and we’re on the home stretch. You’ll want to open up your VirtualBox and then click on your virtual machine that you set up earlier.
Now, click “Start.”
There will be a lot of information displayed on the screen as everything starts running. I recommend stepping away from the machine and letting it run for a few minutes before coming back. Some errors can hang for 5 minutes or longer.

If you’ve done everything properly, you can be confident that the installer will boot properly.
You’ll eventually be presented with the option to pick a Language. If you’ve reached this point, you’re doing very well and are almost ready to run your macOS.
The next steps can be followed:
- Choose your desired language, and click
- Click “Disk Utility” and then
- Click “View” and then “Show All Devices.”
- Click on your empty virtual drive that has been setup and click “Erase.”
- Choose the following settings:
- Name: Macintosh HD
- Format: Mac OS Extended (Journaled)
- Scheme: GUID Partition Map
- Click “Erase” and close Disk Utility when the process is complete.
- Click “Reinstall macOS.”
- Click “Continue.”
You’ll come up to one point where you’ll be asked to choose a hard drive, and you’ll want to select the Macintosh HD partition that you just created with the Disk Utility.
We’ve successfully copied all of the files on the virtual machine, but we’re not done just yet.
Exit your virtual machine and then go back to your virtual machine’s settings. You’ll need to change up your Storage settings. Click on your ISO for High Sierra in the “Storage Tree.” You’ll click that CD icon just like we did earlier and then choose “Remove Disk from Virtual Disk.”
You need to do this to unlink the ISO from your virtual machine.
Start up your virtual machine and you should come across a black screen with the EFI Internal Shell. You’ll want to look for FS1. If this is listed in yellow, click on the virtual machine and then type fs1: and hit the Enter button.
You should be in the fs1 directory.
Type in the following commands:
- cd “macOS Install Data”
- cd “Locked Files”
- cd “Boot Files”
Now we’ll run the installer by running: boot.efi and hitting enter.
If everything goes well, you’ll come across a graphical installer and will just have to work through the prompts. The virtual machine will reboot eventually and then you’ll need to go through the settings and the rest of the setup process.
Soon enough, you’ll be right inside of macOS, where you’ll be able to start using your mac virtual machine on Windows.
Having a virtualbox mac OS is the easiest method of using mac as and when you need it. In addition, using virtualbox is far less complicated than the dual boot hackintosh method we have looked at previously.
About The Author
David Ingram
David has been interested in computers for over 25 years. From playing games on his parents computer as a kid in the early 90s, to building his first PC in 2003 (and many more since then). He has a passion for everything related to computing and this site is dedicated to helping others find the info they need.
Источник


