- How to install MacOS into Xiaomi notebook Pro? Make Xiaomi Pro become MacBook
- Recautions before installation
- Xiaomi Mi Notebook Pro 15.6 inch — Dark Gray 256GB SSD
- Installation instructions
- Step 1: Update the BIOS and firmware
- Step 2: BIOS settings, system partition and WIN10 installation
- Step 3: System boot settings, MacOS Installation
- Summary
- Xiaomi Mi Notebook Pro как основной инструмент веб-разработчика (глазами маковода)
- Введение
- Китайская новинка
- Распаковка
- Включение
- Адаптация
How to install MacOS into Xiaomi notebook Pro? Make Xiaomi Pro become MacBook
By Adan Flannigan 2019-07-07 3493 0
Recautions before installation
● My notebook is the first generation (16 GB) of Xiaomi Pro. If your pro is the same to me, the success rate should be 100%. If you are the latest Pro, there are some issues with upgrading the SSD, but it can be fixed.
● Based on the standard configuration hardware, I bought a 1 TB SSD solid state drive for expansion. Therefore my tutorial is to install WIN10 and Apple’s current system Mojave 10.14.1 on two hard disks.
● The main reason for installing dual systems with two hard drives is that the original standard capacity of 256GB SSD is too low and the success rate is relatively high.
● You can only install the MacOS without Win10, but this is not recommended. Because Microsoft’s Windows system is the most commonly used system, and it is also a system that protects data relatively securely.
● Currently problems that cannot be solved are that the SD card reader cannot be used, that Wi-Fi cannot be used, and that the discrete graphics card cannot be used. For light games, the effect is not great. Even under WIN10, it’s often a nuclear plant, and you definitely don’t buy this price for Xiaomi Pro for the game or the main office.
● There is a problem with using Bluetooth . If it’s good or bad, you really need to be able to buy USB Bluetooth.
● The touchpad is absolutely sufficient for normal users and supports two and three fingers. It’s not as perfect as a native apple. If you are not an old driver of an Apple notebook, you will not spit out the touchpad.
● In this tutorial, WIN10 and MacOS are reinstalled from scratch. So make a backup of your own files. Xiaomi Pro only has a 256GB hard drive, so you can easily create a 1TB mobile hard drive!
Xiaomi Mi Notebook Pro 15.6 inch — Dark Gray 256GB SSD
Installation instructions
Step 1: Update the BIOS and firmware
The system BIOS and firmware versions are located on the bottom of the Apple system and WIN10. Upgrading to the latest version improves Black Apple’s compatibility and reduces the number of related issues.
● Update the BIOS
1. Insert and format the USB flash drive, focusing on the formatted file system and selecting FAT32 . Open the «1.BIOS Upgrade» folder, copy all the files in the «Firmware v0603» folder, and paste them onto the currently formatted U-disk.
- Restart the Xiaomi Pro, but the screen turns black. If you want to perform the restart, press the » F12 » key on the keyboard to call up the user interface for the start order setting. You can find the name of your USB drive in the EFI Start Devices section. For example, my USB flash drive is Kingston. I select the last Kingston option and press Enter.
- Enter the input command interface, enter unlockme.nsh, and press Enter. When the computer restarts, repeat last step to invoke the command interface of (3), continue typing flash.nsh, and wait patiently for the upgrade to complete.
1. Open the folder «2nd Firmware Upgrade», rename the folder «ME» to «Win64», copy it and paste it into the drive C (WIN10 system diskette).
- Click O (Xiao Na) on the right side of the Start button in the lower left corner of the screen, type Powershell in the search box, right-click Windows PowerShell, and select Run as administrator when a dialog box appears Yes
- A command prompt window will appear at this point : Type » cd C: \ Win64″ and press Enter. Then type » \ FWUpdLcl64.exe -F ME.bin» and press Enter. Wait patiently for the upgrade to complete and restart your computer.
Step 2: BIOS settings, system partition and WIN10 installation
This section mainly explains the settings in the BIOS setup interface of Xiaomi Pro to avoid later installation errors and to change the size of the critical partition when installing WIN10.
1. In the » WIN10 System Installation File», which contains the latest version of the official WIN10 version I used, the download address from the official Microsoft website is absolutely secure. Because Xiaomi Pro supports the true Home Edition by default, there is no need to download a cracked third-party version system that contains advertisements and viruses.
- Find a U-disk with a capacity of at least 8 GB, insert the Xiaomi Pro, format it, and select FAT32 in the format. Double-click to open the downloaded WIN10 installation image, copy all files and folders, and paste them to the currently formatted U-disk. Restart Xiaomi Pro when you’re done.
- If the screen turns black and a reboot is expected, press «F2» on the keyboard to enter the BIOS settings. Customize the options by pressing up, down, left, and right, and pressing Enter to confirm and select. Press ese to end and return to the operation. First select Security on the left, select Set Supervisor Password, enter the password under Enter New Password, and then enter the password again under Enter New Password.
Continue to select the Safe Start Mode option in the Security category, set it to Disable, and then disable the Security mode. Finally, press F10 to save and exit your previous settings.
● System partition and WIN10 installation
1. Restart the computer and keep pressing » F12 » to enter the Start Selection Menu, select the USB flash drive where you insert the WIN10 installation file, and boot from the USB flash drive.
- Enter the WIN10 installation program, the general point is always the next step, the installation version is recommended to use the home version, the «upgrade system» and » Custom: Install Windows Only «, select the latter. Remind me that you need to back up your computer data to the mobile hard drive! When the following interface appears, select the drive one by one and click Delete to delete all drives. After the deletion is complete, there are only 2 unassigned drives left that correspond to your two SSDs.
- At this point, we differentiate between your two SSD hard drives according to the size of their capacity. Select the hard disk on which WIN10 is to be installed. If you are a first generation Xiaomi Pro, just choose it. If you are a new Xiaomi Pro, it is recommended to select 256 GB as WIN10. Installation diskette.
- Select , we click new, you see a drive rotated into four partitions, then we use the delete step 6, and delete the primary partition, MSR — partition and system stream three partitions, Restore » partitions . «
- Then press three keys «Shift + Fn + F10», the command box open, the first input disk part, carriage return, then list disk one, a carriage return is displayed here three disks each refer to two SSD solid state drive and a U hard disk for installation, you can identify which hard disk is the disk you want to install WIN on capacity.
- Continue to enter selection disk 0 and press Enter. Note that the number after the disk space is the disk number to install. If you need to install Disk 1, enter Selection Disk 1. Then enter create partition efi size = 300 and press Enter. Enter the format quick fs = fat32 and press Enter. Type exit and press Enter to exit cmd.
- Return to the partition interface and click Update. You can see the system partition you just created. At this point, we click the unallocated disk under the system partition, click New, and the prompt box appears. At this point, you can see that you have added another MSR partition. If the main partition consists of a total of four partitions, click Next. Enter WIN10 installation, basically the next step, set as needed, no difficulty, here is not exhaustive, if there is none, you can get the installation video tutorial.
Step 3: System boot settings, MacOS Installation
Once the WIN10 installation is complete, we need to add a new boot loader to facilitate the installation and startup of the Apple system. Then use WIN10 to install the U-disk to create the Apple Installation U-disk and install it. To create an Apple installation diskette, you must use the installation image, and to ensure that the installation is successful, you must use the installation image I specified as the download address to avoid errors.
● Production of the MacOS installation diskette
1. First we format the U-plate. Then open the «5th Apple System Disk Tools» folder, open the «Etcher» folder and double-click «Etcher.exe» to install the disk tool.
- After successful installation, the software will open automatically, if not, you can open the software by clicking the etcher icon on the desktop. Click on «Selection Image» and select the downloaded Apple installation image. In the middle of the software there is an icon that you can use to select on which U-Disk the image should be installed. If you insert only one U-disk into your Xiaomi Pro, the software automatically detects it without you having to change the manual to select the U-disk. Finally, click Flash to create a disc. Close immediately after the end of the disc. If the system jumps out of a command prompt to format the partition, close directly, you cannot select the formatting!
● System start settings
1. Open the «6th Partition Software» folder, open the «DiskGenius» folder and double-click to open the DiskGenius software. On the left side of the software there is a hard disk partition. Double-click to select the ESP of the hard disk where your WIN10 is located. Note that ESP has two hard drives, one belonging to Win10 and the other to the Apple Installation U hard drive. We have chosen the double click of WIN10 to open. After successful opening, an EFI folder is displayed. Then we open the «7.EFI file», copy the folder of the «EFI» name, switch back to the DiskGenius software, press Ctrl + V on the EFI under the ESP hard disk, paste and merge it, replace it.
- Open the BOOTICE.exe software in the folder «8. System Boot Correction Software», select the WIN10 installation diskette on the target diskette and click on Partition Management.
- In the pop-up window, select ESP, then click the assigned drive letter. Close again and return to the previous window.
- Return to the previous window, click UEFI, and then click to change the start order.
- In the pop-up window, click Add to find the newly created hard disk partition (300 MB capacity). Click on the EFI folder, click on the CLOVER folder, click on the CLOVERX64.efi file and open it. In the menu title we feel like CLOVER, start the hard disk here to select the hard disk where WIN10 is located, start the partition to select the partition with a capacity of 300 MB, and finally click on to save the current settings for the start item. Click the OK dialog box. At this point you can see the word CLOVER in the field on the left, select it, click the Move button, move it up and close the software.
1. Restart the computer. A start interface is displayed as shown below. Select the Microsoft flag, enter the WIN10 system, select the Apple tag, and enter the Apple system installation. Then I enter the Apple Logo reading interface.
- After reading the article, go to the Apple installation interface. You see the words of the macOS utility. At this point, do not click on to install macOS, but on the last disk tool.
- Then we can find the unused SSD solid state drive on the left side, select it, click the delete button above the disk tool, the name is the name of the entered Apple system disk, you may like me as you type «AppleOSPartation», format «Mac OS extension (protocol)», select the GUID partition mapping, click to delete and then exit the hard disk tool.
- Back to the macOS utility page, we decided to install macOS. The following figure shows the choice of hard disk installation: We have named the Apple installation disk as AppleOSPartation so that you can select it in this step. The other two shades of grey are the U hard disk and the WIN10 system In (3) there is no erasing process. In this step, the displayed hard disk is gray and cannot be selected.
- After restarting the installation system, WIN10 is called directly, since the system boot order is reset to WIN10 priority start by default. Simply follow the previous steps, use the BOOTICE.exe software, and move the CLOVER order to First place, Restart.
- After restarting, you will see the three Microsoft Apple icons. In this case, you must click on the Apple icon below, which is described as «Boot macOS Install from AppleOSPartation». Do not make a mistake, you will enter the wrong installation interface. A little wrong, you can restart, don’t worry. Then the read interface of the Apple logo is called and the read time becomes longer. The main reason is copying the files on the U-disk to the SSD solid state hard disk, which requires patience and so on. After you have read the article, it will restart and return to the two Microsoft Apple selection interfaces. At this point, select the Apple icon for » Boot MacOS from AppleOSPartation » and enter the final installation steps of the installation system.
- After that, you’ll essentially need to complete a few setup steps before you can access the Apple system. This is just like WIN10 very simple. Even if you are installing it for the first time, you can follow the Chinese prompt step by step. Just a few important steps to explain them briefly. You can refer to the video tutorial for the specific installation process.
- The following figure shows the network setting. Since our WLAN is not globally solvable, you must purchase additional USB WLAN to use the WLAN. You must install the driver when you purchase it in order for the network to access the system. After installing the driver, connect and set it up.
Summary
The installation of MacOS is quite complicated. You need to find a crack method. It’s a very difficult process, but since this tutorial is only fixed between the Xiaomi Notebook Pro. The difference is not great. As long as you follow the tutorial step by step, there will be no installation error. As for other models of Xiaomi notebooks, I think they are all under Xiaomi. There are many similarities in the hardware. This tutorial may also be applicable, but there are not so many Xiaomi notebooks to test.
Источник
Xiaomi Mi Notebook Pro как основной инструмент веб-разработчика (глазами маковода)

В данной статье я надеюсь, что не затрону чувства верующих в обычные ноутбуки и Windows, а также тех людей, которым ноутбук нужен чисто ради серфинга в интернете и хранения фотографий. Я буду рассматривать этот ноутбук в качестве основного рабочего инструмента для веб-разработчика.
Введение
С 2011 года в качестве основной операционной системы я использую Mac OS и за это время сильно привык к ней, а благодаря девайсам iPhone, Apple Watch и Apple TV окончательно интегрировался и слезть с этой “иглы” для меня будет тяжело, но к счастью, мне это и не нужно!
У нас в компании, мы давно для себя решили, что будем использовать яблочные компьютеры, так как был плохой опыт с обычными ПК. Мы всегда старались сделать рабочее место для сотрудников максимально удобным: большие мониторы, хорошие столы и стулья.
Мы перепробовали большое количество вариаций рабочих мест: mac mini + 2 монитора, iMac + монитор, macbook + 2 или 1 монитор, но в последнее время мы поняли, что самый лучший вариант, это личный стол, ноутбук и мониторы, плюс в офисе много диванов и кресел, где люди могут работать, если им по какой-то причине надоест за своим рабочим местом.

Человек может взять ноут и работать там, где ему комфортно. Поэтому ноутбук должен быть не только мощным, но удобным, компактным, легким и достаточно долго держать батарею. Именно поэтому большинство обычных ноутбуков нам и не подходило, они все толстые, уродливые, тяжелые, пластмассовые, шумные.
После того, как ты однажды поработал на MacBook, остальные ноутбуки будут казаться тебе унылым говном.
Китайская новинка
Этой осенью я увидел китайскую новинку, 15 дюймовый Xiaomi Mi Notebook Pro и он показался мне довольно неплохим, даже можно сказать лучшим среди не macbook-ов. Отличное сочетание цена-качество.
| Процессор | Core i7 восьмого поколения |
| Объем жесткого диска | 256GB SSD |
| Оперативная память | 16GB |
Плюс машина имеет все необходимые порты, включая USB-C. Все это за
75 тысяч рублей, MacBook с похожими характеристиками будет стоить
150 тысяч рублей.
Недавно я решил попробовать его вживую и понять, насколько он удобен и жизнеспособен для работы веб-разработчика.
Распаковка
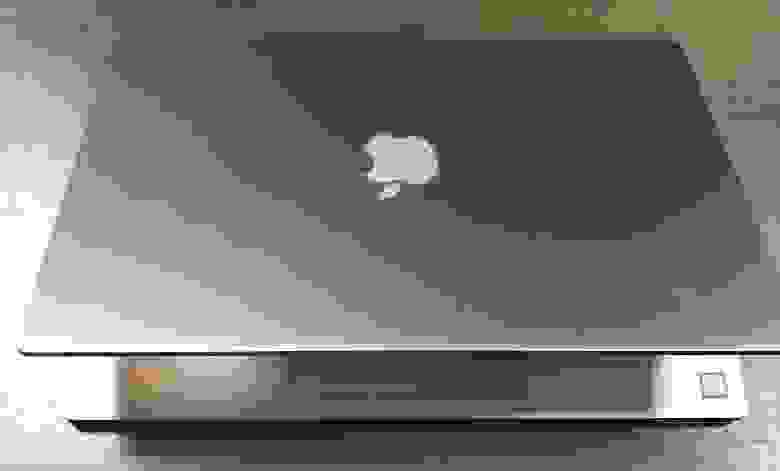
В назначенный день я получил посылку. Как только увидел коробку, мне сразу вспомнились бренды Abibas, Nkie, Pamu, которые издалека похожи на оригинал, а вблизи ты понимаешь, что тебя обманули. В очередной раз убедился – китайцы короли подделок. Хоть Xiaomi и не подделка бренда Apple, и они сделали свой собственный ноутбук, но при этом позаимствовали все, что только можно, и с одной стороны это даже неплохо, раз сделать лучше не могут.


Китайцы даже упаковку продукта и комплектующие сделали такие же, но открывать MacBook приятней, поскольку всё, даже пленка, намного выше качества, а устройство имеет уникальный запах нового девайса.

Наконец наклейка с MacBook оказалась полезной
Включение
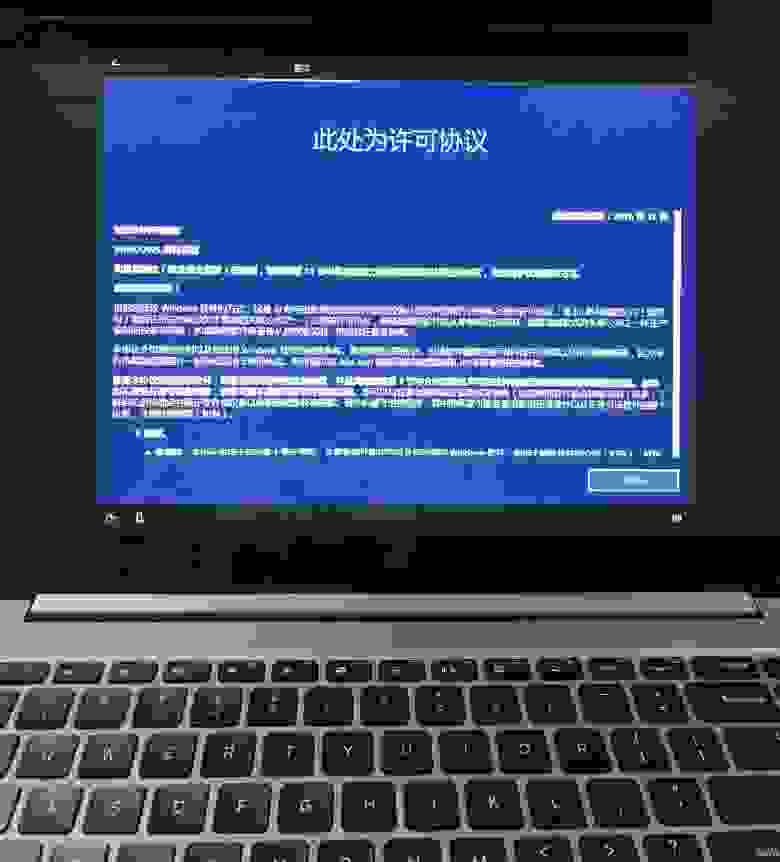
После включения ноутбука начался запуск предустановленной китайской Windows. Это еще тот квест, выбрать английский язык и настроить конфигурации, пришлось пользоваться Google переводчиком с дополненной реальностью. Язык так и не поменял, зато повеселился вдоволь.
Windows попользовался меньше часа, но мне этого хватило, чтобы понять, что даже с этой ОС компьютер работает довольно шустро, но я не представляю, как современному разработчику работать на этой системе, поэтому по-быстренькому поставил Ubuntu 17.10.

Ubuntu поставилась, как говорится, с пол пинка, нашлись все драйвера и устройства, bluetooth, wifi – все заработало из коробки, а вот отпечаток пальца у меня завести так и не удалось. Считаю, что это небольшая проблема и на задачи, для которых ноутбук предназначался, это никак не влияло.
Да, возможно многие скажут, что можно прекрасно работать на Windows, и я спорить не буду, но лично мне кажется, что работать без нормальной консоли – ад. Если front-end разработчику еще более менее нормально работать на винде, то back-end разработчику – нет.
Я поставил все, что мне было необходимо для работы, и решил отложить свой Macbook в сторонку на неделю и полностью погрузиться в работу, используя только Xiaomi Mi Notebook Pro.
Я старался выполнять разные типы задач, старался работать как за столом, так и на диванах, общался по скайпу, писал и ревьювил код, писал тексты, собирал билды, работал с docker, работал с графикой, чтобы максимально протестировать устройство в реальной работе.
Адаптация
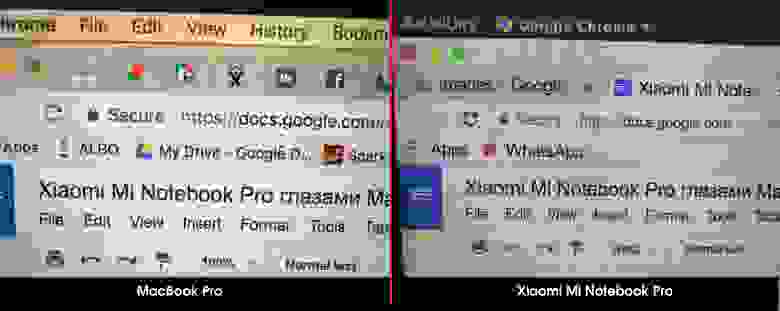
Первое что бросилось в глаза – монитор, я привык к ретине, а на этом ноутбуке мне казалось, что я вижу каждый пиксель, хотя экран и цветопередача действительно хорошие, через день я уже привык и сильно не замечал этот недостаток, ну и большую часть времени я работал за монитором Dell U3415W 34″ и этот недостаток вообще не замечается.
Видно, что ребята старались сделать хорошо, но возможно им не хватило данных, корпоративный шпионаж плохо работал или просто у них работали люди-снежинки, у которых руки из жопы растут.

Может я придирчив и привык использовать force touch, но привыкал к тачпаду я долго и до конца так и не привык. В Xiaomi до сих пор используют механический тачпад, левая кнопка мыши слева внизу, а правая соответственно справа внизу.
Двухпальцевая прокрутка работает хорошо, отзывчивость и движение мыши немного туповатое, но в использовании приемлемо и быстро привыкаешь.
Клавиатура у ноутбука мягкая, тихая и набирать тексты очень приятно. Сложно мне было привыкать к некоторым быстрым клавишам, например ctrl+c, на Macbook это cmd+c, и нажимается большим пальцем, а не мизинцем как ctrl, а все остальное у меня получилось настроить, как я привык.

Клавиатуру полностью сперли с MacBook прошлого поколения, поэтому привыкал я довольно быстро, хотя все равно пришлось привыкать, так как за полтора года я уже привык к новой клавиатуре “бабочка” с маленьким ходом.
Нет русских букв, но лично я это даже не сразу заметил, так как набираю текст слепой печатью.
Заряд держит довольно долго, я не засекал по времени, но по ощущениям не меньше, чем мой Macbook, и заряжается очень быстро.
Зарядное устройство в комплекте с китайской вилкой, поэтому заранее подумайте о переходниках или можете использовать зарядку от Macbook как я.

Работа с ноутбуком
Ноутбук практически бесшумный, как и Macbook Pro, начинает сильно шуметь, когда занят чем-то очень важным трудоемким, например, собирает билд.
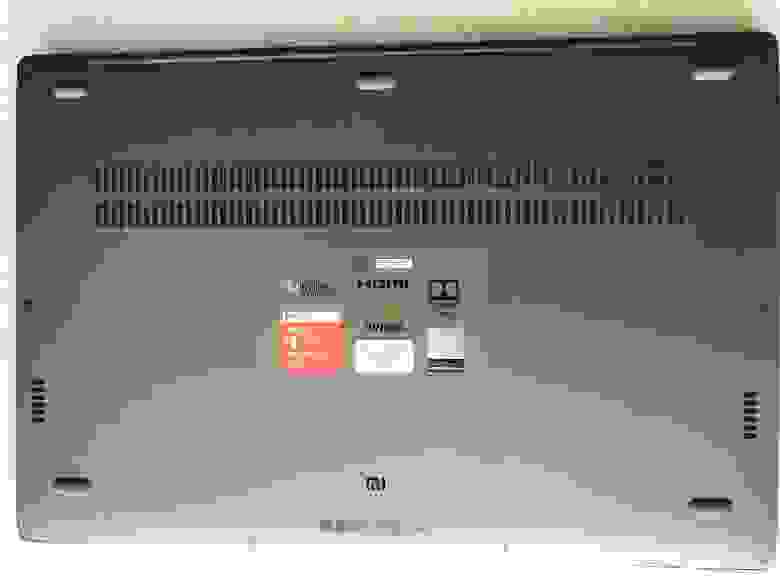
Немного странное расположение охлаждающих вентиляторов, если будешь играть на коленях, то наверняка их обожжешь 🙂
Габариты ноутбука вполне удобные для мобильной работы (работы не за столом), вполне удобно работать с ним в кресле на коленях или стоя за высоким столом.
Есть проблема, которую не понял, как решить, но возможно как-то можно. Закрывая крышку, при подключенном мониторе, клавиатуре и мыши, даже со включенным питанием, монитор тоже гаснет. То есть нельзя работать с ноутбуком при закрытой крышке.
Так как на ноутбуке стоит не MacOS, то мне пришлось искать альтернативы или привыкать к новым программам. Изначально мне было очень неудобно, но за неделю я иногда ловил себя на мысли, что я без проблем выполняю задачи и даже забываю, что работаю не за своим любимым MacBook Pro.
По работе с кодом и текстами у меня проблем практически не было, так как большинство программ, которые я использую кроссплатформенные или в браузере, а работа с консолью практически идентичная. Код пишу в редакторе VS Code, для текстов, в основном использую Google Docs или Notes, как раз его мне не хватало на Ubuntu, так как иногда пишу с телефона или планшета и очень привык к синхронизации.
Приложения для общения: Telegram, Slack, Whatsapp все прекрасно работает на Ubuntu. Единственное меня немного напрягало, что кнопка закрытия окна, действительно закрывает приложение, а не сворачивает его в трей, как делает MacOS, и это меня иногда подводило.
Календарь и Trello, которые я повседневно использую, тоже прекрасно работают на этой системе. Тут проблем тоже не было.
Единственное, с чем есть проблемы, так это с графическими редакторами. Front-end разработчику в этом плане будет потяжелей, например, нет любимого Sketch, но благо сегодня есть браузерный Figma (хоть он и не дотягивает до Sketch, но работать вполне себе можно), ну и придется больше сдружиться с Zeplin.
Источник


