- Get started with the macOS client
- Get the Remote Desktop client
- What about the Mac beta client?
- Add a workspace
- Export and import connections
- Add a remote resource
- Connect to an RD Gateway to access internal assets
- Manage your user accounts
- Customize your display resolution
- Displays have separate spaces
- Drive redirection for remote resources
- Use a keyboard in a remote session
- Support for Remote Desktop gateway pluggable authentication and authorization
- Remotely Access a Mac from a Windows PC
- Remote Access a Mac from Windows
Get started with the macOS client
Applies To: Windows 10, Windows 8.1, Windows Server 2012 R2, Windows Server 2016
You can use the Remote Desktop client for Mac to work with Windows apps, resources, and desktops from your Mac computer. Use the following information to get started — and check out the FAQ if you have questions.
- Curious about the new releases for the macOS client? Check out What’s new for Remote Desktop on Mac?
- The Mac client runs on computers running macOS 10.10 and newer.
- The information in this article applies primarily to the full version of the Mac client — the version available in the Mac AppStore. Test-drive new features by downloading our preview app here: beta client release notes.
Get the Remote Desktop client
Follow these steps to get started with Remote Desktop on your Mac:
- Download the Microsoft Remote Desktop client from the Mac App Store.
- Set up your PC to accept remote connections. (If you skip this step, you can’t connect to your PC.)
- Add a Remote Desktop connection or a remote resource. You use a connection to connect directly to a Windows PC and a remote resource to use a RemoteApp program, session-based desktop, or a virtual desktop published on-premises using RemoteApp and Desktop Connections. This feature is typically available in corporate environments.
What about the Mac beta client?
We’re testing new features on our preview channel on AppCenter. Want to check it out? Go to Microsoft Remote Desktop for Mac and select Download. You don’t need to create an account or sign into AppCenter to download the beta client.
If you already have the client, you can check for updates to ensure you have the latest version. In the beta client, select Microsoft Remote Desktop Beta at the top, and then select Check for updates.
Add a workspace
Subscribe to the feed your admin gave you to get the list of managed resources available to you on your macOS device.
To subscribe to a feed:
- Select Add feed on the main page to connect to the service and retrieve your resources.
- Enter the feed URL. This can be a URL or email address:
- This URL is usually a Windows Virtual Desktop URL. Which one you use depends on which version of Windows Virtual Desktop you’re using.
- For Windows Virtual Desktop (classic), use https://rdweb.wvd.microsoft.com/api/feeddiscovery/webfeeddiscovery.aspx .
- For Windows Virtual Desktop, use https://rdweb.wvd.microsoft.com/api/arm/feeddiscovery .
- To use email, enter your email address. This tells the client to search for a URL associated with your email address if your admin configured the server that way.
- This URL is usually a Windows Virtual Desktop URL. Which one you use depends on which version of Windows Virtual Desktop you’re using.
- Select Subscribe.
- Sign in with your user account when prompted.
After you’ve signed in, you should see a list of available resources.
Once you’ve subscribed to a feed, the feed’s content will update automatically on a regular basis. Resources may be added, changed, or removed based on changes made by your administrator.
Export and import connections
You can export a remote desktop connection definition and use it on a different device. Remote desktops are saved in separate RDP files.
To export an RDP file:
- In the Connection Center, right-click the remote desktop.
- Select Export.
- Browse to the location where you want to save the remote desktop RDP file.
- Select OK.
To import an RDP file:
- In the menu bar, select File >Import.
- Browse to the RDP file.
- Select Open.
Add a remote resource
Remote resources are RemoteApp programs, session-based desktops, and virtual desktops published using RemoteApp and Desktop Connections.
- The URL displays the link to the RD Web Access server that gives you access to RemoteApp and Desktop Connections.
- The configured RemoteApp and Desktop Connections are listed.
To add a remote resource:
- In the Connection Center select +, and then select Add Remote Resources.
- Enter information for the remote resource:
- Feed URL — The URL of the RD Web Access server. You can also enter your corporate email account in this field – this tells the client to search for the RD Web Access Server associated with your email address.
- User name — The user name to use for the RD Web Access server you are connecting to.
- Password — The password to use for the RD Web Access server you are connecting to.
- Select Save.
The remote resources will be displayed in the Connection Center.
Connect to an RD Gateway to access internal assets
A Remote Desktop Gateway (RD Gateway) lets you connect to a remote computer on a corporate network from anywhere on the Internet. You can create and manage your gateways in the preferences of the app or while setting up a new desktop connection.
To set up a new gateway in preferences:
- In the Connection Center, select Preferences > Gateways.
- Select the + button at the bottom of the table Enter the following information:
- Server name – The name of the computer you want to use as a gateway. This can be a Windows computer name, an Internet domain name, or an IP address. You can also add port information to the server name (for example: RDGateway:443 or 10.0.0.1:443).
- User name — The user name and password to be used for the Remote Desktop gateway you are connecting to. You can also select Use connection credentials to use the same user name and password as those used for the remote desktop connection.
Manage your user accounts
When you connect to a desktop or remote resources, you can save the user accounts to select from again. You can manage your user accounts by using the Remote Desktop client.
To create a new user account:
- In the Connection Center, select Settings >Accounts.
- Select Add User Account.
- Enter the following information:
- User Name — The name of the user to save for use with a remote connection. You can enter the user name in any of the following formats: user_name, domain\user_name, or user_name@domain.com.
- Password — The password for the user you specified. Every user account that you want to save to use for remote connections needs to have a password associated with it.
- Friendly Name — If you are using the same user account with different passwords, set a friendly name to distinguish those user accounts.
- Select Save, then select Settings.
Customize your display resolution
You can specify the display resolution for the remote desktop session.
- In the Connection Center, select Preferences.
- Select Resolution.
- Select +.
- Enter a resolution height and width, and then select OK.
To delete the resolution, select it, and then select —.
Displays have separate spaces
If you’re running Mac OS X 10.9 and have disabled Displays have separate spaces in Mavericks (System Preferences > Mission Control), you need to configure this setting in the Remote Desktop client using the same option.
Drive redirection for remote resources
Drive redirection is supported for remote resources, so that you can save files created with a remote application locally to your Mac. The redirected folder is always your home directory displayed as a network drive in the remote session.
In order to use this feature, the administrator needs to set the appropriate settings on the server.
Use a keyboard in a remote session
Mac keyboard layouts differ from the Windows keyboard layouts.
- The Command key on the Mac keyboard equals the Windows key.
- To perform actions that use the Command button on the Mac, you will need to use the control button in Windows (for example Copy = Ctrl+C).
- The function keys can be activated in the session by pressing additionally the FN key (for example, FN+F1).
- The Alt key to the right of the space bar on the Mac keyboard equals the Alt Gr/right Alt key in Windows.
By default, the remote session will use the same keyboard locale as the OS you’re running the client on. (If your Mac is running an en-us OS, that will be used for the remote sessions as well.) If the OS keyboard locale is not used, check the keyboard setting on the remote PC and change it manually. See the Remote Desktop Client FAQ for more information about keyboards and locales.
Support for Remote Desktop gateway pluggable authentication and authorization
Windows Server 2012 R2 introduced support for a new authentication method, Remote Desktop Gateway pluggable authentication and authorization, which provides more flexibility for custom authentication routines. You can now try this authentication model with the Mac client.
Custom authentication and authorization models before Windows 8.1 aren’t supported, although the article above discusses them.
To learn more about this feature, check out https://aka.ms/paa-sample.
Questions and comments are always welcome. However, please do NOT post a request for troubleshooting help by using the comment feature at the end of this article. Instead, go to the Remote Desktop client forum and start a new thread. Have a feature suggestion? Tell us in the client user voice forum.
Remotely Access a Mac from a Windows PC


If you have a network environment with both Windows and Mac OS X, there will be times you need to connect to the Mac from Windows.
Note: In this example, I’m connecting a Windows 7 system to my Mac running OS X Lion over my home network.
Remote Access a Mac from Windows
First, download and install the most recent stable version of the free utility TightVNC to your Windows computer.
During installation, uncheck TightVNC Server, unless you’re going to use it for other remote access situations. For connecting your Windows system to a Mac, the server isn’t required. 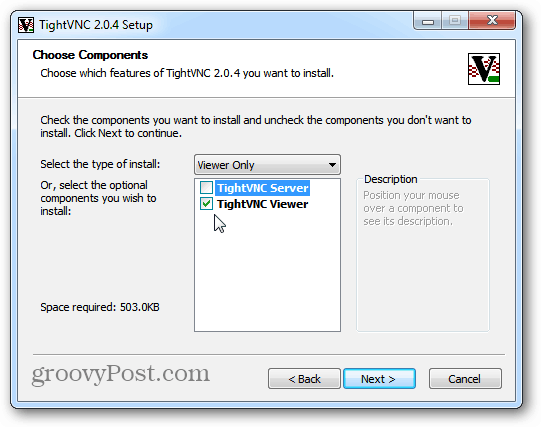
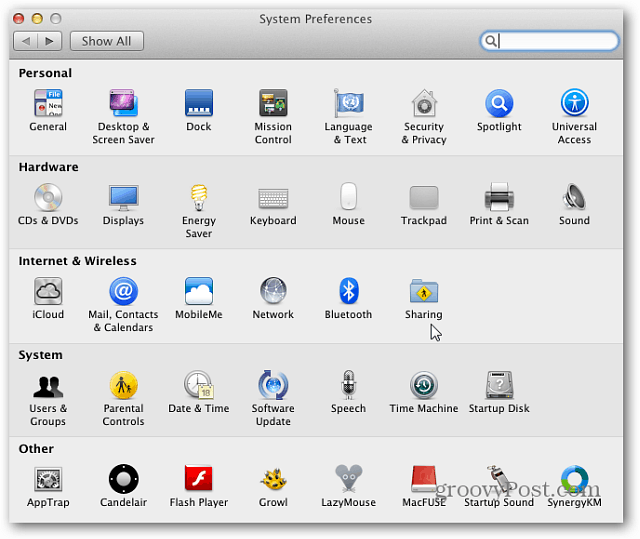
On your Mac, click the Apple icon and select System Preferences.

System Preferences opens. Click Sharing under Internet & Wireless.
Now, in the Sharing window check Screen Sharing. Then click the Computer Settings button. Note the IP address is shown above the Computer Settings button. You’ll need it to connect with TightVNC.
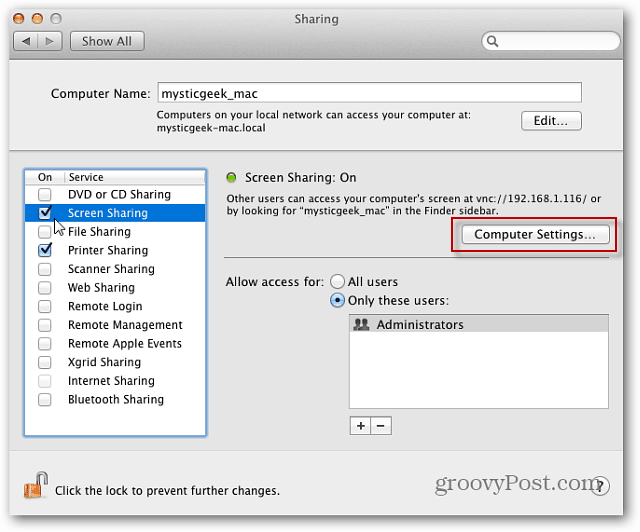
Next, check VNC Viewers Macy Control Screen with Password. Type in a password and click OK.

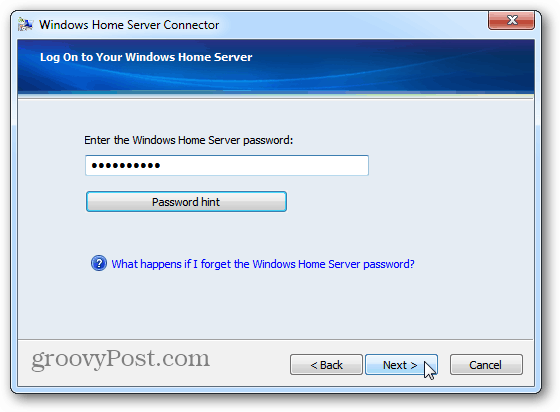
Then type in the password for your Mac system and click OK.

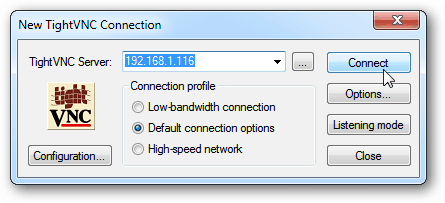
Go back to your Windows computer and click Start > All Programs > TightVNC > TightVNC Viewer.

Enter in the IP address for the Mac computer. The IP address is displayed on the Screen Sharing window on the Mac. Click Connect.
Next type in the password you created for the VNC connection earlier. This is NOT your Mac system password.
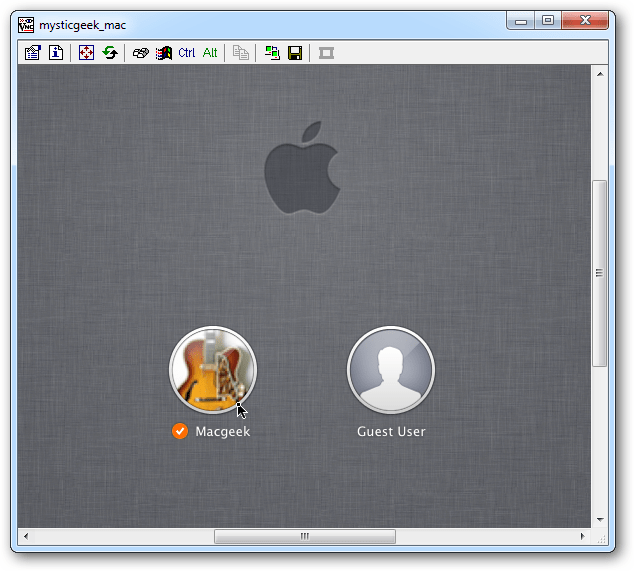
Wait a few seconds for the connection to be established. Tight VNC brings up the remote connection screen. Select the user account you want to use to log in on your Mac.
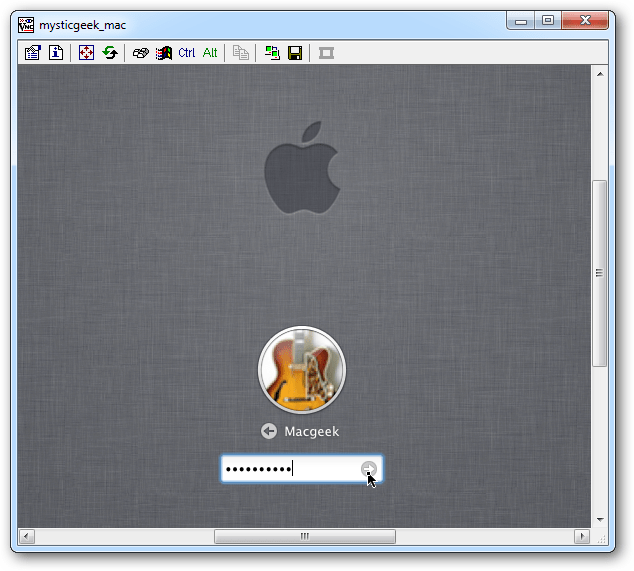
Enter the user account password.
There you go! You can control your Mac remotely from your Windows PC just as if you were sitting in front of it. I have my Mac set to a large display resolution, so the first thing I did is turn it down to 1024×768.
This setting is up to you. You can run it at full resolution if your Windows display is capable.

In fact, TightVNC provides several cool options you can explore to get the remote session to work how you like.

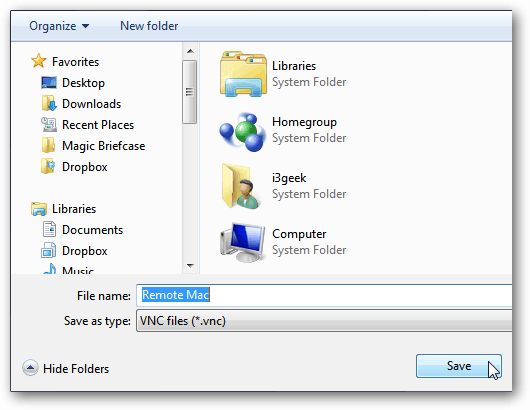
If you use the remote connection a lot, create a shortcut on your desktop. On the TightVNC toolbar, click the Save icon.
Then give the connection shortcut a name, save to desktop and click Save.
Next, it asks if you want to save the password. If you’re the only user on the Windows PC, it’s easier to save it, but again it’s up to you.

The TightVNC remote connection to your Mac icon displays on your desktop. Just double click it anytime you want to connect remotely to your Mac. Simple and nice!
There’s a bit of lag time while controlling your Mac from Windows via TightVNC, based on your network speed or over a WiFi connection. Your mileage will vary. Overall, though, this is an easy and efficient way to remotely control your Mac from your Windows system on the same network.


