- Move your data from a Windows PC to your Mac
- Before you begin
- Move your data
- How to move your information from a PC to your Mac
- After you move your data
- If you have issues moving your data
- What data can I transfer?
- Как запустить любое Windows-приложение прямо в macOS
- Что такое Wine
- Преимущества и недостатки Wine
- Как отключить SIP
- Как установить Wine
- Как установить приложение или игру через Wine
Move your data from a Windows PC to your Mac
Use Windows Migration Assistant to transfer your pictures, documents, and other data from a Windows PC to your Mac.
Windows Migration Assistant transfers your contacts, calendars, email accounts, and more from a PC. It migrates this data to the appropriate places on your Mac. After migrating data to your Mac, authorize your computer for iTunes Store purchases. It’s important to authorize before you sync or play content that you download from the iTunes Store.
If you’re migrating from one Mac to another Mac, follow the steps to move your content to a new Mac.
Before you begin
To prepare for a smooth migration:
- Make sure that Windows is up to date. Migration Assistant works with Windows 7 and later.
- Make sure that you know the name and password of an administrator account on your PC.
- Connect your Mac and PC to the same network, such as your home Wi-Fi network. Or connect an Ethernet cable between the ports on your Mac and PC to create a direct network connection. Some Mac models require an Ethernet adapter, such as the Belkin USB-C to Gigabit Ethernet Adapter or Apple Thunderbolt to Gigabit Ethernet Adapter.
- If you’re using Microsoft OneDrive on your PC, follow Microsoft’s instructions for uninstalling OneDrive before continuing. You can reinstall OneDrive after migration is complete.
Then use the check disk (chkdsk) utility on your PC to make sure that your Windows hard drive doesn’t have any issues:
- Right-click the Start button, then click Run.
- Type cmd and press Enter. Command Prompt opens.
- At the prompt, type chkdsk and press Enter.
- If the utility reports that it found problems, type the following, where drive is the letter that represents your Windows startup disk, such as D:
- Press Enter.
- At the prompt, type Y , then restart your PC.
- Repeat this process until the check disk utility reports no issues. If the utility can’t fix every issue that it finds, you might need to have your PC serviced. Then migrate your data to your Mac.
Move your data
This section guides you through migration, post-migration, and what to do if the steps don’t work for you.
How to move your information from a PC to your Mac
- On your PC, download and install the appropriate Windows Migration Assistant, based on the version of macOS on your Mac:
- Windows Migration Assistant for macOS Big Sur
- Windows Migration Assistant for macOS Mojave and macOS Catalina
- Windows Migration Assistant for macOS Sierra and High Sierra
- Windows Migration Assistant for OS X El Capitan or earlier
- Quit any open Windows apps.
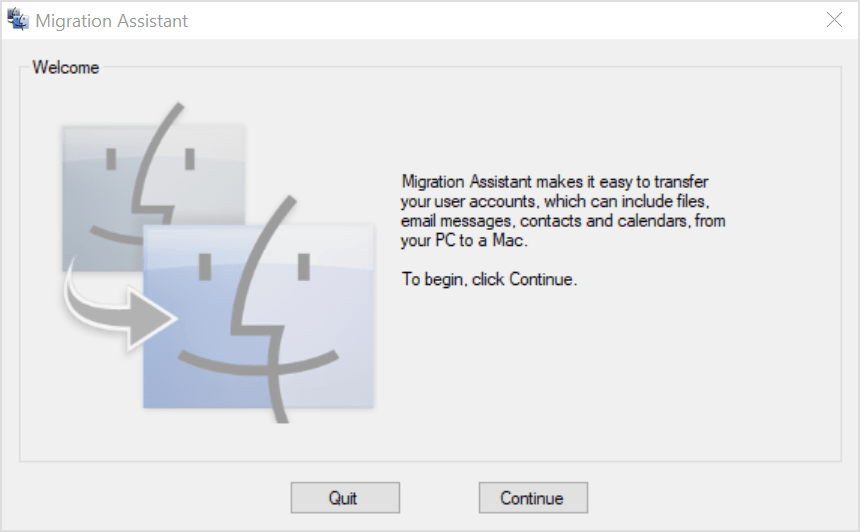
- Open Windows Migration Assistant, then click Continue.

- Start up your Mac. Setup Assistant automatically opens the first time you turn on your Mac. If you’ve already set up your Mac, open Migration Assistant, which is in the Utilities folder of your Applications folder.
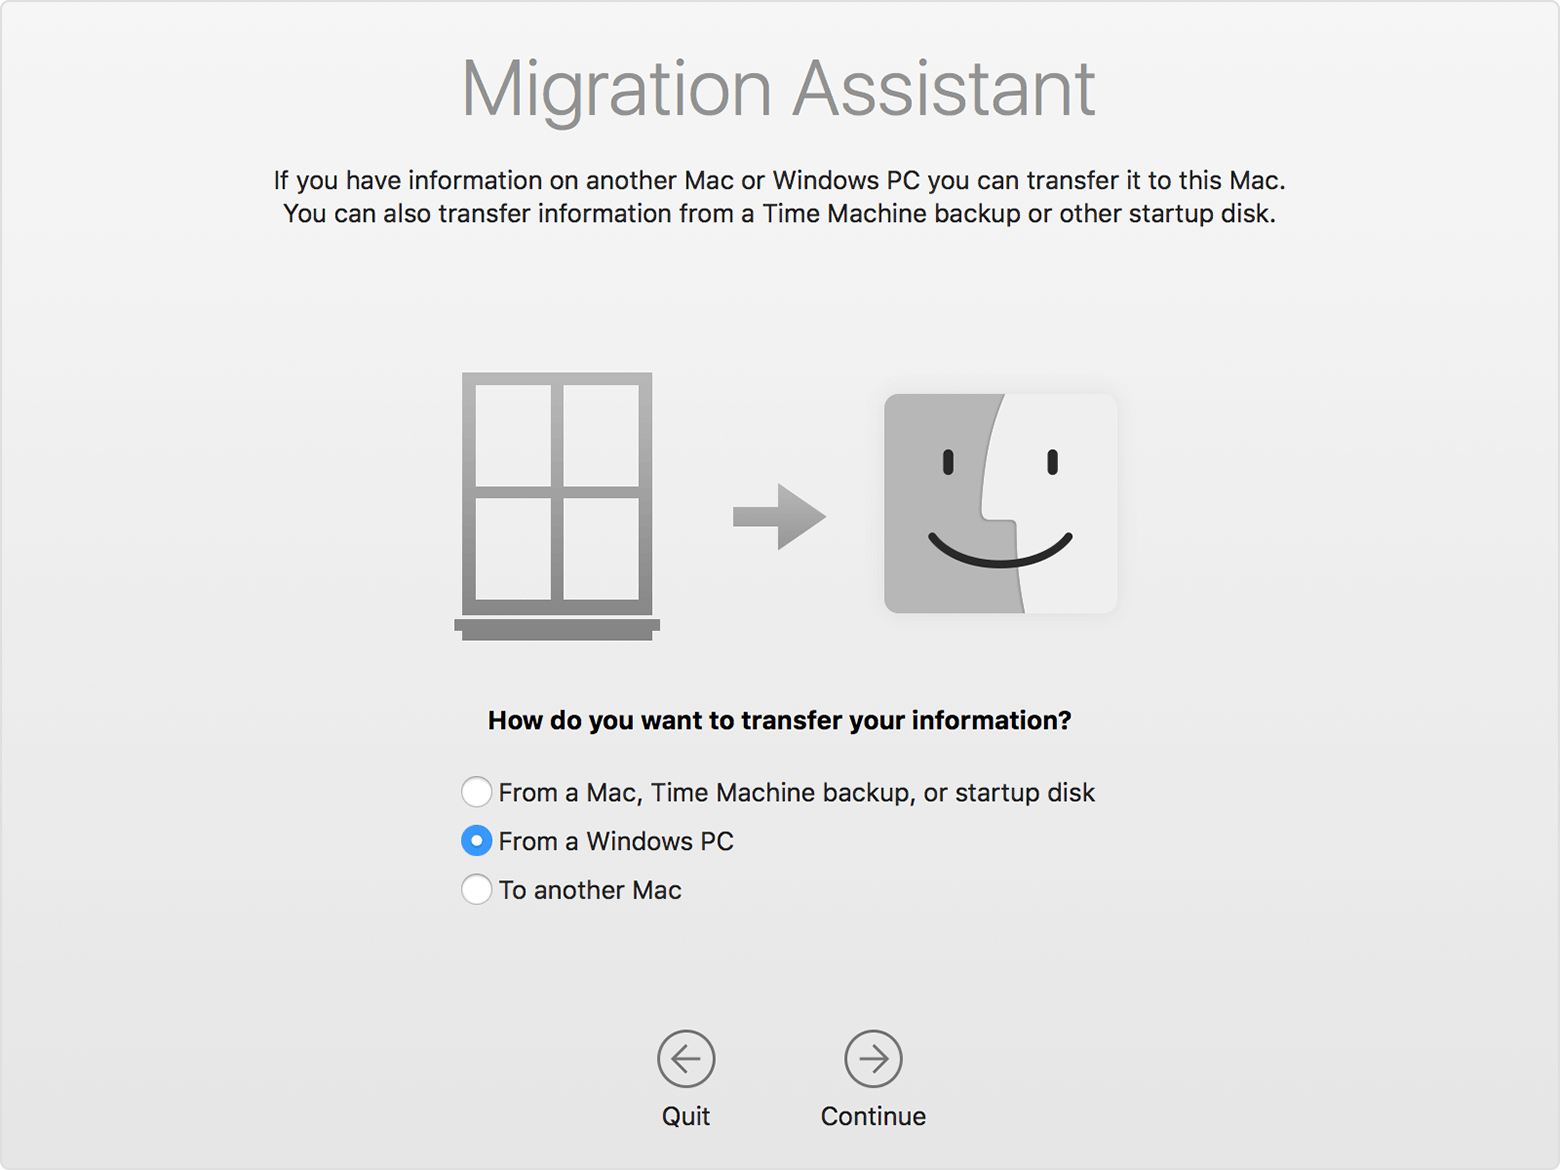
- On your Mac, follow the onscreen prompts until you get to the migration pane of the assistant. Select the option to transfer your information “From a Windows PC,” then click Continue.
- When prompted, enter an administrator name and password.
- Click Continue to close any other open apps.
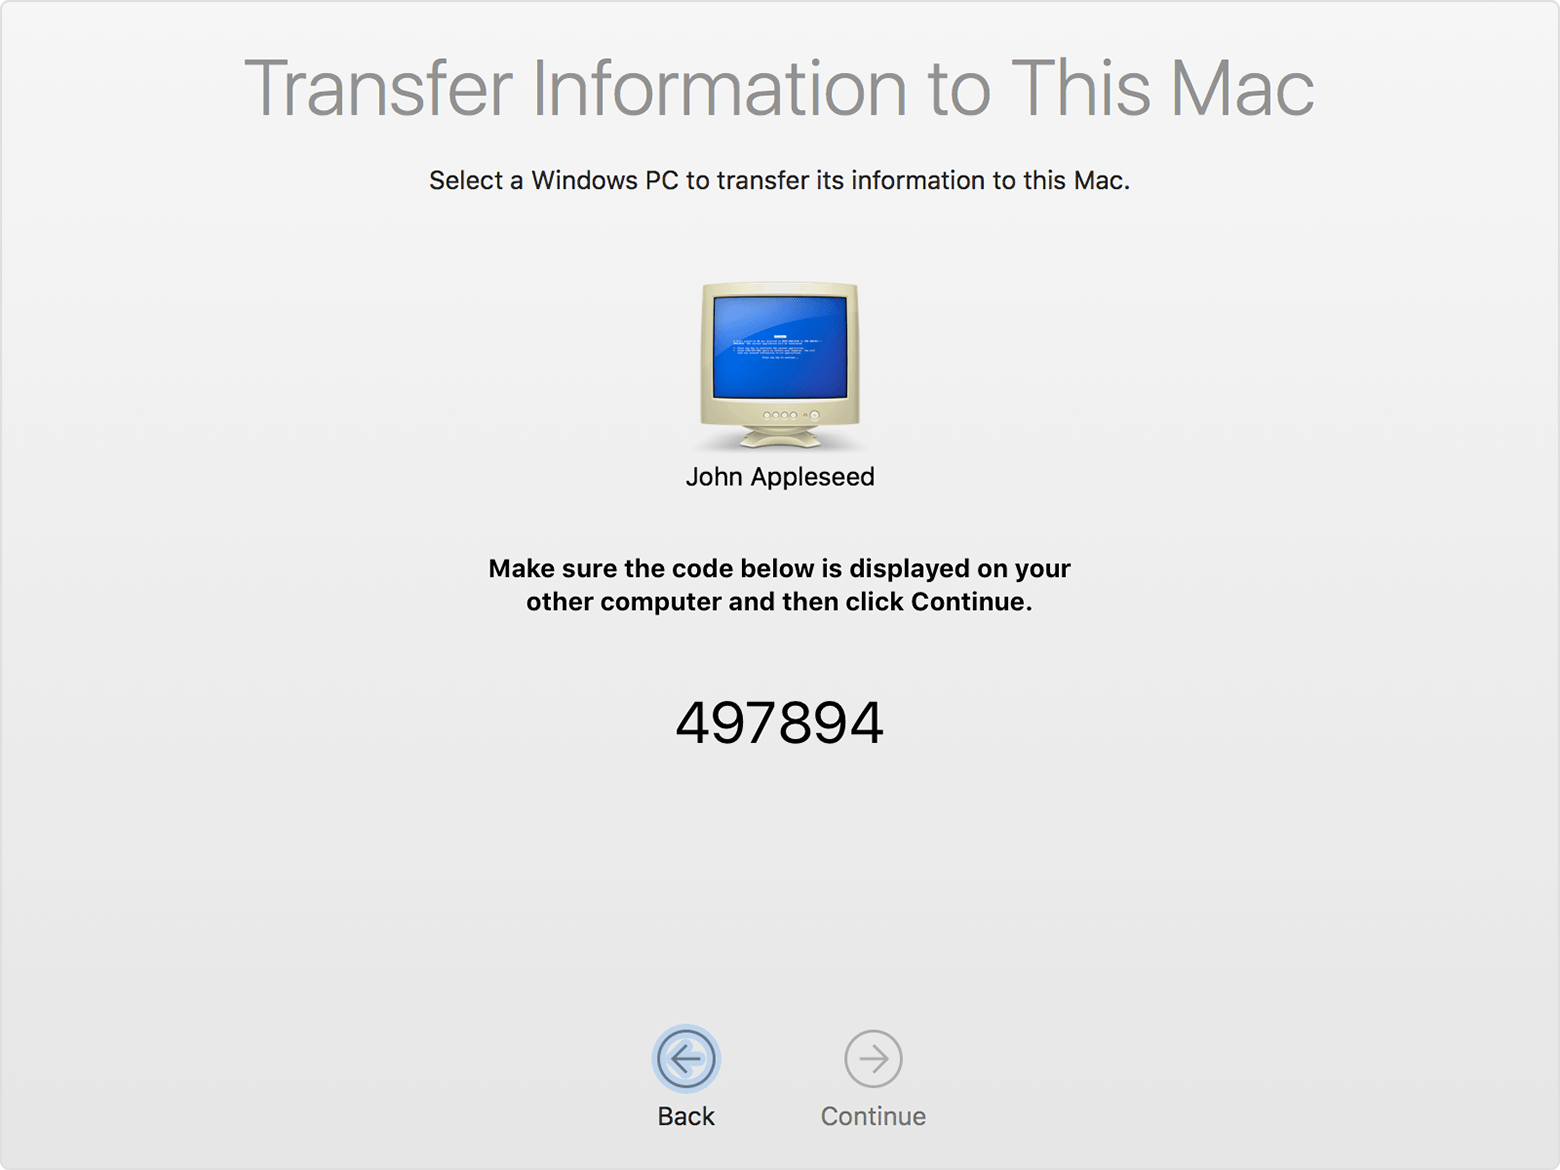
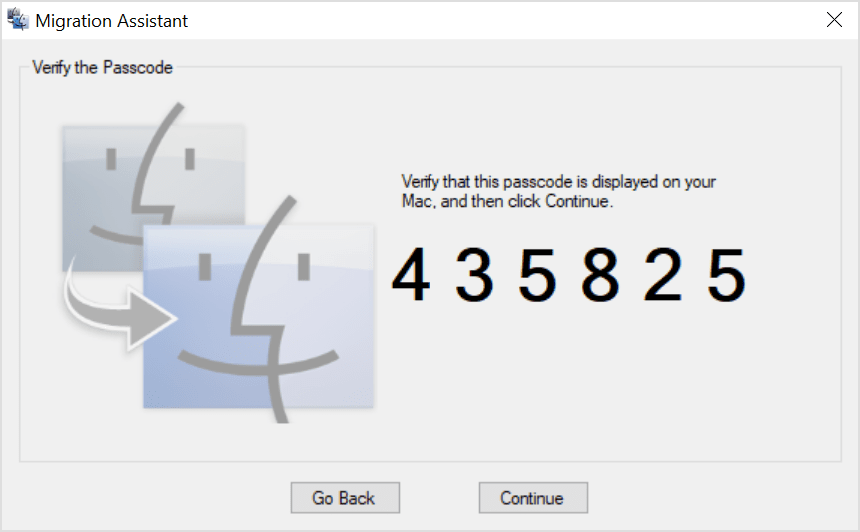
- In the migration window on your Mac, select your PC from the list of available computers. Then wait for the PC to show the same passcode that your Mac shows.
- When both computers display the same passcode, click Continue on your PC and Mac.
- Your Mac scans the drives on your PC to build a list of information to migrate. When the scan completes, select the information that you want to migrate to your Mac and click Continue. Learn about some of the data that you can transfer.
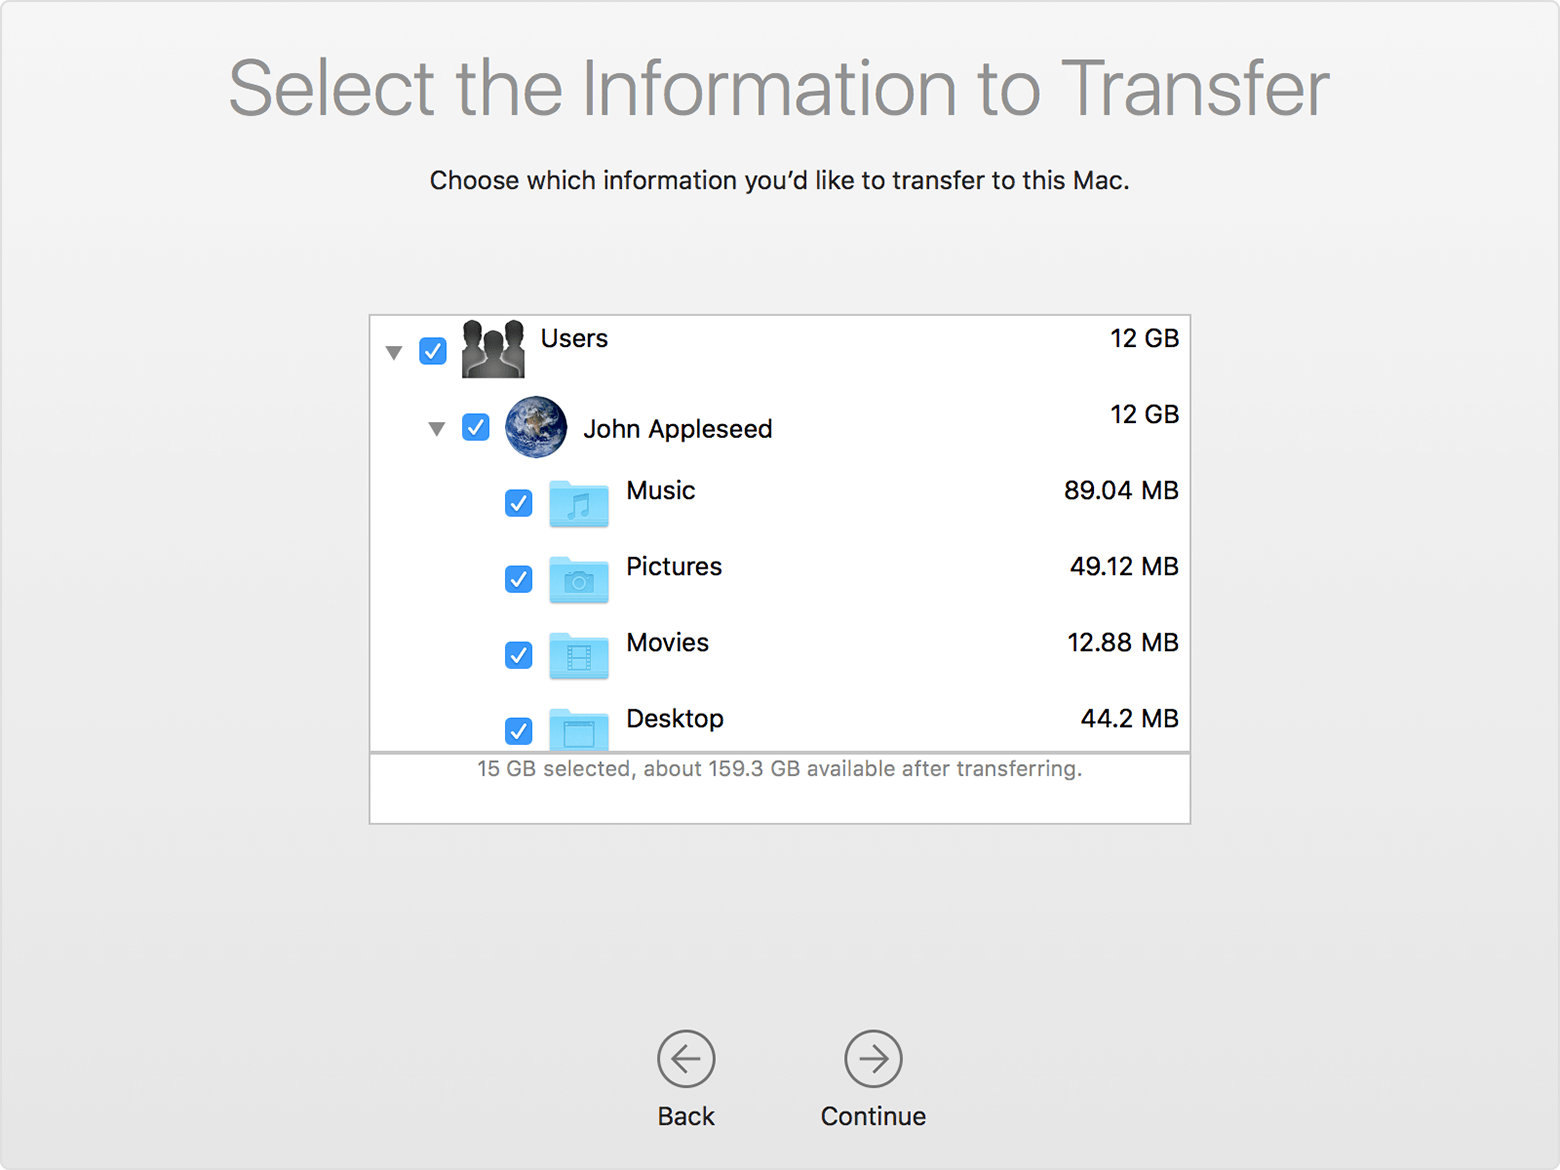
You can watch the progress and estimated time remaining on both the PC and your Mac. They tell you when migration is complete.
After you move your data
When migration completes, close Windows Migration Assistant on your PC. Then log in to the new user account on your Mac. The first time you log in to a user account migrated from your PC, you’re asked to set a password. You can use the same password that you used on your PC, or create a new password.
After logging in to the user account that you migrated, authorize your computer for iTunes Store purchases. It’s important to authorize before you sync or play content downloaded from the iTunes Store.
If you have issues moving your data
- Quit all open apps on your PC, then try migrating your content again. For example, you can press Alt-Tab to choose an open application, then press Alt-F4 to quit it.
- If your PC doesn’t appear in the Setup Assistant or Migration Assistant window on your Mac, make sure the computers are connected to the same network. You can create a network by connecting a single Ethernet cable between your Mac and PC. If that doesn’t help, check for firewall software on your PC and turn it off. After migration completes, you can turn firewall software on again.
- If Migration Assistant doesn’t open on your PC, turn off any antivirus software on your PC. Then try to open Migration Assistant again. After migration completes. You can turn that software on again.
- If you still can’t migrate your information successfully, you can use an external drive or file sharing to manually copy important data to your Mac.
What data can I transfer?
Migration Assistant lets you choose the data to move to your Mac. Here’s what moves over for specific apps and data types:
Email, contacts, and calendar information
Email messages, email-account settings, contacts, and appointments move based on which version of Windows you’re using and which accounts you have.
Outlook 1
Data from 32-bit versions of Outlook in Windows 7 and later move as follows:
- People move to Contacts 2
- Appointments move to the Calendar app
- IMAP and Exchange settings and messages move to the Mail app
- POP settings and messages move to Mail 2
Windows Live Mail
Data from Windows Live Mail in Windows 7 and later moves as follows:
- IMAP settings and messages move to Mail
- POP settings and messages move to Mail 2
Windows Mail
Data from Windows Mail in Windows 7 and later (excluding Windows 8) move as follows:
- IMAP settings and messages move to Mail
- POP settings and messages move to Mail 2
- People move to Contacts
Bookmarks
Bookmarks from Internet Explorer, Safari for Windows, and Firefox move to Safari.
System settings
Language and location settings, and custom desktop pictures move to System Preferences. Your web browser homepage moves to Safari preferences.
Pictures
Photos and other images move to your home folder. You can then add them to Photos, or open Photos and let it search your Mac for photos to import.
iTunes content
Migration Assistant transfers your iTunes media as follows: music to the Apple Music app, videos to the Apple TV app, podcasts to the Apple Podcasts app, and audiobooks to the Apple Books app.
Other files
Migration Assistant also moves these files:
- Files from the top-level folder of the currently logged-in user’s home directory
- Non-system files located in the Windows or Program Files folders
- Top-level folders located on the Windows system disk and other attached disks
1. Migration Assistant doesn’t support 64-bit versions of Outlook. You can manually migrate Mail, Contacts, or Calendars from Outlook 2013 or Outlook 2016 by signing in and entering the content on your Mac manually.
2. Migration Assistant transfers only the Mail or Contacts data that belongs to the logged-in Windows user. To transfer data from another user account, use Migration Assistant again while you’re logged in to another Windows account. Each time you migrate, your Mac creates a new user account.
Information about products not manufactured by Apple, or independent websites not controlled or tested by Apple, is provided without recommendation or endorsement. Apple assumes no responsibility with regard to the selection, performance, or use of third-party websites or products. Apple makes no representations regarding third-party website accuracy or reliability. Contact the vendor for additional information.
Как запустить любое Windows-приложение прямо в macOS
Для операционной системы Windows существует большое количество специализированного и профильного ПО, аналогов которому нет на macOS.
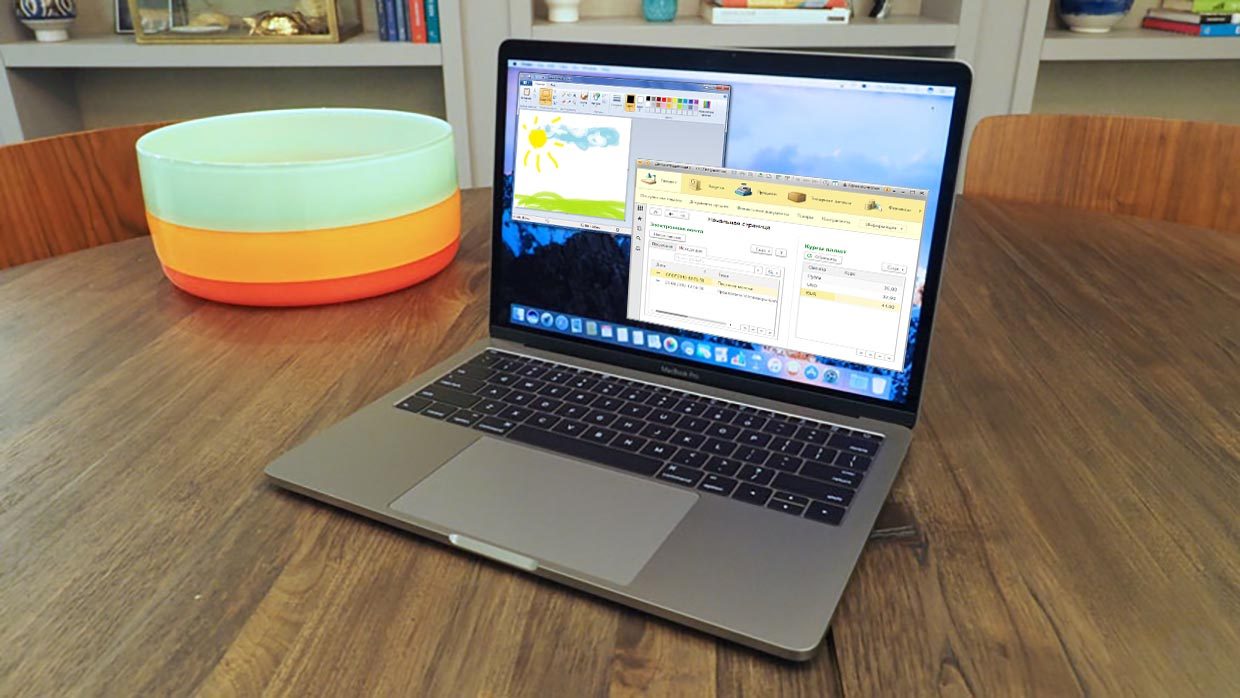
Не все знают, что есть еще один способ запускать Windows-приложения прямо на Mac без дополнительных операционных систем и виртуальных машин. Работает это благодаря технологии Wine, которая не первый год выручает пользователей.
Что такое Wine
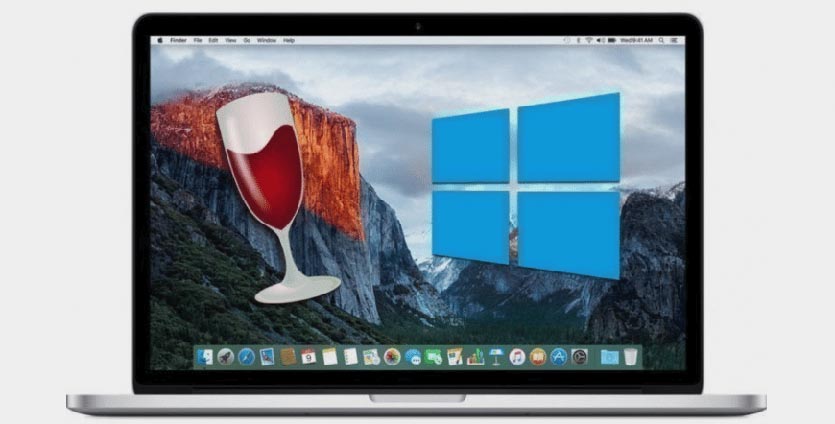
Wine — это свободно распространяемое ПО, которое предназначено для запуска 16-, 32- и 64- битных приложений, которые создавались для Microsoft Windows, в UNIX-подобных операционных системах.
Существуют сборки программы для Linux, macOS и даже Windows (чтобы запускать устаревшие программы и игры для “винды”). Wine основан на альтернативной реализации Windows API и не является эмулятором или виртуальной машиной.
Первые стабильные версии Wine появились в середине 2008 года. С того времени среда активно развивалась, части кода Wine использовались в разных программных продуктах и сборках операционных систем.
На данный момент при помощи Wine можно запустить практически любое приложение или игру из операционной системы Windows на Mac.
Преимущества и недостатки Wine
Прежде чем начать работу со средой Wine, следует изучить ее основные преимущества и недостатки. Возможно, в вашем случае уместнее использовать другой способ запуска Windows-программ.
✅ Windows приложения запаковываются в специальную “обертку” и работают как программы для macOS.
✅ Не требуется место, как для виртуальной машины, Boot Camp или дистрибутива Windows.
✅ Приложение запускается быстро и работает очень отзывчиво. Получится даже поиграть в динамичные игры.
✅ Среда имеет большое количество настроек графики и производительности, что позволяет добиться комфортной работы в большинстве случаев.
❌ Wine практически не взаимодействует с подключенными к компьютеру устройствами. Использовать Windows ПО, например, для работы с подключенным iPhone не получится.
❌ Каждое запакованное приложение будет занимать не менее пары ГБ, ведь будет включать в себя все необходимые API. Если нужно запускать таким способом более 5-6 программ, проще установить виртуальную машину.
❌ Некоторые программы и игры банально не запускаются в Wine, но при этом работают в виртуальной машине или Boot Camp.
Как отключить SIP
Для начала потребуется временно отключить защиту SIP (System Integrity Protection). Это необходимо для изменения системных файлов во время установки Wine и его компонентов.
1. Перезагрузите Mac.
2. Во время включения компьютера зажмите сочетание клавиш Command + R для загрузки в режиме восстановления.
Для этого нужно использовать оригинальную беспроводную клавиатуру Apple или любую проводную. Беспроводные клавиатуры других производителей могу подключаться к Mac уже после начала запуска ОС и не позволят загрузиться в любом служебном режиме.
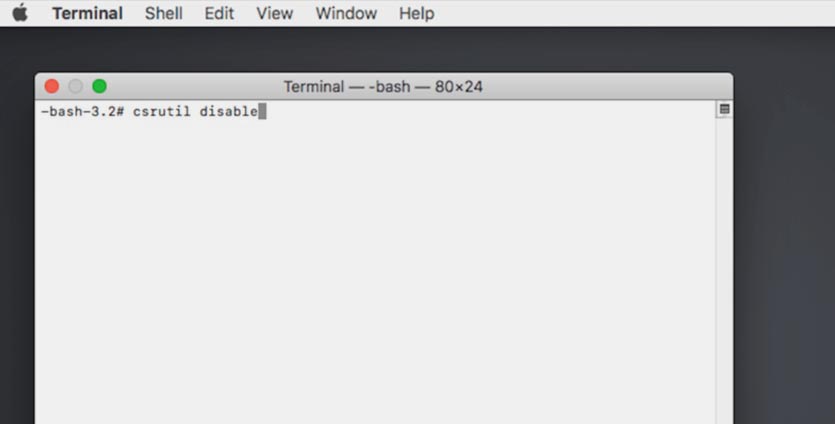
3. После загрузки в режиме восстановления в строке меню выбираем Утилиты – Терминал.
4. Водим следующе команду и нажимаем Ввод:
5. Перезагружаем Mac в обычном режиме. Сделать это можно из строки меню или при помощи команды “reboot”.
После завершения установки Wine и загрузки необходимых приложений можно заново включить защиту SIP. Для этого проделываем аналогичные действия, только для включения используем команду “csrutil enable”.
Как установить Wine
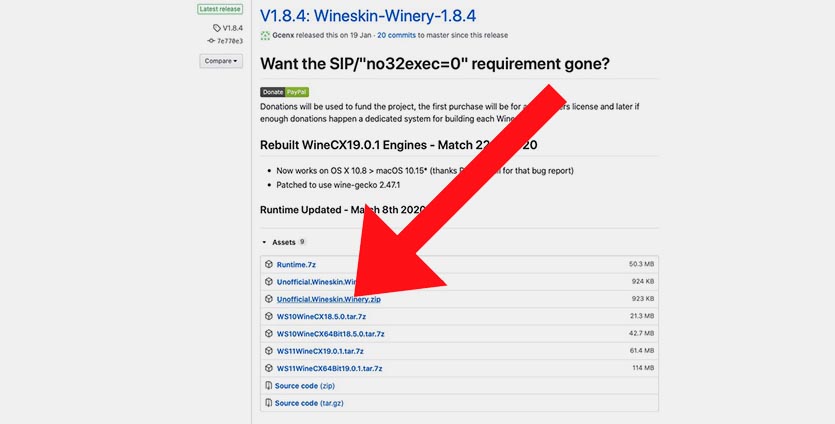
1. Скачайте последнюю неофициальную версию Wine с GitHub. Этот апдейт поддерживает работу с последними релизами macOS, которые еще за бортом официальных версий.
2. Извлеките приложение из архива и запустите его.
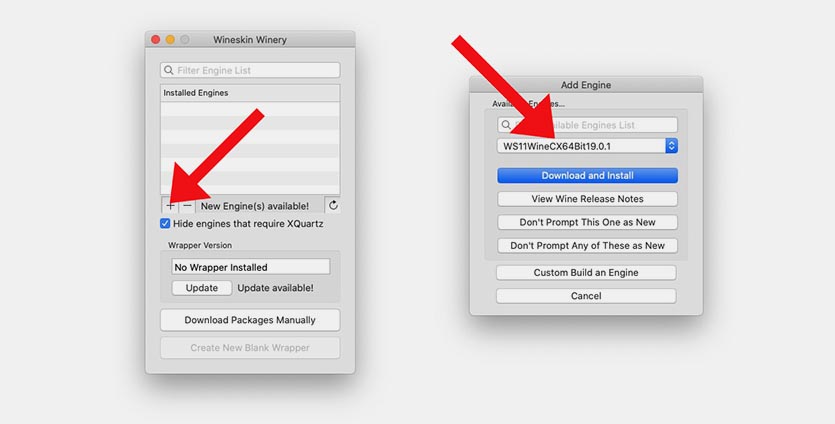
3. Нажмите “+” для добавления нового движка и найдите в списке WS11WineCX64Bit19.01.
Это самая актуальная версия с поддержкой 32-битных приложений.
4. Нажмите Download and Install и дождитесь окончания процесса установки.
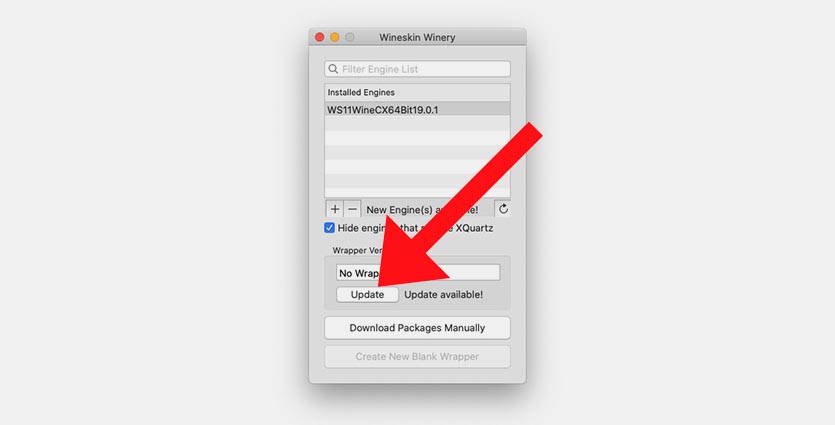
5. Нажмите кнопку Update и дождитесь окончания обновления модуля.
Все. Среда Wine готова для установки приложений. Скачайте подходящие установочные пакеты для операционной системы Windows.
Как установить приложение или игру через Wine
Описанные в предыдущем пункте манипуляции проводятся один раз. После этого для добавления новой программы или игры нужно сделать следующее:
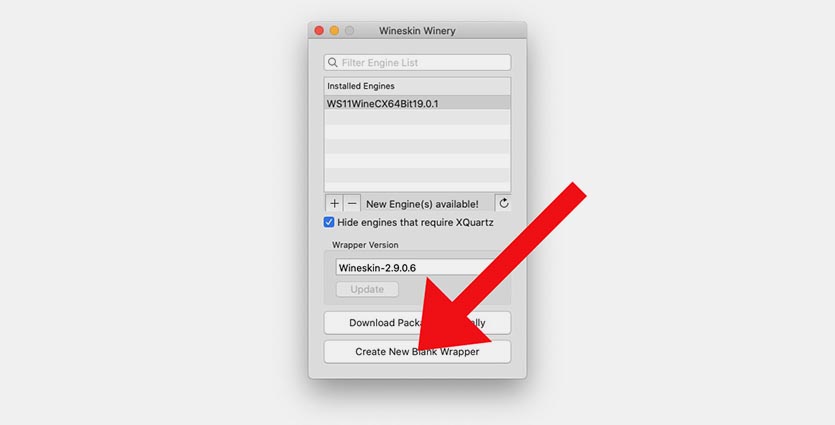
1. Нажмите кнопку Create New Blank Wrapper.
2. Укажите название будущего приложения, нажмите Ok и дождитесь окончания процесса.
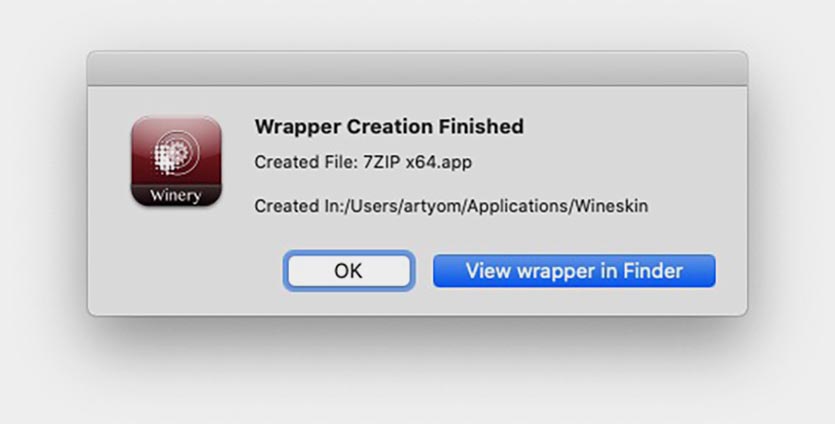
3. В последнем диалоговом окне нажмите View wrapper in Finder.
4. Запустите созданную заготовку будущего приложения.
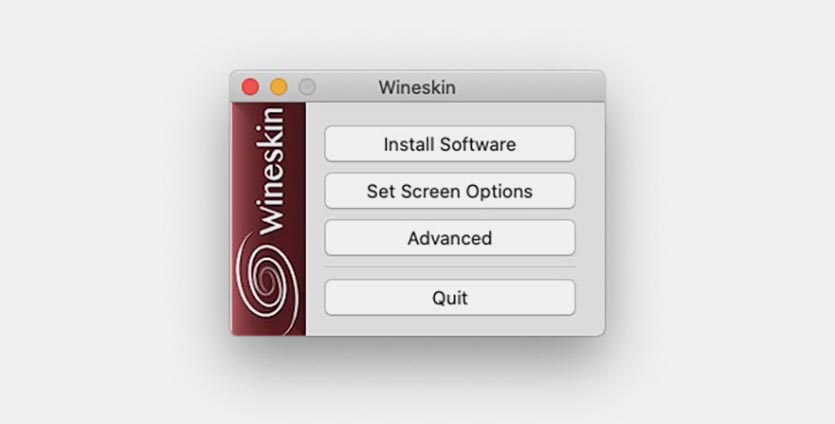
5. Нажмите кнопку Install software.
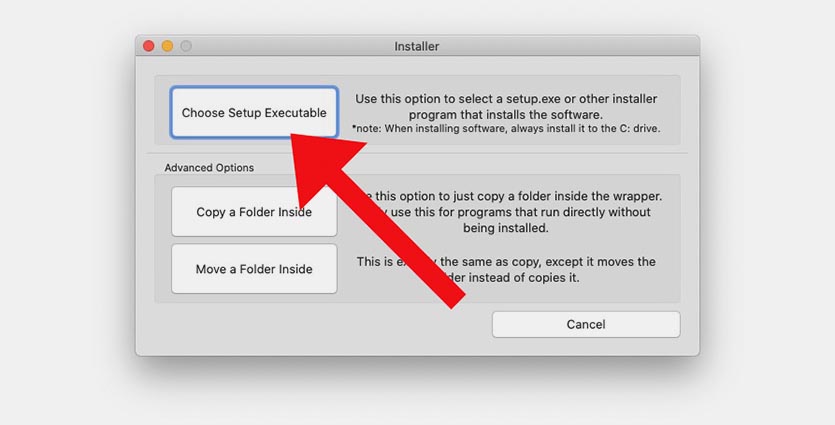
6. Выберите пункт Choose Setup Executable.
7. Укажите установочный покет для ОС Windows и произведите привычную установку программы.
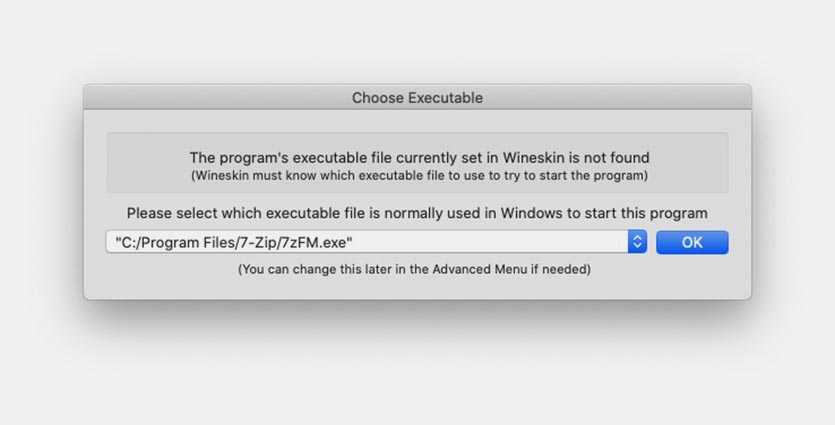
8. После установки укажите правильный *.exe файл для запуска программы и нажмите Ok. Приложение может подхватить не сам исполняемый файл, а, например, файл для деинсталляции программы.
9. Нажмите кнопку Advanced в меню Wineskin.
10. В настройках на вкладке Configuration можете изменить иконку приложения. На вкладке Options отключите все установленные флаги.
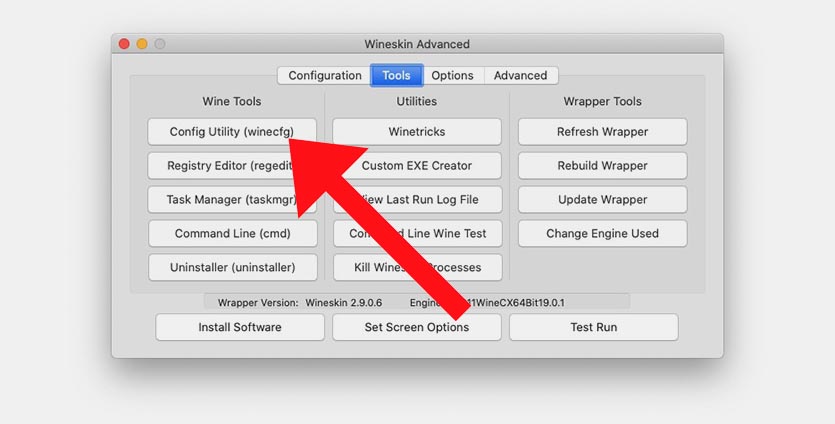
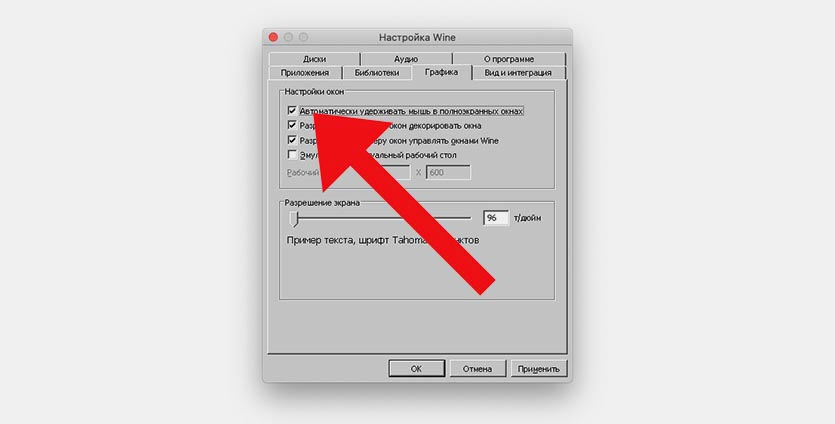
11. Перейдите на вкладку Tools и нажмите Config Utility (winecfg).
12. На вкладке Графика включите самую верхнюю опцию, нажмите Применить и закройте окно.
Готово! Теперь можете запускать созданное приложение. Оно будет доступно в папке /Applications/Wineskin или в Launchpad.
Вот так можно запросто запускать на Mac большинство Windows приложений. Кстати, можете установить 32-битные Windows-игры, аналоги которых для macOS не обновили под 64-битную архитектуру.


