- Как создать загрузочный EFI-раздел Windows на GPT-диске вручную
- 1. Создание EFI-раздела на пустом жёстком диске в командной строке
- 2. Создание EFI-раздела на пустом жёстком диске утилитой Bootice
- 3. Создание EFI-раздела в конце Windows
- 4. Создание EFI-раздела перед Windows
- 3 Ways to Create a System Repair Disc in Windows 10/8.1/8/7
- Why need to create a system repair disc?
- How to create a system repair disc in Windows 10/8.1/8/7?
- Part 1. Create system repair disc in Windows 7/10
- Part 2. Create a recovery drive in Windows 8/8.1/10
- Part 3. Create bootable rescue media with AOMEI Backupper
- Conclusion
Как создать загрузочный EFI-раздел Windows на GPT-диске вручную

Когда мы устанавливаем Windows на пустой (неразмеченный) жёсткий диск или отформатированный раздел обычным образом – с использованием установочного носителя, нам не нужно заморачиваться по поводу создания EFI -разметки операционной системы. Все необходимые разделы, в частности, загрузочный EFI , создаются автоматически, если компьютер работает в режиме BIOS UEFI . Но если Windows нужно установить не обычным образом.
А на другой жёсткий диск со своим независимым загрузчиком, если стоит вопрос в восстановлении работоспособности системы после удаления жёсткого диска с загрузочным разделом, в таких нестандартных ситуациях потребуется ручная работа.
Как вручную создать загрузочный EFI-раздел Windows?
Windows на подключённый к компьютеру второй GPT -диск не устанавливается со своей EFI -структурой. При обычной установке с установочного носителя загрузчик второй системы прописывается на уже существующий EFI -раздел – тот, что находится на первом диске.
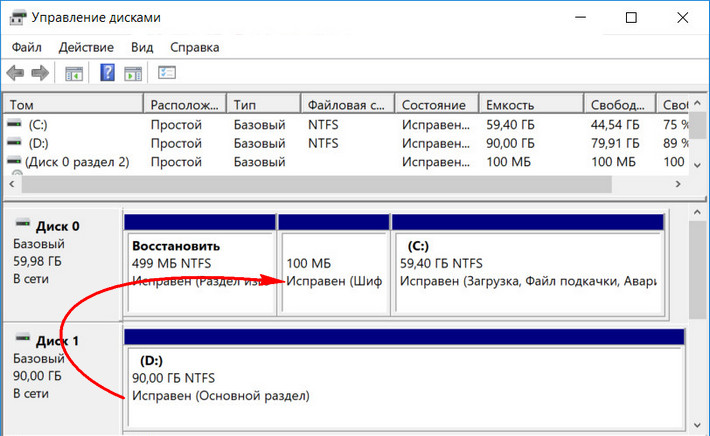
Что делает вторую Windows уязвимой – она не сможет самостоятельно существовать, если загрузчик первой системы будет повреждён. Или если выйдет из строя или просто будет отсоединён первый жёсткий диск. Чтобы у второй Windows была своя независимая EFI -разметка, на время её установки нужно сделать невидимой первую систему – отключить её носитель в настройках BIOS , если такое возможно, или аппаратно. Это не всегда удобно, а иногда и невозможно в случае с ноутбуками.
Вторую Windows со своим независимым загрузчиком могут установить запускаемые в среде текущей системы программы типа WinNTSetup или WinToHDD. Но они потребуют указать им загрузочный EFI -раздел.
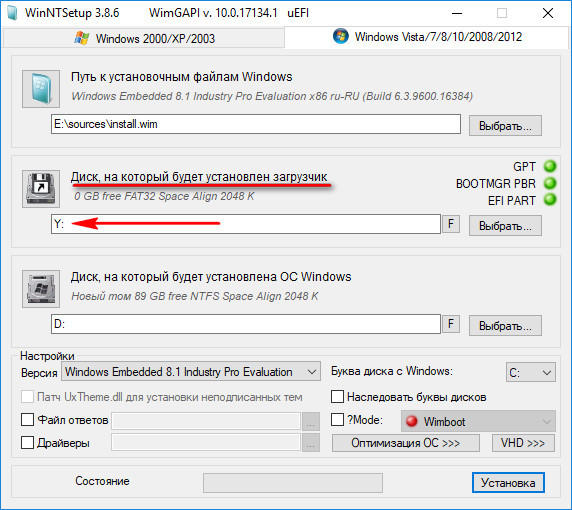
Создать такой на пустом жёстком диске очень просто.
1. Создание EFI-раздела на пустом жёстком диске в командной строке
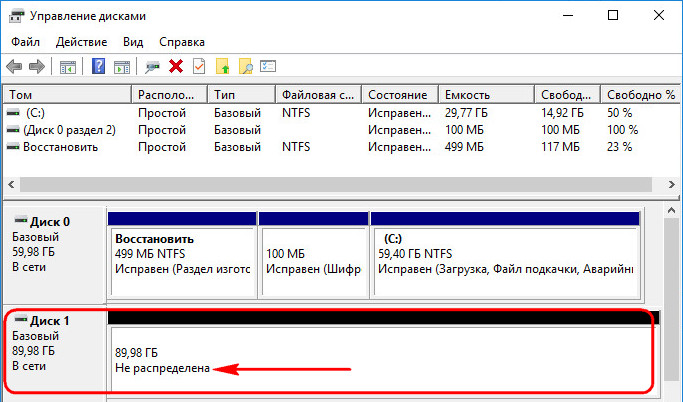
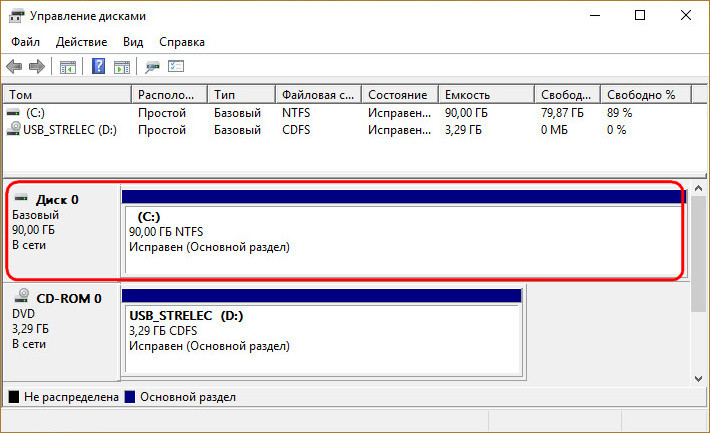
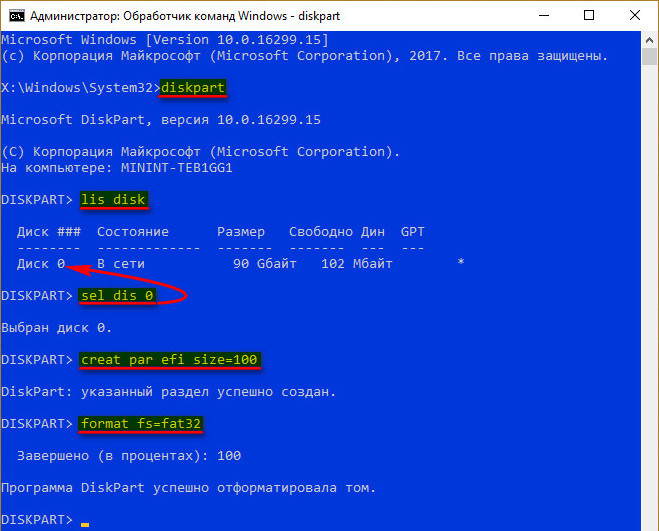
Итак, имеем проинициализированный как GPT носитель без разметки и данных.
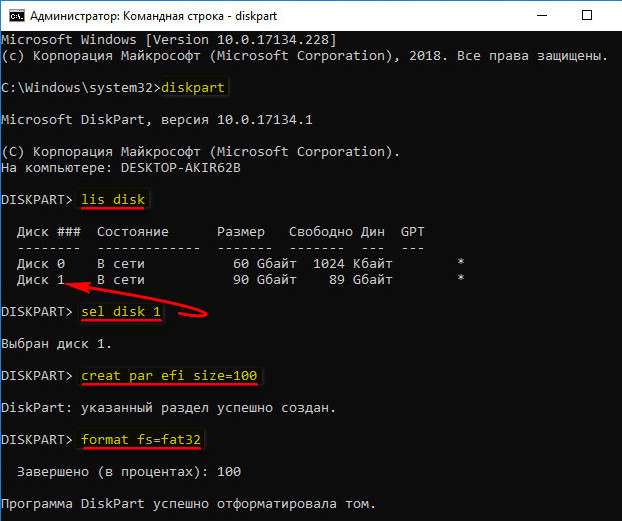
Запускаем командную строку.
Обязательно делаем это от имени администратора.
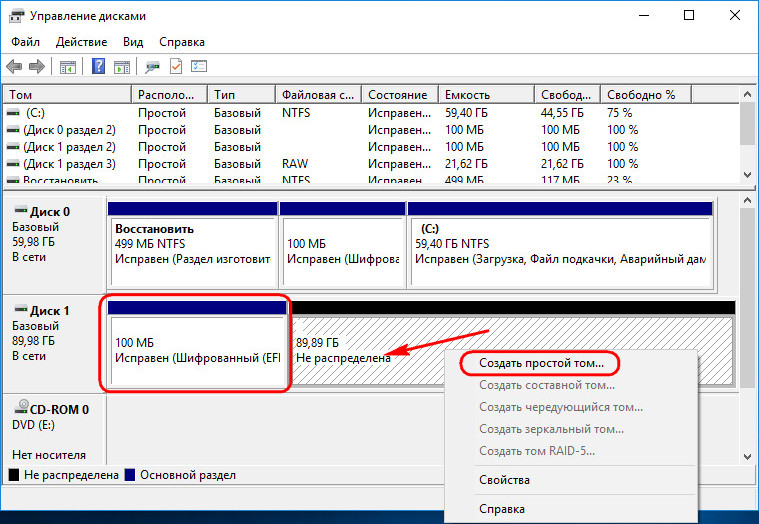
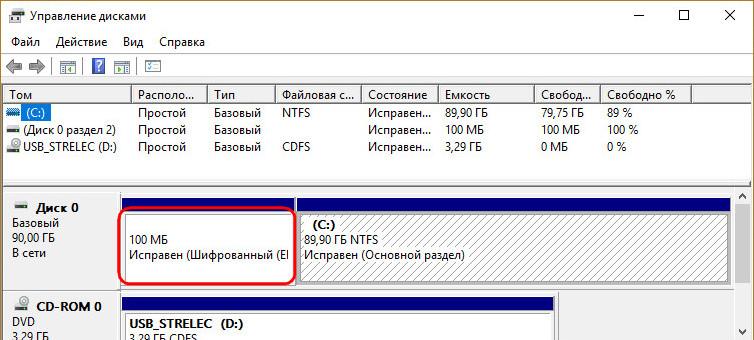
В утилите управления дисками видим, что на втором жёстком появился EFI -раздел на 100 Мб. Теперь можем формировать обычный раздел для указания его программам типа WinNTSetup или WinToHDD в качестве системного раздела С.
2. Создание EFI-раздела на пустом жёстком диске утилитой Bootice
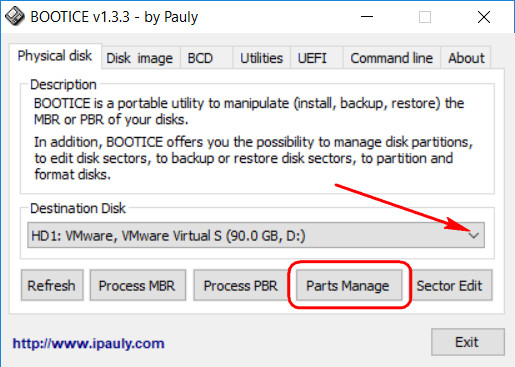
Кто не любит командную строку, для создания EFI -разметки пустого носителя может воспользоваться утилитой Bootice с графическим интерфейсом. Она бесплатная, её можно скачать на любом софт-портале Интернета. В главном окне выбираем второй жёсткий. Кликаем «Parts Manage».
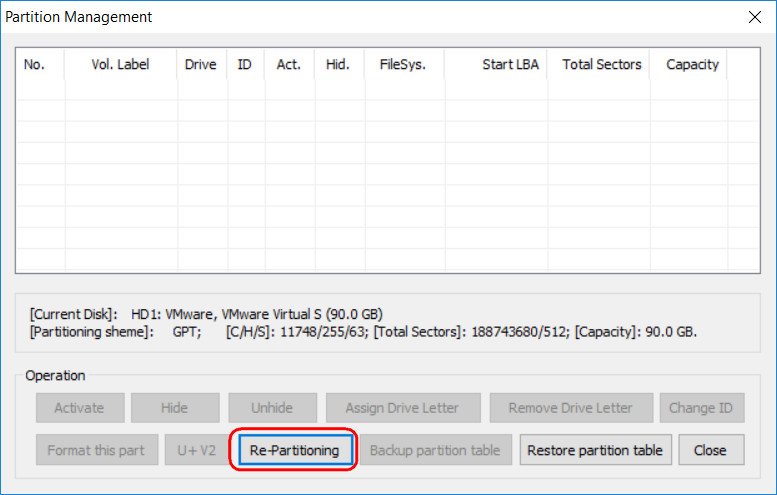
Затем – «Re-Partitioning».
Первым делом ставим галочку GPT в графе «Partition table type». Затем галочку ставим «Create ESP partition». И вверху в графе «Settings» убираем все значения «Size» кроме последнего. Жмём «Ок».
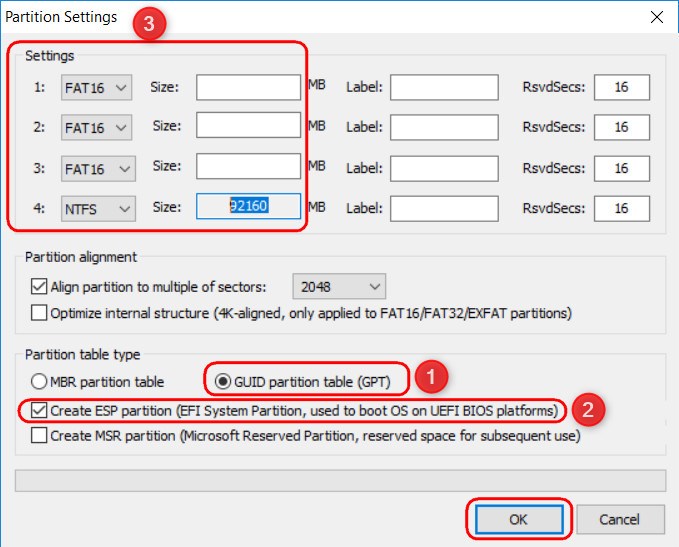
В итоге получим разметку диска с EFI -разделом на 128 Мб и разделом, вместившим в себя остальное дисковое пространство.
А как быть, если жёсткий диск не пустой? Если на нём есть структура и хранящиеся пользовательские данные. Или мы хотим восстановить Windows, лишившуюся загрузочного EFI -раздела после выхода из строя или отключения жёсткого диска, на котором ранее существовал её загрузчик. И на этот случай есть решения. Для восстановления системы без загрузчика нам, естественно, понадобится среда для выполнения определённых операций. В одном из случаев сгодится и обычный установочный носитель Windows. В другом случае будем работать с менеджером дискового пространства, потому нам понадобится функциональный и надёжный LiveDisk WinPE. Одним из таких является LiveDisk Стрельца. Сайт загрузки образа — Sergeistrelec.Ru.
3. Создание EFI-раздела в конце Windows
Итак, имеем, к примеру, вторую Windows, лишившуюся EFI -загрузчика после поломки диска с первой системой.
Как её запустить? Самый простой и быстрый способ – создать EFI -раздел в конце системного раздела и пересоздать загрузчик. Для этого не понадобится ничего более командной строки. Загружаемся с установочного носителя Windows, сразу же нажимаем Shift + F10 . Эта комбинация запустит командную строку. Если используем LiveDisk Стрельца, запускаемся, соответственно, с него.

И уже на его борту задействуем командную строку.
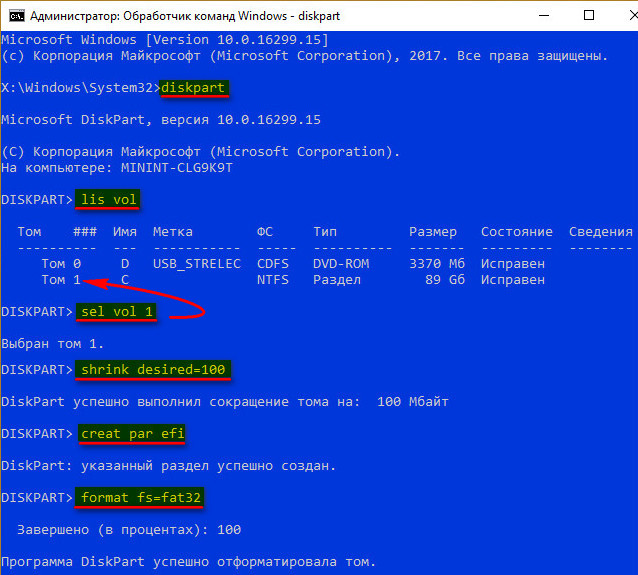
Вот указанный раздел сжался на 100 Мб и на освободившемся месте создался EFI -раздел.

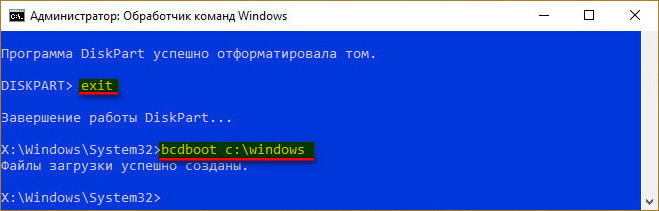
Теперь можем пересоздавать загрузчик.
В командной строке выходим из diskpart:
Далее смотрим, под какой буквой значится системный раздел (смотрим карту разделов после ввода lis vol) . И подставляем её вместо нашей буквы С:
Всё – работоспособность Windows восстановлена.
4. Создание EFI-раздела перед Windows
Загрузочный раздел обычно существует в начале диска, перед системным разделом. Так не обязательно должно быть, но делается с целью ускорения запуска Windows. Чтобы UEFI быстрее нашла загрузчик. На SSD такая оптимизация вряд ли будет ощутимой, а вот в случае с HDD можно побороться пусть даже за толику производительности.
На борту LiveDisk Стрельца запускаем AOMEI Partition Assistant. Делаем клик на системном разделе, на боковой панели операций жмём «Изменение размера».
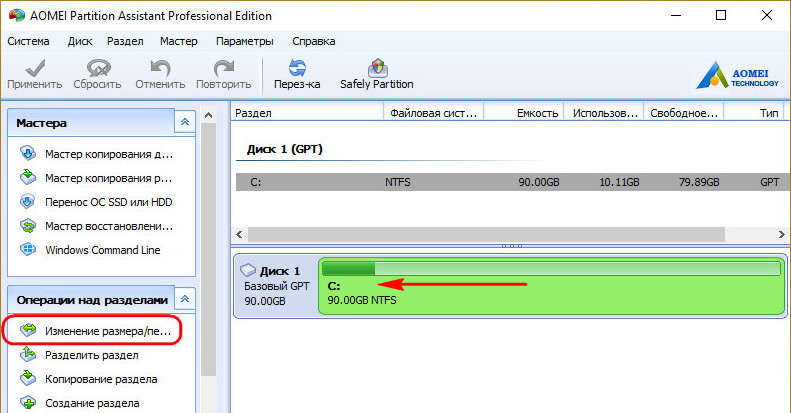
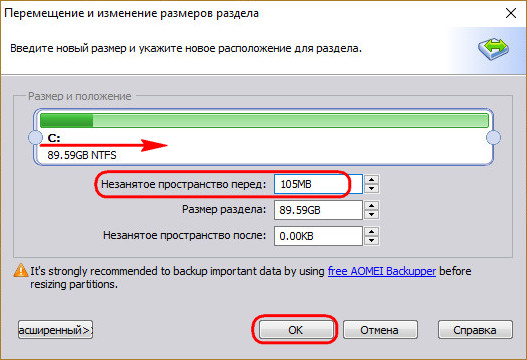
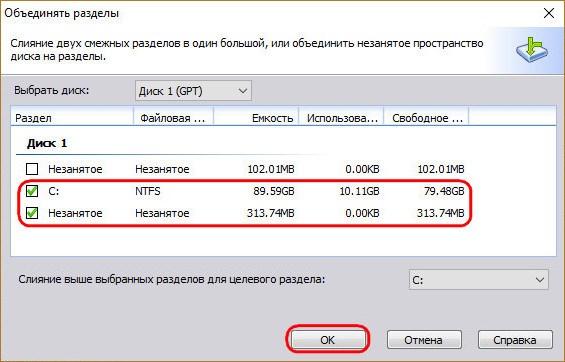
Немного оттягиваем ползунок на карте вправо, чтобы в графе ниже «Незанятое пространство перед» появилось несколько Мб. Далее вместо оттянутой цифры вписываем 105. Чтобы получилось 105 Мб. Жмём «Ок».
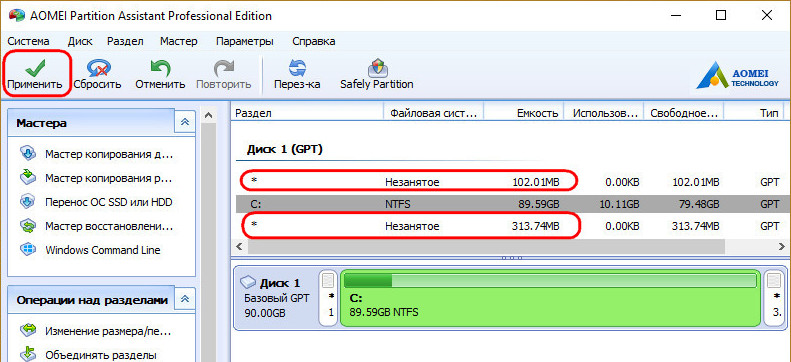
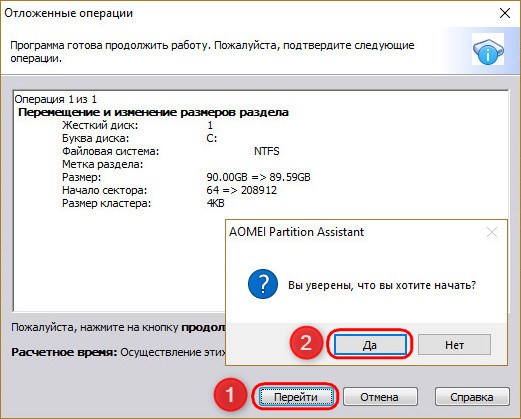
В итоге программа высвободит корректное значение дискового пространства, в нашем случае 102,01 Мб. И оставит небольшой хвост сзади раздела. Жмём «Применить».
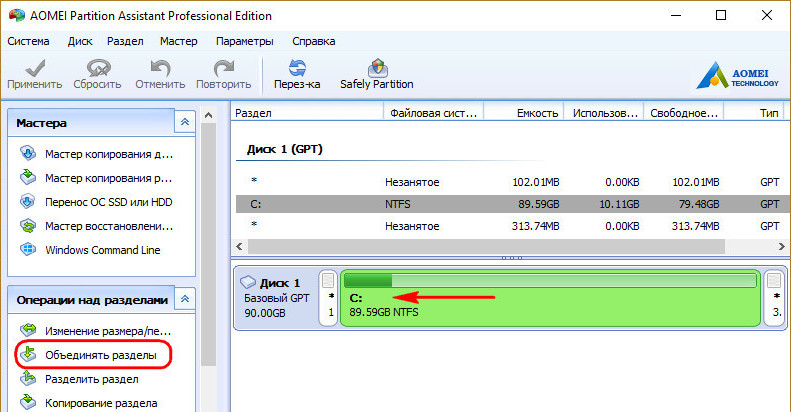
Далее можем присоединить хвост к разделу.
Теперь запускаем командную строку. И создаём EFI -раздел точно так же, как описано в п.1 статьи.
Вот EFI -раздел создан.
Осталось только пересоздать загрузчик, как описано в конце п.3 статьи.
3 Ways to Create a System Repair Disc in Windows 10/8.1/8/7
Want to create a system repair disc in case of system issues but do not now how? Read this guide to find 3 methods to create system repair disc in Windows 10/8.1/8/7.

By AOMEI  / Last Updated January 5, 2021
Why need to create a system repair disc?
In case of system failure, Windows provides System Recovery Options, allowing you to fix some errors, restore your system, repair Windows files, recover previous settings, and more.
To use the system recovery options, you need a Windows installation disc. If you don’t have a Windows installation disc, then you can create a system repair disc to boot the computer that has serious problem and then start System Recovery Options to make your computer work normally again. Besides that, a system repair disc can also help you restore your computer from a system image or restore point.
In a word, it’s necessary to create system repair disc. It can help you get out of the trouble as soon as possible when your computer goes wrong. Read on to get three methods.
How to create a system repair disc in Windows 10/8.1/8/7?
There are two Windows built-in utilities can help you create a system repair disc: Create a system disk (CD/DVD) & Create a recovery drive (USB).
For Windows 7 and Windows 10 users, you can simply create a system repair disk via the Backup and Restore utility. It can help you troubleshoot Windows when it won’t boot correctly. Also, it can help you restore your computer from a system image backup.
For Windows 8/8.1 users (Windows 8 has removed the feature Backup and Restore) and Windows 10 users, you can choose to create a recovery drive. It gives you access to the same troubleshooting tools as a system repair disc. In addition, it can also help you reinstall Windows as long as the recovery drive copies the system files necessary for reinstallation from your current computer.
For Windows 7 or Windows 8 users, it’s clear enough which tool to choose to create a system repair. However, for Windows 10 users, which one is better?
Well, one important thing you should know is that: the system repair disc can let you troubleshoot problems on different PCs that running the same Windows version, while the USB-based recovery drive is only tied to the PC that you used to create it.
Actually, besides the Windows 10 built-in utility, there’s one free third-party tool that can help you create system repair disk in an easy way. It is available for all Windows versions, including Windows 10/8.1/8/7/XP. And it supports both CD/DVD disc and USB flash drive. If you are interested in, just refer to Part 3 to get the method.
Part 1. Create system repair disc in Windows 7/10
1. Make sure you have inserted a writable empty disc to your computer and make sure it is detected.
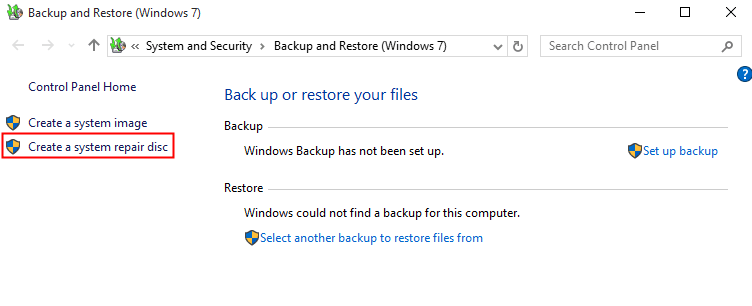
2. Type “backup” into the search box and select Backup and Restore.
3. You can find Create a system repair disc in the left pane and click it.
4. By default, the CD/DVD disc is detected automatically. If not, select it manually. Then click on Create disc.
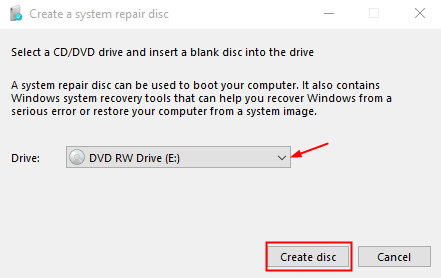
5. Windows will start to create disc right after the clicking.
Part 2. Create a recovery drive in Windows 8/8.1/10
1. Connect the USB drive to your computer.
2. Type “recovery drive” into the search box. In the listed results, select Create a recovery drive.
3. In the pop-up window, check the option “Back up system files to the recovery drive” and click Next.
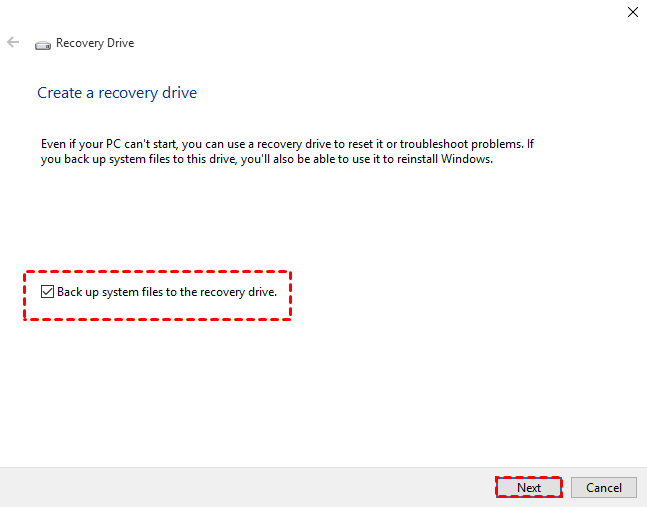
Note: If you check Back up system files to the recovery drive, it gives you a chance to reinstall your computer in a pinch.
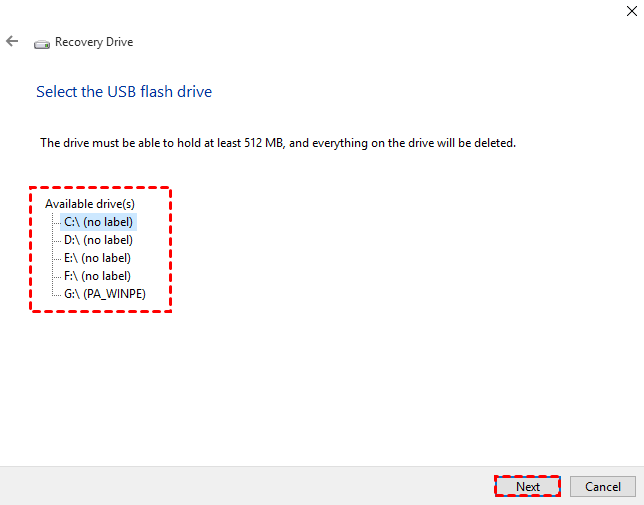
4. Select the USB flash drive, and click Next to continue.
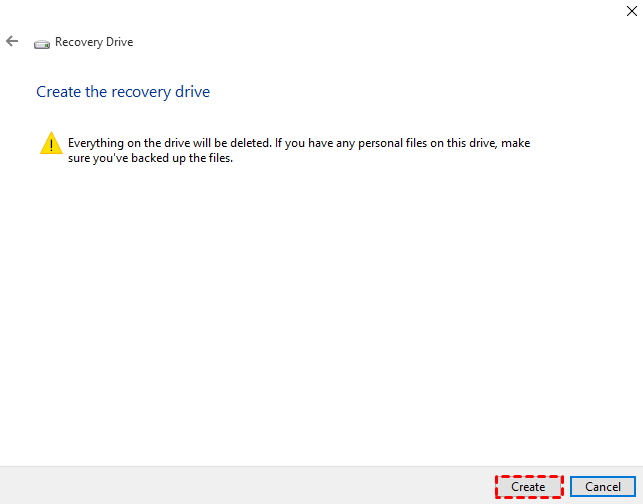
5. Click Create to begin creating the recovery drive.
Now you know how to create a system repair disc in Windows 7/8.1/8/10. If you ever want to use the system repair disk, insert the disc and restart your computer. If your computer starts directly from the hard drive instead of the repair disk, enter BIOS to configure your computer to boot from the CD/DVD or USB drive.
However, unlike installation disc, the system repair disc and recovery disk may not boot other computers except the one that created it. If you may fail to create a system recovery disk or system repair disc with an error message that System repair disc could not be created (0x80070057), which is often caused by the incapability with other software, or other errors. Then you can create bootable rescue disk with third-party software to restore your computer.
Part 3. Create bootable rescue media with AOMEI Backupper
AOMEI Backupper Standard, a powerful Windows backup software, allows you to create bootable rescue media using DVD/CD or USB drive. If you don’t have DVD/CD or USB drive at hand, you can create an ISO image file so you can burn to any removable devices. It supports directly create bootable media on Windows 10/8/8.1/7. If your computer runs Windows XP or old version of Windows before it, you will need to install AIK before creating bootable disc.
To create bootable media:
Step 1. Download, install and launch it.
Step 2. Click Tools and then choose Create Bootable Media.

Step 3. Select a type of bootable media you want to create and click Next to continue. For better performance, the Windows PE bootable disc is recommended.

Step 4. Choose Create legacy bootable disc or Create UEFI bootable disc and then click Next to continue. The two options enable the bootable media to boot from legacy MBR mode or GPT/UEFI. Please view your motherboard user manual for information on choosing boot options at PC startup.
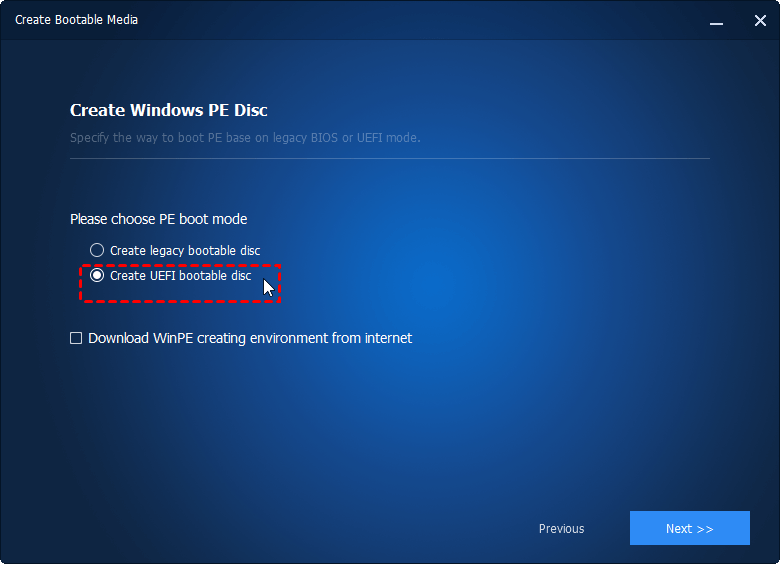
Note: You can download a pre-build PE from AOMEI server by selecting «Download WinPE creating environment from the internet», Windows AIK/ ADK is no longer required.
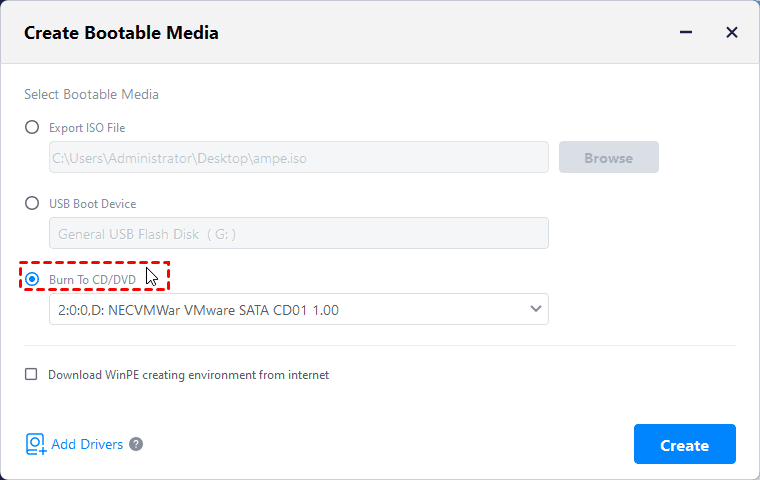
Step 5. Select the storage device or specify the location path where you want to export the ISO file, and then click Next to start. Wait for the process to complete and click Finish.
Tips: In case of unexpected system failures, you could also go «Tools» > «Recovery Environment» to enable the boot option of AOMEI Backupper recovery environment. It allows you to boot into WinPE and peform backup/restore with AOMEI Backupper as well.
Conclusion
That’s all for how to make a system repair disc in Windows 10/8/7/XP. If you have more than one computer, you can create a bootable media with AOMEI Backupper which can boot any PCs regardless of Windows 10/8/7/XP/Vista or other Windows system it runs.
If you want it to be able to boot Windows Servers, you can download AOMEI Bacupper Server. It also lets you create a system image backup to that bootable media or other storage devices, so you can boot the recovery disk to restore your computer, even when it is unbootable.
If you don’t want to connect any removable devices to boot your computer when it is in serious condition, you can also create a recovery partition on your internal hard drive, which allows you to restore your computer when it is not working without any removable devices.


