- Make a bootable USB drive on any Linux distro
- Make a bootable USB drive in Linux
- Options explained:
- Restore the USB drive
- Conclusion
- Making bootable usb from iso linux
- 2. Requirements
- 3. Launch Startup Disk Creator
- 4. ISO and USB selection
- 5. Confirm USB device
- 6. Installation complete
- Make a bootable flash drive from an ISO image
- How to Create Bootable USB from ISO using Linux Terminal
- Check USB Drive
- Download Linux ISO File
- Create Bootable Drive from Terminal
- Conclusion
Make a bootable USB drive on any Linux distro
In this post, you will learn how to make a bootable USB drive in Linux system using the native Linux tools.
I know that many of you are scared of the Linux command line. Of course, you can use graphical programs to make a bootable USB in Linux. But believe me, you will benefit so much if learn the Linux command line tools. For example, if you need to make a bootable USB drive in Linux, different distributions provide different graphical programs to do that, but every Linux distribution has the same built-in tool to do the same job. So, you will benefit for it long-term.
Make a bootable USB drive in Linux
To make a bootable USB drive in Linux, you just need to learn one simple command. The command is dd .
Options explained:
sudo means to give admin privileges to this command.
dd is the program name.
bs=4M means to use a block size of 4M, so the system will read and write the data in chunks of 4M. This option is simply meant to speed up the process.
if specifies the source to read. Simply put, this is an ISO file of the Linux image you download from the Linux distribution website.
path-to-the-ISO — path to the ISO file. For example,
of specified the destination or where to write this ISO file. In other words, it is your USB drive. This is the most important part of the command, If you do mistake here, you can screw up your whole system. So, be very-very careful.
/dev/sdX means the name assigned to a device by your Linux system. It is some kind of analogy of disks C, D, E in Windows systems.
To find out the name Linux assigned to your flash drive, run this command:
Then you need to analyze the output like the one above. Usually, the USB devices are listed at the end. You find your flash drive by its size. It usually has only one partition. I know that my flash drive is 15Gb. So, its name is sdd. This name is not permanent and it depends on the order the drives are mounted to the system. So, you need to check your USB drive name every time you insert it into the computer
status=progress is not necessary. However, it is helpful because it will show you the progress during the writing process. Without this option, nothing will be printed on the terminal screen.
sync is actually another command, not an option. Sync clears the cache. Thanks to the && signs it will be executed as a chain with dd. This will make sure that all the data is written to the flash drive and nothing is left in the cache.
NOTE: I also need to WARN you that this procedure will wipe all the data from your USB flash drive. So, if you have any important data on it, copy it somewhere else before you run this command. I also recommend to back up the data from other hard drives, so you do not destroy them accidentally.
So, when you are sure that there is no valuable data on the flash drive and you specified all the names correctly, especially the of option, press Enter.
It usually takes several minutes to complete. When the process is finished, you can reboot your system and boot from a newly created bootable USB.
That is the way you can make a bootable USB drive in Linux.
Restore the USB drive
After you have used the bootable USB flash drive, you need to restore it back to its normal not-bootable state. So, to do that, you need to remove the bootable system from it. Run this command:
Then, where again sdX is your flash drive name without any number (in my case it is sdd). You can check it with:
After that create a new partition on it:
Select dos option.
And press enter to create a new partition.
Keep it at its maximum size. So, press enter.
Next, press enter again to make it primary. Navigate with the arrow keys to write and press Enter to write the changes.
Finally, type yes to confirm and quit the program.
Then, run this command, to check if a new partition has been created:
As you can see, the new partition has been created. It is named sdd1 in my example.
Then, format this partition as FAT file system:
Where ‘ALU’ is the label I give to this drive, you can use your name instead. And sdd1 is the partition name. Unlike in all the previous steps, where you used the device names, in this command you need to specify the partition name which ends with the number.
After these uncomplicated steps, your flash drive is like new and you can use it to store files.
Conclusion
Now you know how to make a bootable USB drive in Linux. You can now proceed to the installation process or test Linux live distributions.
So, leave your comment and give your opinion about this tutorial. Did you like it? Did you know about this tool?
Источник
Making bootable usb from iso linux
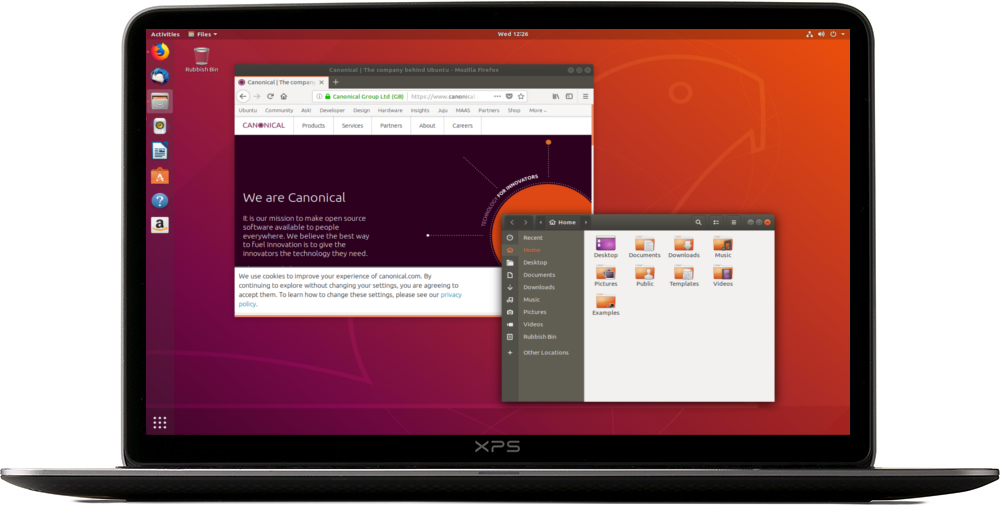
With a bootable Ubuntu USB stick, you can:
- Install or upgrade Ubuntu
- Test out the Ubuntu desktop experience without touching your PC configuration
- Boot into Ubuntu on a borrowed machine or from an internet cafe
- Use tools installed by default on the USB stick to repair or fix a broken configuration
Creating a bootable Ubuntu USB stick is very simple, especially from Ubuntu itself, and we’re going to cover the process in the next few steps.
Alternatively, we also have tutorials to help you create a bootable USB stick from both Microsoft Windows and Apple macOS.
2. Requirements
- A 4GB or larger USB stick/flash drive
- Ubuntu Desktop 14.04 or later installed
- An Ubuntu ISO file. See Get Ubuntu for download links
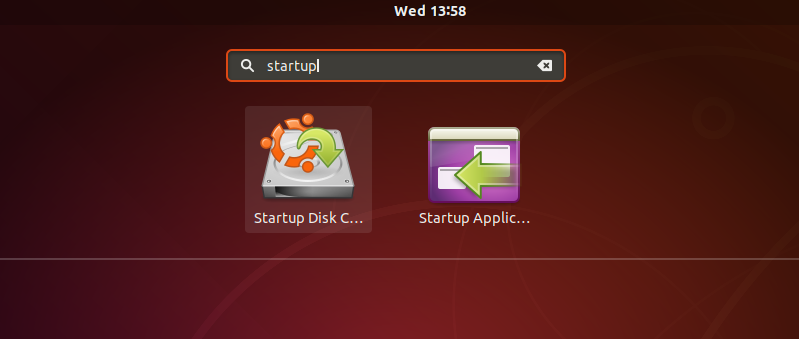
3. Launch Startup Disk Creator
We’re going to use an application called ‘Startup Disk Creator’ to write the ISO image to your USB stick. This is installed by default on Ubuntu, and can be launched as follows:
- Insert your USB stick (select ‘Do nothing’ if prompted by Ubuntu)
- On Ubuntu 18.04 and later, use the bottom left icon to open ‘Show Applications’
- In older versions of Ubuntu, use the top left icon to open the dash
- Use the search field to look for Startup Disk Creator
- Select Startup Disk Creator from the results to launch the application
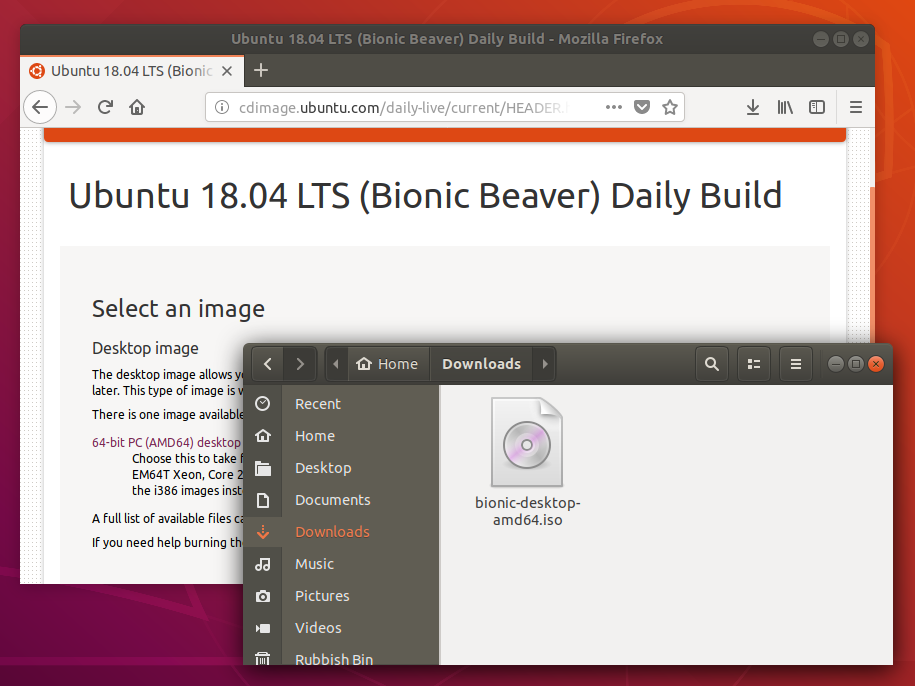
4. ISO and USB selection
When launched, Startup Disk Creator will look for the ISO files in your Downloads folder, as well as any attached USB storage it can write to.
It’s likely that both your Ubuntu ISO and the correct USB device will have been detected and set as ‘Source disc image’ and ‘Disk to use’ in the application window. If not, use the ‘Other’ button to locate your ISO file and select the exact USB device you want to use from the list of devices.
Click Make Startup Disk to start the process.
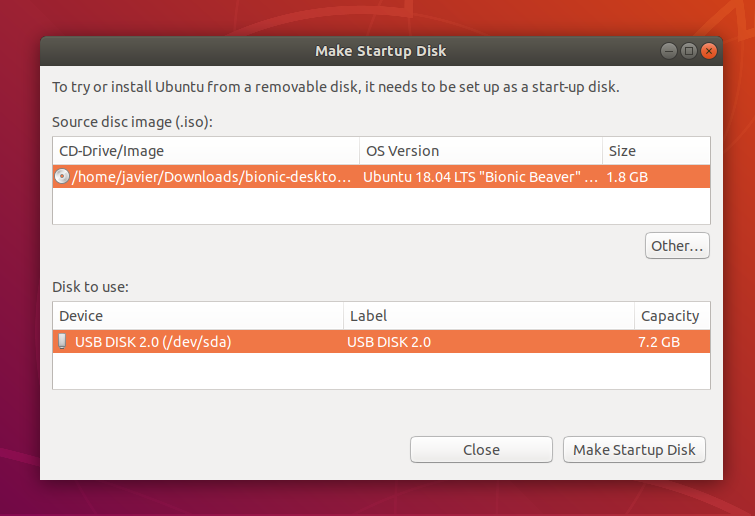
5. Confirm USB device
Before making any permanent changes, you will be asked to confirm the USB device you’ve chosen is correct. This is important because any data currently stored on this device will be destroyed.
After confirming, the write process will start and a progress bar appears.
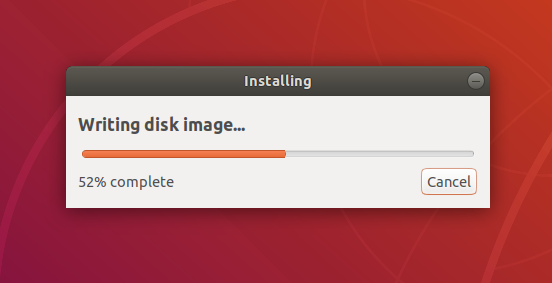
6. Installation complete
That’s it! You now have Ubuntu on a USB stick, bootable and ready to go.
If you want to install Ubuntu, take a look at our install Ubuntu desktop tutorial.
Источник
Make a bootable flash drive from an ISO image

We all know that installing an operating system from a USB drive is much faster than installing from DVD. In this article we will look at several ways to create a bootable USB drive.
Before describing how to create a bootable USB drive read the article How to correctly format the USB stick in Linux Mint. In some cases described below, it is desirable to have already formatted the USB flash drive in FAT32 format.
1. LinuxLive USB Creator (only for Windows users)
If you are a user of the Windows operating system and want to make a bootable USB flash drive with a Linux distribution – this program is for you.
It is very simple, select the USB flash drive, please specify the iso image will be copied, turn on the option to format the USB stick and click on the lightning.
You can download the program on the official developer’s website http://www.linuxliveusb.com/en/download.

Rufus is a utility that helps format and create bootable Flash/Pen/Key drives, memory cards, etc.
Rufus will be especially useful in cases where:
-you need to create a bootable USB disk from a bootable ISO image (Windows, Linux, UEFI, and others)
-need to work on systems that have no OS installed
-you need to flash a BIOS or other firmware from DOS
-you need to run a low-level utility
-Despite its small size, Rufus knows how to do everything!

3. UNetbootin (for Linux, Windows, Mac users)
A very common program. The principle of operation is the same as the previous program. Select the image, select the flash drive, and click OK. For details, see the screenshots below.
Installation latest version into Linux Mint 14/15/16/17/17.1:


4. LiveUSB MultiSystem (for Linux users) -To create a bootable USB flash drive with multiple operating systems (windows or linux) read article Create your LiveUSB MultiBoot very simple in Linux Mint.
5. Either – program to burn the iso image with the distro on a USB flash drive or micro SD card (Windows, MacOS and Linux) read article Either – program to record the iso image on a USB flash drive
6. YUMI – Multiboot USB Creator (for Linux, Windows users)
YUMI (Your Universal Multiboot Integrator), is the successor to our MultibootISOs. It can be used to create a Multiboot USB Flash Drive containing multiple operating systems, antivirus utilities, disc cloning, diagnostic tools, and more. Contrary to MultiBootISOs which used grub to boot ISO files directly from USB, YUMI uses syslinux to boot extracted distributions stored on the USB device, and reverts to using grub toBoot Multiple ISO files from USB, if necessary.
Important Note : YUMI was intended to be used to try to run various “LIVE Linux” Operating Systems from USB. Installing Linux from the YUMI created USB Drive to a Hard Drive is not officially supported. If the installer portion of any Live Linux distro does work, consider it a bonus.
Installation latest version into Linux Mint 14/15/16/17/17.1:
Download DEB package “YUMI for Ubuntu Linux” from website

7. USB image writer (for Linux users)
Linux Mint have default utility USB image writer. One time I used this program, but personally I have not always made a bootable USB flash drive.
Locate menu, the program will run. Select the image, select the USB drive and click Write.


Multiboot USB flash drive designed for loading and installing operating systems Windows/Linux and restoration-resuscitation tools directly from the USB drive.
9. WinUSB – Create Windows Usb stick
is a simple tool that allows you to create your own Windows installation on USB stick from an ISO image or DVD disk in Linux Mint.
10. Using the terminal (in my opinion the best 100% of the way)
As is known, the terminal is installed in any Linux distribution by default, so install additional software is not required.
The terminal command to write the iso image, the distribution is as follows:
Where instead of /home/USER/linuxmint.iso you need to specify the path to the iso file. sdb in the end, it’s a stick on which is written the way.
To determine your flash drive, run in terminal:

And if you stick decided differently, change in the command.
To be entered correctly in the command path to the file, open the folder with the file, open next to the terminal and drag the file into the terminal:

Now we are ready to start. I got the command:
The cursor of the terminal is blinking and it seems that nothing happens, but actually being recorded. Wait for the image capture and at the end you should see in the terminal like this:
Источник
How to Create Bootable USB from ISO using Linux Terminal

There are many third-party tools to create a bootable Linux USB Drive. Here I will show you how to create a bootable USB flash from ISO file using the Linux terminal.
Before we start make sure you have downloaded the .ISO file and have a USB flash drive with not less than 4GB capacity.
Check USB Drive
Connect the USB flash drive to your machine and check if it’s connected successfully. Use lsblk command to list all information about the attached block devices.
From the list find your USB drive’s mounted partition. In our case it’s /dev/sdc1. It is mounted by default.
Next, we must unmount the USB flash drive by the following command:
Make sure to change according to your USB drive and check if it has been unmounted again with lsblk command.
You must see the output without mount point in front of sdc1:
Download Linux ISO File
Here we will create a Ubuntu bootable flash drive, first go to ubuntu website and download the iso file to your Linux computer. Or you can download iso file from the command line using wget or curl command.
This will download iso file to the current directory.
Create Bootable Drive from Terminal
We are going to use dd command to create a bootable USB flash drive.
Where /path/to/input.iso is the path where .iso image downloaded. Make sure to change with your USB disk letter accordingly. The point here is to write the disk name itself (e.g. /dev/sdc) and not the partition (e.g. /dev/sdc1 ).
Where bs is read and write BYTES bytes at a time, if is the input file, of is the output file. The conv=fdatasync bit is important as dd can return before the write operation finishes.
By default the progress of the command will not be displayed, to view the progress you can use pv command:
Note: From 8.24 version of GNU Coreutils, dd command has the option to show the progress.
After the process is finished you can use USB as a bootable drive for ubuntu installation or repair.
Conclusion
Using the terminal to create a bootable USB drive is much easier and way faster than with GUI tools. Also, it is very useful to know how to do it in a terminal, because there isn’t always a GUI available. The main disadvantage, in this case, is that there is no double-check option for dd . GUI tools help you to identify and select the target drive, and provide a final checkpoint, where you can double-check, that you will be writing to the correct drive.
Источник


