- How to Make Windows 10 Look Like macOS? Easy Methods Are Here! [MiniTool News]
- Summary :
- Install a Mac OS Theme for Windows 10
- Add Mac Wallpaper
- Add macOS Icons to Windows 10
- Install Some Apps to Windows 10
- Use Mac OS Transformation Pack
- The End
- ABOUT THE AUTHOR
- How to Make Your Windows Computer Look Like a Mac! NO DOWNLOADS NEEDED.
- Introduction: How to Make Your Windows Computer Look Like a Mac! NO DOWNLOADS NEEDED.
- Step 1: Setting Background
- Step 2: Removing Icon Names
- Step 3: Hiding the Task Bar
- Step 4: Moving the Icons
- Step 5: Final Result
- Step 6: Further Improvement
- Be the First to Share
- How to make Windows look like Mac OSX
- Share This Post
- How to Make Ubuntu Look Like macOS in 5 Easy Steps
- How to give your Ubuntu Linux a macOS makeover
- Prerequisites: GNOME Tweaks and GNOME Extensions
- Step 1: Install a macOS inspired GTK theme
- Step 2: Install macOS like icons
- Step 3: Add macOS like dock
- Step 4: Use macOS wallpaper
- Step 5: Change system fonts
- Bonus Tip: Spotlight like app launcher (if you want to go the extra mile)
How to Make Windows 10 Look Like macOS? Easy Methods Are Here! [MiniTool News]
By Vera | Follow | Last Updated November 26, 2020
Summary :

macOS is popular in public since there are some built-in features in it. If you are looking for a method to make Windows 10 look like Mac and get Mac features on Windows 10, this is the right place you come. MiniTool devotes itself to offering you a detailed explanation of your issues, so keep reading to know how to do this work.
If you once used macOS or you like the interface of a Mac but you still want to continue using Windows 10 operating system, there is still a chance for you to enjoy Mac’s features in Windows 10. Of course, this means making the Windows OS look like macOS by changing the Windows 10’s theme and using a few apps.
These operations only require a couple of clicks. The desktop will be similar to a Mac but your system is still working on Windows 10 and you are able to use all Windows 10 features as before.
What is a system restore point and how to create restore point Windows 10? This post will show you the answers.
Install a Mac OS Theme for Windows 10
To make Windows 10 look like Mac, the first thing you should do is to choose a Mac OS theme for Windows 10. This way, the Windows system has a similar appearance to the Mac.
Add Mac Wallpaper
To do this work, you can firstly search for Mac OS X default wallpapers in Google, click Images to continue and then right-click one to choose Save image as to store it in a folder.
Then, right-click the blank on the Windows desktop to choose Personalization, go to Background > Picture to choose Browse so that you can add the downloaded wallpaper to Windows 10.
Add macOS Icons to Windows 10
Step 1: Search for Aqua Dock (a software that adds an OS X Dock replica to Windows XP/7/8/10) in Google, download and install it on your PC, then run it to open the Dock directly.
Any icon on the Dock can be changed if you want a custom one. To add new icons to Aqua Dock, you can go to this website to download the Zip file and extract it. Then, move these icons to the icons folder of Aqua Dock. Next, right-click one shortcut and choose Customize to add one icon to the Dock. To select one from the icons folder, you can press Change.
Install Some Apps to Windows 10
Additionally, you can make Windows look like Mac by installing some tools to bring in some features in Mac to Windows 10.
1. Lightshot
In Mac, the built-in screen recorder and screenshot feature is extensive and user-friendly for you. To enjoy a similar feature, you can install Lightshot to use print screen.
2. Quick Look Tool — Seer
Seer enables you to preview the file including the content when choosing a file and hit the spacebar, without right-clicking to view properties and double-clicking to open. Importantly, you can customize settings with Seer, including font support, language change, keyboard shortcuts, etc.
To use the same feature in Windows, you can use QuickLook that offers some actions, such as, zoom images or documents via Ctrl + mouse wheel, close preview via Esc, adjust the volume via mouse wheel, etc.
3. WinLaunch
If you want to use the app launcher of macOS in Window 10, you can download WinLaunch that enables you to add programs, URLs, and files to it.
Use Mac OS Transformation Pack
In addition to the above ways, you can choose to install a pack like macOS Transformation Pack that can be very helpful to make Windows 10 look like Mac.
The pack offers many changes and brings some Mac themes, wallpapers, icons, Dock, Dashboard, Spaces, and Mac features to your Windows PC, and so on.
The End
Now, we have shown you how to make Windows 10 look like macOS. Just try the proper way based on your actual needs. To enjoy the Mac’s features and use Windows 10 on the same Mac, you can also purchase a Mac with macOS and install the second OS – Windows 10.
ABOUT THE AUTHOR

Position: Columnist
Vera is an editor of the MiniTool Team since 2016 who has more than 5 years’ writing experiences in the field of technical articles. Her articles mainly focus on disk & partition management, PC data recovery, video conversion, as well as PC backup & restore, helping users to solve some errors and issues when using their computers. In her spare times, she likes shopping, playing games and reading some articles.
How to Make Your Windows Computer Look Like a Mac! NO DOWNLOADS NEEDED.

Introduction: How to Make Your Windows Computer Look Like a Mac! NO DOWNLOADS NEEDED.


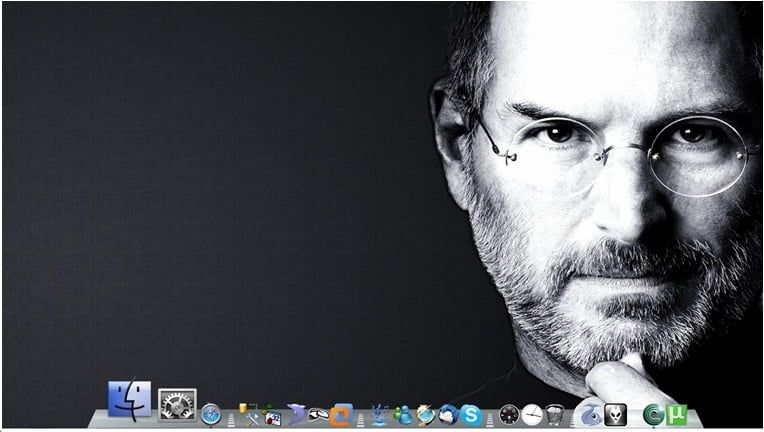
This is a great way to make your windows computer look like a mac. Unlike many ways you can do it, this way is perfectly safe and you don’t need to download or install any risky software that slows down and damages your system. This is what the end result looks like (see above)
Step 1: Setting Background
Save this image above onto your computer then set it as your desktop background.
To save the picture, right click on it and select save.
Go to Control Panel\Appearance and Personalization\Personalization then click on the background tab and set the image you saved as the background, if the background image doesn’t fit your screen, select stretch then click ok.
Your desktop should now have this as the background.
Step 2: Removing Icon Names
You need to remove the Icon names from each icon on your desktop.
1) Open Character Map, scroll down and select a blank character in the grid, click on the Select button, and click on the Copy button. (see screen shot above)
2)Right click on a icon on the desktop that you want to hide the text of, click on Rename, right click inside the rename box, click on Paste, and press enter.
NOTE: If you get a message that a another icon already has the same name, then just repeat step 1 to select a different blank character and do step 2 again.
3)The text of the desktop icon will now be hidden. (see screenshot above)
4)Repeat the steps above for all other icons on the desktop.
Step 3: Hiding the Task Bar
Move your cursor down to the taskbar (the bit at the bottom of your screen) and right mouse click on it. Select properties then, in properties, select the ‘Auto-hide taskbar’ option then select OK. Now, when you look at the screen the taskbar should be hidden. Mo ve your mouse to the very bottom of the screen and it should appear untill you move your mouse off it.
You can access the task bar by moving your cursor to the bottom of the screen at any time.
Step 4: Moving the Icons
Right mouse click anywhere on the homescreen where there isn’t any icons.
Hover your mouse over view so the pop out appears (like in the screen shot above).
Click on ‘Align icons to grid’ so the tick dissappears and click off it. You can now move the icons on screen anywhere and they won’t be stuck in a grid system. Click on an icon and drag it into the box at the bottom, leave a small space bettween each app and don’t over crowd it. It is also best if you move the recycle bin to the far right of the box
Step 5: Final Result
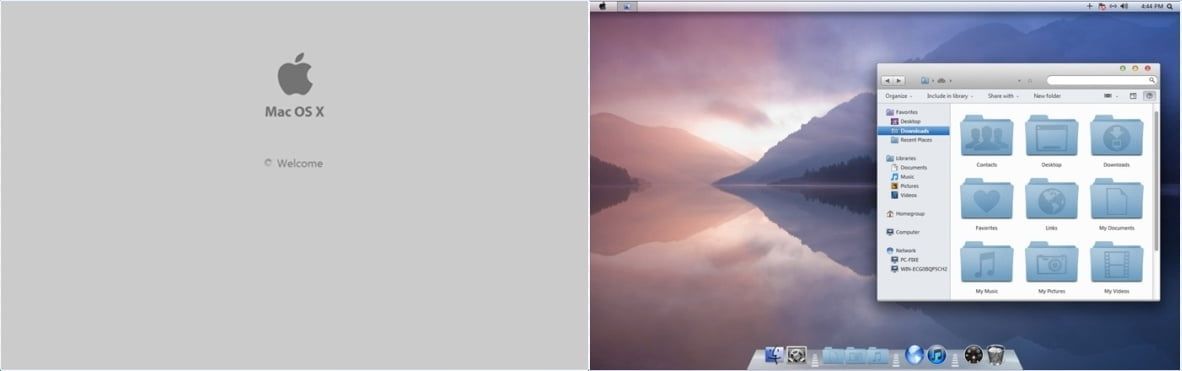
Your screen should look very similar to this (see screen shot above)
If you compare it to the real mac home screen (the other photo), they are incredibly similar and you can hardly tell the diffrence!
If you ever need to access the windows taskbar, just put your mouse at the very bottom of the screen and it should appear!
If you get confused with any of the steps in this guide, feel free to ask me in the comment boxes below each slide!
Step 6: Further Improvement
Not for beginners!!
If you have photoshop, you can make your desktop look even more like a mac then it does already. Just leave the icons on the desktop in the dock at the bottom, then change your wallpaper to a blank colour (green is usually the best) then take a screen shot. Open the screen shot in photoshop then remove the background, so you just have the icons. Then flip the icons upside down, as if it were a reflection. Once you have done this, set the layer transparency to about 40% (or what ever looks good). The use the soft edged eraser tool to get the icons to fade out. Save the image then set it as your wallpaper. It should look similar to the screenshot above.
All finished!
Be the First to Share
Did you make this project? Share it with us!
How to make Windows look like Mac OSX
Share This Post
How to make Windows look like Mac OSX (with Images)
What is it :
If you are someone crazy about Macbook and using a Windows OS then this post is for you.
By following the step by step instructions in this post you will be able to make your Windows look like Mac OSX Lion Inspirat (works fine with all versions of windows 7 however windows XP and Vista has come compatibility issues and may require proper service packs, hence recommended for 7); remember just the appearance gets changed and your OS will still be windows.
Why is it important :
- All the icons including My Computer,Control Panel, Folders, Music etc. gets changed to look like mac.
- You can easily personalise the folders by changing ColorFolder Skin.
- Minimize, Restore and Close buttons gets changed to mac like Green, Yellow and Red buttons
- You can start using Rocket Dock menu.
- Windows welcome message changes to MAC OSX Welcome and while Shutting down it will display MAC OSX Shutting down.. 😛
- Cursors,Sounds/Notifications,Visual Style,Backgrounds etc. etc also gets changed to look like mac.
Above mentioned are few highlights of the pack and there are lot many features which you can enjoy once you install it.
How to make Windows look like Mac OSX :
You can make these changes by installing a complete pack (ie.CustoPack), for that you need to download two files from the internet which are free download .
asKeygeek members/subscribers can download both files from the below link. Others can download it directly from the internet.
Download OR Write to us to get the free Download link: ask here..
Step 1:Download the ‘ mac_os_x_lion_inspirat_dp3_by_david_pieron-d3fbx0w ‘ zip file from the internet.
Step 2:Extract the folders from the zip file and from the -SETUP- folder double click to install the ‘ Mac OSX Lion Inspirat (Transformation Pack) ’ setup file (.exe file)
![]()
Step 3:Download the ‘ CustoPacks-1.0.0.40 ’ (or later version) from the internet and double click to install it.
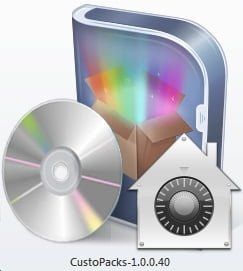
Step 4: After installing both the files open the CustoPack Tools icon from the desktop.
Step 5: From the CustoPack Tools window either you can choose the inbuilt Mac theme or you can create your own theme and also you can manage the settings here.
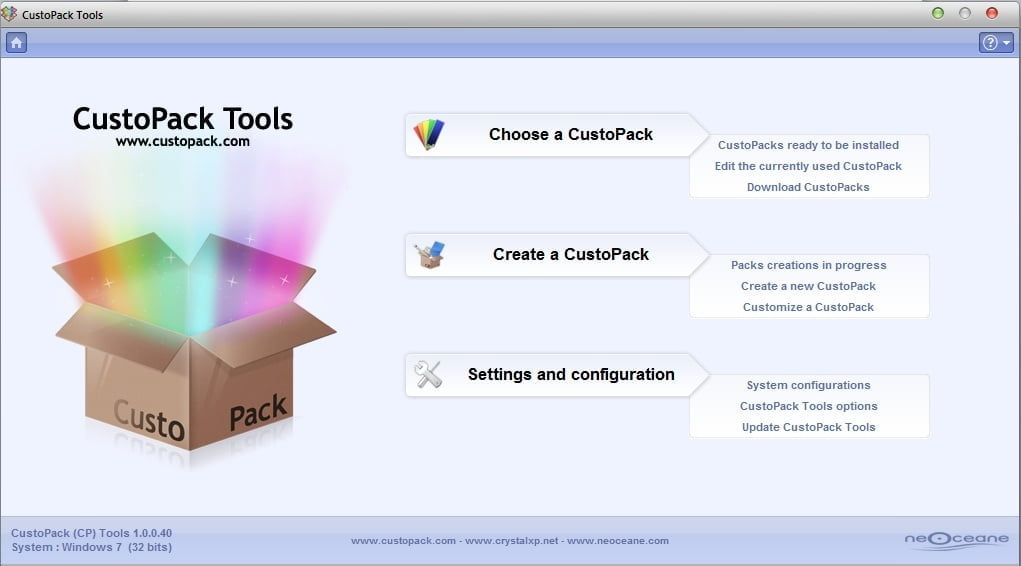
Step 6: Select Choose a CustoPack and go for Classic installation or higher. And when prompted restart your computer to complete the installation process.
Thats it!! now your windows should look like MacOSX 🙂
How to Make Ubuntu Look Like macOS in 5 Easy Steps
Last updated October 1, 2020 By Community 52 Comments
Customization is one of the main reasons why I use Linux. There is no end to the kind of customization you can do to your desktop Linux. You can change icons, themes, change fonts, change terminals, add screenlets, indicator applets, extensions and what not.
We have covered numerous desktop customization tips and tricks on It’s FOSS. In this one, I’ll show you how to make Ubuntu look like macOS.
Many people use macOS because of its simplistic and elegant look. You may disagree with it but it remains a popular opinion. Even there are Linux distributions that have macOS like look and feel.
One of the readers requested us to show how to make Ubuntu look like macOS and hence we’ve created this tutorial. In fact, this is a good example to show the customization capability of desktop Linux.
No, you don’t have to install a new distribution just for customizing the looks. You can do some tweaking on your own and give your system mac-like looks.
How to give your Ubuntu Linux a macOS makeover
Although this article suggests it’s for Ubuntu, you can follow it for other distributions with GNOME desktop with little or no changes. Please make sure to check your desktop environment.
To be honest, even if you are using some other desktop environment, you can still take some hints about what changes to do. But you have to make sure to follow the steps using your DE’s tools.
Prerequisites: GNOME Tweaks and GNOME Extensions
Please make sure to install GNOME Tweaks tool. You’ll need it for changing the themes and icons.
You’ll also need to enable GNOME Extensions for changing GNOME Shell and adding planks.
After you enable GNOME Extension, you need to install “user themes” extension from Gnome extensions or just go to this link and click on the switch to turn it on.
I also expect you to have some knowledge about installing themes in Ubuntu. I’ll briefly touch on this subject, though.
Let’s see the steps one by one.
Step 1: Install a macOS inspired GTK theme
Since the focus is on making GNOME look like macOS, you should choose a macOS like theme. There are plenty of themes which are macOS like.
Download a theme of your choice
You can go to Gnome-look site, and look for themes for GTK3. Don’t worry if you see “Pling” written on the Gnome-look website, they both are from same providers.
You can choose any theme you want. Here are some macOS themes I think you should take a look at:
I shall be using “McMojave” in this article. You can choose any theme you want. You will find dropdown download button on the right side of website, click on it.
Here you may find various “.tar.xz” files. These different files contain same theme with small differences. Like in “McMojave” we have variations like dark and light theme. You can try them all, or just pick anyone you like from the carousel given in middle.
Set downloaded theme
Extract the downloaded theme and copy this extracted theme folder to .local/share/themes folder.
Open GNOME Tweak tool and change the Application and Shell theme. As soon as you change the themes, you can see those three yellow, green and red buttons, and that Apple logo on upper left corner. You can also notice come changes on panel items.
 McMojave GTK and Shell theme
Step 2: Install macOS like icons
The next step in this macOS makeover is to use macOS like icons.
Download icon set
Here are some icon sets I suggest that you can download from Gnome-look website:
I shall be using “McMojave-circle” in this article, feel free to use any icons you like.
Just like the theme, you can download it from “download” dropdown button from right side. Here you may also find various different versions of same icons.
 Mcmojave Circle
Set icon
Now set the downloaded icon. For that extarct the download folder and copy it to .icons folder in your home directory. See this article on installing icon themes in Ubuntu.
This is what this icon looks like:
McMojave Circle Icons Look
Step 3: Add macOS like dock
Without macOS like dock, your Ubuntu will not look like macOS. There are various docks available for Linux. I like Dash to Dock and I am going to use it here.
Dash to Dock is a GNOME extension. By now you are familar with GNOME Extensions. Just go to this link and click on toggle button to install it. Your native dock will be automatically replaced with dash-to-dock.
You can change settings by right clicking on “show applications” button (rightmost menu button), and selecting “Dash to dock settings”.
Step 4: Use macOS wallpaper
Most of the complicated stuff are done. Now it’s time to set macOS wallpaper. You can download macOS default wallpapers from the link below:
Change the desktop background
I shall be using “Mojave Day” wallpaper. Right click on the downloaded image and select ‘Set As Wallpaper’ option to change the wallpaper.
After setting this wallpaper, this is how my system looks like:

Change the lock screen Wallpaper
The lock screen background option is removed from the settings of Ubuntu 20.04. Now it uses blurred desktop wallpaper as the background of lock screen.
To set a custom lock screen wallpaper, you can use “Lock screen background” extension.
Open “Lock screen background” extension setting, and set lock screen wallpaper.
This is how the lockscreen looks now. If you are wondering, here’s how to take screenshot of lockscreen in Ubuntu.
 Lock Screen
  Login Screen
Step 5: Change system fonts
For several years, the primary system font in macOS is ‘San Francisco’. But this San Francisco font is not public domain but proprietary like so many other things in the Apple ecosystem. For this reason, you cannot use this font.
What you can do is to use an open source font that looks similar to the San Francisco fonts. I recommend using Roboto font by Google or Source Sans Pro by Adobe.
Installing fonts is straightforward in Ubuntu. Download the zip files of the fonts and just double-click on the ttf files in the extracted folder. It will give you the option to install the fonts one by one.
If you want to save time and install all the fonts at once, extract all fonts in it to the “.fonts” directory in your home folder (
Once you have installed the fonts, you can change the system wide font using GNOME Tweaks tool.
Bonus Tip: Spotlight like app launcher (if you want to go the extra mile)
If you are a fan of macOS Spotlight launcher, you may have something similar on Linux also. My favorite package for getting this kind of launcher is “Albert“.
After installing; open “Albert” and set hotkey (key combination you want for opening launcher) and you are good to go. I think in macOS, the Command+Space is to launch Spotlight. You may set Super+Space keyboard shortcut in Ubuntu.
You will get many themes in built, in picture below I’ve used “Spotlight dark”.
Albert won’t be able to launch apps directly, you have to give it permissions for where it can look for search results.
After setting up, this is how it looks:
This is how my Ubuntu 20.04 looks like after making all the customizations. Does it look like macOS? You be the judge.
 macOS Theme
So, this is how you can make your GNOME desktop look like macOS. As I said in the beginning, this is a good example of Linux desktop’s customization capability.
If you have any new ideas or have any queries; the comment section is all yours.
Written by Sumeet with additional inputs from Abhishek Prakash.
Like what you read? Please share it with others.


