- How to Easily Remap Keys in Windows 10 using SharpKeys
- Use SharpKeys 3.6 to Change What Keys Do
- Things that SharpKeys will do:
- Things that SharpKeys will not do:
- How to Remap Keys on Windows 10
- Installing SharpKeys on Windows 10
- Remap Keys on Windows 10 Using SharpKeys
- Exporting Your SharpKeys Configuration to Other PCs
- Using Your Keyboard With Windows 10
- 4 Best Keyboard Mapping Software For Windows 10
- SharpKeys
- Key Mapper
- KeyTweak
- MapKeyboard
- Closing Thoughts
How to Easily Remap Keys in Windows 10 using SharpKeys


Most of us are happy with a keyboard in its out-of-the-box condition. And if we aren’t, we usually put up with its quirks and inconveniences. These can range from accessibility issues to regional incompatibilities and of course, just plain old preference. But for those of us who can’t tolerate our keyboards being inefficient or incorrect, there’s a solution: SharpKeys.
SharpKeys 3.6 is another gem I found among many on the Github website such as the HOST File editor, which makes it easier to edit your Windows Host file without all the hassle involved. Like the HOST file editor, SharpKeys takes a functionality that exists in Windows 10—remapping your keyboard keys—but makes it easy enough for the everyday user to do it on the fly. With SharpKeys, you can quickly and easily reassign your keyboard key to another key or make it into a shortcut to launch an application or perform some other Windows function. I’ll show you how to get started.
Use SharpKeys 3.6 to Change What Keys Do
First of all, what does SharpKeys do? SharpKeys lets you remap common keys on your keyboard for other functions. For instance, you can make your Caps Lock key become your new Shift key and vice versa. This utility exposes a hidden function already built into Windows; SharpKey just makes it easy for you and I to change which key we want to use with a few simple clicks. Before we get started, it’s important to list what it can and cannot do. Here is what the site’s description says:
Things that SharpKeys will do:
- Map an entire key to any other key – e.g. you could remap Caps Lock to a Shift key
- Remap more than one key to one single key – e.g. you could remap every key on a keyboard to the letter Q
- Force you to look for the Left or Right ALT key in the list of available keys because Type Key cannot scan for ALT
Things that SharpKeys will not do:
- Allow you to swap two keys with each other – e.g. you can’t have Q and Z swap places because the remapping code would get confused
- Map multiple key presses to one key – e.g. it will not support an attempt to remap Ctrl+C to the F5 key
- Map mouse clicks to any key
- Support certain hardware keys that never make it to Windows – e.g. Logitech’s volume buttons or most Fn keys
- Support multiple mappings for different users – the Windows key being tweaked is for an entire machine
- Protect you from yourself – if you disable your DEL key and can’t log in because Ctrl+Alt+Del doesn’t work now, you’ll have to reformat Source
Some really good points to keep in mind when using SharpKeys. Don’t get crazy using it. SharpKeys 3.6 is a small download, less than 600 KBs. The MSI installer had me up and running in seconds.
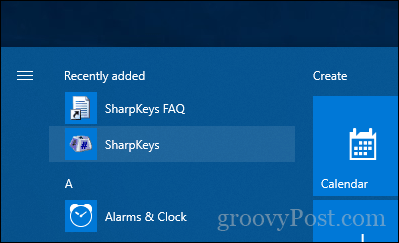
After installation, launch Start, then click SharpKeys under Recently added or look under the S group in All apps.
SharpKeys greets you with a small note reminding users the app supports versions as far back as Windows 2000 (in case you’re crazy enough to still be using Windows 2000…).

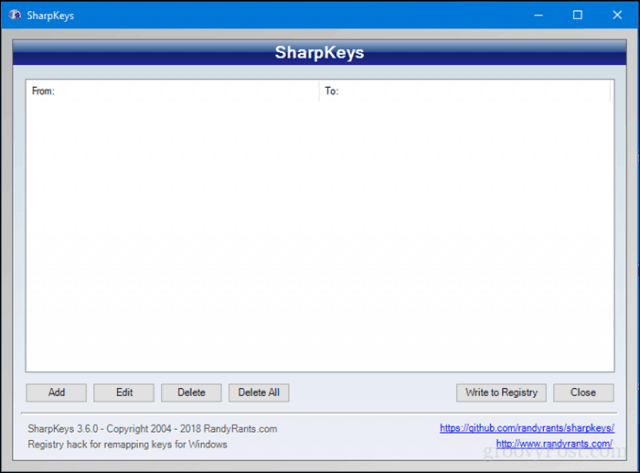
The interface is not particularly intuitive, but one you figure it out, it’s pretty easy. To begin, click the Add button, which will bring up another user interface.
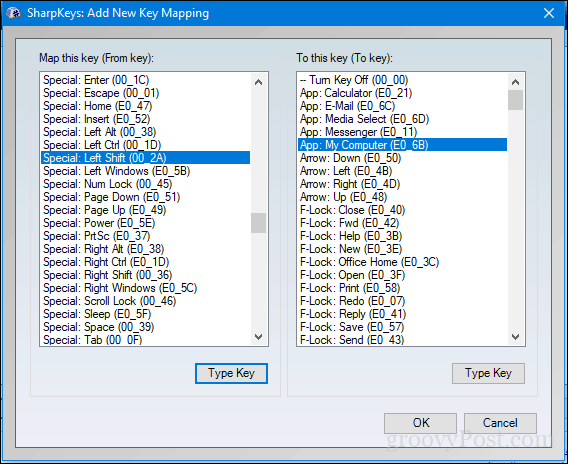
Select a key in the left pane you want to map to another key, app or window. For example, I want my Shift key to open My Computer. Click in the right pane, scroll down to My Computer, then select that option. Click OK to confirm changes.
Click Write to Registry to confirm changes. You will be prompted to log out or reboot to complete the changes. When I used SharpKeys, signing out and signing back in was enough to write the changes.
So, how did the program do?
Yes, it does work and I must say, it does add a world of difference to how you use your keyboard to get to things faster. Instead of having to strike multiple keys or reach for the mouse, it’s a definite time saver.

If at any time you want to remove the changes you made, fire up SharpKeys again, select the assigned key, then click Delete.

Another key I found this useful to reassign was the quote key on my laptop, which was originally manufactured for the UK. The @ symbol was assigned to a location among the qwerty keys for what reason I do not know. But I was able to restore it back to a more natural location thanks to SharpKeys. So, if you have a keyboard that’s holding you back, give this a spin and let us know how goes.
Remember, don’t get too crazy and lock yourself out and always maintain a recent backup or system restore point just in case something goes wrong.
How to Remap Keys on Windows 10
Using a free open-source software program
There are a couple of reasons why you might want to remap keys on Windows 10—the layout might feel wrong or the keys might be broken. Unfortunately, Windows doesn’t allow you to remap keys directly. You can map them by altering the registry yourself, which we wouldn’t recommend, or by using third-party software.
One of the easiest keymapping software to use on Windows is SharpKeys. This free and open-source software allows you to map one or multiple keys to another key, although it only supports keyboard keys as mouse or touchpad keys aren’t supported. Here’s how to remap keys on Windows 10 using SharpKeys.
Installing SharpKeys on Windows 10
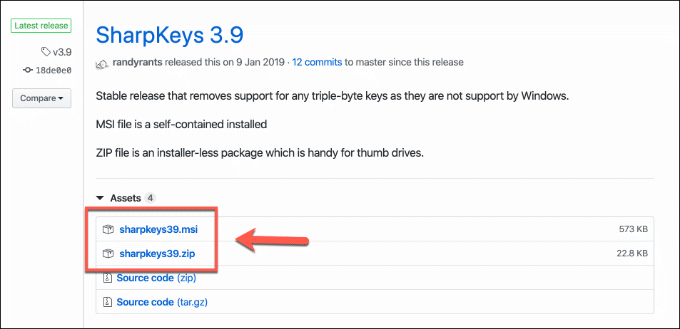
A Windows installer file for SharpKeys is available on the SharpKeys GitHub repository, as is a portable version you can download to use on flash storage drives to take your SharpKeys installation with you. SharpKeys is open source, so you can choose to download the source code and compile it yourself if that’s your preference.
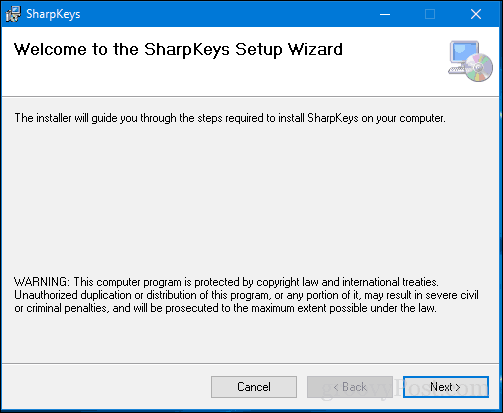
- To remap your keys on Windows 10, download and install the latest version of SharpKeys from the releases section of the SharpKeys GitHub repository. The installer file is listed as an MSI installer file, or you can download and extract a portable ZIP version.
- Once SharpKeys is installed, open it from your Windows Start menu or run the executable file from the extracted folder for the portable version. SharpKeys will warn you that using it will modify the registry, adding a single key to it to remap your keys. Press OK to accept the warning and allow SharpKeys to do this.
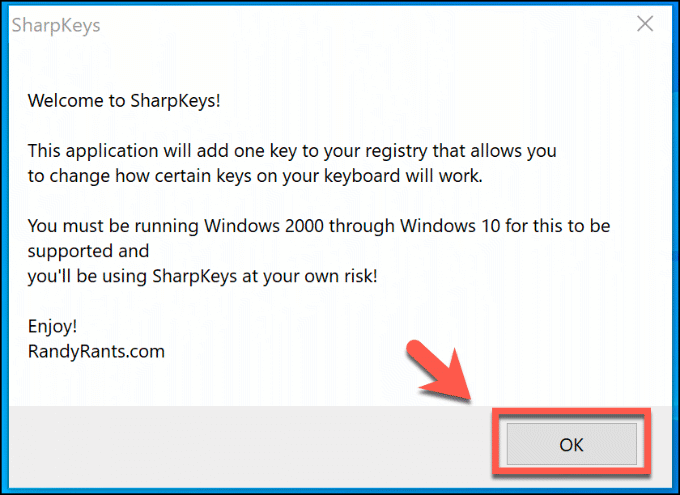
The main SharpKeys window will open once the warning has been accepted.
Remap Keys on Windows 10 Using SharpKeys
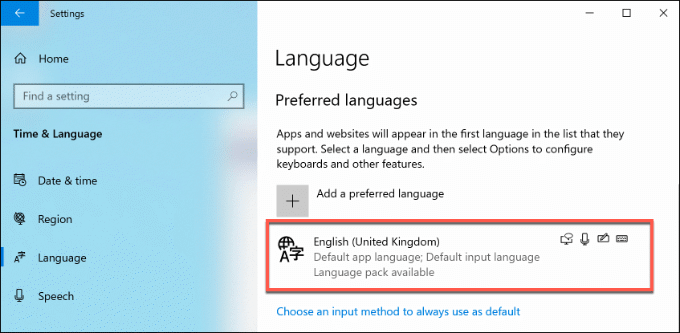
Once SharpKeys is installed, you can use it to begin remapping your keyboard keys. Before you start, however, you should check whether your keyboard locale is correctly set for your location. This might resolve issues when the at sign keys and quote keys on your keyboard are swapped over, for instance.
You can check this by right-clicking the Windows Start menu and clicking Settings. From here, click Time & Language > Language and check the locale listed under the Preferred Languages section.
If your locale is correct and you still need to remap other keys, you can start using the SharpKeys software.
- To begin remapping keys in SharpKeys, click the Add button in the main SharpKeys window.
- In the Add New Key Mapping window, you can select which keys you want to map. You map the key choices from the left-hand list to the physical keys listed in the right-hand list. You can scroll through and select these manually, or click the Type Key button under each section to find them automatically. Press OK when you’ve completed your key mapping.
- You can repeat the above step to map multiple keys. To edit any of the choices you’ve made, select them from the list in the SharpKeys main menu, then press the Edit button.
- Select an item and press the Delete button to remove that particular key mapping from your SharpKeys list. To remove all your key mappings at once, press the Delete All button instead.
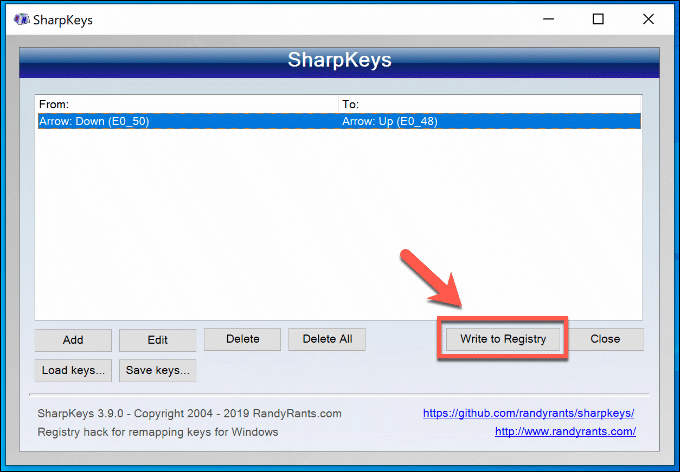
- The key mappings you create, edit, or delete using SharpKeys won’t apply until you write them to the registry. To do that, press the Write to Registry button in the main SharpKeys window.
Exporting Your SharpKeys Configuration to Other PCs
You may wish to export your SharpKey settings to other Windows 10 PCs if you want to use your remapped keys on multiple devices. You might want to do this before you reset and reinstall Windows on a PC using SharpKeys, too.
- You’ll need to export your SharpKeys configuration first. Open SharpKeys and click the Save Keys button in the main window to begin.
- In the Save SharpKeys Key List window, select a suitable location to save your SharpKeys configuration file. Give it a memorable name, then press Save to save the file.

- Transfer the SharpKeys configuration file (in the SKL file format) to another Windows PC with SharpKeys installed. Open SharpKeys on that PC, then press the Load Keys button in the main window.
- Locate your SharpKeys configuration file in the Open SharpKeys Key List window and select it. Press Open to load the configuration file and add the new keys to SharpKeys.

- The exported configuration will be imported into SharpKeys, with the key list updating to show the new key mappings. Press the Write to Registry button to write this updated list to the registry.

Using Your Keyboard With Windows 10
If you remap keys on Windows 10, you can bypass broken keys or a poor layout, but that isn’t the only way you can use your keyboard more effectively. One method is to try using keyboard shortcuts, reducing your reliance on your PC mouse or trackpad.
That depends, of course, on whether you have a fully working keyboard. Remapping keys is one option, but you may need to look at more drastic ways to fix a water damaged keyboard if you’ve spilled a drink over multiple keys. If you have your own keyboard repair tips to share, please leave them in the comments below.
Ben Stockton is a freelance technology writer based in the United Kingdom. In a past life, Ben was a college lecturer in the UK, training teens and adults. Since leaving the classroom, Ben has taken his teaching experience and applied it to writing tech how-to guides and tutorials, specialising in Linux, Windows, and Android. He has a degree in History and a postgraduate qualification in Computing. Read Ben’s Full Bio
4 Best Keyboard Mapping Software For Windows 10
Modern day computers are incredibly powerful and can accomplish a varied array of tasks, ranging from the casual to the not so casual. And that’s not just because of the extremely capable hardware they boast, but also due to the equally capable software applications they run. In a nutshell, the massive improvements made over the past few years in computing technology have led to the advancements both in hardware, as well as software.
However, even as computer hardware has advanced, its core functionality has remained largely unchanged, especially for basic devices like mouse and keyboard. If we specifically talk about the keyboards, they now have multiple layouts, support advanced multimedia controls, and whatnot, but the basic purpose is still the same – entering (textual) information. You press a key, and the alphabet, number or function associated with it is entered. But what if you could make the keyboard keys work the way you wanted them to? That would be awesome for creating custom keyboard layouts that suit you the best, right?
Turns out, you can do just that, thanks to a variety of keyboard mapping software applications out there. So without further ado, let’s jump in and find out more about the 4 best keyboard mapping software for Windows 10.
SharpKeys

Lightweight and no-nonsense, SharpKeys is a surprisingly capable and most importantly, easy to use keyboard mapping application that lets you remap your keyboard’s keys in almost no time. SharpKeys supports all the standard keyboard keys (alphabets, numbers, special characters, combination, function etc.), and can be used to remap even the special multimedia control keys found on some newer keyboards. At the very basic level, it’s just a utility for managing a special key (pun intended) in the Windows Registry that allows the OS to map any key with the function associated with any other key. The working of the program is as simple as it gets. All you have to do is select the key that you want to remap from the key list, and then select the target key that you want to remap it to, again from a similar key list. When done, simply write the changes to the registry, restart your computer, and you’re all set. Should you need to clear the custom keyboard mappings, simply launch the program and hit the “Delete All” button.
Key Mapper

Want a keyboard mapping application that is easy to use, looks gorgeous, and has a number of settings to play around with? You should take a look at Key Mapper, as it ticks off pretty much all of these boxes, and then some more. Thanks to a simple virtual keyboard UI, key mapper makes remapping of keyboard functions as straightforward as its name. The application supports a wide variety of language-specific keyboard layouts. In addition to that, the keys themselves are segregated into categories (e.g. useful keys, working keys) and groups (lock keys, modifier keys etc.) for easy selection and remapping. The keys can be remapped on either a per-user level or globally (boot mapping). The remapping process itself is simple. Double click the key to be remapped, select the target key and hit the “Map” button. Once you’ve specified all the key mappings, simply log off and log back in to effect the changes. The mapped keys are highlighted on the virtual keyboard.
KeyTweak

While it’s doesn’t have the most eye-pleasing UI out there, but make no mistake about it; KeyTweak is a power packed keyboard mapping application, having a whole bunch of features, along with some extra goodies thrown into the mix. Probably the most interesting feature of KeyTweak is that it lets you specify different mapping configurations, which can then be saved as “Remap” files. All you have to do to apply a specific mapping configuration is load its saved remap file and hit the “Apply” button. KeyTweak uses numerical identifiers for all the keyboard keys for easy mapping. Simply click on the key that you want to remap, choose its target remapping from the drop-down menu, and click the “Remap Key” button. You can also disable specific keys if you want. In addition to standard keys, KeyTweak can be also used to map certain additional operations (refresh web pages, open My Computer etc.). It also has two “teach” modes, Full and Half, which can be used to ease up the mapping process even further.
MapKeyboard

At just about 75 KB, MapKeyboard is an extremely featherweight keyboard mapping software. In addition to that, it’s portable as well, which sweetens the pot a bit more. Although MapKeyboard doesn’t really have a whole lot of fancy options, it gets the basics extremely right. The application supports the standard keyboard layout, including all the extra keys such as modifier keys, function keys, and the numeric keypad. The virtual keyboard UI makes mapping simple. Launch the application (preferably with administrator privileges), and click on the key that you want to remap. A remap prompt will come up at the bottom, where you can select the target mapped function from the drop down menu. Once you’ve specified all the remappings, save the layout, and logoff/logon to apply the changes. It’s as simple as that. The remapped keys are highlighted.
Closing Thoughts
The keyboard has always been an important computer peripheral, and that still stands. And while its characteristics, such as the layout, add-on functionalities etc., have evolved over time, the basic purpose remains the same. That being said, the standard keyboard layout works just fine for most of the casual users. However, if you want to squeeze out as much productivity from your keyboard as you can, and want custom key layouts that work the best for you, the above-discussed applications might just help in that. Give them a shot, and let me know what you think in the comments.


