- FIX: Memory leaks in Windows 10 [Full Guide]
- How can I fix memory leaks in Windows 10?
- 1. Restart your PC
- 2. Use the Windows 10 built-in tools
- 3. Check for driver updates
- DriverFix
- 4. Remove malware
- Run a System Scan to discover potential errors
- Bitdefender Antivirus Plus
- 5. Adjust for Best Performance
- 6. Disable programs running at Startup
- 7. Defrag hard drives
- 8. Registry hack
- 9. Disable Runtime Broker
- 10. Disable Superfetch
- 11. Disable Windows Tips and Tricks
FIX: Memory leaks in Windows 10 [Full Guide]

- When a certain app is taking more memory than it normally does, the system becomes slow, even unresponsive , and users are unable to perform even the easiest tasks in Windows .
- Although Windows 10 is the most advanced operating system so far, memory leaks are still quite often.
- Check out our Windows 10 Hub for more information and helpful solutions from our trustworthy tech-experts.
- Take a look at our Fix section for complete guides on troubleshooting tech issues.

- Download Restoro PC Repair Tool that comes with Patented Technologies (patent available here).
- Click Start Scan to find Windows issues that could be causing PC problems.
- Click Repair All to fix issues affecting your computer’s security and performance
- Restoro has been downloaded by 0 readers this month.
The biggest foe of ever PC’s memory is the memory leak. There are a lot of reasons for leaking memory, but the most common one is a programming oversight.
We’ve prepared a high variety of solutions that will help you to prevent memory leaks from occurring again. There could be various factors involved, and we’re going to address most of them.
What are memory leaks in Windows?
Memory leak stands for RAM memory loss in Windows, caused by a program or an app.
Every running process in Windows is taking a certain amount or RAM. The problem is completely software-related.
There are programs that are more demanding and require more RAM usage to run properly, like Google Chrome, or Adobe Photoshop, and there are less demanding programs, that actually take smaller amounts of memory.
So, when a program is taking more memory than it should be taking, we call that a memory leak.
What is RAM memory, and how programs use it?
RAM (Random Access Memory) is a relatively small amount of memory that stores data from the running processes.
Programs store data in RAM temporarily, actually only while running. So, when you restart your PC, RAM is being emptied. Each program stores its own information about running in RAM.
As programs are different, the more-demanding ones, and the programs that actually do more complex action store more data in RAM, and therefore require more memory, while the simpler programs use less memory.
How can I fix memory leaks in Windows 10?
1. Restart your PC
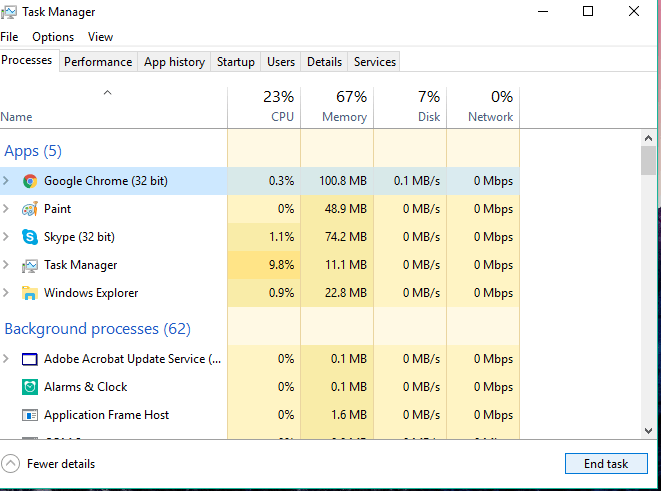
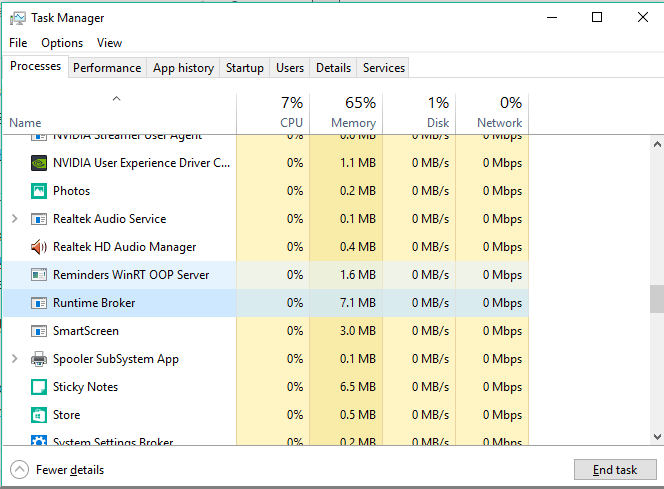
- Press CTRL + SHIFT + ESC keys to open Task Manager.
- Head over to the Processes tab, and see which program is using the most memory.
- Just click End process, to close that program.
The program is now closed, but the problem isn’t solved yet, because the amount of memory initially requested by that program is still unavailable to other processes.
The best solution for that is to simply restart your PC, and memory leak won’t appear until you open the troublesome program next time.
RAM only stores data of running processes while the PC is turned off. Therefore, when you restart your PC, RAM will get empty, and the memory leaking problem will wipe away.
2. Use the Windows 10 built-in tools
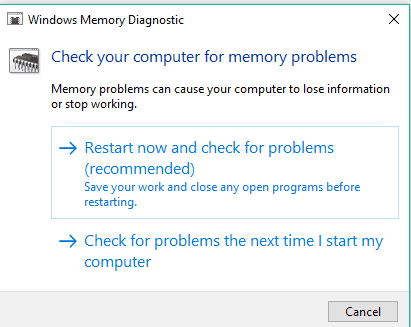
- Go to Search, type Memory Diagnostic Tool and open it.
- Choose Restart nowand check for problems and don’t forget to save your work before restarting.
Windows 10 has its own, built-in diagnostic tools that’s often enough for providing accurate analysis that will help you determining the cause of your problem.
This type of tools scans your PC for potential memory issues, including memory leaks, and gives you precise diagnostics about all detected problems.
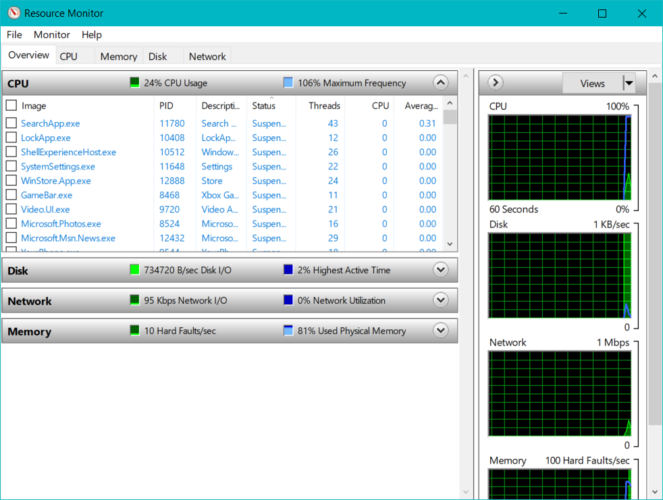
- Go to Search, type Resource Monitor and open it.
- It allows you to view real-time data about your system.
3. Check for driver updates
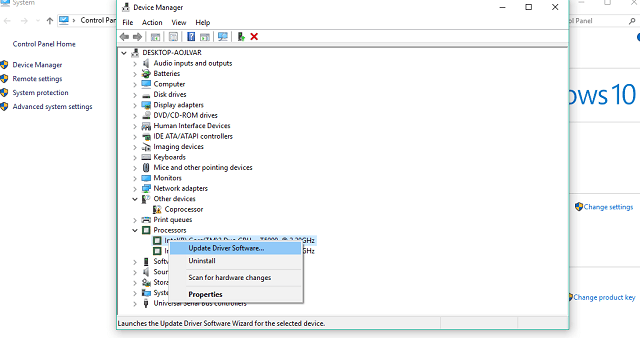
- Go to Search, type Device Manager, and open it.
- Check any driver that has the yellow exclamation mark sign next to it.
- Right-click on it, and choose Update driver software…
- Follow on-screen instructions from the wizard.
Outdated drivers can be a cause to various problems in Windows 10, including memory leaks.
While an outdated driver doesn’t necessarily have to affect any program, and therefore cause memory leak, it itself can use more memory than it should.
But, if you don’t know which driver exactly should be updated, checking each driver individually is too much work. So, you should try some other method for updating drivers in Windows 10.
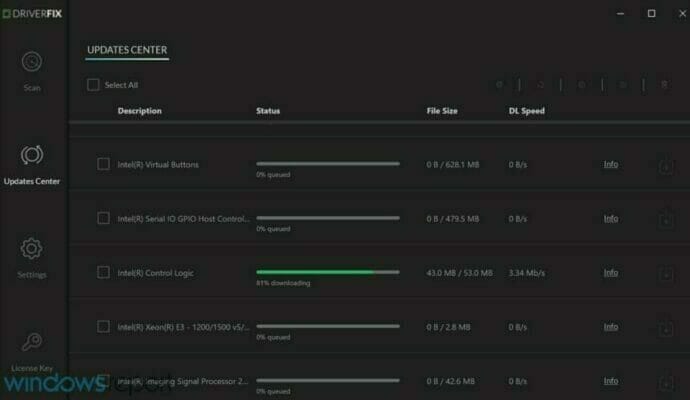
We strongly recommend the DriverFix t ool to update your drivers in order to avoid the permanent damage to your PC by manually downloading the wrong driver versions.
Once installed, this great tool will check your installed driver versions against its cloud database of the latest versions and will download the updates automatically.
All you need to do is wait for the scan to complete.
Keep in mind that updating your drivers is an advanced procedure. If you’re not careful, you can cause permanent damage to your system by downloading the wrong driver versions.
However, we recommend you to download this driver updater tool (100% safe and tested by us) to do it automatically. Thus, you will prevent memory leak and even permanent damage to your PC.
DriverFix
4. Remove malware
Just like outdated drivers, malware and other kind of malicious software is a cause of many known problems in Windows, and causing memory leaks is not an exception.
Run a System Scan to discover potential errors


So, if your PCis plagued with malicious software, it almost certainly won’t perform well (depending on the malicious software type).
The only logical thing to do in this case is to actually clean up our PCs from these unwanted guests.
We recommend Bitdefender Antivirus Plus – a reliable antivirus program that protects your PC against viruses, Trojans, malware, spyware, and other Internet dangers such as rootkits or ransomware.
The program is a combination of a classic virus scanner, a behavior-based adware detection, and also cloud functionality that ensures accuracy and prevents memory leaks.
This great software uses advanced Artificial Intelligence technologies to anticipate, detect, and instantly block even the newest threats.
The latest version comes with an anti-tracker feature that blocks trackers who try to collect your data. Anti-tracker promises to let you surf privately and load websites faster.
Bitdefender Antivirus Plus
5. Adjust for Best Performance
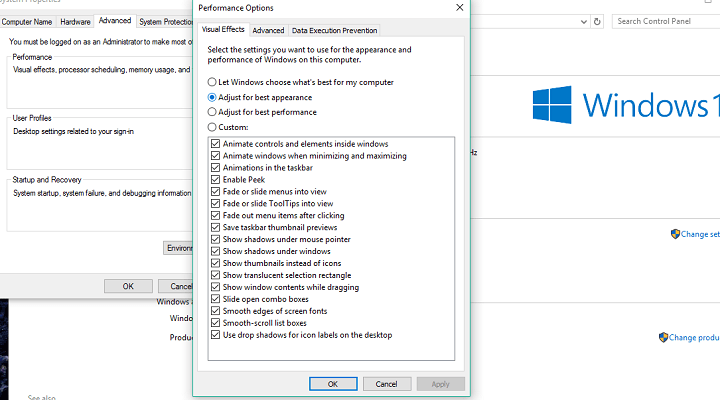
- Right-click This PC from your Desktop.
- Select Advanced system settings.
- Head over to the Advanced tab.
- Click on Settings, under Performance.
- Just check the Adjust for best performance option.
- Click OK.
- Restart your PC.
6. Disable programs running at Startup
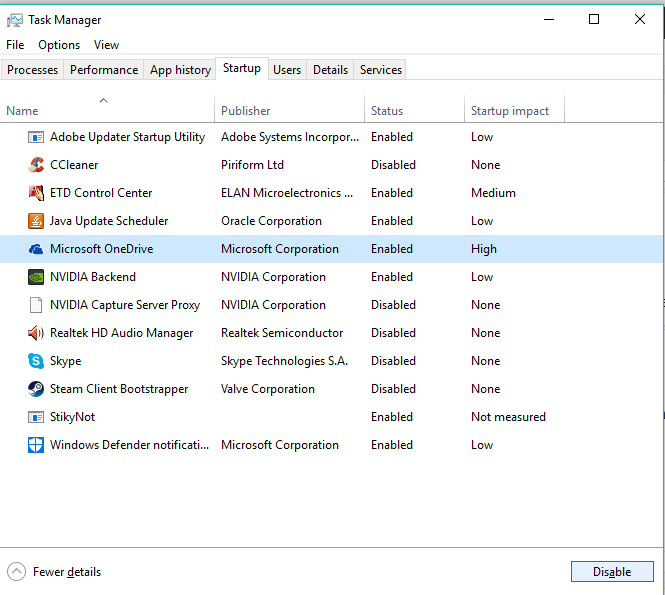
- Press CTRL + SHIFT + ESC keys to open Task Manager.
- Go to the Startup tab.
- Click on the program you want to disable, and choose Disable.
- Restart your PC.
If a program causing memory leak is running on startup, that’s a deadly combo. You’ll just end up in a loop, where the problem automatically re-appears, no matter how many times you temporarily solve it.
To deal with this issue, we simply need to disable the troublesome program at startup, and it won’t cause us problems automatically, anymore.
If the Task Manager already showed you which program is leaking memory, and it also happens that program runs on startup, simply disable it, and that should be it.
7. Defrag hard drives
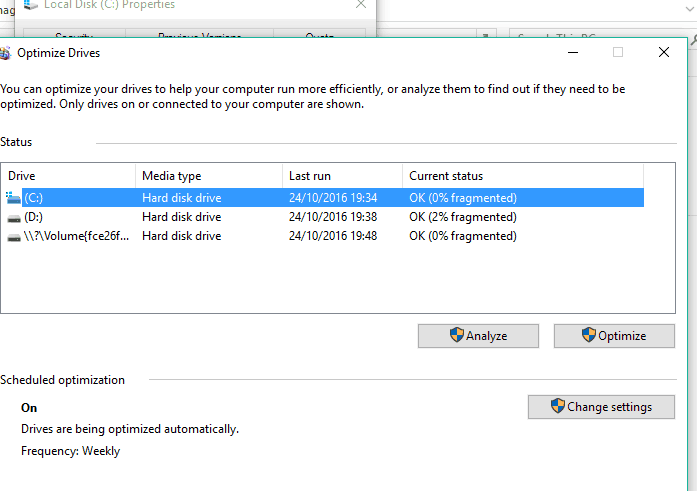
- Go to This PC.
- Right-click your current system hard drive (most likely C:).
- Go to the Tools tab, and click Optimize.
- Select the drive you want to defrag, and choose Analyze.
- Wait for the process to finish.
- Restart your PC.
It is recommend to defrag your hard drive every now and then. Besides optimizing your hard disk, it could also do some more benefits to your PC, including better memory management.
8. Registry hack
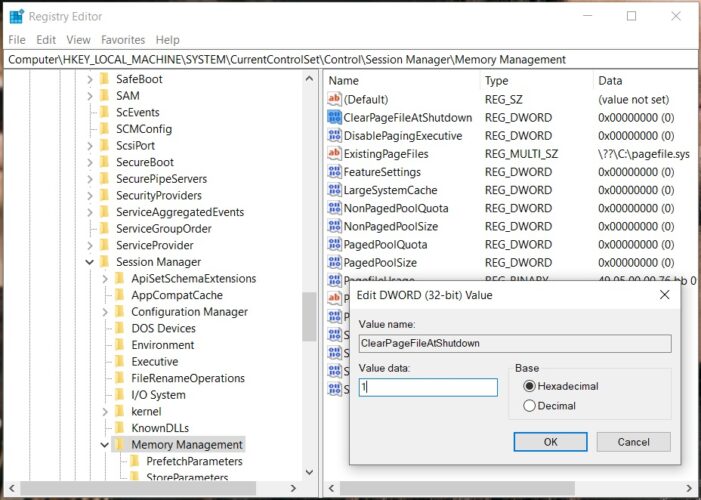
- Go to Search, type regedit, and select Registry Editor.
- Search for the following path:
HKEY_LOCAL_MACHINESYSTEMCurrentControlSetControlSession ManagerMemory Management
- Find ClearPageFileAtShutDown and change its value to 1.
- Save changes.
- Restart your PC.
9. Disable Runtime Broker
- Press CTRL + SHIFT + ESC keys to open Task Manager.
- Locate the Runtime Broker process, and click on it.
- Go to Disable.
Runtime Broker is the process that helps the system to manage permissions on your PC for apps from Microsoft Store.
By default, Runtime Broker should use low amounts of memory, but due to a possible faulty app, this process can significantly slow down your PC.
10. Disable Superfetch
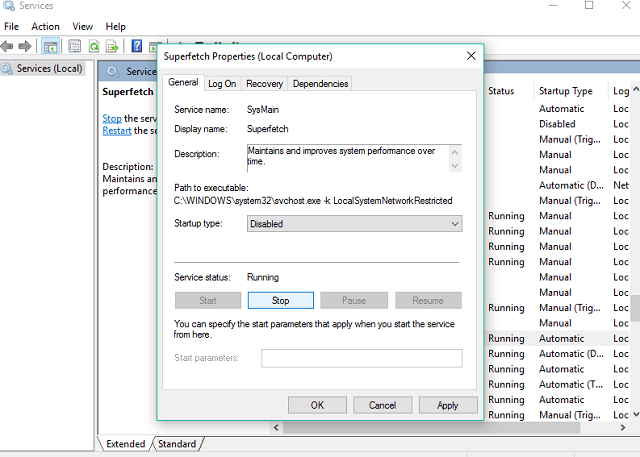
- Go to Search, type services.msc, and open Services.
- Find the process called Superfetch.
- Right-click it, and choose Properties.
- Select Stop, and choose Disable from the Startup Type drop-down menu.
- Restart your PC.
Superfetch is another Windows service, which goal is to optimize the performance of the system. This process allows Windows to manage the amount of RAM, decrease boot time, and make application loading more efficient.
Disabling Superfetch is not recommended, but you can experiment with it, if you want to determine if it actually makes your PC slower.
After disabling compare your PC’s performance before and after. If the system is still as slow as before, you can enable Superfetch once again.
11. Disable Windows Tips and Tricks
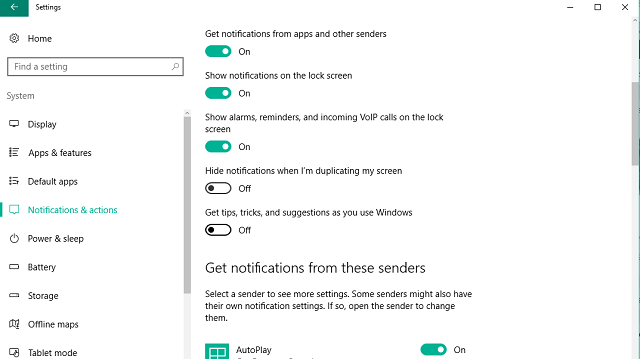
- Go to the Start Menu, and click on Settings app.
- Select System, and choose Notifications & actions.
- Find Get tips, tricks, and suggestions as you use Windows, and uncheck it.
Windows 10 Tips and tricks are actually useful to new users. This feature shows them how to use the system, along with some additional useful options.
No memory leak, but the system still running slow? Add more RAM!
If you’ve recently encountered this problem on your PC, tried all of our solutions, and your PC still performs slow, the problem is probably the actual amount of RAM.
If you don’t have enough RAM memory in your PC to handle all demands, the best available solution is to upgrade RAM memory, if you want your PC to run normally.
By adding more RAM, your system memory will be bigger, and it’ll be able to handle even more demanding operations.
That’s about it for our article about memory leaks in Windows 10. We hope that these info were helpful to you, and that we managed to solve the problem.
- Download this PC Repair Tool rated Great on TrustPilot.com (download starts on this page).
- Click Start Scan to find Windows issues that could be causing PC problems.
- Click Repair All to fix issues with Patented Technologies (Exclusive Discount for our readers).
Restoro has been downloaded by 0 readers this month.
In case you have some comments, questions, or suggestions feel free to let us know in the comments section below.


