- Microsoft LifeCam software and drivers for Windows 10
- How can I fix Microsoft LifeCam issues on Windows 10?
- 1. Use third-party webcam software
- 2. Quick fix for the latest Skype versions
- 3. Reinstall Skype
- 4. Install LifeCam drivers and LifeCam software in Compatibility mode
- Run a System Scan to discover potential errors
- 5. Uninstall LifeCam drivers
- 6. Remove LifeCam application software and LifeCam drivers
- 7. Run Camera software
Microsoft LifeCam software and drivers for Windows 10

- There’s more about Microsoft LifeCam than the gorgeous black and silver aluminum design. It produces clear images and sharp video recordings that you’ll love.
- Let us help you find the necessary Microsoft LifeCam software and drivers for Windows 10. Moreover, no issues are here to stay when you act fast.
- Quick fixes to similar problems can also be found in our Webcam Troubleshooting section.
- For any software solution you may look for, return to our Windows 10 Downloads Hub.

- Download Restoro PC Repair Tool that comes with Patented Technologies (patent available here).
- Click Start Scan to find Windows issues that could be causing PC problems.
- Click Repair All to fix issues affecting your computer’s security and performance
- Restoro has been downloaded by 0 readers this month.
When you make Skype calls, it’s not uncommon that you use the webcam to communicate with other people.
Speaking of webcams, Windows 10 users have reported some issues with Microsoft LifeCam, and today we’re going to fix those issues.
How can I fix Microsoft LifeCam issues on Windows 10?
1. Use third-party webcam software
- Download and install CyberLink Youcam 7 free version from the official website on your PC.
- Open it from the installation folder. Go to the bottom bar and find the Youcam icon. Click on it.
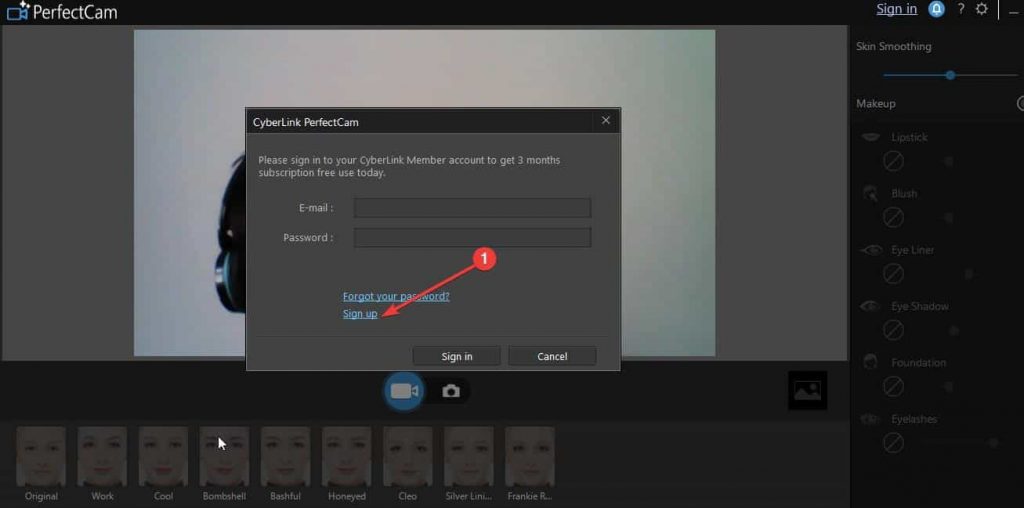
- From the menu select Launch PerfectCam4. Sign up for a 90-day trial by clicking on Sign Up.

- Sign up on the official page and check your email address for the verification link.
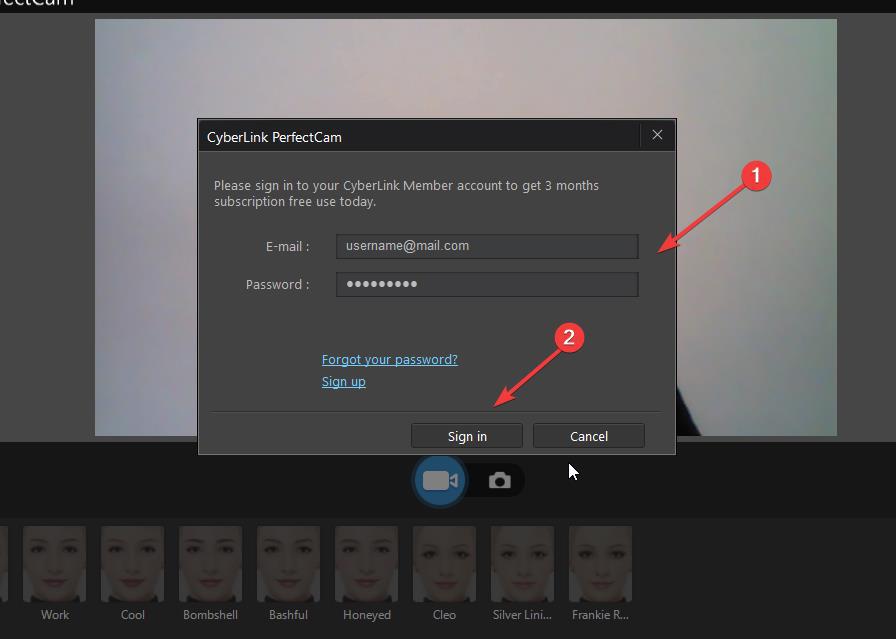
- Sign in to PerfectCam in order to start.
- After signing in, let PerfectCam launch and open Skype. In the Skype main window, select Privacy > Calls > Video Settings.
- On this page, select CyberLink Web Camera Filter (in our case, look for PerfectCam) from the Select Webcam drop-down menu.
- Click the Finish button to save your changes and enable CyberLink YouCam (PerfectCam).

If you don’t have the time or the skills and patience to follow each and every step listed below, we recommend you try a quick fix that might work for you: using third-party webcam software.
We would strongly suggest using CyberLink Youcam 7. Being one of the leaders on the market, this tool is highly reliable and compatible with all camera models.
It worked for us and it’s also free. It requires a sign up on the official website but it doesn’t take more than 30 seconds to register for a free version.
If this solution works on your PC, you can use this tool on all your cameras and forget about any such issues.
2. Quick fix for the latest Skype versions
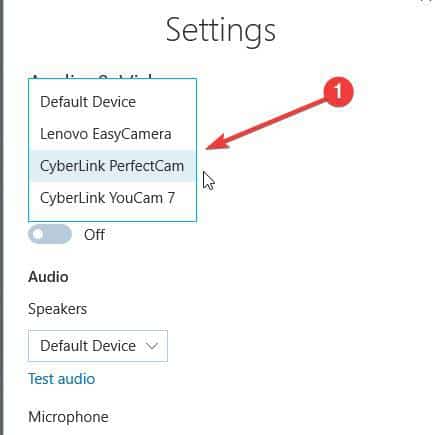
- Open Skype > click User profile in the left top corner (the icon with your avatar image). Click on Settings.
- After that click on the Video drop-down menu and select Cyberlink PerfectCam.
- Try to make some test calls. This solution worked for our test team from the first try. Don’t forget to remove your webcam cover, if you have one.

If you have the new Skype version, fixing this issue much easier. If this quick fix didn’t work for you, use the solutions below.
3. Reinstall Skype
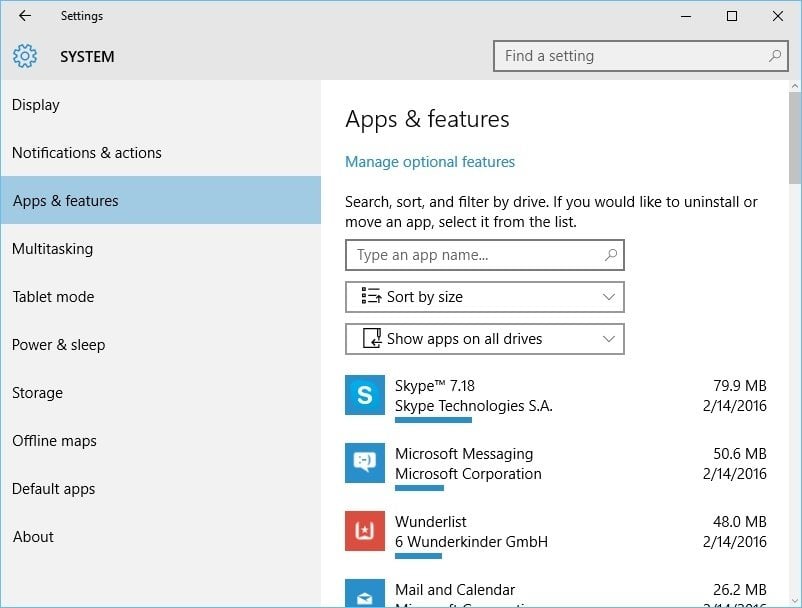
- Open Settings and go to the System > Apps and Features.
- Find Skype on the list, select it, and click the Uninstall button.
- To make sure that Skype is completely uninstalled, download Skype Removal Tool and run it on your computer. This tool should completely remove all traces of Skype from your computer.
- After Skype has been uninstalled, just download the latest version and install it.
If your Microsoft LifeCam isn’t working with Skype, try reinstalling Skype on Windows 10. To do that follow the instructions above.
4. Install LifeCam drivers and LifeCam software in Compatibility mode
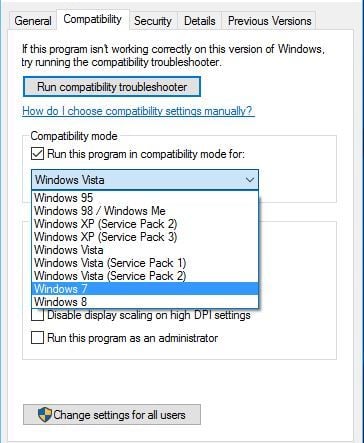
- Right-click the file you wish to run and choose Properties.
- Go to the Compatibility tab and check Run this program in compatibility mode for.
- From the list choose Windows 8 or Windows 7. You might want to experiment with other options if Windows 8 or Windows 7 option doesn’t work for you.
- Click Apply and OK.
- Try running the application again.

Certain applications won’t work properly in Windows 10, so you’ll have to run them using the Compatibility mode.
Run a System Scan to discover potential errors


As for LifeCam issues, sometimes it’s better that you download Windows 8 or even Windows 7 software/drivers for it, and install them in Compatibility mode.
Users have reported that LifeCam webcam works normally after installing drivers/software in Compatibility mode for previous Windows versions.
To run applications in Compatibility mode on Windows 10, complete the above procedure.
We should mention that you’ll have to turn on Compatibility Mode for both drivers and LifeCam software in order to fix this issue.
5. Uninstall LifeCam drivers
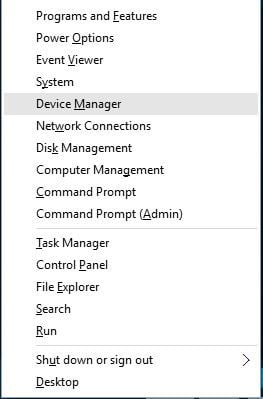
- Open Device Manager by pressing Windows Key + X and choosing Device Manager from the list.
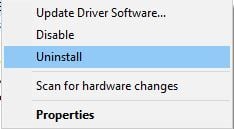
- When Device Manager opens, find your LifeCam driver, right-click , and choose Uninstall.
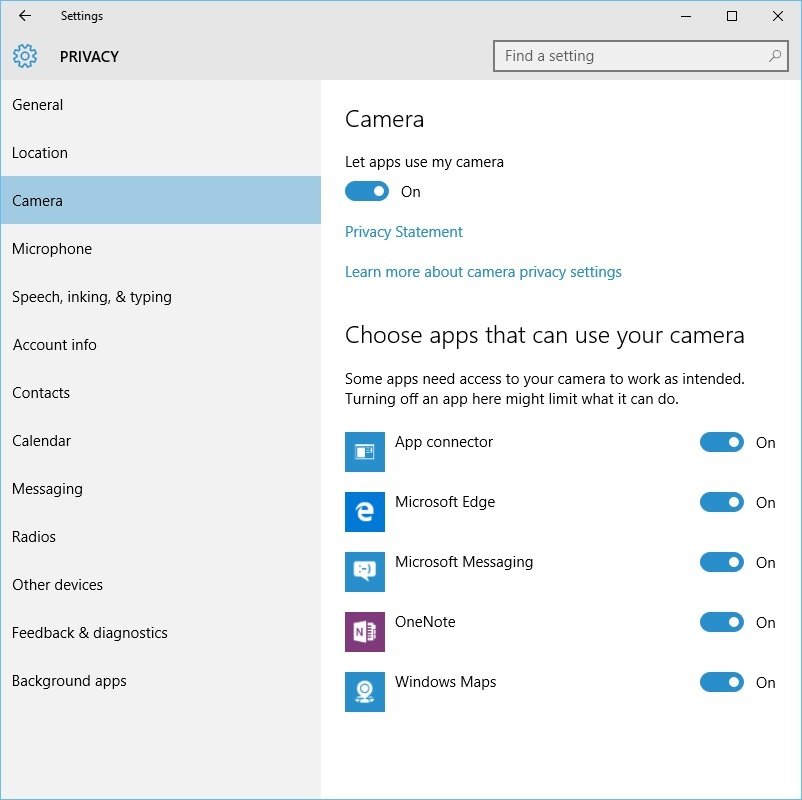
- Now open Settings > Privacy.
- Choose Camera from the left pane.
- In Camera options make sure that Let apps use my camera is turned on.
- After doing that, restart your computer.
6. Remove LifeCam application software and LifeCam drivers
- Go to Settings > System > Apps and Features.
- Find LifeCam software and uninstall it.
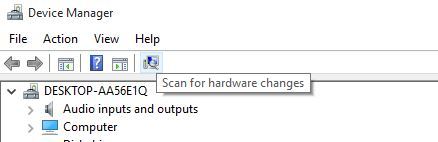
- Now go to Device Manager and uninstall LifeCam drivers.
- After you’ve uninstalled the drivers, click the Scan for hardware changes button.
- This should install default drivers on your computer and fix LifeCam issues.
Users report that Windows 10 automatically installs version 4.25 of LifeCam driver, and if that happens, you might have to roll back to the previous version of drivers by using Device Manager.
To do that, follow these instructions:
- Open Device Manager and find LifeCam driver.
- Right-click it and choose Rollback driver.
7. Run Camera software
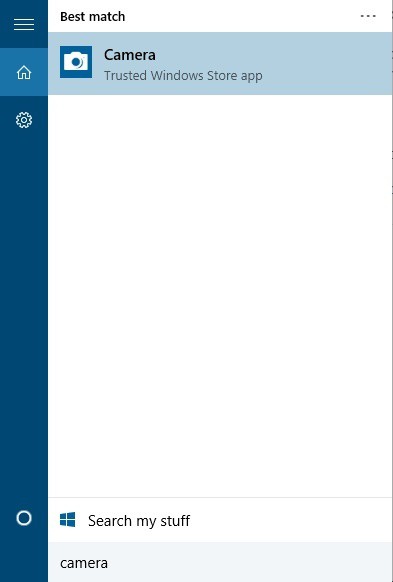
- Press Windows Key + S and type Camera.
- From the list of results choose Camera.
- If your camera is working properly you should see the picture.
- Now close the Camera app and try using LifeCam with Skype.
This sounds like an unusual solution, but some users have managed to fix LifeCam issues with Skype by running the Camera app.
Microsoft LifeCam might be a good webcam, but it has certain issues with Windows 10.
Regarding the issues, most of them can be solved by updating your drivers or by reinstalling Skype. As for compatibility and software issues, keep these things in mind:
Microsoft LifeCam software and drivers for Windows 10
- There’s more about Microsoft LifeCam than the gorgeous black and silver aluminum design. It produces clear images and sharp video recordings that you’ll love.
- Let us help you find the necessary Microsoft LifeCam software and drivers for Windows 10. Moreover, no issues are here to stay when you act fast.
- Quick fixes to similar problems can also be found in our Webcam Troubleshooting section.
- For any software solution you may look for, return to our Windows 10 Downloads Hub.
- Download Restoro PC Repair Tool that comes with Patented Technologies (patent available here).
- Click Start Scan to find Windows issues that could be causing PC problems.
- Click Repair All to fix issues affecting your computer’s security and performance
- Restoro has been downloaded by 0 readers this month.
When you make Skype calls, it’s not uncommon that you use the webcam to communicate with other people.
Speaking of webcams, Windows 10 users have reported some issues with Microsoft LifeCam, and today we’re going to fix those issues.
How can I fix Microsoft LifeCam issues on Windows 10?
1. Use third-party webcam software
- Download and install CyberLink Youcam 7 free version from the official website on your PC.
- Open it from the installation folder. Go to the bottom bar and find the Youcam icon. Click on it.
- From the menu select Launch PerfectCam4. Sign up for a 90-day trial by clicking on Sign Up.
- Sign up on the official page and check your email address for the verification link.
- Sign in to PerfectCam in order to start.
- After signing in, let PerfectCam launch and open Skype. In the Skype main window, select Privacy > Calls > Video Settings.
- On this page, select CyberLink Web Camera Filter (in our case, look for PerfectCam) from the Select Webcam drop-down menu.
- Click the Finish button to save your changes and enable CyberLink YouCam (PerfectCam).
If you don’t have the time or the skills and patience to follow each and every step listed below, we recommend you try a quick fix that might work for you: using third-party webcam software.
We would strongly suggest using CyberLink Youcam 7. Being one of the leaders on the market, this tool is highly reliable and compatible with all camera models.
It worked for us and it’s also free. It requires a sign up on the official website but it doesn’t take more than 30 seconds to register for a free version.
If this solution works on your PC, you can use this tool on all your cameras and forget about any such issues.
2. Quick fix for the latest Skype versions
- Open Skype > click User profile in the left top corner (the icon with your avatar image). Click on Settings.
- After that click on the Video drop-down menu and select Cyberlink PerfectCam.
- Try to make some test calls. This solution worked for our test team from the first try. Don’t forget to remove your webcam cover, if you have one.
If you have the new Skype version, fixing this issue much easier. If this quick fix didn’t work for you, use the solutions below.
3. Reinstall Skype
- Open Settings and go to the System > Apps and Features.
- Find Skype on the list, select it, and click the Uninstall button.
- To make sure that Skype is completely uninstalled, download Skype Removal Tool and run it on your computer. This tool should completely remove all traces of Skype from your computer.
- After Skype has been uninstalled, just download the latest version and install it.
If your Microsoft LifeCam isn’t working with Skype, try reinstalling Skype on Windows 10. To do that follow the instructions above.
4. Install LifeCam drivers and LifeCam software in Compatibility mode
- Right-click the file you wish to run and choose Properties.
- Go to the Compatibility tab and check Run this program in compatibility mode for.
- From the list choose Windows 8 or Windows 7. You might want to experiment with other options if Windows 8 or Windows 7 option doesn’t work for you.
- Click Apply and OK.
- Try running the application again.
Certain applications won’t work properly in Windows 10, so you’ll have to run them using the Compatibility mode.
Run a System Scan to discover potential errors
As for LifeCam issues, sometimes it’s better that you download Windows 8 or even Windows 7 software/drivers for it, and install them in Compatibility mode.
Users have reported that LifeCam webcam works normally after installing drivers/software in Compatibility mode for previous Windows versions.
To run applications in Compatibility mode on Windows 10, complete the above procedure.
We should mention that you’ll have to turn on Compatibility Mode for both drivers and LifeCam software in order to fix this issue.
5. Uninstall LifeCam drivers
- Open Device Manager by pressing Windows Key + X and choosing Device Manager from the list.
- When Device Manager opens, find your LifeCam driver, right-click , and choose Uninstall.
- Now open Settings > Privacy.
- Choose Camera from the left pane.
- In Camera options make sure that Let apps use my camera is turned on.
- After doing that, restart your computer.
6. Remove LifeCam application software and LifeCam drivers
- Go to Settings > System > Apps and Features.
- Find LifeCam software and uninstall it.
- Now go to Device Manager and uninstall LifeCam drivers.
- After you’ve uninstalled the drivers, click the Scan for hardware changes button.
- This should install default drivers on your computer and fix LifeCam issues.
Users report that Windows 10 automatically installs version 4.25 of LifeCam driver, and if that happens, you might have to roll back to the previous version of drivers by using Device Manager.
To do that, follow these instructions:
- Open Device Manager and find LifeCam driver.
- Right-click it and choose Rollback driver.
7. Run Camera software
- Press Windows Key + S and type Camera.
- From the list of results choose Camera.
- If your camera is working properly you should see the picture.
- Now close the Camera app and try using LifeCam with Skype.
This sounds like an unusual solution, but some users have managed to fix LifeCam issues with Skype by running the Camera app.
Microsoft LifeCam might be a good webcam, but it has certain issues with Windows 10.
Regarding the issues, most of them can be solved by updating your drivers or by reinstalling Skype. As for compatibility and software issues, keep these things in mind:


