- Windows Contacts
- Introduction
- Developer Audience
- Windows Contacts Documentation
- Overviews
- Reference
- Related Topics
- Настройка приложения «Безопасность Windows» для вашей организации Customize the Windows Security app for your organization
- Требования Requirements
- Использование групповой политики для включения и настройки контактных данных Use Group Policy to enable and customize contact information
- Customize the Windows Security app for your organization
- Requirements
- Use Group Policy to enable and customize contact information
- Выбор контактов Select contacts
- Настройка окна выбора контактов Set up the contact picker
- Настройка режима выбора (необязательно) Set the selection mode (optional)
- Запуск окна выбора контактов Launch the picker
- Обработка контактов Process the contacts
- Полный пример (один контакт) Complete example (single contact)
- Полный пример (несколько контактов) Complete example (multiple contacts)
- Сводка и дальнейшие действия Summary and next steps
Windows Contacts
New applications should not use this set of interfaces. These interfaces exist for backward compatibility with legacy applications. These interfaces will be unavailable in the future.
Introduction
WindowsВ Vista provides a new mechanism and user interface for storing and retrieving information about people (contacts) who are important to the users of Microsoft Outlook and Windows Mail (formerly Outlook Express).
Windows Contacts replaces Windows Address Book (WAB) as an API for extending the contacts functionality.
Documentation in the WindowsВ Vista Software Development Kit (SDK) is provided for programmers interested in using this new API.
Developer Audience
The C++ class-based interface is designed for C/C++ programmers. Familiarity with Component Object Model (COM) is required, and familiarity with the Windows graphical user interface and message-driven architecture may be helpful.
Windows Contacts Documentation
This documentation is organized as shown below:
Overviews
About Windows Contacts introduces Windows Contacts.
Windows Contacts Schema describes the built-in schema to express and organize the properties that form contacts.
Programming Windows Contacts shows how you can extend applications, such as Windows Mail, using the Windows ContactsВ API.
Reference
Windows Contacts Reference provides information about the Windows ContactsВ API, using the C++ programming language and COM.
Related Topics
Windows Mail is an online communication tool supplied as part of WindowsВ Vista. It is an important host application for Windows Contacts. For more information, see Windows Mail.
Настройка приложения «Безопасность Windows» для вашей организации Customize the Windows Security app for your organization
Относится к: Applies to
- Windows 10, версия 1709 и более поздние версии Windows 10, version 1709 and later
Аудитория Audience
- Администраторы безопасности предприятия Enterprise security administrators
Управляемость доступна с помощью следующих инструментов: Manageability available with
- Групповая политика Group Policy
Сведения о вашей организации можно добавить в контактную карточку в приложение Windows Security. You can add information about your organization in a contact card to the Windows Security app. Вы можете включить ссылку на сайт поддержки, номер телефона для службы поддержки и адрес электронной почты для поддержки на основе электронной почты. You can include a link to a support site, a phone number for a help desk, and an email address for email-based support.
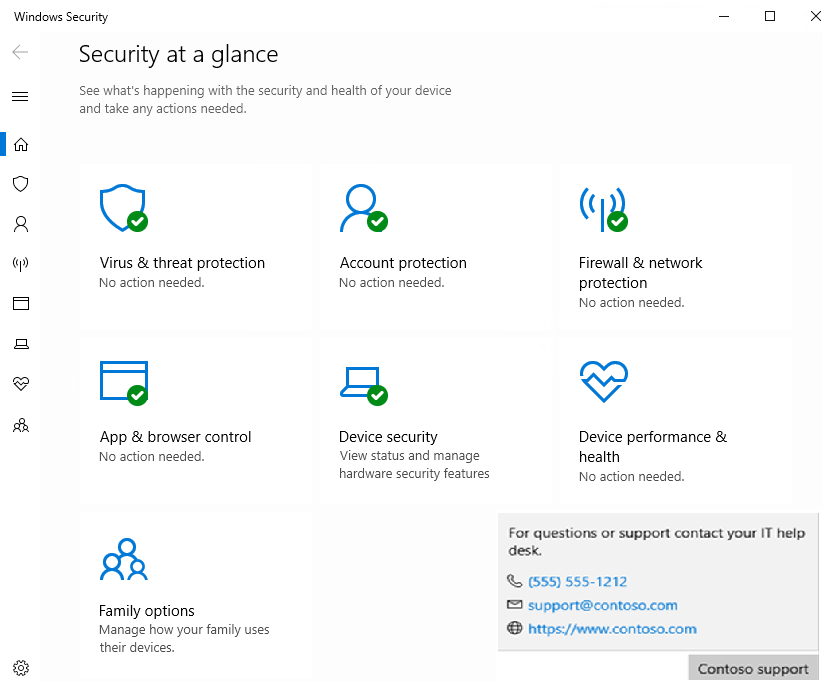
Эти сведения также будут показаны в некоторых корпоративных уведомлениях (включая уведомления для функции Blockс первого взгляда и потенциально нежелательные приложения). This information will also be shown in some enterprise-specific notifications (including notifications for the Block at first sight feature, and potentially unwanted applications).

Пользователи могут выбрать отображаемую информацию, чтобы инициировать запрос на поддержку: Users can select the displayed information to initiate a support request:
- Выберите вызов или номер телефона, чтобы открыть Skype, чтобы запустить вызов на отображаемом номере. Select Call or the phone number to open Skype to start a call to the displayed number.
- Выберите адрес электронной почты или адрес электронной почты для создания новой электронной почты в адресе приложения электронной почты компьютера по умолчанию для отображаемой электронной почты. Select Email or the email address to create a new email in the machine’s default email app address to the displayed email.
- Выберите портал справки или URL-адрес веб-сайта, чтобы открыть веб-браузер компьютера по умолчанию и перейти к отображаемму адресу. Select Help portal or the website URL to open the machine’s default web browser and go to the displayed address.
Требования Requirements
Вы должны иметь Windows 10, версию 1709 или более поздней версии. You must have Windows 10, version 1709 or later. В файлах шаблонов ADMX/ADML для более ранних версий Windows этих параметров групповой политики нет. The ADMX/ADML template files for earlier versions of Windows do not include these Group Policy settings.
Использование групповой политики для включения и настройки контактных данных Use Group Policy to enable and customize contact information
Использование карточки контакта и настроенных уведомлений включает в себя два этапа. There are two stages to using the contact card and customized notifications. Во-первых, необходимо включить карточку контакта или пользовательские уведомления (или и то, и другое), а затем указать по крайней мере название вашей организации и один элемент контактных данных. First, you have to enable the contact card or custom notifications (or both), and then you must specify at least a name for your organization and one piece of contact information.
Это можно сделать только в групповой политике. This can only be done in Group Policy.
На компьютере, осуществляющем групповую политику, откройте Консоль управления групповыми политиками, правой кнопкой мыши щелкните объект групповой политики, который вы хотите настроить, и выберите команду Редактировать. On your Group Policy management machine, open the Group Policy Management Console, right-click the Group Policy Object you want to configure and click Edit.
В разделе Редактор управления групповой политикой перейдите в раздел Конфигурация компьютера и выберите Административные шаблоны. In the Group Policy Management Editor go to Computer configuration and click Administrative templates.
Расширь дерево до компонентов Windows > Windows Security > корпоративной настройки. Expand the tree to Windows components > Windows Security > Enterprise Customization.
Включить контактную карту и настраиваемые уведомления, настроив два отдельных параметра групповой политики. Enable the contact card and the customized notifications by configuring two separate Group Policy settings. Они оба будут использовать один и тот же источник информации (поясняется в шагах 5 и 6). They will both use the same source of information (explained in Steps 5 and 6). Вы можете включить и то, и другое, или размыть одно или другое: You can enable both, or slect one or the other:
Чтобы включить карточку контакта, откройте параметр Настроить пользовательские контактные данные и установите для него значение Включено. To enable the contact card, open the Configure customized contact information setting and set it to Enabled. Нажмите OК. Click OK.
Чтобы включить настроенные уведомления, откройте параметр Настроить пользовательские уведомления и установите для него значение Включено. To enable the customized notifications, open the Configure customized notifications setting and set it to Enabled. Нажмите OК. Click OK.
После включения карточки контакта или настроенных уведомлений (или и того, и другого) необходимо установить параметр Указать название компании для связи в значение Включено. After you’ve enabled the contact card or the customized notifications (or both), you must configure the Specify contact company name to Enabled. Введите название вашей компании или организации в поле в разделе Параметры. Enter your company or organization’s name in the field in the Options section. Нажмите OК. Click OK.
Чтобы пользовательские уведомления или контактная карточка появились, необходимо также настроить по крайней мере один из следующих параметров. To ensure the custom notifications or contact card appear, you must also configure at least one of the following settings. Откройте параметр, выберите Включено, а затем добавьте контактные данные в поле в статье Параметры: Open the setting, select Enabled, and then add the contact information in the field under Options:
- Укажите контактный адрес электронной почты или идентификатор электронной почты Specify contact email address or Email ID
- Укажите контактный телефонный номер или идентификатор Skype Specify contact phone number or Skype ID
- Укажите контактный веб-сайт Specify contact website
Выберите ОК после настройки каждого параметра для сохранения изменений. Select OK after you configure each setting to save your changes.
Необходимо указать название компании для связи и хотя бы один способ связи — адрес электронной почты, номер телефона или URL-адрес веб-сайта. You must specify the contact company name and at least one contact method — email, phone number, or website URL. Если вы не укажете название компании для связи и способ связи, настройки применены не будут: карточка контакта не будет отображаться и в уведомлениях ничего не изменится. If you do not specify the contact name and a contact method the customization will not apply, the contact card will not show, and notifications will not be customized.
Customize the Windows Security app for your organization
Applies to
- Windows 10, version 1709 and later
Audience
- Enterprise security administrators
Manageability available with
You can add information about your organization in a contact card to the Windows Security app. You can include a link to a support site, a phone number for a help desk, and an email address for email-based support.

This information will also be shown in some enterprise-specific notifications (including notifications for the Block at first sight feature, and potentially unwanted applications).

Users can select the displayed information to initiate a support request:
- Select Call or the phone number to open Skype to start a call to the displayed number.
- Select Email or the email address to create a new email in the machine’s default email app address to the displayed email.
- Select Help portal or the website URL to open the machine’s default web browser and go to the displayed address.
Requirements
You must have Windows 10, version 1709 or later. The ADMX/ADML template files for earlier versions of Windows do not include these Group Policy settings.
Use Group Policy to enable and customize contact information
There are two stages to using the contact card and customized notifications. First, you have to enable the contact card or custom notifications (or both), and then you must specify at least a name for your organization and one piece of contact information.
This can only be done in Group Policy.
On your Group Policy management machine, open the Group Policy Management Console, right-click the Group Policy Object you want to configure and click Edit.
In the Group Policy Management Editor go to Computer configuration and click Administrative templates.
Expand the tree to Windows components > Windows Security > Enterprise Customization.
Enable the contact card and the customized notifications by configuring two separate Group Policy settings. They will both use the same source of information (explained in Steps 5 and 6). You can enable both, or slect one or the other:
To enable the contact card, open the Configure customized contact information setting and set it to Enabled. Click OK.
To enable the customized notifications, open the Configure customized notifications setting and set it to Enabled. Click OK.
After you’ve enabled the contact card or the customized notifications (or both), you must configure the Specify contact company name to Enabled. Enter your company or organization’s name in the field in the Options section. Click OK.
To ensure the custom notifications or contact card appear, you must also configure at least one of the following settings. Open the setting, select Enabled, and then add the contact information in the field under Options:
- Specify contact email address or Email ID
- Specify contact phone number or Skype ID
- Specify contact website
Select OK after you configure each setting to save your changes.
You must specify the contact company name and at least one contact method — email, phone number, or website URL. If you do not specify the contact name and a contact method the customization will not apply, the contact card will not show, and notifications will not be customized.
Выбор контактов Select contacts
Пространство имен Windows.ApplicationModel.Contacts позволяет выбирать контакты несколькими способами. Through the Windows.ApplicationModel.Contacts namespace, you have several options for selecting contacts. В этой статье описано, как выбрать один или несколько контактов, и показано, как настроить окно выбора контактов, чтобы получать только необходимые вашему приложению сведения о контактах. Here, we’ll show you how to select a single contact or multiple contacts, and we’ll show you how to configure the contact picker to retrieve only the contact information that your app needs.
Настройка окна выбора контактов Set up the contact picker
Настройка режима выбора (необязательно) Set the selection mode (optional)
По умолчанию окно выбора контактов извлекает все доступные данные о контактах, выбранных пользователем. By default, the contact picker retrieves all of the available data for the contacts that the user selects. Свойство SelectionMode позволяет настроить окно выбора контактов так, чтобы получать только поля данных, необходимые вашему приложению. The SelectionMode property lets you configure the contact picker to retrieve only the data fields that your app needs. Этот способ использования окна выбора контактов более эффективен, если нужна только часть доступных сведений контакта. This is a more efficient way to use the contact picker if you only need a subset of the available contact data.
Сначала задайте свойство SelectionMode для параметра Поля: First, set the SelectionMode property to Fields:
Затем при помощи свойства DesiredFieldsWithContactFieldType укажите поля, которые должно извлекать окно выбора контактов. Then, use the DesiredFieldsWithContactFieldType property to specify the fields that you want the contact picker to retrieve. В примере ниже показано, как настроить окно выбора контактов для извлечения адресов электронной почты. This example configures the contact picker to retrieve email addresses:
Запуск окна выбора контактов Launch the picker
Если вы хотите, чтобы пользователь выбрал один или несколько контактов, используйте PickContactsAsync. Use PickContactsAsync if you want the user to select one or more contacts.
Обработка контактов Process the contacts
Когда окно выбора возвращает данные, проверьте, выбрал ли пользователь какие-либо контакты. When the picker returns, check whether the user has selected any contacts. Если да, обработайте сведения о контактах. If so, process the contact information.
В данном примере показано, как обработать один контакт. This example shows how to processes a single contact. Здесь мы извлекаем имя контакта и копируем его в элемент управления TextBlock с именем OutputName. Here we retrieve the contact’s name and copy it into a TextBlock control called OutputName.
В этом примере показано, как обработать несколько контактов. This example shows how to process multiple contacts.
Полный пример (один контакт) Complete example (single contact)
В данном примере окно выбора контактов извлекает имя, а также адрес электронной почты, расположение или номер телефона одного контакта. This example uses the contact picker to retrieve a single contact’s name along with an email address, location or phone number.
Полный пример (несколько контактов) Complete example (multiple contacts)
В данном примере окно выбора контактов получает несколько контактов, а затем добавляет контакты в элемент управления ListView с именем OutputContacts . This example uses the contact picker to retrieve multiple contacts and then adds the contacts to a ListView control called OutputContacts .
Сводка и дальнейшие действия Summary and next steps
Теперь вы имеете представление об использовании окна выбора контактов для получения контактных данных. Now you have a basic understanding of how to use the contact picker to retrieve contact information. Скачайте Примеры универсальных приложений для Windows из GitHub, чтобы ознакомиться с другими примерами использования контактов и окна выбора контактов. Download the Universal Windows app samples from GitHub to see more examples of how to use contacts and the contact picker.


