- 990x.top
- Простой компьютерный блог для души)
- Host Process for Setting Synchronization что это, почему грузит диск и как отключить? (SettingSyncHost.exe)
- Синхронизация параметров на устройствах с Windows 10
- International Settings
- Prepare keyboards, time zones, and other regional settings
- Configure international settings by using Windows PowerShell
- Configure international settings by using Control Panel
- Configure international settings by using DISM
- Configure international settings by using an answer file
990x.top
Простой компьютерный блог для души)
Host Process for Setting Synchronization что это, почему грузит диск и как отключить? (SettingSyncHost.exe)
 Всем даровчик. Сегодня мы будем узнавать что такое Host Process for Setting Synchronization, и эта штука как я понимаю работает под процессом SettingSyncHost.exe, пока мне ничего не понятно.. Но я должен узнать что это, вот должен и все. Так ребята, я нашел тему на форуме Microsoft, тут чел пишет, что у него процесс Host Process for Setting Synchronization постоянно грузит жесткий диск. Пишет что если процесс завершить, то все приходит в норму. Так, ну и вот ему отвечают, что это синхронизация настроек, можно отключить в параметрах, для этого зажмите кнопки Win + C, потом пойдите в параметры, изменение параметров компьютера, OneDrive, синхронизация параметров. В общем там где-то можно отключить эту синхронизацию
Хотя вот другой чел пишет, что ему отключение синхронизации не помогло, процесс SettingSyncHost.exe все равно иногда появляется и грузит жесткий диск так, что работать просто нереально.
Так, а вот еще один совет есть. Вот пишут, что попробуйте зажать кнопки Win + R, потом вставьте в окошко Выполнить такую команду:
Нажали ОК? Отлично. Теперь в диспетчере задач быстро завершаете процесс SettingSyncHost.exe и все в папке SettingSync удаляете!
Ага, есть еще новости. Короче ребята, данный процесс отвечает за синхронизацию настроек компа, метро-приложений, данных веб-браузера и еще чего-то и все это между устройствами, где стоит одна и та же учетная запись OneDrive.
Еще один чел пишет, что он посмотрел свойства папки SettingSync и был в ужасе, что она весит два гига. Он убил процесс SettingSyncHost.exe и потом почистил папку и все пришло в норму. То есть ребята, я думаю вам нужно это попробовать, надеюсь поможет.
Так, еще раз, если вам эта синхронизация OneDrive не нужна, то ее нужно отключить. Как это сделать я писал вначале. Если синхронизация нужна, то нужно очистить папку SettingSync, как это сделать я тоже писал уже. Ну это так типа подводя итоги.
Вот еще нашел такую картинку, а ну посмотрите:

Эта картинка, это антивирус Касперского, компонент Мониторинг сети. Видите, как тут процесс Host Process for Setting Synchronization активно себя ведет? Прилично накачал данных. Ребята, это нормально. Это означает что на другом устройстве, на котором был выполнен вход в такую же учетную запись, то там кто-то скачал что-то на 16 гигов. И это синхронизировалось сюда, так как учетная запись одна. Вот такие дела, ничего криминального нет.
В общем ребята, такие дела. Извините если что не так, но я реально вообще больше инфы не нашел. Удачи вам, приходите еще в гости!
Синхронизация параметров на устройствах с Windows 10
Когда параметр Синхронизация включен, Windows синхронизирует выбранные вами параметры на всех устройствах с Windows 10, в которые вы вошли с учетной записью Майкрософт.
Вы также можете синхронизировать параметры для рабочей или учебной учетной записи (если это разрешено вашей организацией). Дополнительные сведения о том, как Azure Active Directory и в состоянии предприятия для синхронизации параметров пользователей и приложений в облаке, смотрите Общие сведения о роуминге в корпоративном состоянии.
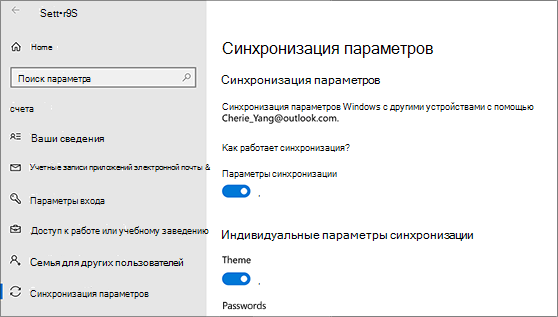
Чтобы найти параметры синхронизации, нажмите кнопку » Пуск «. и выберите Параметры Учетные записи > > синхронизировать параметры .
Чтобы остановить синхронизацию параметров и удалить их из облака, отключите параметры синхронизации на всех устройствах, подключенных к учетной записи Майкрософт. После этого вам потребуется удалить ее из своей учетной записи. Для этого выполните следующие действия.
Прокрутите страницу вниз до конца и выберите очистить синхронизированные параметры.
Например, можно синхронизировать настройки языка, пароли и цветовые темы. Если включить параметр «Другие параметры Windows», Windows также будет синхронизировать некоторые параметры устройств (например, настройки принтера и мыши), параметры проводника и настройки уведомлений. Полный список параметров, которые можно синхронизировать с Windows, приведены в разделе Параметры роуминга в Windows 10.
International Settings
You can specify the default language, locale, and keyboard values during deployment or after Windows is installed. You can configure international settings by using the International module for Windows PowerShell, by using an answer file with Windows Setup, or by using Deployment Imaging Servicing and Management (DISM).
For information about using DISM to configure international settings in an offline Windows image, see DISM Languages and International Servicing Command-Line Options.
In Windows 10, Control Panel items are gradually being migrated over to the Settings application. Intl.cpl can be used to manage features that exist on the cpl page. However, it’s not supported for settings migrated to the new Settings application. For items in Settings Application, use Windows PowerShell cmdlets.
In addition, Deployment Imaging Servicing and Management (DISM) should also only be used against an offline Windows image. In Windows 10, language settings are dynamically configured based on the user’s language list. Individual settings, such as the display language, default input method, and user locale may be reset dynamically based on user preferences on a running Windows installation. Use the International PowerShell cmdlet settings to change the international settings of a running Windows installation.
Prepare keyboards, time zones, and other regional settings
You can specify the default keyboard layout, language, or locale, either during deployment or after Windows is installed.
- Configure International Settings in Windows
- Default Input Profiles (Input Locales) in Windows: Lists the default input profiles (language and keyboard pairs) used for each region.
- Default Time Zones: Lists the default time zone used for each region.
- Keyboard identifiers for Windows: Lists the keyboard hexadecimal values used when configuring input profiles.
Configure international settings by using Windows PowerShell
In WindowsВ 10, you can use the International Settings PowerShell cmdlets to change the language on a running Windows installation.
Open a Windows PowerShell prompt.
Display the locale information:
Set the locale for the region and language, for example, to Japanese:
Configure international settings by using Control Panel
On a running Windows installation, you can use Control Panel to select language packs and configure additional international settings.
On the Start page, type language, and select Add a language.
Browse or search for the language that you want to install. For example, select Catalan, and then select Add.
Catalan is now added as one of your languages.
In the Change your language preferences pane, select Options next to the language that you added.
If a language pack is available for your language, select Download and install language pack.
When the language pack is installed, the language is displayed as available to useВ for the Windows display language.
To make this language your display language, move it to the top of your language list.
Log off and then log back on to Windows for the change to take effect.
Installing many additional language packs affects disk space and system performance. In particular, disk space and system performance are affected during servicing operations, such as service pack installations. Therefore, we recommend that you add a language pack to your computer only if you plan to use the language pack.
Language packs also let multiple users who share a computer select distinct display languages. For example, one user can select to see the dialog boxes, menus, and other text in Japanese, whereas another user can select to see the same content in French.
Configure international settings by using DISM
You can use Deployment Imaging Servicing and Management (DISM) to change the international settings against an offline Windows image
Mount a Windows image. For example,
Get the language settings that are configured in the Windows image by using the /Get-Intl parameter. For example
Change the default language, locale, and other international settings by using the /set-allIntl parameter.
Configure international settings by using an answer file
You can configure international settings in an answer file in the following ways:
Language Packs are installed from a distribution share and settings are configured installed during WindowsPE configuration pass.
Corporations that deploy a multilingual edition of Windows typically create an answer file that configures international settings during the WindowsPE configuration pass. For multilingual deployments, language packs can exist in both a distribution share and in the image. You can add and configure Language packs from the distribution share during the WindowsPE configuration pass, or you can add these Language pa cks during the WindowsPE configuration pass and configure the settings in another configuration pass.
The Microsoft-Windows-International-Core-WinPE component includes the settings that you can use to modify the language and locale settings during the windowsPE configuration pass. Additionally, you can change the Setup UI language for Windows Setup by specifying values in this component.
Language packs are installed to the Windows image and settings are configured during specialize and oobesystem configuration passes.
OEMs and corporations that deploy a single-language edition of Windows to various regions typically create an answer file for each region and set the locale and keyboard settings in the specialize configuration pass. In this scenario, the language pack is added to the Windows image before international settings are configured.
The Microsoft-Windows-International-Core component includes the settings that you can use to modify the language and locale settings during the specialize and oobeSystem configuration passes.
You can pre-select a language and skip the WindowsВ Welcome language selection UI page for users by specifying language and locale settings in the oobeSystem configuration pass in the Microsoft-Windows-International-Core component. In general, a user can choose between the default Setup language and any additional languages that are installed in the image. The selection of the language will update the other regional settings to the default values that are associated with that language. The user can then individually change the default settings.
To configure international settings during the WindowsВ PE configuration pass
Verify that the necessary language packs are available in the image or in a Windows distribution share. For more information about multilingual distribution shares, see Add Multilingual Support to a Windows Distribution.
Open Windows System Image Manager (WindowsВ SIM) and create an answer file. For more information, see Create or Open an Answer File.
Add the Microsoft-Windows-International-Core-WinPE component to the answer file to apply settings during the windowsPE configuration pass.
Configure international settings in the Microsoft-Windows-International-Core-WinPE component. For example, if the Spanish language pack is available in the distribution share, you can add es-ES values to the component settings in the windowsPE configuration pass.
Most system locales require a restart. When you configure your locale settings during the windowsPE configuration pass, the computer will automatically restart. Additional restarts are not required.
For more information about these settings, see the Microsoft-Windows-International-Core-WinPE components in the WindowsВ® Unattended Setup Reference.
Save the answer file and close WindowsВ SIM. The language pack in the distribution share will be automatically added and the international settings will be applied when you run WindowsВ Setup and specify this answer file.
To configure international settings during the specialize configuration pass
Verify that the necessary language packs are available in the image. For more information about how to add a language pack offline, see Add and Remove Language Packs Offline Using DISM. For more information about how to add a language pack using an answer file, see Add a Package to an Answer File.
Open WindowsВ SIM and create a new answer file. For more information, see Create or Open an Answer File.
Add the Microsoft-Windows-International-Core component to apply settings during the specialize and oobeSystem configuration passes.
Most system locales require a restart. When you process language settings during the specialize or oobeSystem configuration passes, the computer might require an additional restart.
Edit the settings for the Microsoft-Windows-International-Core component to configure international settings for a specific region. For example, you can add EN-US values to the Microsoft-Windows-International-Core settings in the specialize configuration pass.
You can also pre-select a language and specify language and locale settings in the oobeSystem configuration pass in the Microsoft-Windows-International-Core component. When you do this, the WindowsВ Welcome language selection UI page will be skipped when the users boot to WindowsВ Welcome. In general the user can select between the default Setup language and any additional languages that are installed in the image. The selection of the language will update the other regional settings to the default values associated with that language. The user can then change these default settings individually.
For more information about these settings, see the Microsoft-Windows-International-Core component in the WindowsВ® Unattended Setup Reference.
Save the answer file and close WindowsВ SIM. When you run WindowsВ Setup specifying this answer file, the regional settings that you specified in the answer file will be applied.
To change international settings in separate configuration passes in the same answer file:
Create multiple sections in an answer file that will process different language settings during different phases of Windows installation. This enables you to configure multiple language settings in an answer file by specifying different settings to be processed in different configuration passes. For more information, see How Configuration Passes Work.
For example, you can create language and locale settings in the windowsPE configuration pass with the Microsoft-Windows-International-Core-WinPE component.
You can then change the default settings in either the oobeSystem or the specialize configuration pass by adding settings to the Microsoft-Windows-International-Core component.
For example, you can specify EN-US as the default language to use on the computer in the windowsPE configuration pass. Then, if you intend to send the computer to a different region, you can add more language and locale settings to the oobeSystem configuration pass.
If language settings are processed during the oobeSystem configuration pass, a restart might be required. Also, the time that is required for the computer to process the language settings might prevent the end user from starting WindowsВ Welcome quickly.


