- How to change your keyboard layout
- Summary
- More Information
- Windows 7 or Windows Vista
- Windows XP
- How to make sure that the selected layout matches the keyboard
- Windows 7 or Windows Vista
- Windows XP
- References
- Change your keyboard layout
- Change the keyboard layout or other method you use to type
- Install or change a display language
- Change your keyboard layout
- How to create custom keyboard layouts in Windows 10
- Set keyboard layout on Windows 10, 8
- 1. Add a new keyboard layout
- 2. Change keyboard input methods
- 3. Use Microsoft Keyboard Layout Creator
How to change your keyboard layout
Summary
This article describes how to change keyboard layouts for the Microsoft keyboards listed in the «Applies To» section.
You can configure your keyboard to use a different language or keyboard layout, such as Canadian Multilingual, Spanish, or United States-Dvorak. A large selection of keyboard layouts is installed with the Microsoft Windows operating system.
Generally, you should configure your keyboard layout in Windows to match the actual keyboard that you use. If you can choose a different layout, be aware that the keys on your keyboard may display different characters than those that appear on screen.
More Information
To configure your keyboard to use a different language or keyboard layout, use the appropriate method for your version of Windows.
Note These methods use the Canadian French keyboard layout as an example.
Windows 7 or Windows Vista
Click Start  , type intl.cpl in the Start Search box, and then press ENTER.
On the Keyboards and Language tab, click Change keyboards.
Expand the language that you want. For example, expand French (Canada).
Expand Keyboard list, click to select the Canadian French check box, and then click OK.
In the options, click View Layout to compare the layout with the actual keyboard.
In the Default input language list, click French (Canada) – Canadian French, and then click OK two times.
In the Regional and Language Options dialog box, click OK.
Note The Language bar appears on the taskbar. When you rest the mouse pointer over this bar, a tooltip appears that describes the active keyboard layout.
Click the Language bar, and then click FR French (Canada).
Windows XP
Click Start , type intl.cpl in the Run box, and then press ENTER.
On the Languages tab, click Details.
Under Installed services, click Add.
In the Input language list, select the language that you want. For example, select French (Canada) .
In the Keyboard layout/IME list, click Canadian French, and then click OK .
In the Select one of the installed input languages to use when you start your computer list, click French (Canada) – Canadian French, and then click OK.
In the Regional and Language Options dialog box, click OK.
Note The Language bar appears on the taskbar. When you rest the mouse pointer over this bar, a tooltip appears that describes the active keyboard layout.
Click the Language bar, and then click French (Canada).
How to make sure that the selected layout matches the keyboard
Windows 7 or Windows Vista
Click Start, type osk in the Start Search box, and then press ENTER.
Match the keyboard on the screen with the physical keyboard to make sure that the layout matches.
To check the uppercase characters, click the shift key on the keyboard or on the screen, and match the characters printed on the keyboard.
Windows XP
Click Start, type osk in the Run box, and then press ENTER.
Match the keyboard on the screen with the physical keyboard to make sure that the layout matches.
To check the uppercase characters, click the shift key on the keyboard or on the screen, and match the characters printed on the keyboard.
References
For more information about the Language bar, click the following article number to view the article in the Microsoft Knowledge Base:
306993 HOW TO: Use the Language Bar in Windows XP
For more information about how to use the United States-International keyboard layout, click the following article number to view the article in the Microsoft Knowledge Base:
306560 How to use the United States-International keyboard layout in Windows 7, in Windows Vista, and in Windows XP
Change your keyboard layout
Swipe in from the right edge of the screen, tap Settings, and then tap Change PC settings. (If you’re using a mouse, point to the lower-right corner of the screen, move the mouse pointer up, click Settings, and then click Change PC settings.)
Tap or click Time and language, and then tap or click Region and language, and then tap or click Add a language.
Browse for the language you want, and then tap or click it to add it to your language list.
Swipe in from the right edge of the screen, tap Settings, and then tap Change PC settings. (If you’re using a mouse, point to the lower-right corner of the screen, move the mouse pointer up, click Settings, and then click Change PC settings.)
Tap or click Time and language, and then tap or click Region and language.
If the language says Language pack available, tap or click Options.
Note: If you don’t see Language pack available, you might be able to download the language pack at the Download Center.
Tap or click Download. The download process might take a while, depending on your PC and the size of the language pack.
Swipe in from the right edge of the screen, tap Settings, and then tap Change PC settings. (If you’re using a mouse, point to the lower-right corner of the screen, move the mouse pointer up, click Settings, and then click Change PC settings.)
Tap or click Time and language, and then tap or click Region and language.
Tap or click the language that you want to see Windows in, and then tap or click Set as primary. The Will be display language after next sign-in message will appear under the language.
Tap or click Set as primary to move the language to the top of the list. If the language can become your Windows display language, you’ll see Will be display language after next sign-in appear under the language.
Sign out of Windows, and then sign back in.
Warning: When you change your primary language, your keyboard layout might also change. When signing back in to Windows, make sure you’re using the right keyboard layout for entering your password. Otherwise, you might not be able to sign in. You can change your keyboard layout on the sign-in screen by tapping or clicking the language abbreviation button in the lower-right corner.
Change the keyboard layout or other method you use to type
Whenever you add a language, a keyboard layout or input method is added so you can enter text in the language. If you want to use a different keyboard layout or input method, you can add a new one or switch between the ones you have.
Swipe in from the right edge of the screen, tap Settings, and then tap Change PC settings. (If you’re using a mouse, point to the lower-right corner of the screen, move the mouse pointer up, click Settings, and then click Change PC settings.)
Tap or click Time and language, and then tap or click Region and language.
Tap or click the language you want to add a keyboard to, and then tap or click Options.
Tap or click Add a keyboard, browse the input method list for the one you want to use, and then tap or click it.
You can enter text with different keyboard layouts or input methods by switching between them. There are a few different ways to switch between keyboard layouts or input methods:
On a hardware keyboard, press and hold the Windows logo key , and then press the Spacebar to cycle through your input methods.
If you have a touchscreen, you can switch your touch keyboard layout by tapping or clicking the keyboard icon, and then tapping or clicking the keyboard layout you want to switch to.
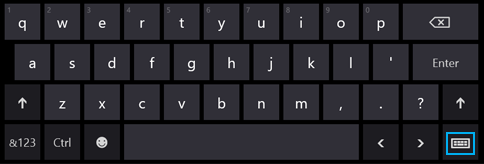
Language abbreviation button in the touch keyboard
On the desktop taskbar, tap or click the language abbreviation in the notification area at the far right of the taskbar, and then tap or click the keyboard layout or input method you want to switch to.
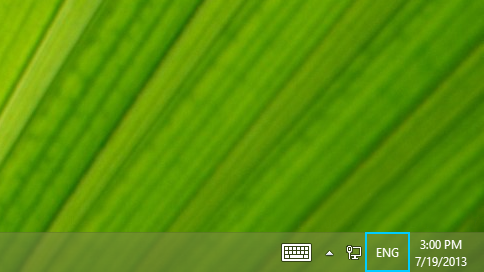
Language abbreviation button in the desktop taskbar
Your default keyboard layout or input method is the one that’s automatically used with the language you see Windows in (for example, the QWERTY keyboard for American English). If you want to keep your Windows language the same but use a different keyboard automatically, follow these steps:
Open Control Panel by swiping in from the right edge of the screen, tapping Search (or if you’re using a mouse, pointing to the upper-right corner of the screen, moving the mouse pointer down, and then clicking Search), entering Control Panel in the search box, and then tapping or clicking Control Panel.
Enter Add a language in the search box, and then tap or click Add a language.
Tap or click Advanced settings.
Under Override for default input method, choose the keyboard layout or input method you’d like to be your new default, and then tap or click Save.
Note: If you don’t see the keyboard layout or input method you want, then you haven’t added it to your input method list. For instructions, see the Add a keyboard layout or input method for a language section.
Install or change a display language
You can change the language Windows uses to display text in wizards, dialog boxes, menus, and other items in the user interface. Some display languages are installed by default, while others require you to install additional language files.
To install a Language Interface Pack (LIP), double-click the file to open the setup program. To install a language pack, follow these steps:
Open Region and Language by clicking the Start button , clicking Control Panel, clicking Clock, Language, and Region, and then clicking Region and Language.
Click the Keyboards and Languages tab.
Under Display language, click Install/uninstall languages, and then follow the steps.  If you’re prompted for an administrator password or confirmation, type the password or provide confirmation.
Note: The Display language section will be visible only if you have already installed a Language Interface Pack or if your edition of Windows supports a language pack. Language packs are available only in Windows 7 Ultimate and Windows 7 Enterprise.
When you change the display language, the text in menus and dialog boxes for some programs might not be in the language that you want. This happens because the program might not support Unicode.
Open Region and Language by clicking the Start button , clicking Control Panel, clicking Clock, Language, and Region, and then clicking Region and Language.
Click the Keyboards and Languages tab.
Under Display language, choose a language from the list, and then click OK.
Note: If you don’t see the list of display languages, you need to install additional language files.
Change your keyboard layout
On the Language bar, click the Input language button, and then select an input language.
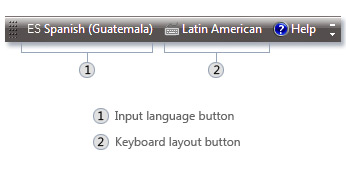
Click the Keyboard layout button, and then select a keyboard layout.
Note: If you don’t see the Language bar, right-click the taskbar, point to Toolbars, and then click Language bar.
On the Welcome screen, click the Keyboard layout button  , and then select a keyboard layout.
Note: If you don’t see the Keyboard layout button, you might not have more than one input language, or your regional and language settings might not be applied to reserved accounts.
How to create custom keyboard layouts in Windows 10


Are you interested in customizing your own keyboard layouts or starting the layouts from scratch for any kinds of reason — like seting the keyboard to a language Microsoft systems don’t have support for or include a symbol of your liking just by pressing a keyboard button? Now you can find exactly how to do this by following the instructions listed below. 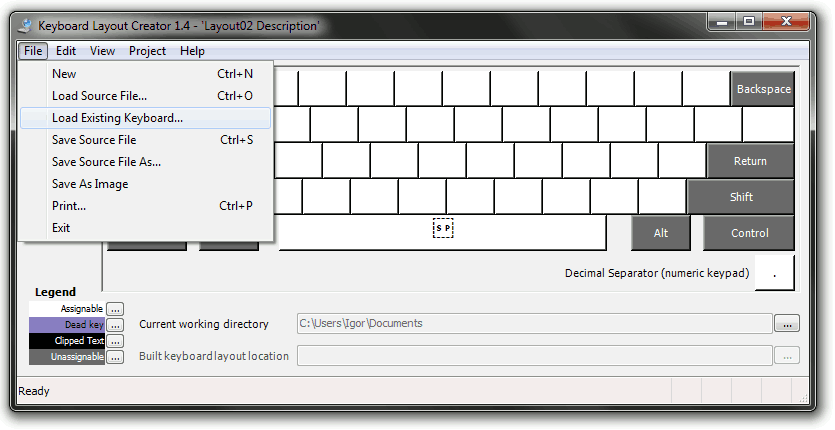
In the tutorial below, we will see exactly how we can set an input method, remove an input method from our keyboard layouts and use the Microsoft Keyboard Layout Creator to customize the keyboard on Windows Windows 10, Windows 8 to our preferences.
Set keyboard layout on Windows 10, 8
1. Add a new keyboard layout
This tutorial shows how to add or remove keyboard input from Control Panel.
- Move the mouse cursor to the right side of the screen.
- In the search box type Control Panel
- Click (left click) on “Control Panel” icon that shows after the search is completed.
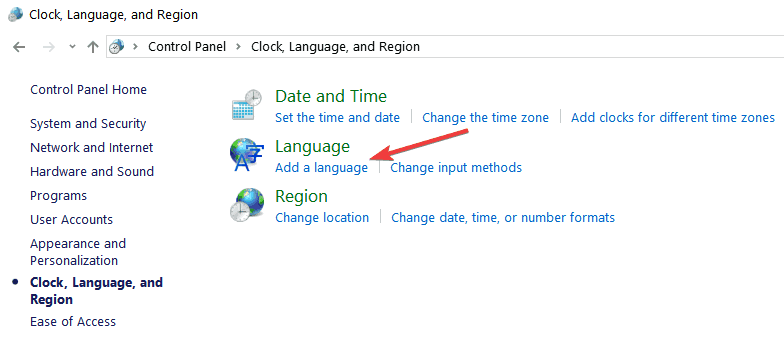
- After the Control Panel window opens click (left click) on the “Language” icon.
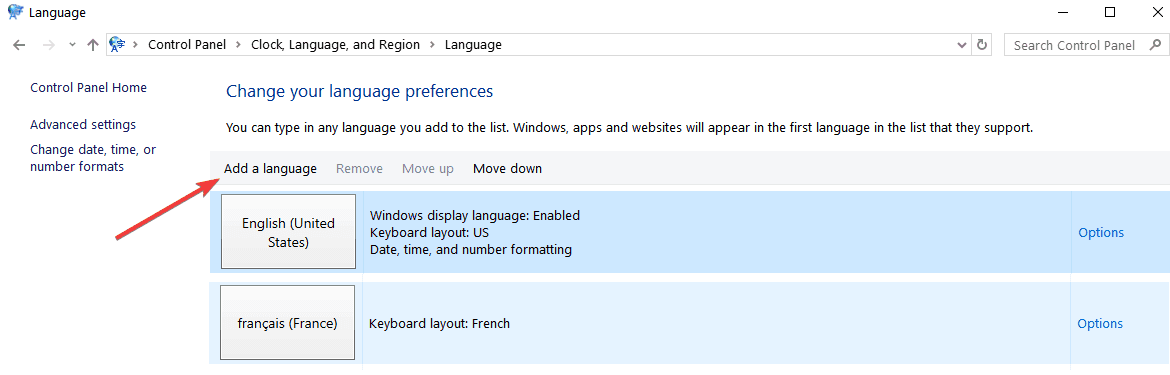
- Double click (left click) on “Add a language” situated in the middle side of the window you opened.

- Under the “Input Method” field click (left click) on “Add an input method”.
- Double click (left click) on an input method you prefer to add or just choose an input method and click on “Add”.
- You can repeat the two steps above to add another input language if you want.
- When you are finished you just need to click (left click) on “Save” in the lower side of the window.
- After you add an input method you will just need to switch the methods from the lower right side of the screen where it says what language is your keyboard set to operate.
- RELATED: The best PC keyboards for 2018
2. Change keyboard input methods
You can also add or remove input methods using the PC settings feature in Windows 10, 8.1 as shown below:
- Open “PC Settings” by going with the mouse on the charms bar
- Click (left click) on “Settings”
- Or another way to open PC settings is by pressing and holding “Windows” and “I” buttons.
- Click (left click) on “General” situated on the left of the screen.
- Click (left click) on “Language Preferences” link situated under the “Language” section on the right side of the screen.
- From here you can follow the steps presented in the first tutorial.

3. Use Microsoft Keyboard Layout Creator
Let’s see how we can download Microsoft Keyboard Layout Creator and create our own keyboard layouts from scratch using this app.
- Follow the link below to download Microsoft Keyboard Layout creator
- Using the link below, you will see that this application doesn’t support Windows 10, 8 but nevertheless it will work just fine if you install it. Also, as a requirement for this app to work on your Windows 10, 8 system, you will need to install also Microsoft .NET Framework v2.0, you can find the link for this app below.
Note: This application also requires a 32-bit system, but if you got a 64-bit system it will run with no issues just that it will be in a 32-bit mode setup.
The three ways above showed you how you can customize the keyboard input in Windows 10, 8. All you have to do now is go and try it for yourself. Please write us below for any new ideas on how to customize your keyboard.
Speaking of keyboards, there are various technical issues that you may encounter after connecting your keyboard to your computer or after enabling certain settings. If you’re experiencing any keyboard issues after creating a custom keyboard layout, here are some troubleshooting guides to help you fix them:


