- Virus & threat protection in Windows Security
- Run the scans you want
- Manage your Virus & threat protection settings
- Manage your real-time protection
- Get access to cloud-delivered protection
- Send us files with automatic sample submission
- Tamper Protection defends your security settings
- Protect files from unauthorized access
- Exclude items from virus scans
- Curate your notifications
- Protect your device with the latest updates
- Security Check для Windows
- Отзывы о программе Security Check
- Bug Check 0x139: KERNEL_SECURITY_CHECK_FAILURE
- Bug Check 0x139 KERNEL_SECURITY_CHECK_FAILURE Parameters
- Cause
- Resolution
Virus & threat protection in Windows Security
If you’re running Windows 10 in S mode, some of the features of the Windows Security interface will be a little different. Windows 10 in S mode is streamlined for tighter security, so the Virus & threat protection area has fewer options than those described here. This is because the built-in security of Windows 10 in S mode automatically prevents viruses and other threats from running on your device. Additionally, devices running Windows 10 in S mode receive security updates automatically.
In previous versions of Windows 10, Windows Security is called Windows Defender Security Center.
Virus & threat protection in Windows Security helps you scan for threats on your device. You can also run different types of scans, see the results of your previous virus and threat scans, and get the latest protection offered by Microsoft Defender Antivirus.
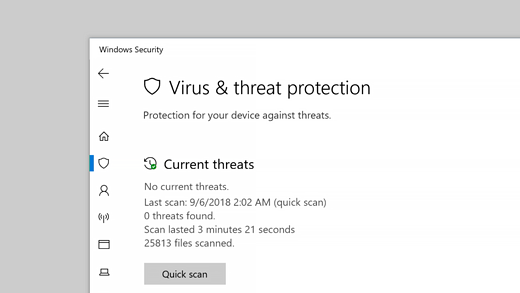
The Current threats area lets you:
See any threats currently on your device.
See the last time a scan was run on your device, how long it took, and how many files were scanned.
Start a new scan.
See threats that have been quarantined before they can affect you.
See anything identified as a threat that you have allowed to run on your device.
Note: If you are using third-party antivirus software, you’ll be able to use its virus and threat protection options here.
Run the scans you want
Even though Windows Security is turned on and scans your device automatically, you can perform an additional scan whenever you want.
Quick scan. Concerned that you may have done something to introduce a suspicious file or virus to your device? Select Quick scan (called Scan now in previous versions of Windows 10) to immediately check your device for any recent threats. This option is useful when you don’t want to spend the time running a full scan on all your files and folders. If Windows Security recommends that you run one of the other types of scans, you’ll be notified when the Quick scan is done.
Scan options .Select this link (called Run a new advanced scan in previous versions of Windows 10) to choose from one of the following advanced scan options:
Full scan. Scans every file or program that’s currently running on your device to make sure there’s nothing dangerous in progress.
Custom scan. Scans only files and folders that you select.
Microsoft Defender Offline scan. Uses the latest definitions to scan your device for the latest threats. Run it when you are concerned that your device has been exposed to malware or a virus, or if you want to scan your device without being connected to the Internet. This will restart your device, so be sure to save files you may have open.
Manage your Virus & threat protection settings
Use Virus & threat protection settings when you want to customize your level of protection, send sample files to Microsoft, exclude trusted files and folders from repeated scanning, or temporarily turn off your protection.
Manage your real-time protection
Want to stop running real-time protection for a short while? You can use the Real-time protection setting to turn it off temporarily; however, real-time protection will turn back on automatically after a short while to resume protecting your device. While real-time protection is off, files you open or download won’t be scanned for threats.
Note: If the device you’re using is part of an organization, your system administrator may prevent you from turning off real-time protection.
Get access to cloud-delivered protection
Provide your device with access to the latest threat definitions and threat behavior detection in the cloud. This setting allows Microsoft Defender to get constantly updated improvements from Microsoft while you’re connected to the internet. This will result in more accurately identifying, stopping, and fixing, threats.
This setting is turned on by default.
Send us files with automatic sample submission
If you’re connected to the cloud with cloud-delivered protection, you can send suspicious sample files to Microsoft to check them for potential threats. Microsoft will notify you if you need to send additional files—and alert you if a requested file contains personal information.
Tamper Protection defends your security settings
Microsoft Defender Antivirus settings can occasionally get changed by malicious, or careless, apps or processes; or sometimes by unaware people. With Tamper Protection turned on, important settings like real-time protection, can’t be easily or accidentally turned off.
This setting is turned on, by default, for consumers.
Protect files from unauthorized access
Use the Controlled folder access setting to manage which folders untrusted apps can make changes to. You can also add additional apps to the trusted list so they can make changes in those folders. This is a powerful tool to make your files safer from ransomware.
When you turn on Controlled folder access, a lot of the folders you use most often will be protected by default. This means that content in any of these folders cannot be accessed or changed by any unknown or untrusted apps. If you add additional folders, they become protected as well.
Exclude items from virus scans
There may be times when you’ll want to exclude specific files, folders, file types, or processes from being scanned, such as if these are trusted items and you are certain you don’t need to take time to scan them. In those rare instances you can add an exclusion for them.
Curate your notifications
Windows Security will send notifications about the health and safety of your device. You can turn these notifications on, or off, on the notifications page. In Virus & threat protection, under Virus & threat protection settings, select Manage settings, scroll down to Notifications and select Change notification settings.
Protect your device with the latest updates
Security intelligence (sometimes referred to as «definitions») are files that contain information about the latest threats that could infect your device. Windows Security uses security intelligence every time a scan is run.
Microsoft automatically downloads the latest intelligence to your device as part of Windows Update, but you can also manually check for it. On the Virus & threat protection page, under Virus & threat protection updates, select Check for updates to scan for the latest security intelligence.
Security Check для Windows
| Оценка: |
5.00 /5 голосов — 3 |
| Лицензия: | Бесплатная |
| Версия: | 1.4.0.53 | Сообщить о новой версии |
| Обновлено: | 29.10.2017 |
| ОС: | Windows 10, 8.1, 8, 7, Vista, XP |
| Интерфейс: | Русский |
| Разработчик: | glax24 |
| Категория: | другое |
| Загрузок (сегодня/всего): | 0 / 2 828 | Статистика |
| Размер: | 507 Кб |
| СКАЧАТЬ | |

Security Check — небольшая утилита для быстрой проверки на наличие уязвимых приложений. Результат проверки выдает в виде лог-файла.
- Контроль учетных записей.
- Сервис пак.
- Версия IE.
- Автообновление ОС.
- Антивирус,файервол
- Версии Java
- Версия Adobe Flash Player
- Версия AdobeReader
- QuickTime, Bonjour
- Установленные браузеры
- Проверка запущенных процессов браузеров.

AdwCleaner — бесплатная программа от Malwarebytes для борьбы с нежелательным и рекламным ПО, которые.
Avast Clear — утилита для удаления приложений avast, когда стандартным путём из панели управления Windows удалить невозможно.
ESET Uninstaller — небольшая утилита для полной деинсталляции антивирусных продуктов вендора ESET.
Как часто вы, устанавливая какую-либо программу, получали в довесок ворох ненужных.
Конфиденциальный, быстрый и безопасный браузер от компании Avast, который умеет.
Freeraser — бесплатная программа, которая позволяет быстро, легко и надежно удалить любые пользовательские файлы. Утилита предлагает три режима удаления данных.
Отзывы о программе Security Check
 Admin
Admin
Отзывов о программе Security Check 1.4.0.53 пока нет, можете добавить.
Bug Check 0x139: KERNEL_SECURITY_CHECK_FAILURE
The KERNEL_SECURITY_CHECK_FAILURE bug check has a value of 0x00000139. This bug check indicates that the kernel has detected the corruption of a critical data structure.
This topic is for programmers. If you are a customer who has received a blue screen error code while using your computer, see Troubleshoot blue screen errors.
Bug Check 0x139 KERNEL_SECURITY_CHECK_FAILURE Parameters
| Parameter | Description |
|---|---|
| 1 | The type of corruption. For more information, see the following table. |
| 2 | Address of the trap frame for the exception that caused the bug check |
| 3 | Address of the exception record for the exception that caused the bug check |
| 4 | Reserved |
The following table describes possible values for Parameter 1.
| Parameter 1 | Description |
|---|---|
| 0 | A stack-based buffer has been overrun (legacy /GS violation). |
| 1 | VTGuard instrumentation code detected an attempt to use an illegal virtual function table. Typically, a C++ object was corrupted, and then a virtual method call was attempted using the corrupted object’s this pointer. |
| 2 | Stack cookie instrumentation code detected a stack-based buffer overrun (/GS violation). |
| 3 | A LIST_ENTRY was corrupted (for example, a double remove). For more information, see the following Cause section. |
| 4 | Reserved |
| 5 | An invalid parameter was passed to a function that considers invalid parameters fatal. |
| 6 | The stack cookie security cookie was not properly initialized by the loader. This may be caused by building a driver to run only on WindowsВ 8 and attempting to load the driver image on an earlier version of Windows. To avoid this problem, you must build the driver to run on an earlier version of Windows. |
| 7 | A fatal program exit was requested. |
| 8 | A array bounds check inserted by the compiler detected an illegal array indexing operation. |
| 9 | A call to RtlQueryRegistryValues was made specifying RTL_QUERY_REGISTRY_DIRECT without RTL_QUERY_REGISTRY_TYPECHECK, and the target value was not in a trusted system hive. |
| 10 | Indirect call guard check detected invalid control transfer. |
| 11 | Write guard check detected invalid memory write. |
| 12 | An attempt was made to switch to an invalid fiber context. |
| 13 | An attempt was made to assign an invalid register context. |
| 14 | The reference count for an object is invalid. |
| 18 | An attempt was made to switch to an invalid jmp_buf context. |
| 19 | An unsafe modification was made to read-only data. |
| 20 | A cryptographic self-test failed. |
| 21 | An invalid exception chain was detected. |
| 22 | A cryptographic library error occurred. |
| 23 | An invalid call was made from within DllMain. |
| 24 | An invalid image base address was detected. |
| 25 | An unrecoverable failure was encountered while protecting a delay load import. |
| 26 | A call was made to an unsafe extension. |
| 27 | A deprecated service was invoked. |
| 28 | An out of bounds buffer access was detected. |
| 29 | An RTL_BALANCED_NODE RBTree entry has been corrupted. |
| 37 | An out of range switch jumptable entry was invoked. |
| 38 | A longjmp was attempted to an invalid target. |
| 39 | An export suppressed call target couldn’t be made a valid call target. |
Cause
Using the parameter 1 table, and a dump file, it is possible to narrow down the cause for many bug checks of this type.
LIST_ENTRY corruption can be difficult to track down and this bug check, indicates that an inconsistency has been introduced into a doubly-linked list (detected when an individual list entry element is added to or removed from the list). Unfortunately, the inconsistency is not necessarily detected at the time when the corruption occurred, so some detective work may be necessary to identify the root cause.
Common causes of list entry corruption include:
- A driver has corrupted a kernel synchronization object, such as a KEVENT (for example double initializing a KEVENT while a thread was still waiting on that same KEVENT, or allowing a stack-based KEVENT to go out of scope while another thread was using that KEVENT). This type of bug check typically occurs in nt!Ke* or nt!Ki* code. It can happen when a thread finishes waiting on a synchronization object or when code attempts to put a synchronization object in the signaled state. Usually, the synchronization object being signaled is the one that has been corrupted. Sometimes, Driver Verifier with special pool can help track down the culprit (if the corrupted synchronization object is in a pool block that has already been freed).
- A driver has corrupted a periodic KTIMER. This type of bug check typically occurs in nt!Ke* or nt!Ki* code and involves signaling a timer, or inserting or removing a timer from a timer table. The timer being manipulated may be the corrupted one, but it might be necessary to inspect the timer table with !timer (or manually walking the timer list links) to identify which timer has been corrupted. Sometimes, Driver Verifier with special pool can help track down the culprit (if the corrupted KTIMER is in a pool block that has already been freed).
- A driver has mismanaged an internal LIST_ENTRY-style linked list. A typical example would be calling RemoveEntryList twice on the same list entry without reinserting the list entry between the two RemoveEntryList calls. Other variations are possible, such as double inserting an entry into the same list.
- A driver has freed a data structure that contains a LIST_ENTRY without removing the data structure from its corresponding list, causing corruption to be detected later when the list is examined after the old pool block has been reused.
- A driver has used a LIST_ENTRY-style list in a concurrent fashion without proper synchronization, resulting in a torn update to the list.
In most cases, you can identify the corrupted data structure by walking the linked list both forward and backwards (the dl and dlb commands are useful for this purpose) and comparing the results. Where the list is inconsistent between a forward and backward walk is typically the location of the corruption. Since a linked list update operation can modify the list links of a neighboring element, you should look at the neighbors of a corrupted list entry closely, as they may be the underlying culprit.
Because many system components internally utilize LIST_ENTRY lists, various types of resource mismanagement by a driver using system APIs might cause linked list corruption in a system-managed linked list.
Resolution
Determining the cause of this issues typically requires the use of the debugger to gather additional information. Multiple dump files should be examined to see if this stop code has similar characteristics, such as the code that is running when the stop code appears.
Use the event log to see if there are higher level events that occur leading up to this stop code.
These general troubleshooting tips may be helpful.
If you recently added hardware to the system, try removing or replacing it. Or check with the manufacturer to see if any patches are available.
If new device drivers or system services have been added recently, try removing or updating them. Try to determine what changed in the system that caused the new bug check code to appear.
Check the System Log in Event Viewer for additional error messages that might help pinpoint the device or driver that is causing the error. For more information, see Open Event Viewer. Look for critical errors in the system log that occurred in the same time window as the blue screen.
Look in Device Manager to see if any devices are marked with the exclamation point (!). Review the events log displayed in driver properties for any faulting driver. Try updating the related driver.
Run a virus detection program. Viruses can infect all types of hard disks formatted for Windows, and resulting disk corruption can generate system bug check codes. Make sure the virus detection program checks the Master Boot Record for infections.
For additional general troubleshooting information, see Blue Screen Data.


