- How to Pair an Old Apple Mighty Mouse or Magic Mouse in Windows 10
- Installing Apple Mighty Mouse or Magic Mouse Drivers in Windows 10
- Pairing Mighty Mouse or Magic Mouse in Windows 10
- Mighty Mouse 1.0
- Основная информация о программе
- Как подключить Magic Mouse к Windows-компьютеру
- Способ I — Magic Mouse Utilities
- Способ II — установка драйверов Bootcamp
- Question: Q: Mighty Mouse on Windows
- All replies
How to Pair an Old Apple Mighty Mouse or Magic Mouse in Windows 10

Got an old Apple Bluetooth mouse laying around? Good news, it works in Windows 10!

I was digging through boxes in my basement the other day and unearthed a buried treasure: my old Apple Mighty Mouse. My brief stint as a Mac user ended over five years ago and so my once-trusty Apple-branded Bluetooth mouse had been collecting dust. I was surprised to see that upon switching it on, it blinked to life. I decided to see if it would work on my Windows 10 PC. And it did, with a little coaxing.
Here’s how to get yours working, too.
Installing Apple Mighty Mouse or Magic Mouse Drivers in Windows 10
If your computer has Bluetooth, that’s half the equation. Drivers are the second half.
I am using the discontinued Apple Mighty Mouse, model A1197.

Apple makes official Windows drivers for their peripherals, including the Mighty Mouse and Magic Mouse. They are bundled up with Boot Camp, which lets you boot Windows on your Mac.
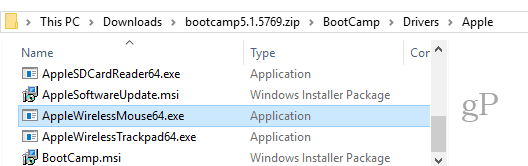
Normally, you get these drivers as part of the Boot Camp Assistant setup process. But if you are no longer a Mac user, you can snag them from Apple’s support pages. I found the driver in the Boot Camp Support Software 5.1.5769 (August 2015) zip file.
Go ahead and download this file and unzip it. Inside, to navigate the BootCamp > Drivers > Apple folder. In there, you’ll find a file called applewirelessmouse64.exe. Run it to install your Magic Mouse drivers or Mighty Mouse drivers.
(Note: If you are using an Apple Magic Trackpad, try out the AppleWirelessTrackpad64.exe drivers.)
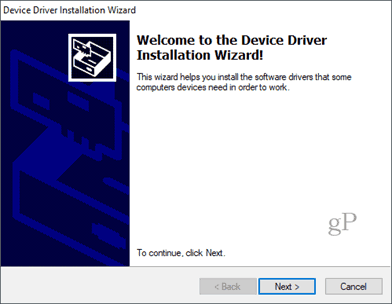
Proceed through the Device Driver Installation Wizard.
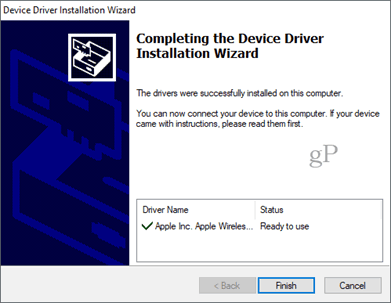
Click Finish when you’re done.
Pairing Mighty Mouse or Magic Mouse in Windows 10
Now that you have the drivers, the next step is to pair the mouse. It had been so long since I used my Mighty Mouse that I had forgotten how to pair it. There isn’t a pair button it, just an on/off switch on the bottom that slides over the optical sensor on the bottom.
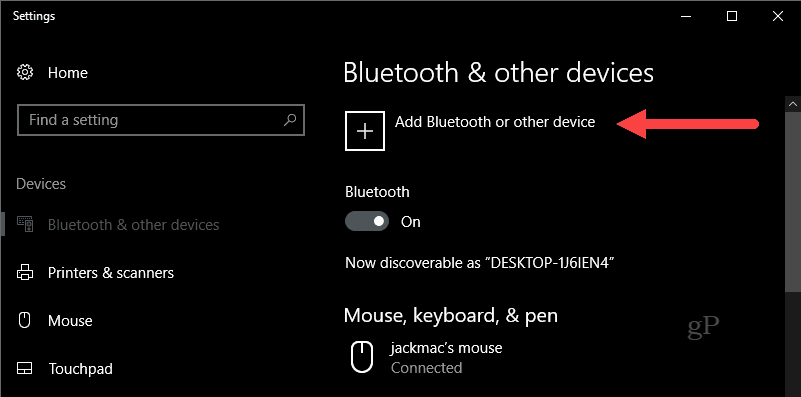
To get it to pair, go into your Bluetooth settings in Windows 10. Turn off your mouse and click Add Bluetooth or other device and choose Bluetooth.
Now, when Windows starts looking for the device, switch on your mouse while holding the left-click button. Keep holding the left-click button till the green light on the bottom starts flashing.

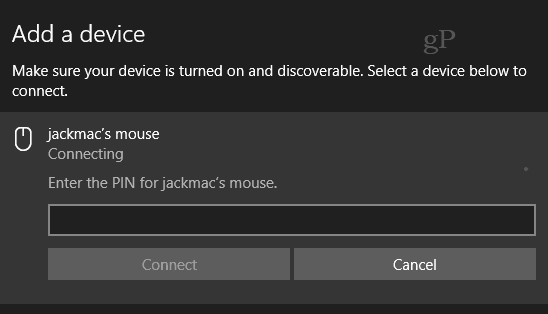
Your Apple mouse should show up in the list of devices. Click it. If prompted for a passcode, try 0000 or 1111.
Once you’re connected, Windows 10 will finish setting it up.
That’s it! You should be up and running.
I’ve only tried this on my Apple Mighty Mouse. But I believe it should work with any Apple wireless mouse. If you try it on your Windows 10 PC, let me know about your success or failure in the comments.
PS A note about the feature image. This was taken by Feureau (Own work) [CC BY-SA 3.0 or GFDL], via Wikimedia Commons. I could’ve taken a photo of my own Mighty Mouse but it’s filthy. When I say I dusted it off, I mean that figuratively…
Mighty Mouse 1.0


| Автор | Dirceu Veiga |
| Языки | Английский |
| Лицензия | Freeware (Бесплатная) |
Основная информация о программе
Mighty Mouse — набор красивых иконок высокого качества с изображением известной компьютерной мыши Apple Mouse, которые можно установить в операционную систему или просто сохранить на жесткий диск для коллекции.
Знаменитая Apple Mouse представляет из себя многокнопочную сенсорную мышь с возможностью индивидуального программирования всех четырех кнопок. Также Mighty Mouse (первое название мыши до переименования в Apple Mouse в 2009 году) имеет не стандартный колесный, а «продвинутый» шариковый скролл с поддержкой горизонтальной и вертикальной прокрутки. Примечательно, что во время скроллинга мышь издает специфический звук через встроенный в устройство небольшой динамик. Данный манипулятор был разработан компанией Apple Inc еще в 2005 году и не смотря на выпуск более новой модели Magic Mouse в 2009 году по сегодняшний день остается одним из самых популярных манипуляторов у пользователей Mac и Windows.
В набор Mighty Mouse входит шесть иконок размером 128 x 128 пикселей, изображающих Apple Mouse в разных ракурсах (сверху, по диагонали слева и справа), а также иконки с изображением мыши в состоянии подключения через Bluetooth.
Как подключить Magic Mouse к Windows-компьютеру
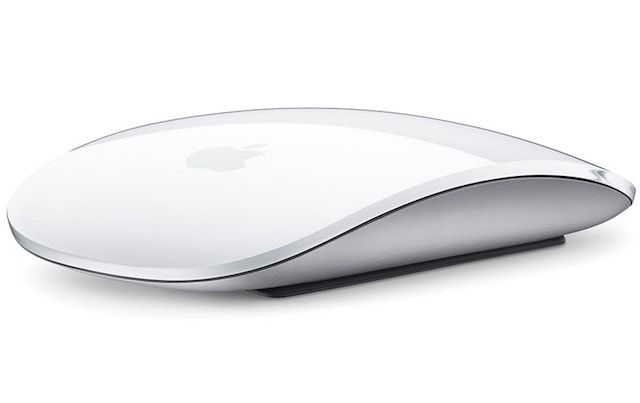
Apple Magic Mouse — возможно, самая необычная компьютерная мышь в мире. Почему? У неё есть всего одна кнопка, а поверхность распознает мультитач-жесты, так что происходящим на экране компьютера можно управлять жестами — так же, как на iPhone или iPad. Хотите попробовать такую мышку на своём ПК на Windows?
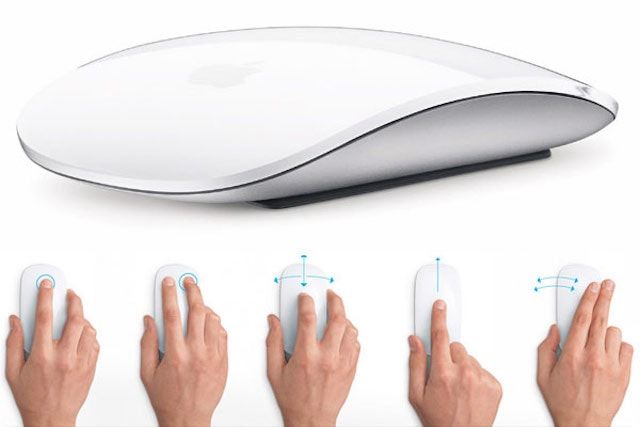
Подключить Magic Mouse к компьютеру на Windows просто — достаточно включить на ПК модуль Bluetooth. Но после сопряжения мыши и компьютера вы получите самую обыкновенную мышку, да к тому же ещё и однокнопочную. Все «сочные» фишки вроде нажатия в любой точке, нажатия правой кнопки мыши двумя пальцами, скроллинга веб-страниц и фотографий двумя пальцами, импульсной прокрутки протестировать не получится. В чём дело?
В позиции Apple, которая сделала Magic Mouse официально совместимой только с компьютерами Mac. Но не расстраивайтесь — уникальные жесты «яблочной» мышки все-таки можно перенести на ПК. Сразу несколько способов по настройке Magic Mouse под Windows предлагается ниже.
Способ I — Magic Mouse Utilities
Самый простой вариант «подружить» мышь Apple с вашим компьютером — набор бесплатных сторонних программ от разработчика Trackpadmagic.
1. Убедитесь, что на вашем ПК есть модуль Bluetooth. Если его нет, приобретите специальный Bluetooth-адаптер. Рекомендуемая модель для покупки — IOGEAR Bluetooth 4.0 USB Micro Adapter (GBU521), он проверен на работу с Magic Mouse. Пожалуйста, имейте в виду — с «яблочной» мышью совместим не каждый адаптер. Так что при прочих равных следует отдать предпочтение именно модели, приведенной выше.
2. Скачайте драйвер Magic Mouse. C его помощью вы сможете подключить мышь к компьютеру на Windows и получить базовую функциональность.
3. Скачайте и установите Magic Mouse Utility. C её помощью вы получите доступ к «продвинутым» функциям вроде скроллинга и возможности следить за уровнем заряда батареи. Условие — утилита должна быть включена всякий раз, когда вы пользуетесь чудо-мышкой Apple. Для этого зайдите в настройки и активируйте автозапуск сразу же после загрузки Windows.
4. Подключите Magic Mouse к ПК через Bluetooth. Если во время сопряжения возникнут проблемы, попробуйте провести сопряжение устройств с кодом 0000.
Способ II — установка драйверов Bootcamp
Bootcamp — набор драйверов для работы «железа» Apple в окружении Windows. Обычно их используют для установки «винды» второй системой на Mac, но подойдут они и в нашем случае.
Идеальный вариант для установки — последовательная установка версий драйверов Bootcamp.
1. Скачайте Bootcamp 3.0, смонтируйте его образ на диске и запустите файл Setup. После окончания установки перезагрузите ПК.
2. Установите версию Bootcamp 3.1 (32-разрядные ПК, 64-разрядные ПК). Затем снова перезагрузите ПК.
3. Установите Bootcamp версии 3.2 (32-разрядные ПК, 64-разрядные ПК). Перезагрузите компьютер.
Если желания «накатывать» все версии Bootcamp у вас нет, установите два драйвера: AppleWT и AppleMultiTP
Если Magic Mouse по-прежнему не работает:
1. Откройте на компьютере раздел настроек Bluetooth, выберите Добавить устройство.
2. Включите Magic Mouse.
3. Когда Windows распознает мышь, добавьте её в список устройств.
Готово! Теперь вы можете опробовать Magic Mouse в действии. Доступны будут не все функции, но самое интересное — жесты, клики, скроллинг — доступны Windows.
Question: Q: Mighty Mouse on Windows
I just purchased Mighty Mouse wireless from Apple Center. Now i can used it perfect and don’t have any problem yet but I have two OS which is Mac OS 10.4 and Windows XP (boot camp).. The problem here when I running on Windows, my Mighty Mouse can’t work and detected.. I read the manual or what ever, Mighty Mouse wireless only can run on Mac OS X.. How I can used it on Windows from boot camp? Any suggestion? Help me.. Please.. Thanks..
iMac G3, iMac G4, Macbook Pro 15″, Mac OS X (10.4.10), Mighty Mouse, Koolsink & 3D Worlds
Posted on Aug 28, 2007 8:12 AM
All replies
Loading page content
Page content loaded
Sep 11, 2007 12:55 PM
Sep 22, 2007 7:21 AM
Mighty Mouse just arrived two days ago from Apple User Group Center — here is my issue:
MM is discovered in MAC environ. & not in the windows environ.
The same with wireless keyboard at first, but then it was just a matter of turning on and off the keyboard to be discovered I guess, I tried everything with the mighty wireless mouse & nothing.
Where can I search to find somewhere to enter preferences on the windows environ to try and fix issue?
Oct 18, 2007 5:14 PM
I have a MacBook and BootCamp installed. I am running Windows Vista on the Windows side. I am able to pair and use Apple’s Wireless Keyboard and Mighty Mouse with the built-in Bluetooth on the Mac. I’ll post directions to pair the two devices and enable services.
Oct 19, 2007 8:20 AM
This guide is to help Apple users connect their wireless keyboard and mouse with Windows Vista. The following system requirements must be met before proceeding:
1. Apple Computer with Bluetooth Connectivity
2. BootCamp with Windows Vista (Home, Premeium, Ultimate, etc)
3. Wireless Keyboard and Wireless Mighty Mouse
**We’re going to configure one wireless device at a time.**
A. Setting up your Mac (in Windows) to connect to your Mouse:
1. Cick on Start (bottom left corner), then select Control Panel.
2. Click on Bluetooth Devices, this will now open the Bluetooth Devices window.
3. Enable (turn on) your Bluetooth Wireless Mouse (bottom of Mighty Mouse).
4. Click the Add button in the Bluetooth Devices window.
5. Check the selection box ‘My device is setup and ready to be found’.
6. Click Next, your computer will search for devices within range.
7. Your mouse should appear with ‘your name — new device’ under the label.
8. Click on your mouse, then click Next.
9. The next screen is for the passkey, leave the default item selected ‘Choose passkey for me’.
10. Click Next, your computer will pair with the Mouse now.
11. Windows Vista will now install the device and necessary drivers.
12. Click finish.
Now you will notice that you may have no movement from your mouse. If you have movement please do not read section B. Section C has keyboard configuration with your Mac.
B. Configuring Bluetooth Services for your Wireless Mouse.
1. Please navigate to your Bluetooth Devices window again (panel stil may be open).
2. You will see your mouse here, this is normal.
3. Click on the mouse and then click the Properties button lower right hand corner.
4. You will see two tabs on this scree ‘General’ and ‘Services’. Click on the Services tab.
5. Give the computer and minute and will search for services within your Bluetooth mouse hardware.
6. Check the box ‘Driver for keyboard. mouse. etc (HID)’.
7. Finally, click the Apply button. Your computer will install ‘Bluetooth HID Device’ drivers again.
8. Click OK button to close the keyboard properties window. Click OK again to close the Bluetooth Devices window.
9. You will now have movement of your mouse.
C. Setting up your Mac (in Windows) to connect to your Keyboard:
1. Cick on Start (bottom left corner), then select Control Panel.
2. Click on Bluetooth Devices, this will now open the Bluetooth Devices window.
3. Enable (turn on) your Bluetooth Wireless Keyboard (bottom of Keyboard).
4. Click the Add button in the Bluetooth Devices window.
5. Check the selection box ‘My device is setup and ready to be found’.
6. Click Next, your computer will search for devices within range.
7. Your keyboard should appear with ‘your name — new device’ under the label.
8. Click on your keyboard, then click Next.
9. The next screen is for the passkey, leave the default item selected ‘Choose passkey for me’.
10. Click Next, you will be prompted to enter the passkey on your keyboard OR the passkey will automatically configure the keyboard for Windows.
11. Windows Vista will now install the device and necessary drivers.
12. Click Finish.
D. Configuring Bluetooth Services for your Wireless Keyboard.
1. Please navigate to your Bluetooth Devices window again (panel stil may be open).
2. You will see your keyboard here, this is normal.
3. Click on the mouse and then click the Properties button lower right hand corner.
4. You will see two tabs on this scree ‘General’ and ‘Services’. Click on the Services tab.
5. Give the computer and minute and will search for services within your Bluetooth keyboard hardware.
6. Check the box ‘Driver for keyboard. mouse. etc (HID)’.
7. Finally, click the Apply button. Your computer will install ‘Bluetooth HID Device’ drivers again.
8. Click OK button to close teh keyboard properties window. Click OK again to close the Bluetooth Devices window.
9. You will now have key input from your wireless keyboard.
This should do it! Sorry for all the steps, but I wanted to be sure to get all them for everybody.


