- How to Upgrade 32 Bit to 64 Bit in Win10/8/7 without Data Loss [MiniTool Tips]
- Summary :
- Quick Navigation :
- Why Upgrade 32 Bit to 64 Bit in Windows 10/8/7
- How to Convert 32 Bit to 64 Bit Windows 7/8/10 without Data Loss
- Move 1: Make Sure Your Processor Is 64-Bit Capable
- Move 2: Ensure Your PC Hardware Has 64-Bit Drivers Available
- Move 3: Back up Your PC
- Move 4: Upgrade Windows to 64 Bit
- Bottom Line
- Upgrade Windows 10 32 Bit to 64 Bit FAQ
- ABOUT THE AUTHOR
- How to Migrate Oracle 10.2 32bit to 10.2 64bit on Microsoft Windows (Doc ID 403522.1)
- Applies to:
- Purpose
- Questions and Answers
- To view full details, sign in with your My Oracle Support account.
- Don’t have a My Oracle Support account? Click to get started!
How to Upgrade 32 Bit to 64 Bit in Win10/8/7 without Data Loss [MiniTool Tips]
By Vera | Follow | Last Updated March 03, 2021
Summary :
Have a need to upgrade Windows to 64 bit from 32 bit in Windows 10/8/7 since your memory is not used? How to upgrade 32 bit to 64 bit? This post shows you some things that you should check out, as well as the way to perform Windows 64 bit upgrade.
Quick Navigation :
Why Upgrade 32 Bit to 64 Bit in Windows 10/8/7
Microsoft offers both 32-bit and 64-bit versions of Windows 10/8/7. The 32-bit version is also known as the x86 version while the 64-bit version is known as the x64 version.
When installing Windows 7, 8 or Windows 10, you can choose to install 32-bit or 64-bit version of Windows. But most of you may choose to install the 64-bit version instead of the 32-bit version. If you have installed a 32-bit operating system, you may change it to a 64-bit system.
Why change 32 bit to 64 bit of Windows OS? This is because the 32-bit version is limited to 4GB of RAM (Ramdon Access Memory), which is a small amount these days when PCs usually have 8GB or more. If you installed many applications at the same time, “your computer is low on memory” error message may appear.
If you want to actually use more than 4GB of RAM resources, probably you need a 64-bit version of Windows. With the additional access to memory, you can run more apps simultaneously and improve performance. And the system improves productivity with memory-intensive tasks, such as virtual machines, video editing, Office-working, and web browsing when dealing with a lot of open tabs.
What’s more, 64-CPU may have backward compatibility, allowing it to run 32-bit programs and may also support running 32-bit operating systems. In this aspects, 64-bit version of Windows may have more benefits than 32-bit.
Besides, it’s not surprising that many applications now require a 64-bit operating system due to that limitation. Moreover, you can run x64 and x86 applications on a 64-bit OS, but that is not possible on a 32-bit OS.
How to Convert 32 Bit to 64 Bit Windows 7/8/10 without Data Loss
In the following paragraphs, we will walk you through four steps to upgrade Windows to 64 bit.
- Make Sure Your Processor Is 64-Bit Capable
- Ensure Your PC Hardware Has 64-Bit Drivers Available
- Back up Your PC
- Upgrade 32 Bit to 64 Bit
Move 1: Make Sure Your Processor Is 64-Bit Capable
To do this work, go to Settings > Systems > About. On the right-hand side of the interface, navigate to the System type entry.
Then, you will see one of the following system type:
- 64-bit operating system, x64-based processor: Your CPU support 64-bit and you have already installed the 64-bit edition of Windows 10. So, you don’t need to upgrade to 64 bit.
- 32-bit operating system, x64-based processor: Your CPU supports 64-bit, but you have installed the 32-bit version of Windows.
- 32-bit operating system, x86-based processor: Your CPU supports 32-bit and you have installed the 32-bit version of Windows.
To be specific, if you see the second entry, you are in luck and you can move on to the next section to continue Windows 10 64 bit upgrade since your 64-bit Central Processing Unit can run a 64-bit version. But if you see the third entry, you cannot install a 64-bit OS since your CPU doesn’t support 64-bit.
Move 2: Ensure Your PC Hardware Has 64-Bit Drivers Available
In addition, you should check whether other components, for example, video and sound cards, can work properly with a 64-bit version of Windows 10. Simply speaking, 64-bit OS requires 64-bit hardware drivers and the 32-bit drivers won’t work.
Modern hardware should certainly offer 64-bit drivers but some old hardware may no longer support and manufacturers may haven’t offered 64-bit drivers. To check for this, please go to your manufacturer support website to see if 64-bit drivers are available for download.
Move 3: Back up Your PC
Since you are making major changes to your operating system, it is indispensable to make a full backup of Windows 10. When you upgrade 32 bit to 64 bit in Windows 10/8/7, your personal files, settings, and applications will be deleted. And the best thing is to back up all the affected files to your external storage devices or USB drive to avoid data loss.
To back up your important files, you need a free backup program to help you. Which one is worth recommending? MiniTool ShadowMaker, a piece of professional file backup software, will be a good option, coming with many powerful features.
With the help of this freeware, you can create an image file for files & folders, Windows operating system, disk or partition. Besides, it can help you to sync files to other locations for backup. Above all, automatic file backup, differential & incremental backup can be created.
Right now, before you free change 32 bit to 64 bit of Windows 10/8/7, get MiniTool ShadowMaker Trial Edition from the following button to back up your crucial files. Note that this edition only allows you to free use for 30 days. If you want to keep this software all the time, get its Pro Edition.
Step 1: Double-click on this program to open it.
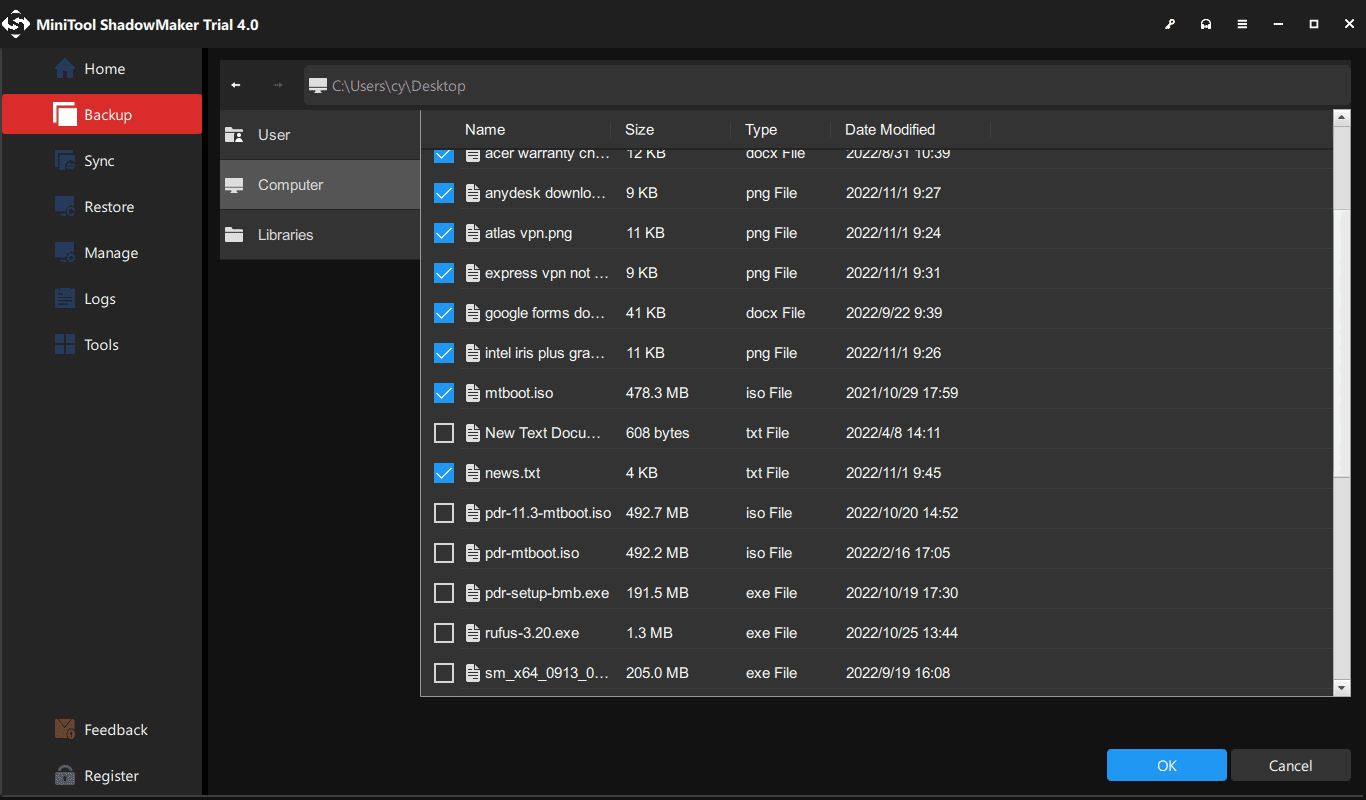
Step 2: Which feature should you use to back up files, Backup or Sync? Both are available. And here, you take the first feature as an example.
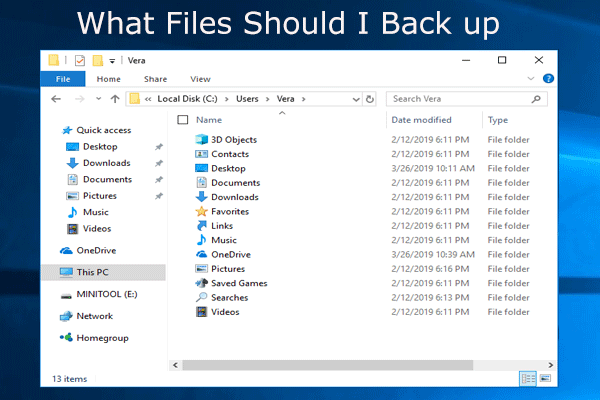
What do I need to back up my computer? What files should I back up? Now, get the answers to these two questions in this post.
In the Backup window, you need to decide which files to back up and where to save the backup image file. Just go to the Source section and choose personal files you want to back up.
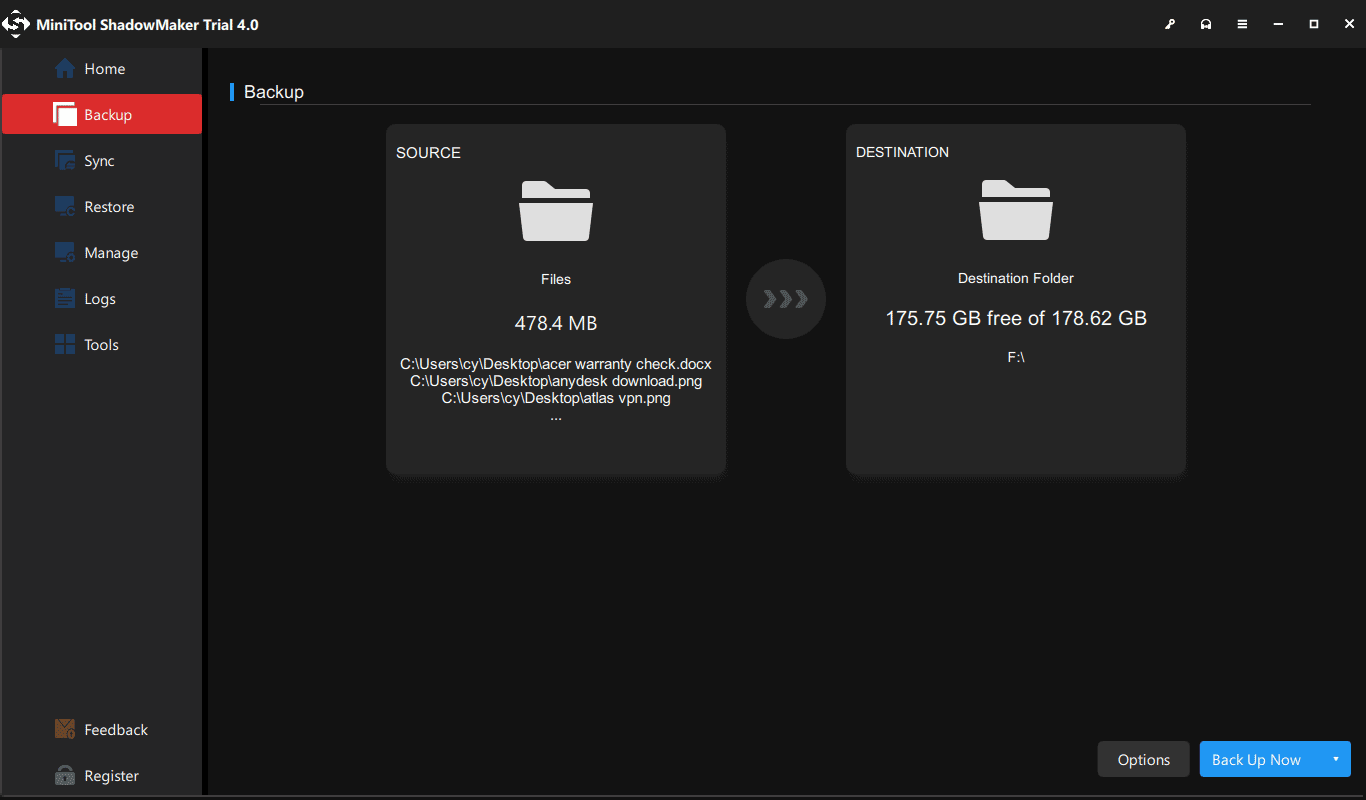
Then, go to the Destination section and choose an external hard drive, USB flash drive, or NAS as the storage path.
Step 3: Finally, start the full backup process of your important files by hitting the Back up Now button.
Now, all operations to back up files are told to you. If you are planning to convert 32 bit to 64 bit of Windows 10/8/7 operating system, don’t hesitate to free download this backup software to prevent your data from losing after upgrading to the 64-bit version of Windows.
Right now, the previous three steps are told to you. Reading here, it is time for you to take action to upgrade Windows 10 32 bit to 64 bit. Just go to the next move to follow the corresponding steps for Windows 10 64-bit version upgrade.
Move 4: Upgrade Windows to 64 Bit
How to convert 32 bit to 64 bit Windows 7/8/10? As mentioned above, performing an upgrade from 32-bit to 64-bit version of Windows is actually clean install. Now, follow the steps below to make a reinstallation.
Create a Bootable USB Drive
How can you create bootable USB from ISO in Windows 10 for a clean install? This post will show you the Windows 10 USB tool for ISO to USB.
Here, take Windows 10 64 bit upgrade as an example and we will show you the step-by-step instructions. Right now, insert your USB flash drive with at least 4GB of storage space to your device and to create the 64-bit Windows 10 installation media.
Step 1: Open the official web page to download Windows 10 Media CreationTool.
Step 2: Click Download tool now under Create Windows 10 installation media.
Step 3: Double-click on the MediaCreationTool.exe to run this utility and then accept the Microsoft terms.
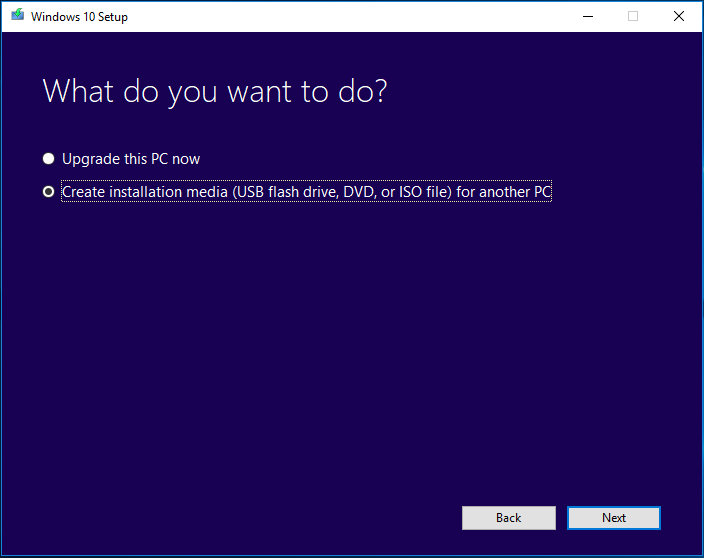
Step 4: There are two options. Check the option Create installation media (USB flash drive, DVD or ISO file) for another PC.
Step 5: Please choose language and edition. To upgrade Windows 10 to 64 bit, here please specify the 64-bit (x64) option for 64-bit Architecture.

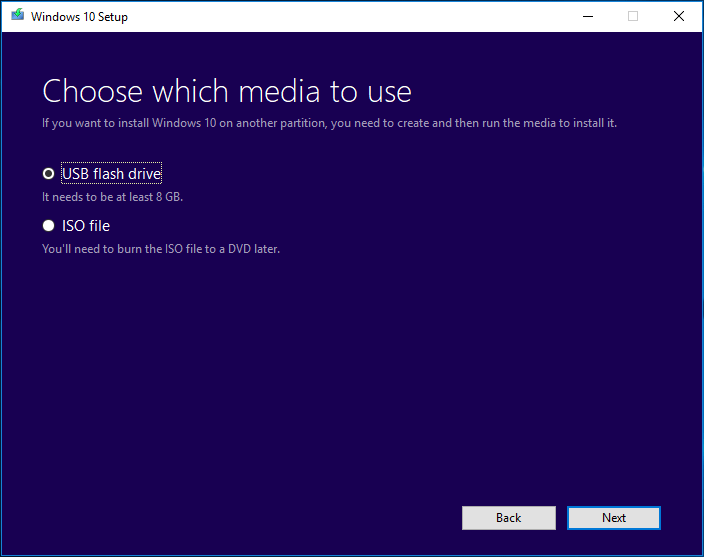
Step 6: Choose the USB flash drive option so as to create a bootable USB drive. Additionally, you can also check the option ISO file but you need to burn the file to a USB drive or CD/DVD. Here, we recommend the first one.
Step 7: Next, all your drives on your computer will be listed. Just choose the USB flash drive from the list to continue.
Step 8: Then, this tool will start downloading needed files and creating a bootable drive from ISO file that is compatible with Windows 10 64 bit. Wait for the process to be finished.
Install Windows 10 64 Bit from Scratch
How to upgrade Windows 7 32 bit to 64 bit without CD or upgrade Windows 8/10 to 64 bit without disk? Now, restart your computer with the bootable USB drive and then follow these steps:
Step 1: After booting your PC from the USB drive, choose language, time and currency format and keyboard.
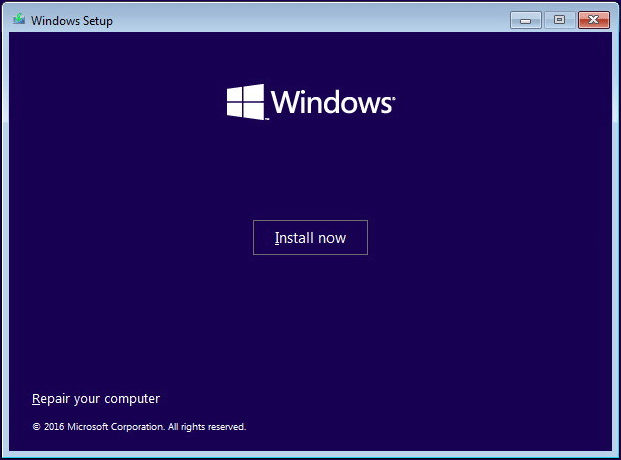
Step 2: Click Install now to continue.
Step 3: Your purpose is to upgrade 32 bit to 64 bit for Windows 10, so you should click the I don’t have a product key link (assuming your PC has been already properly activated).
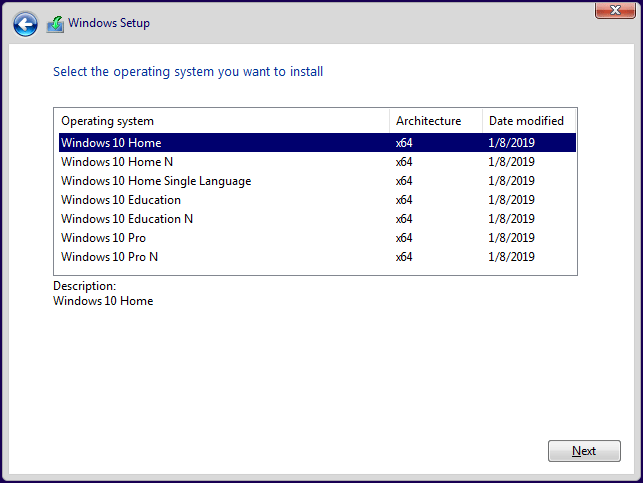
Step 4: Choose the edition of Windows 10 to go on.
Step 5: Accept the license terms. To upgrade Windows 10 32 bit to 64 bit, please choose Custom: Install Windows only (advanced).

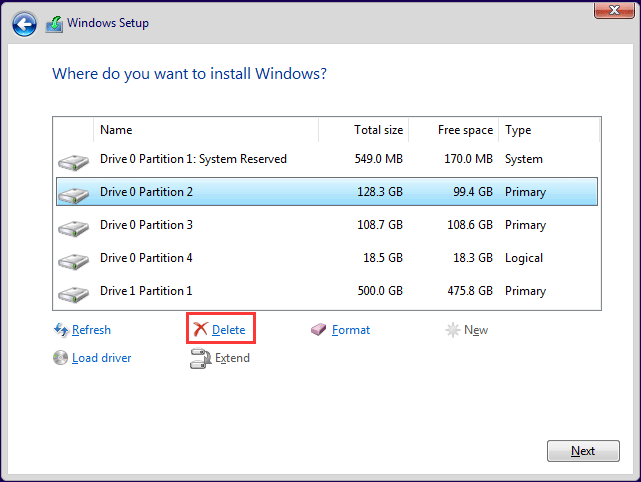
Step 6: You may ask: how to upgrade 32 bit to 64 bit Windows 7/8/10 without formatting? Actually, it is easy. In the following drive list option page, choose the partition(s) with the current installation of Windows, and click the Delete button instead of formatting operation to remove it from the hard drive.
Step 7: Then, click the unallocated space to continue. Then, the setup will install the 64-bit version of Windows 10 on your computer. Later, you need to complete the Out-of-box experience (OOBE) setup the OS with your preferences by following the on-screen directions.
Bottom Line
Want to upgrade 32 bit to 64 bit? Here is the overview that you should do before the upgrade and how to convert 32 bit to 64 bit Windows 7/8/10. Just follow the above guides to start the upgrade operation.
Remember to leave a comment below or contact [email protected] if you have any different idea or question when you change 32 bit to 64 bit.
Upgrade Windows 10 32 Bit to 64 Bit FAQ
ABOUT THE AUTHOR

Position: Columnist
Vera is an editor of the MiniTool Team since 2016 who has more than 5 years’ writing experiences in the field of technical articles. Her articles mainly focus on disk & partition management, PC data recovery, video conversion, as well as PC backup & restore, helping users to solve some errors and issues when using their computers. In her spare times, she likes shopping, playing games and reading some articles.
How to Migrate Oracle 10.2 32bit to 10.2 64bit on Microsoft Windows (Doc ID 403522.1)
Last updated on FEBRUARY 22, 2019
Applies to:
Oracle Database — Enterprise Edition — Version 10.2.0.5 to 10.2.0.5 [Release 10.2]
Oracle Database Cloud Schema Service — Version N/A and later
Oracle Database Exadata Cloud Machine — Version N/A and later
Oracle Database Exadata Express Cloud Service — Version N/A and later
Oracle Cloud Infrastructure — Database Service — Version N/A and later
Microsoft Windows x64 (64-bit)
z*OBSOLETE: Microsoft Windows Server 2003
Microsoft Windows 2000Microsoft Windows Server 2003Microsoft Windows Server 2003 (64-bit AMD64 and Intel EM64T)
Purpose
How to Migrate Oracle 10.2 32bit to Oracle 10.2 64bit on Microsoft Windows.
These are the steps used to successfully migrate Oracle 10.2.0.1.0 32bit on Windows 2000, to Oracle 10.2.0.2.0 64bit on Windows 2003 (64bit):
NOTE: It does not matter what patchset level you are currently at (ie. 10.2.0.1, 10.2.0.2, 10.2.0.3, 10.2.0.4 or 10.2.0.5)
These instructions will work for all Oracle 10.2.0.x versions. You must make sure that you migrate to the same level or higher (eg. 10.2.0.1 to 10.2.0.2). This example uses the 10.2.0.2 patchset on the 64bit machine.
Install Oracle 10.2.0.1.0 32bit on Windows 2000 (32bit).
Create a default Database (ORCL).
Verify there are NO invalid objects.
Verify all components in the DBA_REGISTRY are Valid.
***************************************
NOTE: It is EXTREMELY important to make sure there are NO Invalid objects in the Database, prior to the migration.
***************************************
Install Oracle 10.2.0.1.0 64bit, on Windows 2003 64bit (either AMD64 or EM64T processors).
You do NOT need to install a new Database, since you will be migrating an existing Database.
NOTE: If you wish to apply a patchset, you can do that now. For this test, the 10.2.0.2 patchset was applied to the 64bit installation.
The same directory structure was used for both machines.
Copy the Database files from the 32bit machine, to the 64bit machine.
(Datafiles, Logfiles, Controlfiles, init.ora, tnsnames.ora, listener.ora, etc..)
*****************************************
NOTE: If a different directory structure will be used, then you will need to recreate the controlfiles, before starting the migration process.
*****************************************
Create the Oracle service on the 64bit system, using the ORADIM command.
(eg., oradim –new –sid orcl –startmode auto –pfile )
Run Sqlplus
Issue the command: startup upgrade.
Run the script:
\Oracle_Home\rdbms\admin\utlip.sql
(This script invalidates all the objects. This is needed in order to change the word size.)
(NOTE: You can also run the \utlirp.sql script. This script will invalidate and recompile the objects. For this particular test, the utlip.sql was used to invalidate the objects. Recompiling the objects is done later in the Note).
Then run the CATUPGRD.SQL script.
=====================================
NOTE: If you are migrating to the same version (ie., 10.2.0.1.0 32bit to 10.2.0.1.0 64bit), then you
do not need to run the catupgrd.sql script. This should only be run if you are going to a newer patchset
version (ie., 10.2.0.1.0 32bit to 10.2.0.2.0 64bit, or 10.2.0.3.0 64bit).
If you do run the catupgrd.sql script going to the same version, you could end up with the errors:
ORA-20000: Upgrade re-run not supported from version
ORA-06512: at «SYS.VERSION_SCRIPT», line 45
=====================================
This finished with some invalid objects, and some of the components were still marked as invalid (in the dba_registry).
Run the UTLRP.SQL script.
This recompiled all the invalid objects.
NOTE: If you have the OLAP option installed, you should review the following Notes:
DB CONVERSION: 32 bit —>64 Bit Broke OLAP OPTION
Upgrading OLAP from 32 to 64 bits
When this was all done, there should be 0 (zero) invalid objects.
Also, ALL of the Components in DBA_REGISTRY should be valid.
Questions and Answers
To view full details, sign in with your My Oracle Support account.
Don’t have a My Oracle Support account? Click to get started!
In this Document
| Purpose |
| Questions and Answers |
| References |
My Oracle Support provides customers with access to over a million knowledge articles and a vibrant support community of peers and Oracle experts.
Oracle offers a comprehensive and fully integrated stack of cloud applications and platform services. For more information about Oracle (NYSE:ORCL), visit oracle.com. В© Oracle | Contact and Chat | Support | Communities | Connect with us |  |
|  |
|  | Legal Notices | Terms of Use


