- Kerberos: The Network Authentication Protocol
- Recent News
- 18 Feb 2021 — krb5-1.19.1 is released
- 17 Nov 2020 — krb5-1.18.3 is released
- Configuring Kerberos Authentication for Windows
- Active Directory
- MIT Kerberos
- Downloading and Installing MIT Kerberos for Windows 4.0.1
- Setting Up the Kerberos Configuration File
- Setting Up the Kerberos Credential Cache File
- Obtaining a Ticket for a Kerberos Principal
- MIT Kerberos for Windows (32-bit)
- Download and install Kerberos
- Kerberos for Windows
- 32-bit or 64-bit Windows?
- Download and install Kerberos
- Download and install Network Identity Manager
- Run and configure Network Identity Manager
- What now?
Kerberos: The Network Authentication Protocol
|
Recent News
18 Feb 2021 — krb5-1.19.1 is released
The krb5-1.19.1 source release is now available.
17 Nov 2020 — krb5-1.18.3 is released
The krb5-1.18.3 source release is now available.
Kerberos is a network authentication protocol. It is designed to provide strong authentication for client/server applications by using secret-key cryptography. A free implementation of this protocol is available from the Massachusetts Institute of Technology. Kerberos is available in many commercial products as well.
The Internet is an insecure place. Many of the protocols used in the Internet do not provide any security. Tools to «sniff» passwords off of the network are in common use by malicious hackers. Thus, applications which send an unencrypted password over the network are extremely vulnerable. Worse yet, other client/server applications rely on the client program to be «honest» about the identity of the user who is using it. Other applications rely on the client to restrict its activities to those which it is allowed to do, with no other enforcement by the server.
Some sites attempt to use firewalls to solve their network security problems. Unfortunately, firewalls assume that «the bad guys» are on the outside, which is often a very bad assumption. Most of the really damaging incidents of computer crime are carried out by insiders. Firewalls also have a significant disadvantage in that they restrict how your users can use the Internet. (After all, firewalls are simply a less extreme example of the dictum that there is nothing more secure than a computer which is not connected to the network — and powered off!) In many places, these restrictions are simply unrealistic and unacceptable.
Kerberos was created by MIT as a solution to these network security problems . The Kerberos protocol uses strong cryptography so that a client can prove its identity to a server (and vice versa) across an insecure network connection. After a client and server has used Kerberos to prove their identity, they can also encrypt all of their communications to assure privacy and data integrity as they go about their business.
Kerberos is freely available from MIT, under copyright permissions very similar those used for the BSD operating system and the X Window System. MIT provides Kerberos in source form so that anyone who wishes to use it may look over the code for themselves and assure themselves that the code is trustworthy. In addition, for those who prefer to rely on a professionally supported product, Kerberos is available as a product from many different vendors.
In summary, Kerberos is a solution to your network security problems. It provides the tools of authentication and strong cryptography over the network to help you secure your information systems across your entire enterprise. We hope you find Kerberos as useful as it has been to us. At MIT, Kerberos has been invaluable to our Information/Technology architecture.
$Id: index.html,v 1.253 2021/02/18 17:53:47 ghudson Exp $
All images and text on this page are copyright MIT.
Configuring Kerberos Authentication for Windows
Active Directory
The Simba Apache Hive ODBC Connector supports Active Directory Kerberos on Windows. There are two prerequisites for using Active Directory Kerberos on Windows:
- MIT Kerberos is not installed on the client Windows machine.
- The MIT Kerberos Hadoop realm has been configured to trust the Active Directory realm so that users in the Active Directory realm can access services in the MIT Kerberos Hadoop realm.
MIT Kerberos
Downloading and Installing MIT Kerberos for Windows 4.0.1
For information about Kerberos and download links for the installer, see the MIT Kerberos website: http://web.mit.edu/kerberos/.
To download and install MIT Kerberos for Windows 4.0.1:
- Download the appropriate Kerberos installer:
- For a 64-bit machine, use the following download link from the MIT Kerberos website: http://web.mit.edu/kerberos/dist/kfw/4.0/kfw-4.0.1-amd64.msi.
- For a 32-bit machine, use the following download link from the MIT Kerberos website: http://web.mit.edu/kerberos/dist/kfw/4.0/kfw-4.0.1-i386.msi.
The 64-bit installer includes both 32-bit and 64-bit libraries. The 32-bit installer includes 32-bit libraries only.
Setting Up the Kerberos Configuration File
Settings for Kerberos are specified through a configuration file. You can set up the configuration file as an .ini file in the default location, which is the C:\ProgramData\MIT\Kerberos5 directory, or as a .conf file in a custom location.
Normally, the C:\ProgramData\MIT\Kerberos5 directory is hidden. For information about viewing and using this hidden directory, refer to Microsoft Windows documentation.
For more information on configuring Kerberos, refer to the MIT Kerberos documentation.
To set up the Kerberos configuration file in the default location:
- Obtain a krb5.conf configuration file. You can obtain this file from your Kerberos administrator, or from the /etc/krb5.conf folder on the machine that is hosting the Hive Server 2 instance .
- Rename the configuration file from krb5.conf to krb5.ini .
- Copy the krb5.ini file to the C:\ProgramData\MIT\Kerberos5 directory and overwrite the empty sample file.
To set up the Kerberos configuration file in a custom location:
- Obtain a krb5.conf configuration file. You can obtain this file from your Kerberos administrator, or from the /etc/krb5.conf folder on the machine that is hosting the Hive Server 2 instance .
- Place the krb5.conf file in an accessible directory and make note of the full path name.
- Open the System window:
- If you are using Windows 7 or earlier, click Start , then right-click Computer, and then click Properties.
- Or, if you are using Windows 8 or later, right-click This PC on the Start screen, and then click Properties.
- Click Advanced System Settings.
- In the System Properties dialog box, click the Advanced tab and then click Environment Variables.
- In the Environment Variables dialog box, under the System Variables list, click New.
- In the New System Variable dialog box, in the Variable Name field, type KRB5_CONFIG.
- In the Variable Value field, type the full path to the krb5.conf file.
- Click OK to save the new variable.
- Make sure that the variable is listed in the System Variables list.
- Click OK to close the Environment Variables dialog box, and then click OK to close the System Properties dialog box.
Setting Up the Kerberos Credential Cache File
Kerberos uses a credential cache to store and manage credentials.
To set up the Kerberos credential cache file:
- Create a directory where you want to save the Kerberos credential cache file. For example, create a directory named C:\temp .
- Open the System window:
- If you are using Windows 7 or earlier, click Start , then right-click Computer, and then click Properties.
- Or, if you are using Windows 8 or later, right-click This PC on the Start screen, and then click Properties.
- Click Advanced System Settings.
- In the System Properties dialog box, click the Advanced tab and then click Environment Variables.
- In the Environment Variables dialog box, under the System Variables list, click New.
- In the New System Variable dialog box, in the Variable Name field, type KRB5CCNAME.
- In the Variable Value field, type the path to the folder you created above, and then append the file name krb5cache . For example, if you created the folder C:\temp , then type C:\temp\krb5cache .
krb5cache is a file (not a directory) that is managed by the Kerberos software, and it should not be created by the user. If you receive a permission error when you first use Kerberos, make sure that the krb5cache file does not already exist as a file or a directory.
Obtaining a Ticket for a Kerberos Principal
A principal refers to a user or service that can authenticate to Kerberos. To authenticate to Kerberos, a principal must obtain a ticket by using a password or a keytab file. You can specify a keytab file to use, or use the default keytab file of your Kerberos configuration.
To obtain a ticket for a Kerberos principal using a password:
- Open MIT Kerberos Ticket Manager.
- In MIT Kerberos Ticket Manager, click Get Ticket.
- In the Get Ticket dialog box, type your principal name and password, and then click OK.
If the authentication succeeds, then your ticket information appears in MIT Kerberos Ticket Manager.
To obtain a ticket for a Kerberos principal using a keytab file:
- Open a command prompt:
- If you are using Windows 7 or earlier, click Start , then click All Programs, then click Accessories, and then click Command Prompt.
- If you are using Windows 8 or later, click the arrow button at the bottom of the Start screen, then find the Windows System program group, and then click Command Prompt.
- In the Command Prompt, type a command using the following syntax:
kinit -k -t Mit kerberos для windows[Principal]
Mit kerberos для windows is the full path to the keytab file. For example: C:\mykeytabs\myUser.keytab .
[Principal] is the Kerberos user principal to use for authentication. For example: myUser@EXAMPLE.COM .
If the cache location KRB5CCNAME is not set or used, then use the -c option of the kinit command to specify the location of the credential cache. In the command, the -c argument must appear last. For example:
kinit -k -t C:\mykeytabs\myUser.keytab myUser@EXAMPLE.COM -c C:\ProgramData\MIT\krbcache
Krbcache is the Kerberos cache file, not a directory.
To obtain a ticket for a Kerberos principal using the default keytab file:
For information about configuring a default keytab file for your Kerberos configuration, refer to the MIT Kerberos documentation.
- Open a command prompt:
- If you are using Windows 7 or earlier, click Start , then click All Programs, then click Accessories, and then click Command Prompt.
- If you are using Windows 8 or later, click the arrow button at the bottom of the Start screen, then find the Windows System program group, and then click Command Prompt.
- In the Command Prompt, type a command using the following syntax:
kinit -k [principal]
[principal] is the Kerberos user principal to use for authentication. For example: MyUser@EXAMPLE.COM .
If the cache location KRB5CCNAME is not set or used, then use the -c option of the kinit command to specify the location of the credential cache. In the command, the -c argument must appear last. For example:
kinit -k -t C:\mykeytabs\myUser.keytab myUser@EXAMPLE.COM -c C:\ProgramData\MIT\krbcache
Krbcache is the Kerberos cache file, not a directory.
MIT Kerberos for Windows (32-bit)
Please note that we now STRONGLY RECOMMENDED that you use the version of Kerberos which comes as part of the Auristor OpenAFS client and follow the procedure detailed in AFS for Windows to obtain Kerberos credentials and (optionally) AFS tokens. If you have an urgent query, please contact us through the support form
Please note that these instructions were correct when last tested (2016), but we no longer have access to 32-bit versions of Windows. If these instructions do not work for you, please let us know via the support form.
This document describes how to install and configure MIT Kerberos for Windows. This is the recommended version of kerberos for 32-bit Windows. Users of 64-bit Windows are advised to install Heimdal.
Download and install Kerberos
Download the MIT Kerberos for Windows installer from Secure Endpoints:
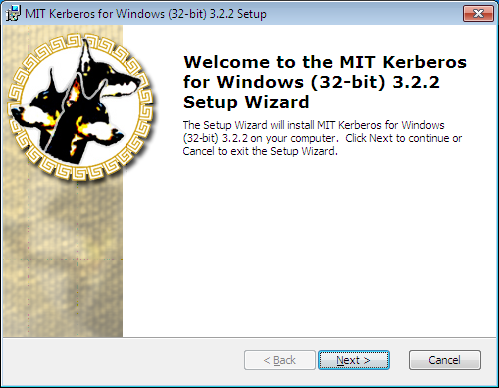
Run the installer that you downloaded:
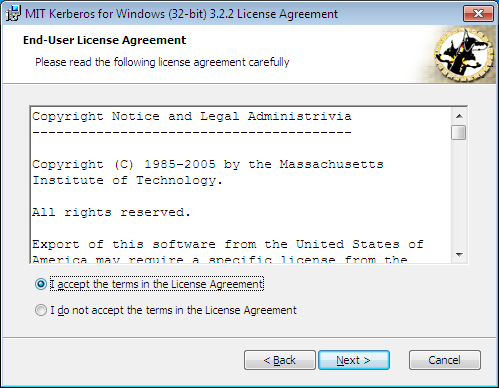
Accept the licence agreement and click Next:
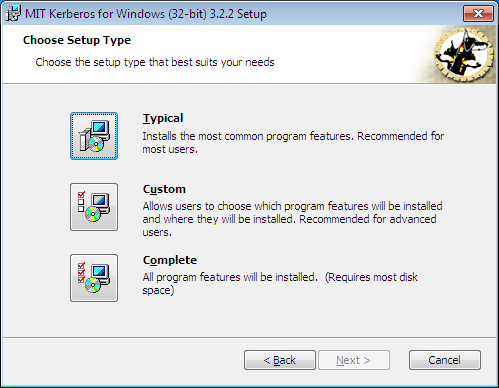
Select «Typical» for the setup type:
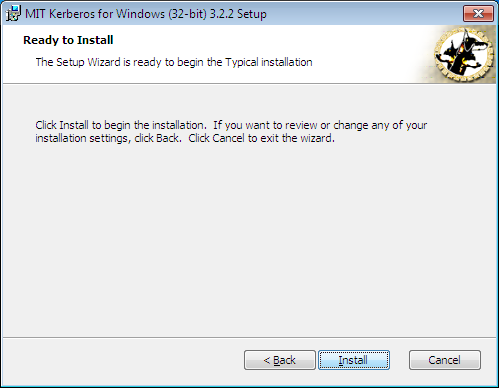
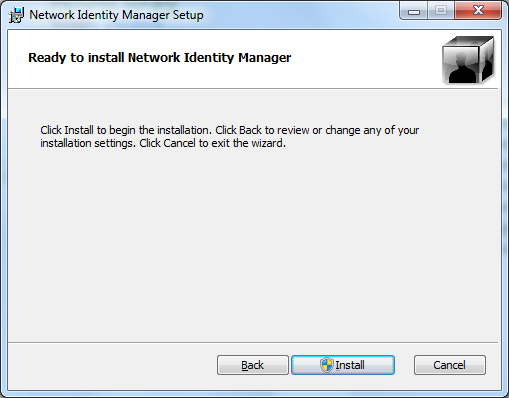
Finally, confirm that you wish to proceed by clicking Install:
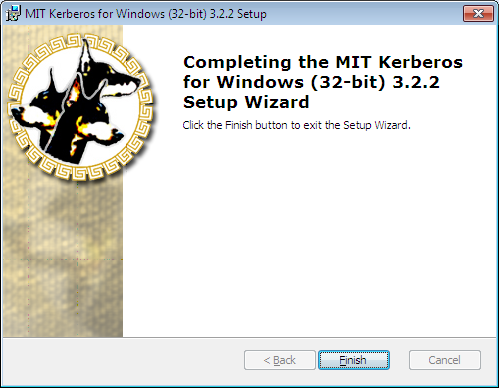
Once installation has completed, click Finish:
Return to the main Kerberos for Windows document to install the latest Network Identity Manager.
Kerberos for Windows
Please note that we now STRONGLY RECOMMENDED that you use the version of Kerberos which comes as part of the Auristor OpenAFS client and follow the procedure detailed in AFS for Windows to obtain Kerberos credentials and (optionally) AFS tokens. If you have an urgent query, please contact us through the support form
This document describes how to install and configure Kerberos for Windows. This procedure been tested using Windows 7 32-bit and 64-bit, Windows 8 32-bit and 64-bit and Windows 10 64-bit, but should be applicable to other versions of Windows.
Please note: Heimdal Kerberos does not work correctly on 32-bit windows. For this reason, we recommend that 64-bit windows users install Heimdal and 32-bit windows users install MIT Kerberos. There are separate pages (below) describing the download and installation of these. Aside from this, the process is almost identical once Kerberos has been installed. Differences between the kerberos distributions are noted in the text
32-bit or 64-bit Windows?
To follow the instructions in this document, you will need to know whether you are running 32-bit or 64-bit Windows. If you don’t know this, Microsoft have instructions on finding out:
The instructions above seem to be for older versions of Windows. For Windows 10, right-click on the Start menu and select System for information on System type.
Download and install Kerberos
The distribution of Kerberos to install depends on whether you are running 32-bit or 64-bit Windows (see above).
For 64-bit Windows, we recommend Heimdal Kerberos:
For 32-bit Windows, we recommend MIT Kerberos:
Download and install Network Identity Manager
The next stage in the process is to download and install Network Identity Manager, again from Secure Endpoints:
Again, you will need to choose between 32-bit and 64-bit installers (64-bit machines require only the 64-bit installer). Choose the appropriate version without SDK.
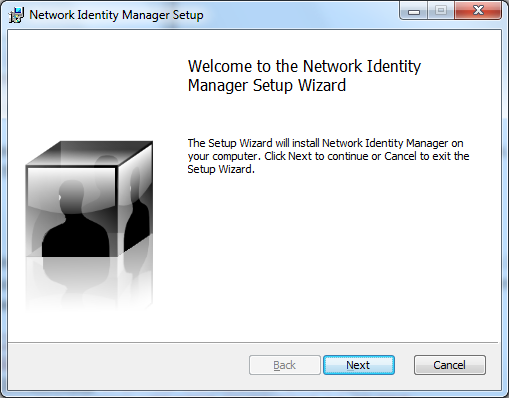
Run the installer:
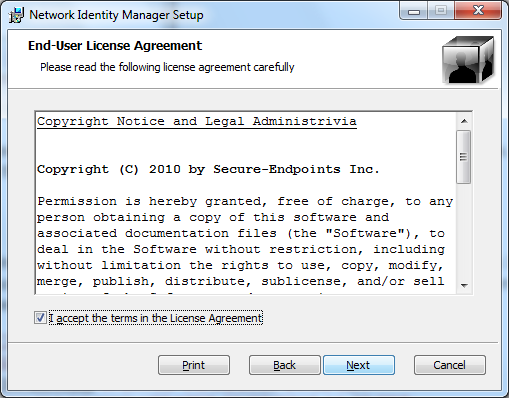
Accept the licence agreement:
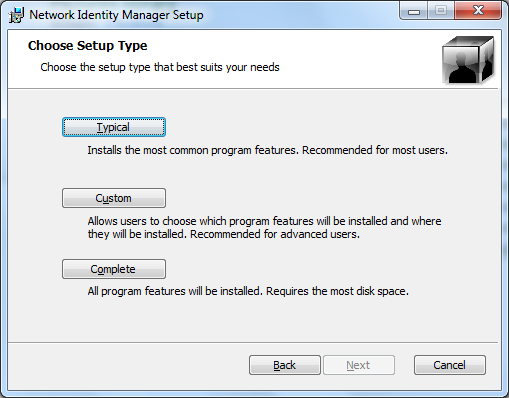
Select Typical install:
Click Install to proceed:
Finally, click Finish once the installer has completed:

Run and configure Network Identity Manager
Run Network Identity Manager for the first time from the Start menu (Windows 10 users may need to restart Windows before Network Identity Manager works correctly):

Following this, an icon for Network Identity Manager should appear in the system tray (this is found in the bottom right part of the Windows Task Bar). Click on this icon. If the icon doesn’t appear, you might need to click on the up arrow first and then select Show Network Identity Manager.
For users of MIT Kerberos only: It is recommended that you disable the Kerberos v4 plugin in Network Identity Manager before proceeding. This can be done by selecting Options->Plugins from the menu, selecting Krb4Cred and clicking «Disable». You will be prompted to confirm and restart Network Identity Manager.
Once Network Identity Manager has (re)started:
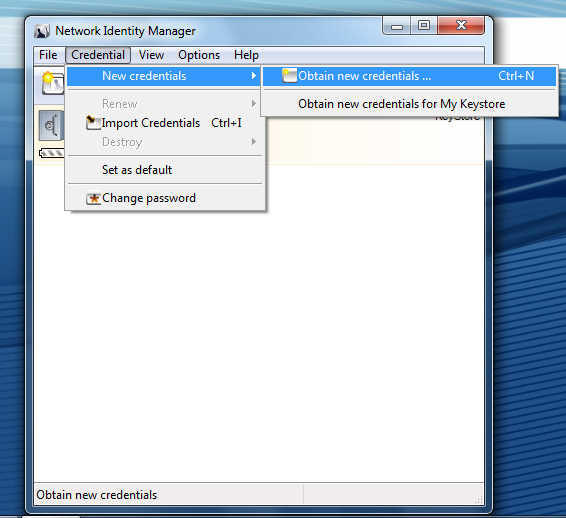
Select Credential -> New credentials -> Obtain new credentials .
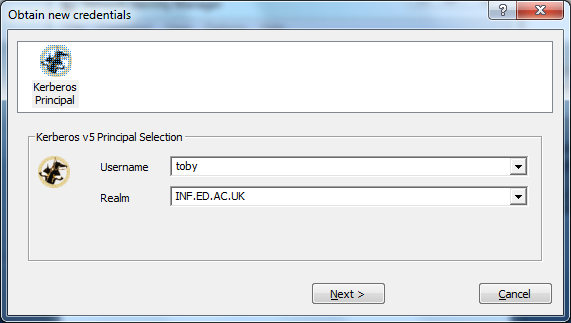
Enter your DICE username in the Username box and INF.ED.AC.UK (this must be upper case) in the Realm box and click Next:
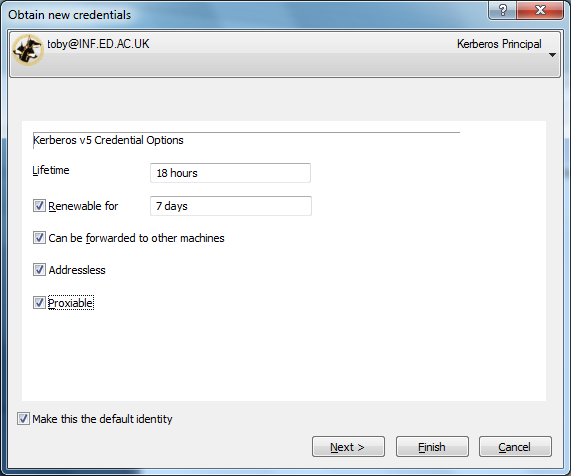
Optionally, tick the «Proxiable» and «Make this the default identity boxes» and increase the lifetime to 18 hours (this is the maximum lifetime for DICE user credentials). Click on Next (not Finish):
Enter your DICE password in the Password box and then tick «Make this the default identity» (again!) Select «Save password in My Keystore» if you want the password for your DICE identity saved on this machine and click Next:
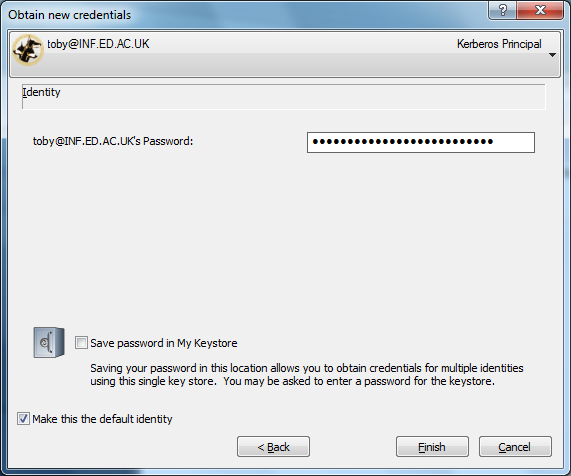
Finally, click Finish, you should see a status dialog box appear briefly as your credentials are obtained.
Note if you have chosen to save your password, click Next instead, and then follow the prompts to set up a keystore.
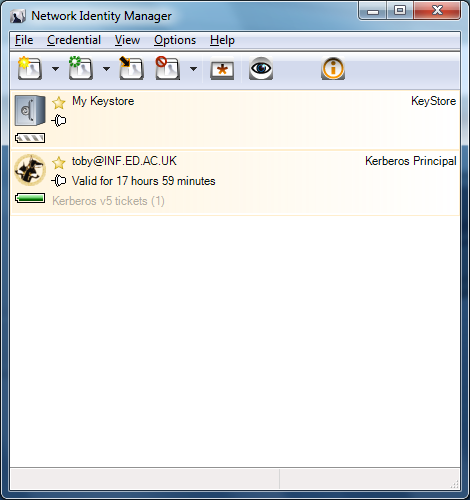
Once your username and password have been authenticated, you will be returned to the main Network Identity Manager window which should contain a new entry indicating that Kerberos tickets have been successfully obtained:
What now?
Now that you have installed Kerberos on Windows, you may want to:


