- Penetration Testing Tools
- Kali Linux Tools Listing
- Ettercap
- Ettercap Description
- Ettercap Help
- How to use Ettercap
- What is man in the middle attack ?
- How to install ettercap on kali linux
- Using Ettercap GUI
- ARP poisoning Attack in Ettercap
- DNS spoofing with ettercap
- Ettercap Filters
- How To protect yourself?
- Comments
- Kali Linux Howto’s
- Pages
- Perform A Man In The Middle Attack With Kali Linux & Ettercap
Penetration Testing Tools
Kali Linux Tools Listing
Ettercap
Ettercap Description
Ettercap is a comprehensive suite for man in the middle attacks. It features sniffing of live connections, content filtering on the fly and many other interesting tricks. It supports active and passive dissection of many protocols and includes many features for network and host analysis.
Authors: Alberto Ornaghi (ALoR), Marco Valleri (NaGA), Emilio Escobar (exfil), Eric Milam (J0hnnyBrav0), Gianfranco Costamagna (LocutusOfBorg)
Ettercap Help
Sniffing and Attack options: -M, —mitm perform a mitm attack -o, —only-mitm don’t sniff, only perform the mitm attack -b, —broadcast sniff packets destined to broadcast -B, —bridge use bridged sniff (needs 2 ifaces) -p, —nopromisc do not put the iface in promisc mode -S, —nosslmitm do not forge SSL certificates -u, —unoffensive do not forward packets -r, —read read data from pcapfile -f, —pcapfilter set the pcap filter -R, —reversed use reversed TARGET matching -t, —proto
sniff only this proto (default is all) —certificate certificate file to use for SSL MiTM —private-key private key file to use for SSL MiTM User Interface Type: -T, —text use text only GUI -q, —quiet do not display packet contents -s, —script issue these commands to the GUI -C, —curses use curses GUI -D, —daemon daemonize ettercap (no GUI) -G, —gtk use GTK+ GUI Logging options: -w, —write write sniffed data to pcapfile -L, —log log all the traffic to this -l, —log-info log only passive infos to this -m, —log-msg log all the messages to this -c, —compress use gzip compression on log files Visualization options: -d, —dns resolves ip addresses into hostnames -V, —visual
Источник
How to use Ettercap
Last Updated on May 26, 2021 by Walid Salame 2 Comments
What is ettercap? Ettercap is a utility for analyzing network traffic passing through a computer interface, but with additional functionality. The program allows you to perform attacks like “Man in the middle” to force another computer to transfer packets not to the router, but to you.
With Ettercap, you can check the security of your network, how susceptible it is to this type of attack, and also analyze traffic from several computers, and even modify it on the fly. In this article, we will look at how to use Ettercap to analyze and modify traffic.
What is man in the middle attack ?
By default, the computer sends all network packets that need to be sent to the Internet and sends it to the router, which in turn sends them to the next router until the packet reaches the target. But for certain reasons, the packet can be transmitted not to the router, but immediately to your computer, and only then to the router.
The computer through which the packets will pass can analyze the source, target address, and if they are not encrypted, then their full contents.There are two ways to do MITM (Man In Middle Attack):
- ARP attack – using the features of the ARP protocol, your computer tells others that it is a router, after which all packets begin to indulge in it;
- DNS attack – when a computer tries to get an ip address for a domain, we substitute this address for its own, but for this type to work, you need to use the ARP method.
Ettercap Linux can perform both types of attacks. In addition, the utility can perform denial of service attacks and scan ports. Now let’s take a look at how to install and use Ettercap.
How to install ettercap on kali linux
This is a fairly popular program among network security experts, so it is in the official repositories of most distributions. For example, to install Ettercap in Ubuntu, run:
On Fedora or other distributions based on it, the command will look similar:
We coped with the task of installing Ettercap Linux, but before using it, you need to change a few settings in the configuration file.
The ec_uid and ec_gid lines must be set to 0 in order for the program service to work on behalf of the superuser:

Next you need to find and uncomment these two lines:

They are used to redirect SSL connections to regular HTTP, if possible. Then save the changes and the program is ready to work.
Using Ettercap GUI
The program can work in several modes – with a graphical interface, without and as a service. We will consider work in the graphical interface. To run a program with a GTK interface, use the -G option:
We use the -E option for sudo to save all of our user’s environment variables. The main window of the program looks very simple. First we look at how the ARP-poisoing attack is performed.
ARP poisoning Attack in Ettercap
As I said, with this attack we can force the target computer to send packets not to the router, but to us. Everything works quite simply. The computer knows the IP of the router, it got it when connected to the network. But every time he needs to send a packet, he needs to convert this universal IP address to a low-level address of the network technology used, for example, for the wired Internet – this is the MAC address.
For this, the ARP protocol is used. The computer sends a request to all devices on the network, for example, “who is 192.168.1.1” and the router, upon seeing its address, will send in response its MAC. Then it will be saved in the cache. But we can use Ettercap to ask the target computer to update its ARP cache and transfer its MAC address instead of the MAC address of the router. Then all the packages will be transferred to us, and we will send them where necessary.
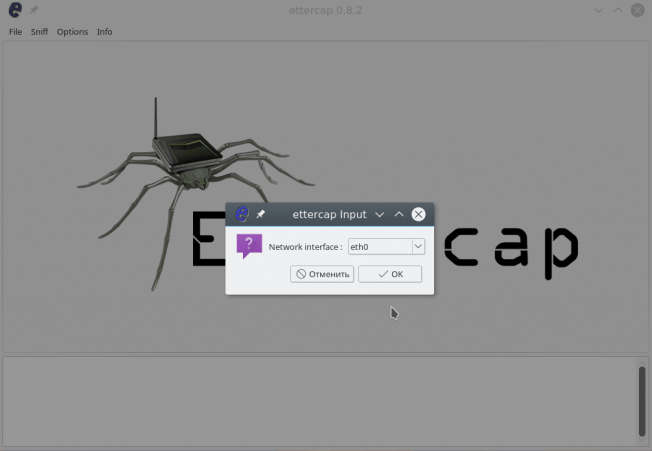
Let us get to the point and execute the attack attercap arp spofing. In Ettercap, open the Sniff menu and select Unified Snifing. Then select your network interface, for example, eth0 or wlan0:
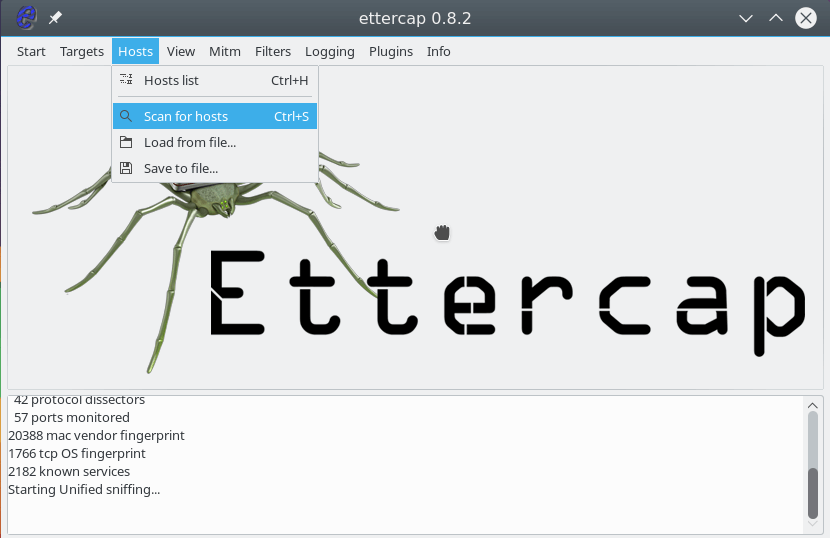
The program window will change and much more functions will be available to us. Now you need to scan the network. To do this, open the Hosts menu and click Scan hosts. Even if something does not work, then you can load the list of hosts from the file:
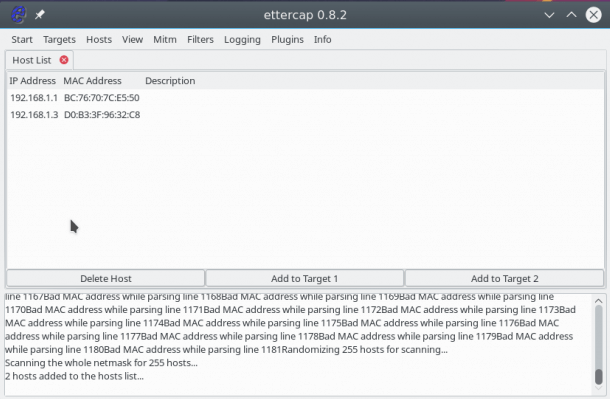
Further, after a quick scan, if you open Hosts -> Hosts List , you will see a list of devices connected to the network:
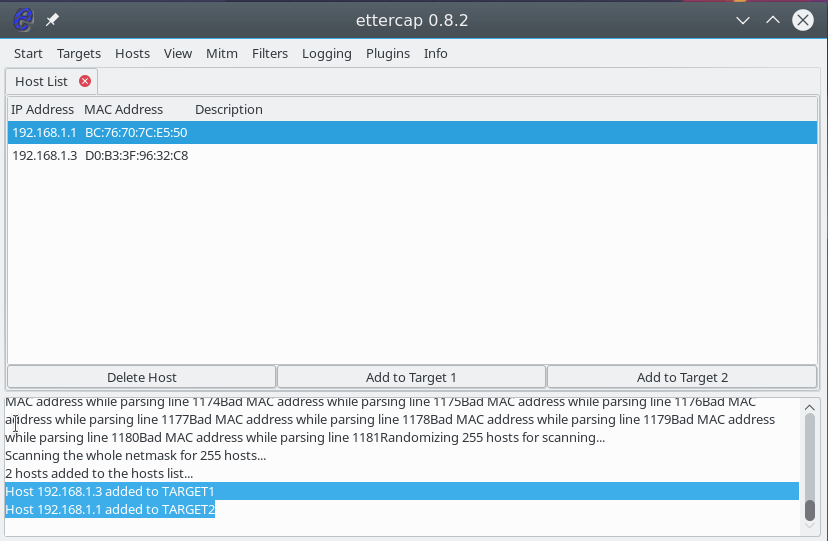
To start the attack, we need to specify target 1 and target 2. As the first target, you need to specify the IP of the machine that we are going to attack, and the target 2 is the ip of the router. To add targets, use the Add Target 1 and Add Target 2 buttons :
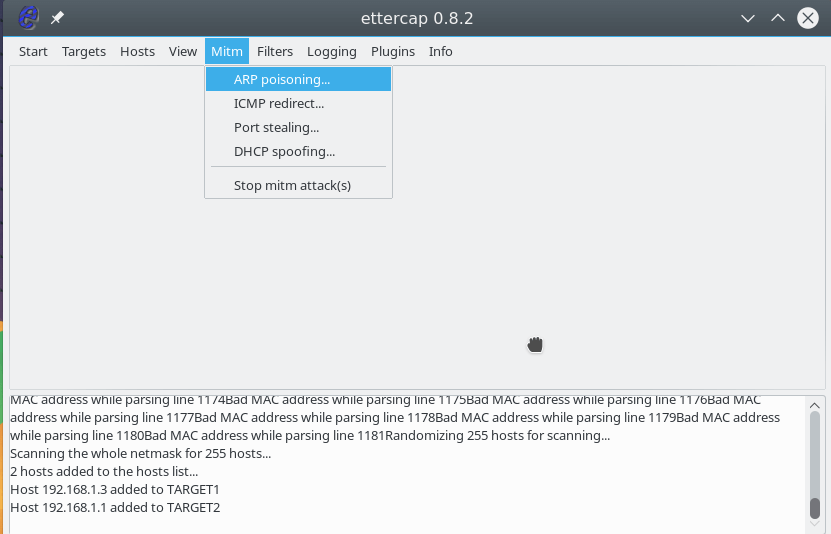
Next, open the MITM menu and select ARP poisoning :
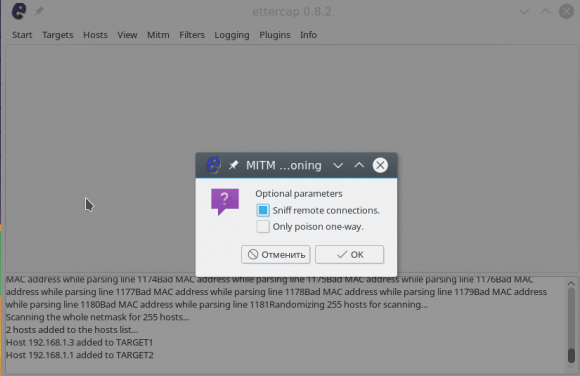
In the window that opens, check the Sniff remote connections box to intercept all remote connections from this computer:
Now, to start the substitution process, in the Start menu, select Start Sniffing.
After that, the program will start sending packets to the network, with a request for 192.168.1.3 to update the ARP cache and replace the MAC address of the router with yours. The attack is started and successfully executed. You can open the View -> Connections menu and see the active connections for the target device:
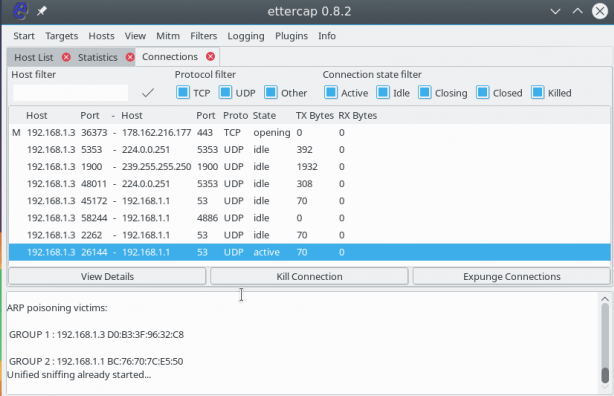
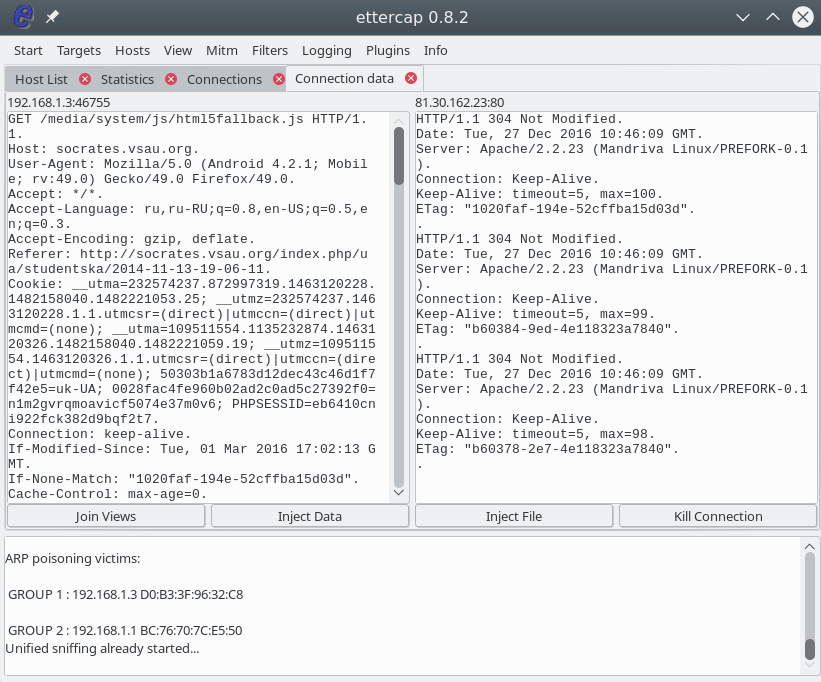
If the packet was not encrypted, then we can view the transmitted information by clicking on the connection with the mouse. The sent information is displayed on the left, and the received information is displayed on the right.
DNS spoofing with ettercap
A special service, DNS, is used to convert site names to network IP addresses. When the computer needs an ip of the site, he asks him for the DNS server. But if you are already performing a MITM attack, then we can spoof the server’s response so that instead of the site server’s IP, our IP is returned. First we need to edit the /etc/ettercap/etter.dns file:
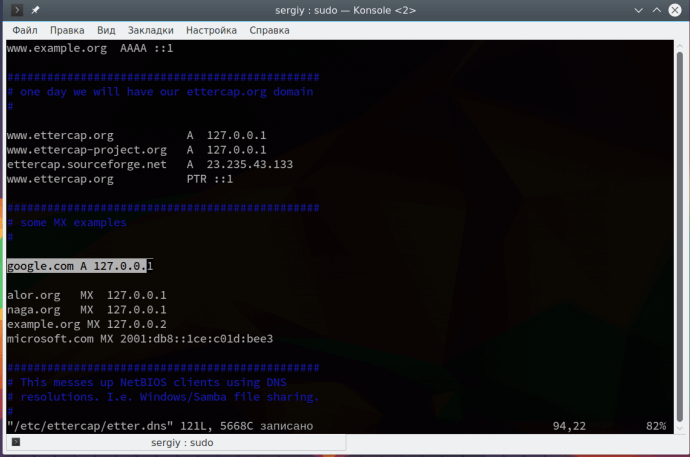
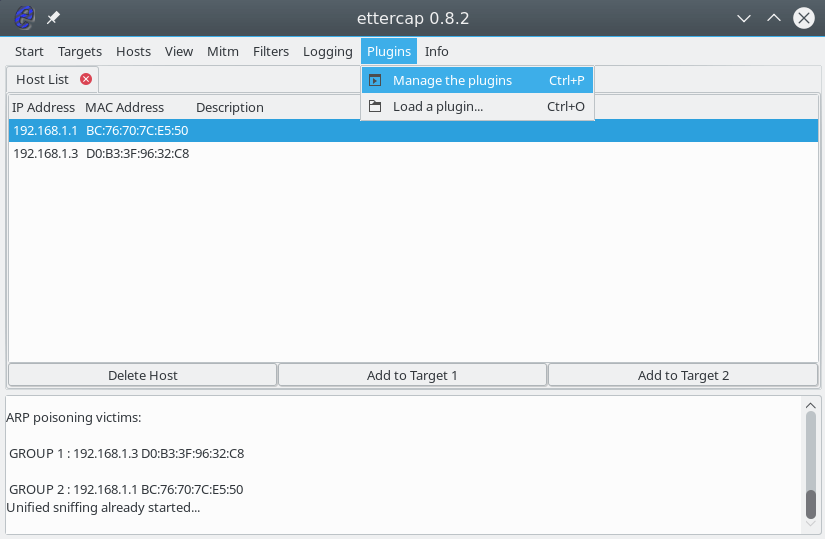
This record means that we will substitute the main IP google.com with 127.0.0.1. Please note that this attack is not performed without the previous one. Further open the menu Plugins -> Manage Plugin:
Then double click on the dns_spoof plugin :
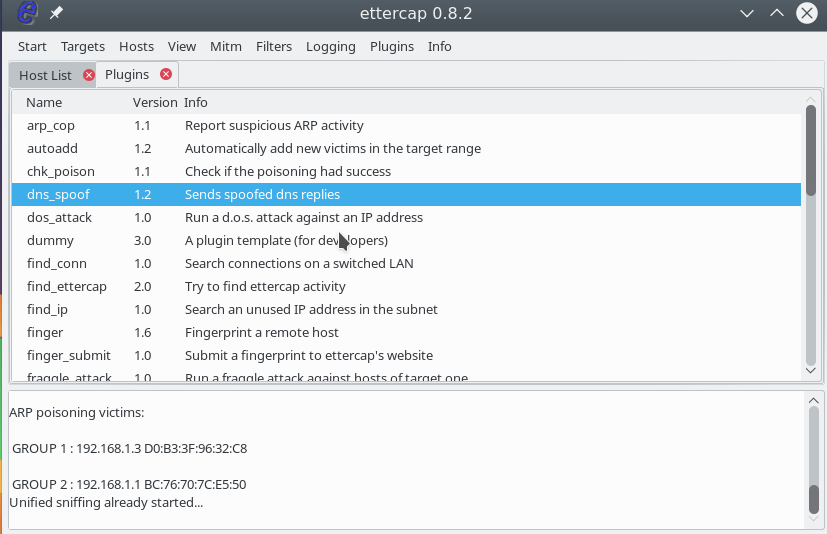
The plugin will be activated and you can check the ip on the device. DNS is really being replaced. For example, you can run on a target machine:
In addition to these plug-ins, there are others with which you can perform the necessary actions.
Ettercap Filters
Filters allow you to modify the packets passed through the program on the fly. You can drop packets or make necessary changes to them using the replace function. Filters also work only while the MITM attack is running. The syntax of the conditions by which we will filter packets is very similar to wireshark. Let’s consider a simple filter that will replace all the pictures with ours:
For those who have had experience with programming languages, everything should be clear here. If the TCP protocol and the destination port are 80, we continue searching and look for Accept-Encoding. Then we replace this word with any other, but equivalent in length. Because if the browser will send Accept-Encoding gzip, then the data will be compressed and we will not filter anything there. Next, in the server’s response, the source port is 80, we replace all the images with ours. Now the filter needs to be compiled:
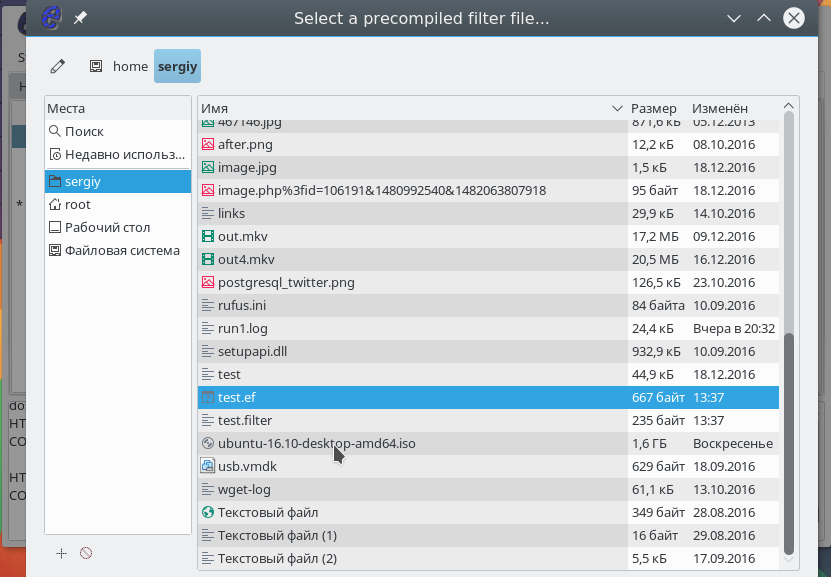
It remains to load the filter using the menu Filters -> Load Filter :
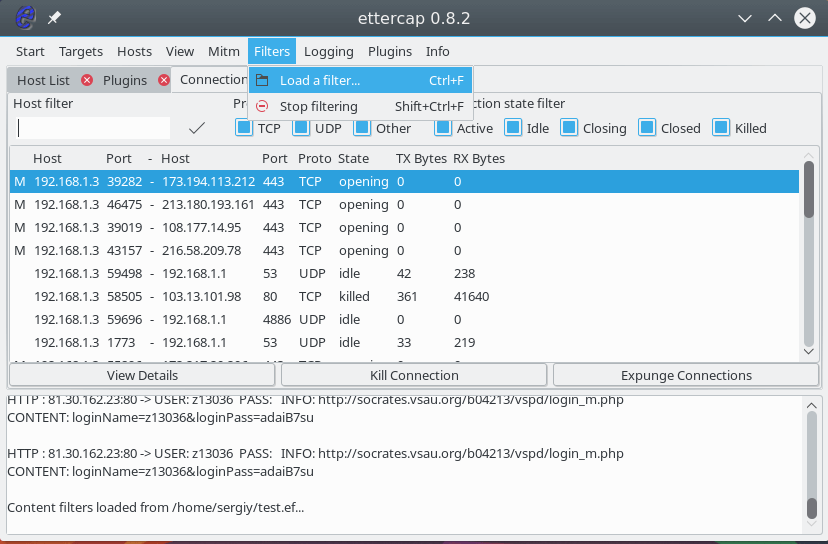
Select a filter file in the file system:
The filter will be loaded and you can open any site where https is not used to make sure everything works. To stop the MITM attack, open the MITM menu and select Stop All Mitm attacks . Our Ettercap manual is coming to an end, but …
How To protect yourself?
Probably, after reading the article, you have a reasonable question, how to protect your computer from this type of attack? There are several tools for this, including for the Linux operating system:
- XArp is a graphical utility that can detect attempts to spoof MAC addresses using the ARP protocol and counteract this. It can work in Windows and in Linux;
- Snort is a fairly well-known system to counter intrusions, among other things, it detects attacks on the ARP protocol;
- ArpON is a small service that monitors the ARP table and protects it from spoofing MAC addresses.
Findings
In this article, we looked at how to use Ettercap, a program for analyzing network packets and performing Man-in-the-Middle attacks. Use the program only to test the security of your networks or applications, and do not forget that illegal actions in the information space are also punishable.
Comments
where can i download this ettercap,the one i download is ettercap ng-0.7.3
Источник
Kali Linux Howto’s
Complete and professional how-to tutorials for Kali Linux and its numerous tools.
Pages
Perform A Man In The Middle Attack With Kali Linux & Ettercap
It’s one of the simplest but also most essential steps to “Conquering” a network. Once a hacker has performed a “Man In The Middle” attack (MITM) on a local network, he is able to perform a number of other “Side-kick” attacks. This includes: cutting a victim’s internet connection; intercepting Emails, logins, chat messages, and many others.
And only one tool is needed for this attack:
- An install or Live boot of Kali Linux, a well-known OS containing a collection of hundreds of penetration testing tools.
If you have that, then proceed to the tutorial below, and we’ll demonstrate how to perform this attack.
Important Notice:
This tutorial is intended to be used for penetration testing, i.e. the act of hacking to become more secure. It is not at all meant for malicious purposes. Performing any type of fraudulent activity on someone else’s network without permission is considered a crime in most countries. Lewis’s Computer Howto’s is using their own test network in this demonstration.
By reading and/or using the information below, you are agreeing to our Disclaimer,
Step One:
Start Kali Linux and login, preferably as the root user. When you’ve logged in, open a Terminal and enter this command: echo 1 > /proc/sys/net/ipv4/ip_forward. This enables IP forwarding, which is mandatory in order for the victim device to maintain connection while we are ARP poisoning it. This command will not be permanent; you’ll have to enter it every time that you restart Kali and wish to perform another MITM attack.
Step Two:
For whatever reason, ettercap doesn’t come ready to work from the factory. We need to make some small edits before it will work.
Open a Terminal and type: leafpad /etc/ettercap/etter.conf

Step Three:
Look through the text file that just opened. On one of the first lines, under the [privs] section, look for the words highlighted below:

You need to change the “ec_uid” and “ec_gid” values to zero. They should look like this when done:

Remove the number 65534 and replacing it with 0 (zero). You can leave the “# nobody is default” line.
Step Four:
This next one will be tricky to locate, so we’re going to use the “Find” option. Click on Search in the toolbar at the top of leafpad and click Find, or hit Ctrl+F.
Type the word iptables in the box that appears and click the Find button or press Enter.

It should skip to a line that looks like this:

We need to “uncomment” the two bottom lines. To do this, remove the two “#” symbols before each “redir_command,” so that the two lines look like this:

Now close leafpad and click Yes when it asks you to save changes.
Step Five:
Now start Ettercap-gtk, open a Terminal and type ettercap –G

Wait until Ettercap opens. When it does, click Sniff in the toolbar and select Unified Sniffing… from the menu.

Step Six:
Select the interface that’s connected to the network.

If your using a wired (ethernet) connection, then the interface will probably be eth0, but if you’re using wireless, (WLAN), then it will be a different one. To find which one of your interfaces is connected, run ifconfig.
Step Seven:
Now Ettercap should load into attack mode. Click on Hosts and select Scan for hosts from the menu.

Step Eight:
Ettercap will briefly scan for hosts on the network. After a moment, you should see the words “hosts added to the host list…” in the command box.
Click on Hosts again, and this time select Hosts list from the menu.

Step Nine:
Click the IP address of the router and click the Add to Target 1 button.

Then select the IP of your test victim’s machine and click Add to Target 2.

Step 10:
Now click Mitm on the toolbar and select Arp poisoning…

When the question box shows up, check the box next to Sniff remote connections and hit OK.

Step 11:
Ettercap will now Arp poison the victim and router. It might take a few minutes for the ARP process to work out, but once it does, your victim PC should be able to still connect to the internet without knowing that you’re virtually in between it and the router. If you’re victim can’t connect, make sure that you entered the “IP forward” command in Step 1 before starting ettercap. It might be a good idea to test this attack on one of your devices first, just to make sure that everything is going as planned.

You’ve successfully executed an MITM attack!
You can now use tools such as URLsnarf and SSLstrip to sniff out information about your victim’s internet traffic. You can also use etterfilters to cut you victim’s internet completely. Tutorials on how to use these tools will be coming soon.
To stop the MITM attack, click on MITM and select Stop mitm attack(s) from the menu.

Ettercap will then send the ARP correction packet, and the network will return to normal. You can then close Ettercap.
Ways to protect yourself against one of these attacks.
There are a couple of methods:
This method is pretty useless. There are very few ARP detection programs out there, and the few that do exist are either free junk or over priced. In addition, to use these programs on a windows machine requires installing special drivers for your wireless cards. Recommendation: Don’t use.
This method works the best for the standard individual. You just type in a simple command and your computer becomes “Unarpable.” This is how it works:
When an attacker performs an ARP MITM attack, his computer sends a ARP packet to the victim’s machine telling it that his mac address is the router’s. The victim’s machine is fooled and starts sending its data to the attacker.
When you enter a static ARP entry, you’re telling your computer that the router’s mac address is permanent and will not be changed. Therefore, your computer ignores any phony ARP packets sent by the attacker.
We will be making a tutorial on how to do this soon. In the meantime, you can use Google to find answers.
We Hope You Enjoyed This Tutorial
Источник


