- Installing MongoDB on a Mac
- What’s MongoDB?
- Prerequisites
- Installation Overview
- Install and Run MongoDB with Homebrew
- Install and Run MongoDB by Downloading it Manually
- How to install MongoDB on macOS using Homebrew
- Creating Data Folder Before you install and use MongoDB, you need to create a data/db folder on your computer for storing MongoDB data. Before macOS Catalina, you can create this folder in the user’s root directory with the following command: If you are on macOS Catalina or Big Sur (or any future release), you can not use the root folder for this purpose. macOS Catalina runs in a read-only system volume, separate from other files on the system. Apple created a secondary volume on Catalina that you need to use for storing MongoDB data folder: Installing MongoDB You can install the MongoDB community edition with Homebrew. If Homebrew is not already installed, execute the following command first: Now update Homebrew to the latest version: Next, tap the MongoDB formulae into Homebrew: Finally, execute the following command to install the MongoDB community edition: That’s it. MongoDB is now installed on your macOS computer. Managing MongoDB Service To manage MongoDB on your macOS computer, you can use the brew services command. First of all, install brew services by tapping homebrew/services : To start the MongoDB service, you use the following command: The above command will start MongoDB as a background service. Here’s what you will see on the terminal: Note: You can also use the run command instead of start . The start command will configure MongoDB to automatically start when you log into your Macbook. If you do not want to run MongoDB all the time, use the run command instead. To check the current status of the MongoDB service, issue the following command: The above command will output something like below: You can stop the service anytime by typing: If you want to restart the service, use the following command: Creating Aliases To make your life easier, you can also create aliases for managing MongoDB service. Just add the following to Next source the /.zshrc file to load aliases: Now you can use aliases to manage your MongoDB service: Conclusion That’s all folks for today. In this article, we learned how to install the MongoDB community edition on macOS Catalina and higher. We use the Homebrew package manager to install MongoDB binaries and to manage MongoDB service. If you enjoy reading this article, don’t forget to share it with your friends and followers. ✌️ Like this article? Follow me on Twitter and LinkedIn. You can also subscribe to RSS Feed. Источник Installing MongoDB on Mac (Catalina and non-Catalina) I had to reconfigure my Macbook after sending it for repairs. During the reconfiguration period, I noticed the instructions I linked to in “Setting up a local MongoDB connection” were outdated. Here’s an updated version on how to install MongoDB on a Mac. There are a few steps: First, you install Homebrew. If you’re curious about what Homebrew is, read this article. Second, find the MongoDB tap. Third, install MongoDB. MongoDB is now installed on your computer. Preparations (Before MacOS Catalina) Before you can use MongoDB, you need to create a /data/db folder on your computer to use MongoDB. You can create this folder with the following command: You also need to give permissions to use it: Now you can follow the rest of the article to set up your MongoDB connection. Preparations (MacOS Catalina onwards) Apple created a new Volume in Catalina for security purposes. If you’re on Catalina, you need to create the /data/db folder in System/Volumes/Data . Use this command: Then, use this command to give permissions: Using MongoDB In the past, I can run the mongod command to start MongoDB. This no longer works out for the box from MongoDB v4.2.3 onwards. The best way to start MongoDB now is via brew services . Starting MongoDB Use this command: MongoDB will start as a background service. Here’s what you’ll see: You can use start instead of run . start will start MongoDB automatically when you login into your Macbook. I prefer run since I don’t want MongoDB to be running all the time. Checking if MongoDB is running Use this command: Homebrew will list all running services. If MongoDB is running, mongodb-community will have a status set to started . The Mongo Shell If MongoDB is running, you should be able to access the Mongo shell with the mongo command. Stopping MongoDB Use this command: Homebrew will stop MongoDB and let you know. Aliases to make these easier It’s a chore typing brew services run mongodb-community every time I want to start MongoDB. I created some aliases to make things easier for me. Here are my aliases: What’s next? If you haven’t already, you should learn how to set up a local MongoDB connection. If you enjoyed this article, please tell a friend about it! Share it on Twitter. If you spot a typo, I’d appreciate if you can correct it on GitHub. Thank you! Источник Install MongoDB Community Edition on macOSВ¶ MongoDB Atlas is a hosted MongoDB service option in the cloud which requires no installation overhead and offers a free tier to get started. OverviewВ¶ Use this tutorial to install MongoDB 4.4 Community Edition on macOS using the third-party Homebrew package manager. Starting with MongoDB 4.4.1, installing MongoDB via Homebrew also installs the MongoDB Database Tools. See Using the MongoDB Database Tools for more information. MongoDB VersionВ¶ This tutorial installs MongoDB 4.4 Community Edition. To install a different version of MongoDB Community , use the version drop-down menu in the upper-left corner of this page to select the documentation for that version. ConsiderationsВ¶ Platform SupportВ¶ MongoDB 4.4 Community Edition supports macOS 10.13 or later. See Supported Platforms for more information. Production NotesВ¶ Before deploying MongoDB in a production environment, consider the Production Notes document which offers performance considerations and configuration recommendations for production MongoDB deployments. Install MongoDB Community EditionВ¶ PrerequisitesВ¶ Ensure your system meets each of the following prerequisites. You only need to perform each prerequisite step once on your system. If you have already performed the prerequisite steps as part of an earlier MongoDB installation using Homebrew, you can skip to the installation procedure. Install Xcode Command-Line ToolsВ¶ Homebrew requires the Xcode command-line tools from Apple’s Xcode. Install the Xcode command-line tools by running the following command in your macOS Terminal: Install HomebrewВ¶ macOS does not include the Homebrew brew package by default. Installing MongoDB 4.4 Community EditionВ¶ Follow these steps to install MongoDB Community Edition using Homebrew’s brew package manager. Be sure that you have followed the installation prerequisites above before proceeding. Tap the MongoDB Homebrew Tap to download the official Homebrew formula for MongoDB and the Database Tools, by running the following command in your macOS Terminal: If you have already done this for a previous installation of MongoDB, you can skip this step. To install MongoDB, run the following command in your macOS Terminal application: Alternatively, you can specify a previous version of MongoDB if desired. You can also maintain multiple versions of MongoDB side by side in this manner. If you have previously installed an older version of the formula, you may encounter a ChecksumMismatchError. To resolve, see Troubleshooting ChecksumMismatchError. The installation includes the following binaries: The mongod server The mongos sharded cluster query router The mongo shell In addition, the installation creates the following files and directories at the location specified below, depending on your Apple hardware: See Apple’s documentation for the current list of Apple hardware using the M1 processor. You can also run the following command to check where brew has installed these files and directories: Starting with MongoDB 4.4.1, the installation also includes the MongoDB Database Tools. See Using the MongoDB Database Tools for more information. Run MongoDB Community EditionВ¶ Follow these steps to run MongoDB Community Edition. These instructions assume that you are using the default settings. You can run MongoDB as a macOS service using brew , or you can run MongoDB manually as a background process. It is recommended to run MongoDB as a macOS service, as doing so sets the correct system ulimit values automatically (see ulimit settings for more information). To run MongoDB (i.e. the mongod process) as a macOS service, issue the following: To stop a mongod running as a macOS service, use the following command as needed: To run MongoDB (i.e. the mongod process) manually as a background process, issue the following: For macOS running Intel processors: To stop a mongod running as a background process, connect to the mongod from the mongo shell, and issue the shutdown command as needed. Both methods use the mongod.conf file created during the install. You can add your own MongoDB configuration options to this file as well. macOS may prevent mongod from running after installation. If you receive a security error when starting mongod indicating that the developer could not be identified or verified, do the following to grant mongod access to run: Open System Preferences Select the Security and Privacy pane. Under the General tab, click the button to the right of the message about mongod , labelled either Open Anyway or Allow Anyway depending on your version of macOS. To verify that MongoDB is running, perform one of the following: If you started MongoDB as a macOS service: You should see the service mongodb-community listed as started . If you started MongoDB manually as a background process: You should see your mongod process in the output. You can also view the log file to see the current status of your mongod process: /usr/local/var/log/mongodb/mongo.log . Connect and Use MongoDBВ¶ To begin using MongoDB, connect a mongo shell to the running instance. From a new terminal, issue the following: macOS may prevent the mongo shell from running after installation. If you receive a security error when starting the mongo shell indicating that the developer could not be identified or verified, do the following to grant the mongo shell access to run: Open System Preferences Select the Security and Privacy pane. Under the General tab, click the button to the right of the message about the mongo shell, labelled either Open Anyway or Allow Anyway depending on your version of macOS. For information on CRUD (Create,Read,Update,Delete) operations, see: Using the MongoDB Database ToolsВ¶ Starting in MongoDB 4.4.1, installing MongoDB via brew also installs the MongoDB Database Tools. The MongoDB Database Tools are a collection of command-line utilities for working with a MongoDB deployment, including data backup and import/export tools like mongoimport and mongodump as well as monitoring tools like mongotop . Once you have installed the MongoDB Server in the steps above, the Database Tools are available directly from the command line in your macOS Terminal application. For example you could run mongotop against your running MongoDB instance by invoking it in your macOS Terminal like so: It should start up, connect to your running mongod , and start reporting usage statistics. See the MongoDB Database Tools Documentation for usage information for each of the Database Tools. Additional InformationВ¶ Localhost Binding by DefaultВ¶ By default, MongoDB launches with bindIp set to 127.0.0.1 , which binds to the localhost network interface. This means that the mongod can only accept connections from clients that are running on the same machine. Remote clients will not be able to connect to the mongod , and the mongod will not be able to initialize a replica set unless this value is set to a valid network interface. This value can be configured either: in the MongoDB configuration file with bindIp , or via the command-line argument —bind_ip Before binding to a non-localhost (e.g. publicly accessible) IP address, ensure you have secured your cluster from unauthorized access. For a complete list of security recommendations, see Security Checklist. At minimum, consider enabling authentication and hardening network infrastructure. For more information on configuring bindIp , see IP Binding. Troubleshooting ChecksumMismatchErrorВ¶ If you have previously installed an older version of the formula, you may encounter a ChecksumMismatchError resembling the following: Remove the downloaded .tgz archive. Источник
- Installing MongoDB
- Managing MongoDB Service
- Creating Aliases
- Conclusion
- Installing MongoDB on Mac (Catalina and non-Catalina)
- Preparations (Before MacOS Catalina)
- Preparations (MacOS Catalina onwards)
- Using MongoDB
- Starting MongoDB
- Checking if MongoDB is running
- The Mongo Shell
- Stopping MongoDB
- Aliases to make these easier
- What’s next?
- Install MongoDB Community Edition on macOS
- Overview
- MongoDB Version
- Considerations
- Platform Support
- Production Notes
- Install MongoDB Community Edition
- Prerequisites
- Install Xcode Command-Line Tools
- Install Homebrew
- Installing MongoDB 4.4 Community Edition
- Run MongoDB Community Edition
- Connect and Use MongoDB
- Using the MongoDB Database Tools
- Additional Information
- Localhost Binding by Default
- Troubleshooting ChecksumMismatchError
Installing MongoDB on a Mac
What’s MongoDB?
MongoDB is a document database which belongs to a family of databases called NoSQL — not only SQL. In MongoDB, records are documents which behave a lot like JSON objects in JavaScript. Values in documents can be looked up by their field’s key. Documents can have some fields/keys and not others, which makes Mongo extremely flexible.
This is different than SQL databases like MySQL and PostgreSQL, where fields correspond to columns in a table and individual records correspond to rows.
Prerequisites
- You should have some familiarity with the Mac Terminal application since you’ll need to use it to install and run MongoDB.
- Dependencies. This guide goes over the two main ways to install MongoDB on a Mac. One of the methods requires Homebrew.
- Homebrew. Homebrew is a package manager for the Mac – it makes installing most open source software (like MongoDB) as simple as writing brew install mongodb . Follow the instructions in the How to Install Homebrew on a Mac instruction guide.
Installation Overview
There are two primary ways to install MongoDB on a Mac. The best way to install MongoDB is with Homebrew. The other way to install MongoDB is by downloading it from the the MongoDB website.
Install and Run MongoDB with Homebrew
- Open the Terminal app and type brew update .
- After updating Homebrew brew install mongodb
- After downloading Mongo, create the “db” directory. This is where the Mongo data files will live. You can create the directory in the default location by running mkdir -p /data/db
Make sure that the /data/db directory has the right permissions by running
Install and Run MongoDB by Downloading it Manually
- Go to the MongoDB website’s download section and download the correct version of MongoDB.
After downloading Mongo move the gzipped tar file (the file with the extension .tgz that you downloaded) to the folder where you want Mongo installed. In this case, we’ll say that we want Mongo to live in our home folder, and so the commands might look something like this:
Extract MongoDB from the the downloaded archive, and change the name of the directory to something more palatable: > cd
/ > tar -zxvf mongodb-osx-x86_64-3.0.7.tgz > mv mongodb-osx-x86_64-3.0.7 mongodb
Make sure that the /data/db directory has the right permissions by running
/mongodb/bin/mongod . This will start the Mongo server.
Run the Mongo shell, with the Mongo daemon running in one terminal, type
/mongodb/bin/mongo in another terminal window. This will run the Mongo shell which is an application to access data in MongoDB.
Источник
How to install MongoDB on macOS using Homebrew
December 06, 2020 • Atta
In an earlier article, I wrote about how to install the MongoDB community edition on Ubuntu operating system. Today, you’ll learn to install the MongoDB community edition on macOS Catalina and higher.
Creating Data Folder
Before you install and use MongoDB, you need to create a data/db folder on your computer for storing MongoDB data.
Before macOS Catalina, you can create this folder in the user’s root directory with the following command:
If you are on macOS Catalina or Big Sur (or any future release), you can not use the root folder for this purpose. macOS Catalina runs in a read-only system volume, separate from other files on the system.
Apple created a secondary volume on Catalina that you need to use for storing MongoDB data folder:
Installing MongoDB
You can install the MongoDB community edition with Homebrew. If Homebrew is not already installed, execute the following command first:
Now update Homebrew to the latest version:
Next, tap the MongoDB formulae into Homebrew:
Finally, execute the following command to install the MongoDB community edition:
That’s it. MongoDB is now installed on your macOS computer.
Managing MongoDB Service
To manage MongoDB on your macOS computer, you can use the brew services command.
First of all, install brew services by tapping homebrew/services :
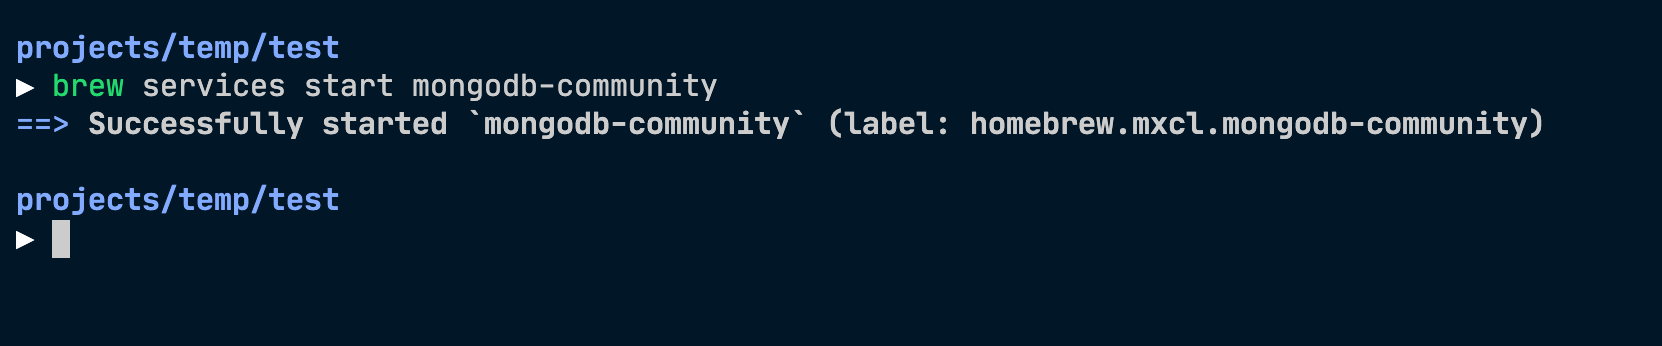
To start the MongoDB service, you use the following command:
The above command will start MongoDB as a background service. Here’s what you will see on the terminal:
Note: You can also use the run command instead of start . The start command will configure MongoDB to automatically start when you log into your Macbook. If you do not want to run MongoDB all the time, use the run command instead.
To check the current status of the MongoDB service, issue the following command:
The above command will output something like below:
You can stop the service anytime by typing:
If you want to restart the service, use the following command:
Creating Aliases
To make your life easier, you can also create aliases for managing MongoDB service. Just add the following to
Next source the
/.zshrc file to load aliases:
Now you can use aliases to manage your MongoDB service:
Conclusion
That’s all folks for today. In this article, we learned how to install the MongoDB community edition on macOS Catalina and higher.
We use the Homebrew package manager to install MongoDB binaries and to manage MongoDB service.
If you enjoy reading this article, don’t forget to share it with your friends and followers.
✌️ Like this article? Follow me on Twitter and LinkedIn. You can also subscribe to RSS Feed.
Источник
Installing MongoDB on Mac (Catalina and non-Catalina)
I had to reconfigure my Macbook after sending it for repairs. During the reconfiguration period, I noticed the instructions I linked to in “Setting up a local MongoDB connection” were outdated.
Here’s an updated version on how to install MongoDB on a Mac.
There are a few steps:
First, you install Homebrew. If you’re curious about what Homebrew is, read this article.
Second, find the MongoDB tap.
Third, install MongoDB.
MongoDB is now installed on your computer.
Preparations (Before MacOS Catalina)
Before you can use MongoDB, you need to create a /data/db folder on your computer to use MongoDB. You can create this folder with the following command:
You also need to give permissions to use it:
Now you can follow the rest of the article to set up your MongoDB connection.
Preparations (MacOS Catalina onwards)
Apple created a new Volume in Catalina for security purposes. If you’re on Catalina, you need to create the /data/db folder in System/Volumes/Data .
Use this command:
Then, use this command to give permissions:
Using MongoDB
In the past, I can run the mongod command to start MongoDB. This no longer works out for the box from MongoDB v4.2.3 onwards.
The best way to start MongoDB now is via brew services .
Starting MongoDB
Use this command:
MongoDB will start as a background service. Here’s what you’ll see:
You can use start instead of run . start will start MongoDB automatically when you login into your Macbook. I prefer run since I don’t want MongoDB to be running all the time.
Checking if MongoDB is running
Use this command:
Homebrew will list all running services. If MongoDB is running, mongodb-community will have a status set to started .

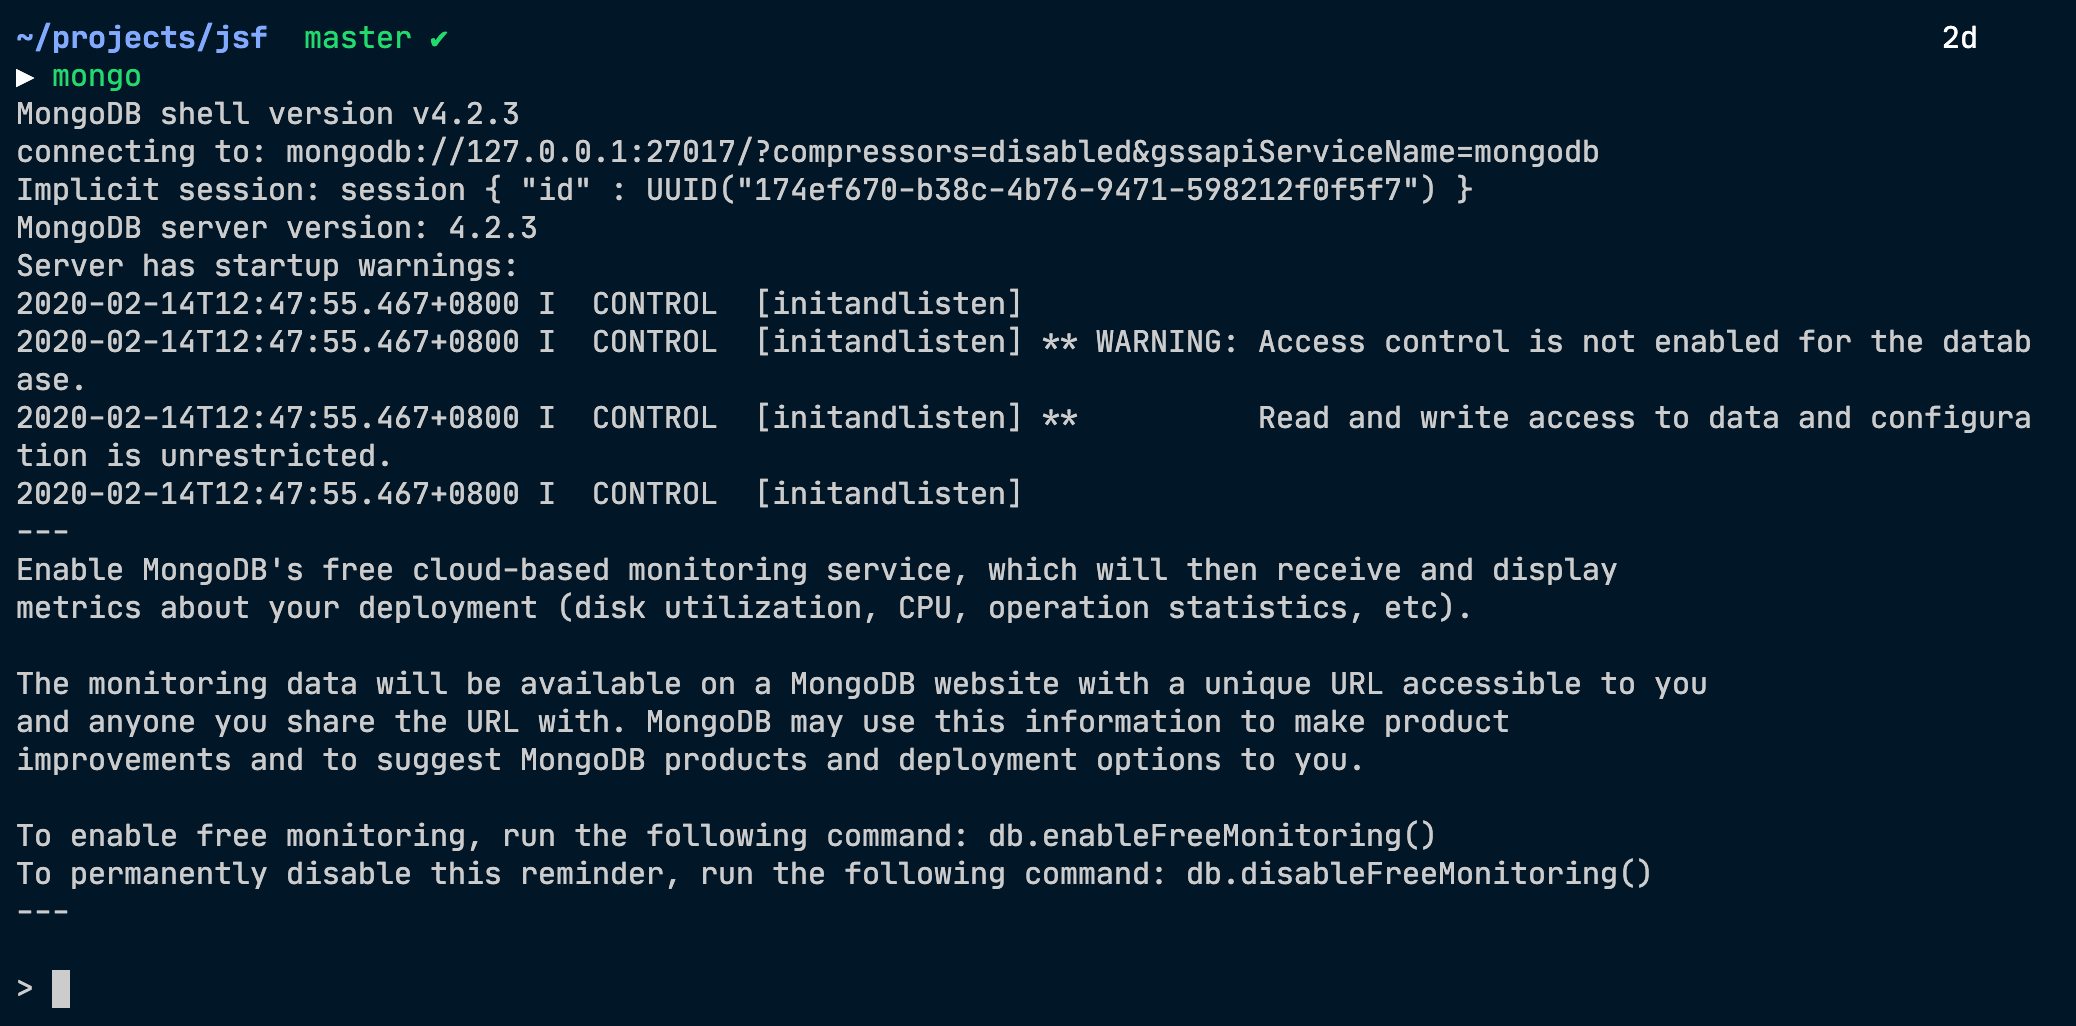
The Mongo Shell
If MongoDB is running, you should be able to access the Mongo shell with the mongo command.
Stopping MongoDB
Use this command:
Homebrew will stop MongoDB and let you know.

Aliases to make these easier
It’s a chore typing brew services run mongodb-community every time I want to start MongoDB.
I created some aliases to make things easier for me. Here are my aliases:
What’s next?
If you haven’t already, you should learn how to set up a local MongoDB connection.
If you enjoyed this article, please tell a friend about it! Share it on Twitter. If you spot a typo, I’d appreciate if you can correct it on GitHub. Thank you!
Источник
Install MongoDB Community Edition on macOS
MongoDB Atlas is a hosted MongoDB service option in the cloud which requires no installation overhead and offers a free tier to get started.
Overview
Use this tutorial to install MongoDB 4.4 Community Edition on macOS using the third-party Homebrew package manager.
Starting with MongoDB 4.4.1, installing MongoDB via Homebrew also installs the MongoDB Database Tools. See Using the MongoDB Database Tools for more information.
MongoDB Version
This tutorial installs MongoDB 4.4 Community Edition. To install a different version of MongoDB Community , use the version drop-down menu in the upper-left corner of this page to select the documentation for that version.
Considerations
Platform Support
MongoDB 4.4 Community Edition supports macOS 10.13 or later.
See Supported Platforms for more information.
Production Notes
Before deploying MongoDB in a production environment, consider the Production Notes document which offers performance considerations and configuration recommendations for production MongoDB deployments.
Install MongoDB Community Edition
Prerequisites
Ensure your system meets each of the following prerequisites. You only need to perform each prerequisite step once on your system. If you have already performed the prerequisite steps as part of an earlier MongoDB installation using Homebrew, you can skip to the installation procedure.
Install Xcode Command-Line Tools
Homebrew requires the Xcode command-line tools from Apple’s Xcode.
Install the Xcode command-line tools by running the following command in your macOS Terminal:
Install Homebrew
macOS does not include the Homebrew brew package by default.
Installing MongoDB 4.4 Community Edition
Follow these steps to install MongoDB Community Edition using Homebrew’s brew package manager. Be sure that you have followed the installation prerequisites above before proceeding.
Tap the MongoDB Homebrew Tap to download the official Homebrew formula for MongoDB and the Database Tools, by running the following command in your macOS Terminal:
If you have already done this for a previous installation of MongoDB, you can skip this step.
To install MongoDB, run the following command in your macOS Terminal application:
Alternatively, you can specify a previous version of MongoDB if desired. You can also maintain multiple versions of MongoDB side by side in this manner.
If you have previously installed an older version of the formula, you may encounter a ChecksumMismatchError. To resolve, see Troubleshooting ChecksumMismatchError.
The installation includes the following binaries:
- The mongod server
- The mongos sharded cluster query router
- The mongo shell
In addition, the installation creates the following files and directories at the location specified below, depending on your Apple hardware:
See Apple’s documentation for the current list of Apple hardware using the M1 processor. You can also run the following command to check where brew has installed these files and directories:
Starting with MongoDB 4.4.1, the installation also includes the MongoDB Database Tools. See Using the MongoDB Database Tools for more information.
Run MongoDB Community Edition
Follow these steps to run MongoDB Community Edition. These instructions assume that you are using the default settings.
You can run MongoDB as a macOS service using brew , or you can run MongoDB manually as a background process. It is recommended to run MongoDB as a macOS service, as doing so sets the correct system ulimit values automatically (see ulimit settings for more information).
To run MongoDB (i.e. the mongod process) as a macOS service, issue the following:
To stop a mongod running as a macOS service, use the following command as needed:
To run MongoDB (i.e. the mongod process) manually as a background process, issue the following:
For macOS running Intel processors:
To stop a mongod running as a background process, connect to the mongod from the mongo shell, and issue the shutdown command as needed.
Both methods use the mongod.conf file created during the install. You can add your own MongoDB configuration options to this file as well.
macOS may prevent mongod from running after installation. If you receive a security error when starting mongod indicating that the developer could not be identified or verified, do the following to grant mongod access to run:
- Open System Preferences
- Select the Security and Privacy pane.
- Under the General tab, click the button to the right of the message about mongod , labelled either Open Anyway or Allow Anyway depending on your version of macOS.
To verify that MongoDB is running, perform one of the following:
If you started MongoDB as a macOS service:
You should see the service mongodb-community listed as started .
If you started MongoDB manually as a background process:
You should see your mongod process in the output.
You can also view the log file to see the current status of your mongod process: /usr/local/var/log/mongodb/mongo.log .
Connect and Use MongoDB
To begin using MongoDB, connect a mongo shell to the running instance. From a new terminal, issue the following:
macOS may prevent the mongo shell from running after installation. If you receive a security error when starting the mongo shell indicating that the developer could not be identified or verified, do the following to grant the mongo shell access to run:
- Open System Preferences
- Select the Security and Privacy pane.
- Under the General tab, click the button to the right of the message about the mongo shell, labelled either Open Anyway or Allow Anyway depending on your version of macOS.
For information on CRUD (Create,Read,Update,Delete) operations, see:
Using the MongoDB Database Tools
Starting in MongoDB 4.4.1, installing MongoDB via brew also installs the MongoDB Database Tools.
The MongoDB Database Tools are a collection of command-line utilities for working with a MongoDB deployment, including data backup and import/export tools like mongoimport and mongodump as well as monitoring tools like mongotop .
Once you have installed the MongoDB Server in the steps above, the Database Tools are available directly from the command line in your macOS Terminal application. For example you could run mongotop against your running MongoDB instance by invoking it in your macOS Terminal like so:
It should start up, connect to your running mongod , and start reporting usage statistics.
See the MongoDB Database Tools Documentation for usage information for each of the Database Tools.
Additional Information
Localhost Binding by Default
By default, MongoDB launches with bindIp set to 127.0.0.1 , which binds to the localhost network interface. This means that the mongod can only accept connections from clients that are running on the same machine. Remote clients will not be able to connect to the mongod , and the mongod will not be able to initialize a replica set unless this value is set to a valid network interface.
This value can be configured either:
- in the MongoDB configuration file with bindIp , or
- via the command-line argument —bind_ip
Before binding to a non-localhost (e.g. publicly accessible) IP address, ensure you have secured your cluster from unauthorized access. For a complete list of security recommendations, see Security Checklist. At minimum, consider enabling authentication and hardening network infrastructure.
For more information on configuring bindIp , see IP Binding.
Troubleshooting ChecksumMismatchError
If you have previously installed an older version of the formula, you may encounter a ChecksumMismatchError resembling the following:
- Remove the downloaded .tgz archive.
Источник


