- How to install MongoDB on macOS using Homebrew
- Creating Data Folder Before you install and use MongoDB, you need to create a data/db folder on your computer for storing MongoDB data. Before macOS Catalina, you can create this folder in the user’s root directory with the following command: If you are on macOS Catalina or Big Sur (or any future release), you can not use the root folder for this purpose. macOS Catalina runs in a read-only system volume, separate from other files on the system. Apple created a secondary volume on Catalina that you need to use for storing MongoDB data folder: Installing MongoDB You can install the MongoDB community edition with Homebrew. If Homebrew is not already installed, execute the following command first: Now update Homebrew to the latest version: Next, tap the MongoDB formulae into Homebrew: Finally, execute the following command to install the MongoDB community edition: That’s it. MongoDB is now installed on your macOS computer. Managing MongoDB Service To manage MongoDB on your macOS computer, you can use the brew services command. First of all, install brew services by tapping homebrew/services : To start the MongoDB service, you use the following command: The above command will start MongoDB as a background service. Here’s what you will see on the terminal: Note: You can also use the run command instead of start . The start command will configure MongoDB to automatically start when you log into your Macbook. If you do not want to run MongoDB all the time, use the run command instead. To check the current status of the MongoDB service, issue the following command: The above command will output something like below: You can stop the service anytime by typing: If you want to restart the service, use the following command: Creating Aliases To make your life easier, you can also create aliases for managing MongoDB service. Just add the following to Next source the /.zshrc file to load aliases: Now you can use aliases to manage your MongoDB service: Conclusion That’s all folks for today. In this article, we learned how to install the MongoDB community edition on macOS Catalina and higher. We use the Homebrew package manager to install MongoDB binaries and to manage MongoDB service. If you enjoy reading this article, don’t forget to share it with your friends and followers. ✌️ Like this article? Follow me on Twitter and LinkedIn. You can also subscribe to RSS Feed. Источник Installing MongoDB on Mac (Catalina and non-Catalina) I had to reconfigure my Macbook after sending it for repairs. During the reconfiguration period, I noticed the instructions I linked to in “Setting up a local MongoDB connection” were outdated. Here’s an updated version on how to install MongoDB on a Mac. There are a few steps: First, you install Homebrew. If you’re curious about what Homebrew is, read this article. Second, find the MongoDB tap. Third, install MongoDB. MongoDB is now installed on your computer. Preparations (Before MacOS Catalina) Before you can use MongoDB, you need to create a /data/db folder on your computer to use MongoDB. You can create this folder with the following command: You also need to give permissions to use it: Now you can follow the rest of the article to set up your MongoDB connection. Preparations (MacOS Catalina onwards) Apple created a new Volume in Catalina for security purposes. If you’re on Catalina, you need to create the /data/db folder in System/Volumes/Data . Use this command: Then, use this command to give permissions: Using MongoDB In the past, I can run the mongod command to start MongoDB. This no longer works out for the box from MongoDB v4.2.3 onwards. The best way to start MongoDB now is via brew services . Starting MongoDB Use this command: MongoDB will start as a background service. Here’s what you’ll see: You can use start instead of run . start will start MongoDB automatically when you login into your Macbook. I prefer run since I don’t want MongoDB to be running all the time. Checking if MongoDB is running Use this command: Homebrew will list all running services. If MongoDB is running, mongodb-community will have a status set to started . The Mongo Shell If MongoDB is running, you should be able to access the Mongo shell with the mongo command. Stopping MongoDB Use this command: Homebrew will stop MongoDB and let you know. Aliases to make these easier It’s a chore typing brew services run mongodb-community every time I want to start MongoDB. I created some aliases to make things easier for me. Here are my aliases: What’s next? If you haven’t already, you should learn how to set up a local MongoDB connection. If you enjoyed this article, please tell a friend about it! Share it on Twitter. If you spot a typo, I’d appreciate if you can correct it on GitHub. Thank you! Источник Install MongoDB Community Edition on macOSВ¶ MongoDB Atlas is a hosted MongoDB service option in the cloud which requires no installation overhead and offers a free tier to get started. OverviewВ¶ Use this tutorial to install MongoDB 5.0 Community Edition on macOS using the third-party Homebrew package manager. Starting with MongoDB 4.4.1, installing MongoDB via Homebrew also installs the MongoDB Database Tools. See Using the MongoDB Database Tools for more information. MongoDB VersionВ¶ This tutorial installs MongoDB 5.0 Community Edition. To install a different version of MongoDB Community , use the version drop-down menu in the upper-left corner of this page to select the documentation for that version. ConsiderationsВ¶ Platform SupportВ¶ MongoDB 5.0 Community Edition removes support for macOS 10.13 MongoDB 5.0 Community Edition supports macOS 10.14 or later. See Supported Platforms for more information. Production NotesВ¶ Before deploying MongoDB in a production environment, consider the Production Notes document which offers performance considerations and configuration recommendations for production MongoDB deployments. Install MongoDB Community EditionВ¶ PrerequisitesВ¶ Ensure your system meets each of the following prerequisites. You only need to perform each prerequisite step once on your system. If you have already performed the prerequisite steps as part of an earlier MongoDB installation using Homebrew, you can skip to the installation procedure. Install Xcode Command-Line ToolsВ¶ Homebrew requires the Xcode command-line tools from Apple’s Xcode. Install the Xcode command-line tools by running the following command in your macOS Terminal: Install HomebrewВ¶ macOS does not include the Homebrew brew package by default. Installing MongoDB 5.0 Community EditionВ¶ Follow these steps to install MongoDB Community Edition using Homebrew’s brew package manager. Be sure that you have followed the installation prerequisites above before proceeding. Tap the MongoDB Homebrew Tap to download the official Homebrew formula for MongoDB and the Database Tools, by running the following command in your macOS Terminal: If you have already done this for a previous installation of MongoDB, you can skip this step. To install MongoDB, run the following command in your macOS Terminal application: Alternatively, you can specify a previous version of MongoDB if desired. You can also maintain multiple versions of MongoDB side by side in this manner. If you have previously installed an older version of the formula, you may encounter a ChecksumMismatchError. To resolve, see Troubleshooting ChecksumMismatchError. The installation includes the following binaries: The mongod server The mongos sharded cluster query router The MongoDB Shell, mongosh In addition, the installation creates the following files and directories at the location specified below, depending on your Apple hardware: See Apple’s documentation for the current list of Apple hardware using the M1 processor. You can also run the following command to check where brew has installed these files and directories: Starting with MongoDB 4.4.1, the installation also includes the MongoDB Database Tools. See Using the MongoDB Database Tools for more information. Run MongoDB Community EditionВ¶ Follow these steps to run MongoDB Community Edition. These instructions assume that you are using the default settings. You can run MongoDB as a macOS service using brew , or you can run MongoDB manually as a background process. It is recommended to run MongoDB as a macOS service, as doing so sets the correct system ulimit values automatically (see ulimit settings for more information). To run MongoDB (i.e. the mongod process) as a macOS service, run: To stop a mongod running as a macOS service, use the following command as needed: To run MongoDB (i.e. the mongod process) manually as a background process, run: For macOS running Intel processors: To stop a mongod running as a background process, connect to the mongod using mongosh, and issue the shutdown command as needed. Both methods use the mongod.conf file created during the install. You can add your own MongoDB configuration options to this file as well. macOS may prevent mongod from running after installation. If you receive a security error when starting mongod indicating that the developer could not be identified or verified, do the following to grant mongod access to run: Open System Preferences Select the Security and Privacy pane. Under the General tab, click the button to the right of the message about mongod , labelled either Open Anyway or Allow Anyway depending on your version of macOS. To verify that MongoDB is running, perform one of the following: If you started MongoDB as a macOS service: You should see the service mongodb-community listed as started . If you started MongoDB manually as a background process: You should see your mongod process in the output. You can also view the log file to see the current status of your mongod process: /usr/local/var/log/mongodb/mongo.log . Connect and Use MongoDBВ¶ To begin using MongoDB, connect mongosh to the running instance. From a new terminal, issue the following: macOS may prevent mongosh from running after installation. If you receive a security error when starting mongosh indicating that the developer could not be identified or verified, do the following to grant mongosh access to run: Open System Preferences Select the Security and Privacy pane. Under the General tab, click the button to the right of the message about mongosh , labelled either Open Anyway or Allow Anyway depending on your version of macOS. For information on CRUD (Create,Read,Update,Delete) operations, see: Using the MongoDB Database ToolsВ¶ Starting in MongoDB 4.4.1, installing MongoDB via brew also installs the MongoDB Database Tools. The MongoDB Database Tools are a collection of command-line utilities for working with a MongoDB deployment, including data backup and import/export tools like mongoimport and mongodump as well as monitoring tools like mongotop . Once you have installed the MongoDB Server in the steps above, the Database Tools are available directly from the command line in your macOS Terminal application. For example you could run mongotop against your running MongoDB instance by invoking it in your macOS Terminal like so: It should start up, connect to your running mongod , and start reporting usage statistics. See the MongoDB Database Tools Documentation for usage information for each of the Database Tools. Additional InformationВ¶ Localhost Binding by DefaultВ¶ By default, MongoDB launches with bindIp set to 127.0.0.1 , which binds to the localhost network interface. This means that the mongod can only accept connections from clients that are running on the same machine. Remote clients will not be able to connect to the mongod , and the mongod will not be able to initialize a replica set unless this value is set to a valid network interface. This value can be configured either: in the MongoDB configuration file with bindIp , or via the command-line argument —bind_ip Before binding to a non-localhost (e.g. publicly accessible) IP address, ensure you have secured your cluster from unauthorized access. For a complete list of security recommendations, see Security Checklist. At minimum, consider enabling authentication and hardening network infrastructure. For more information on configuring bindIp , see IP Binding. Troubleshooting ChecksumMismatchErrorВ¶ If you have previously installed an older version of the formula, you may encounter a ChecksumMismatchError resembling the following: Remove the downloaded .tgz archive. Источник How to Install MongoDB on a Mac MongoDB is one of the most popular unstructured database management systems that can store a high volume of data. It is a document-oriented database system that belongs to the family of NoSQL (non-SQL). Here the data and records are stored as documents that behave more like JSON objects. Documents are a combination of key-value pairs that form the basic unit of data in MongoDB. This database system came into action in mid-2000. What is NoSQL and why should we use NoSQL? NoSQL stands for Not Only SQL or non-SQL and is an unstructured database that helps store and retrieve data. In the year 1998, Carl Strozz introduced NoSQL. It models the data by means other than the tabular relations. It means such databases do not have a fixed schema, but are intended explicitly for the distributed data that demands humongous data storage. We use NoSQL databases for real-time web apps, mobile apps, big data, etc. Websites like Google, Twitter, Amazon, Facebook, Instagram, etc., collect terabytes of data every day. Earlier, web applications were simple and did not generate such huge amounts of data. But with the advent of big companies like Facebook, Google, Amazon, etc., huge volumes of data are generated, because of which NoSQL databases have become popular. Traditional RDBMS (like SQL) uses simple queries to store and retrieve textual data. But NoSQL database management systems embrace a wide range of file systems storing structured, unstructured, semi-structured, and polymorphic data. Features of NoSQL NoSQL databases do not follow the relational model. They are schema-free, or they do not follow any specific schema. NoSQL renders heterogeneous data structures (graph, tree, column family, key-value pair, document, etc.) on the same domain. Data is not stored flat in rows and columns (table). NoSQL does not demand data normalization and object-relational mapping. NoSQL does not demand setting up complex concepts like joins, referential integrity, ACID properties, etc. Who should use MongoDB? Developers who want to deal with structured, semi-structured, or unstructured data need to use MongoDB for their applications. Those who are into Big data analysis can also use MongoDB. Again, if an application’s data needs agility, scaling, and high performance, MongoDB is the best solution. It supports a broad spectrum of use cases , from real-time exploratory and predictive analytics to parallel data processing. MongoDB can provide high-performance data storage even when spread across multiple servers. Prerequisites Software Requirement: macOS 10.13 or later MongoDB 4.4 Community Edition (we will show the download procedure later) Install Xcode Command-Line Tools: Homebrew demands to install the Xcode command-line tool from Apple’s Xcode before using it. To install Xcode, you have to run the following command in your macOS Terminal: xcode-select —install Homebrew package manager: By default, macOS does not incorporate the Homebrew package. You can install Homebrew using the documentation given on their official website (https://brew.sh/#install). Hardware Requirement: Intel Processor / Apple M1 Processor 4 GB RAM preferred Installation Steps Install Manually without Brew Step 1: Let us now download MongoDB. For this, open your web browser and type: google.com Step 2: From Google search, type: MongoDB and hopefully, the first link the search throws up would be the MongoDB link. From here, we have two ways of installing MongoDB. Follow these steps to install using the macOS terminal. Step 3: Go to mongodb-community Select the version, platform, and package. Make sure you choose macOS as the platform and ‘tgz’ as the file format and click the download button. Step 4: Once the tgz file gets downloaded, go to the macOS terminal to extract it. Step 5: Mostly, your MongoDB will get downloaded in the Downloads folder. For this, type the following command in the terminal: Step 6: Now, we have to move the MongoDB folder to our local binary storage. This will ask for your system password. Provide the password. You can change the directory to /usr/local/mongodb and see whether all the files exist or not using the ls command. Note that this step is optional. To change the directory, type the command Next, you have to create the db folder. By default, MongoDB writes or stores the data in the folder called data/db. The command for this will be The -p flag will allow us to create the directory structure. Now, to check whether this path and directory have been created or not, we use the command: To check whether we are on the right directory or not, just type the command:pwd For changing the permission, you need to know your username first. To know your username, type the command:whoami Now change the permission of this directory. To do this, the command is: sudo chown /data/db Finally, you are eligible to directly run the mongo process. Install using Brew – If you want to install MongoDB through Homebrew manually, follow these steps – Step 1: Homebrew helps in installing and managing applications on MacOS. If you haven’t downloaded or installed Homebrew, then click the link (https://github.com/mongodb/homebrew-brew) to download the official Homebrew formula for MongoDB, by running the command in your macOS Terminal: Step 2: Once the Homebrew package resides in your system, you can download MongoDB using brew. Step 3: Type the following command in your macOS Terminal: Step 4: This installation will add the following binaries: The mongod server The mongo shell The mongos sharded cluster query router Step 5: The installation will take a few seconds. Once done, you can create a directory to store MongoDB data using the following command. Step 6: Now, you have to note that your data directory should have the appropriate permissions. To do this, execute the command: Step 7: This will ensure that the data directory is ready and has all the proper permissions. Step 8: Apart from that, the MongoDB installation will produce the following files and directories at the locations given below – Intel Processors Apple M1 Log directory /usr/local/var/log/mongodb /opt/homebrew/var/log/mongodb Configuration file /usr/local/etc/mongod.conf /opt/homebrew/etc/mongod.conf Data directory /usr/local/var/mongodb /opt/homebrew/var/mongodb Step 9: Let us now run the MongoDB community Edition. You can use the brew command to run MongoDB as a macOS. A manual procedure is needed to run MongoDB services on macOS. To execute MongoDB daemon, which resides by the name mongod (process), use the following command: brew services start mongodb-community macOS will run this process as a macOS service. Step 10: For stopping a mongod process running as a macOS service, apply the following command: Step 11: For running MongoDB in the background manually and listening for connections on a given port, use the following command — For Mac systems with Intel processors: mongod —config /usr/local/etc/mongod.conf —fork For Mac systems with Apple M1 processors: mongod —config /opt/homebrew/etc/mongod.conf –fork Step 12: Next, verify your MongoDB version. To do this, type the following command: mongo –version Step 13: The command line will display the installed version of MongoDB on your Mac system. Developers recommend using the newest version of libraries and software whenever feasible. It will keep you away from any compatibility issues with client-side applications. Step14: You can view the installation list by typing the command: mongodb Step15: Use the command mongod —config /usr/local/etc/mongod.conf to start the MongoDB Step 16: To connect to mongodb service, type the command: mongo Step17: Use the ‘ show dbs’ command to see all databases. You can learn more about the working of MongoDB and become an expert NoSQL database administrator by joining the course mongodb-administrator . This course covers features of MongoDB 4.0 and future releases. Uninstall MongoDB on macOS X – Uninstalling MongoDB from your system will entirely remove MongoDB along with its associated files. Before uninstalling MongoDB, check whether any mongo service is running by using the command:launchctl list | grep mongo If any running process exists before uninstallation, you should stop or kill it. To kill all the processes related to mongod , use the command:pkill -f mongod The command to uninstall MongoDB from your system is: If installed via brew:brew uninstall mongodb-community Or, if installed manually you can simply delete the folder: rm -rf If you have a separate folder for the database, use the command to remove that database directory:rm -rf /data/db MongoDB is the leading NoSQL, document-based, open-source database system. It is a cross-platform system — licensed under the Server-Side Public License (SSPL). Due to its broad spectrum of features and benefits, it became popular very quickly. Hopefully, this article has helped you understand the basics of installing MongoDB in your Apple system. In this article, we have walked you through the two ways to install MongoDB in a macOS. Also, this article explicitly talked about installing MongoDB in Apple systems with Intel processors and with Apple M1 processors. So, you can navigate this article as per your system. You can learn more about MongoDB installation and join the course from mongodb-administrator . Gaurav Kr. Roy Mr. Gaurav is a cybersecurity engineer, developer, researcher, and Book-Author who did his B.S.-Cybersecurity from EC-Council University & Masters from LPU. He is an India Book of Record holder, Guest speaker with 7+ years of experience in IT. Join the Discussion Your email address will not be published. Required fields are marked * Trending blog posts Suggested Blogs How to Become a Successful Full Stack Web Developer? By Nabendu Biswas by Nabendu Biswas 08 Jun 2021 29 mins read Full stack developer roles are among the hottest c. Read More How To Install and Setup React Native on Mac By Rajesh Bhagia /.bash_profile file or the /.zshrc file to add the environment variables:For .bash_profile users, use the following command:source /.bash_profileAfter configuration, restart the terminal, then execute the following command: adbThe correct result if all variables are successfully configured is:Android Debug Bridge Version 1.0.41 version 29.0.1-5644136 Installed as /Your Android SDK Directory Location/platform-tools/adbGit1.You can also use git, which comes with Xcode. However, if its unavailable, run the code below:brew install gitgit is a substitute for the Android Studio development environment.Gradle DaemonSometimes you may need to modify the java code, in which case, your development speed will be affected. Gradle Daemon is a tool that manages these changes to speed up your development.Other Installation MethodsExpo CLIExpo CLI is a tool built to install and manage react-native frameworks. However, its unsuitable feature is that it has numerous native features, which makes building an app tedious and also makes the app size more extensive than it needs to be. Additionally, incorporating elements in an app that are not available in Expo CLI is difficult, making the tool unsuitable for developers. Despite that, Expo CLI has many useful native tools, unlike React Native CLI, such as geolocation, camera, the microphone that can come in handy for most application needs. Expo CLI is a much easier route than the react-native CLI route.The installation process is as follows:1.Install the Expo CLI command line utility using:Npm install –g expo-cli2.Run the command below to create your first project:expo init my app3. Browse to the directory with the following command in the terminal:4. Finally, run the projectExpo start5. A development environment server will be started by these commands. Running the app requires installing the Expo client app to your device (iOS/Android) then connecting it to your computer. Android requires scanning the QR code on the terminal to authenticate the project, while iOS requires QR code scanning using the camera app. On the Android (emulator/real device), use the following command to initialize the app:npm run android6. While on the iOS emulator run:npm run iosExpo has docs that you can reference for solutions or even utilize the Expo Forums created for the Expo community to ask questions.Expo is mostly best suited for beginners as it does not include the use of native code thus cannot be used to develop complex applications with custom components.TestingProject structureReact Native project structure consists of a project directory with configuration files such as package.json, app.json, .watchman.json at the root; separate Android and iOS folders; a _tests_ folder with validation tests for the project; a nodes_module for housing smaller app modules; and an index.js file that maps the application and serves as the initialization point of the application. package.json specifies project dependencies and versions, while app.json contains the app name.The npm (node package manager) manages the node_modules folder, which stores all the project library dependencies. You should avoid modifying the files present in the folder since alterations performed cannot be assured to be stable from updates/installs. Assets in the public folder are to be shared publicly. The src folder contains all development work by the developer, including components and source codes.Developing an app1. First, you need to lock the version you build with to ensure the app still works even after updates, using the following command:npm config set save-exact=true2. Create a native project through the command:react-native init AwesomeProject cd AwesomeProject react-native run-iosYour new app will run successfully in the emulator.3. In iOS, execute the command below:cd SampleApp #react-native run ios npm run iosThe react-native app will show up on the emulator.4. On Android, run the following command:cd SampleApp #react-native run-android npm run androidYour Android emulator will output:Welcome to ReactSecond App VerificationHello World is a simple program for most development environments. Open index.ios.js for iOS or index.android.js for Android, then proceed to delete everything between the tags . Write Hello World and execute the emulator.The result will be Hello World on the screen.Modifying Your AppAfter successful testing, you can modify your app through the following steps:Open index.ios.js or index.android.js and edit some files.Click CommandX + R in the iOS Emulator and reload to see changes.Potential issuesYou might encounter problems while installing Cocoapods or React Native CLI — the most probable solution is entering a sudo command before the installation command, which will prompt you for your system password. Input the password, and your installation will go through just fine. You might also get this result [Broken AVD system path. Check your ANDROID_SDK_ROOT value]. Check if you installed android -sdk using homebrew; if you did, then uninstall it through the following command: brew uninstall android-sdk Another error is No ANDROID_HOME which means the bash files do not point to the ANDROID_HOME path. You can correct this through the following steps:Open and add the following code to the /.bash_profile file or the /.zshrc file to add the environment variables:#export ANDROID_HOME=$HOME/Library/Android/sdk export ANDROID_HOME=android SDK directory location/ Android/sdk export PATH=$PATH:$ANDROID_HOME/emulator export PATH=$PATH:ANDROID_HOME/tools export PATH=$PATH:$ANDROID_HOME/tools/bin export PATH=$PATH:$ANDROID_HOME/platform-toolsFor .bash_profile users, use the following command:source /.bash_profileThen proceed to verify the correction using the following code:echo $ANDROID_HOME // default: /Users//Library/Android/sdkAndroid Emulator won’t run from Android Virtual Device Manager – Android Studio rarely shows an error that may occur in the Android Device Emulator; thus, you need to utilize the command line and run the commands below to check the name of the Android virtual device:Avdmanager list avdThen runEmulator –avd Wait for the device to boot up, then run your app in the emulatorReact-native run-androidYour app should run successfully.No Connected devices- you should run the following commandReact-native run-androidWrong Android emulator – you need to find the right emulator using the following code:find — -name emulator –type f /Users//Library/Android/sdk/emulator // this /Users//Library/Android/sdk/tools/emulator // not thisRestart the terminal and verify the error is gone.Avdmanager not found- write /.bash_profile, then add the following code afterwards:PATH=$PATH:$ANDROID_HOME/tool s/bin export PATHthen runsource Источник
- Installing MongoDB
- Managing MongoDB Service
- Creating Aliases
- Conclusion
- Installing MongoDB on Mac (Catalina and non-Catalina)
- Preparations (Before MacOS Catalina)
- Preparations (MacOS Catalina onwards)
- Using MongoDB
- Starting MongoDB
- Checking if MongoDB is running
- The Mongo Shell
- Stopping MongoDB
- Aliases to make these easier
- What’s next?
- Install MongoDB Community Edition on macOS
- Overview
- MongoDB Version
- Considerations
- Platform Support
- Production Notes
- Install MongoDB Community Edition
- Prerequisites
- Install Xcode Command-Line Tools
- Install Homebrew
- Installing MongoDB 5.0 Community Edition
- Run MongoDB Community Edition
- Connect and Use MongoDB
- Using the MongoDB Database Tools
- Additional Information
- Localhost Binding by Default
- Troubleshooting ChecksumMismatchError
- How to Install MongoDB on a Mac
- What is NoSQL and why should we use NoSQL?
- Features of NoSQL
- Who should use MongoDB?
- Prerequisites
- Software Requirement:
- Hardware Requirement:
- Installation Steps
- Install using Brew –
- Uninstall MongoDB on macOS X –
- Gaurav Kr. Roy
- Join the Discussion
- Trending blog posts
- Suggested Blogs
- How to Become a Successful Full Stack Web Developer?
- By Nabendu Biswas
- How To Install and Setup React Native on Mac
- By Rajesh Bhagia
How to install MongoDB on macOS using Homebrew
December 06, 2020 • Atta
In an earlier article, I wrote about how to install the MongoDB community edition on Ubuntu operating system. Today, you’ll learn to install the MongoDB community edition on macOS Catalina and higher.
Creating Data Folder
Before you install and use MongoDB, you need to create a data/db folder on your computer for storing MongoDB data.
Before macOS Catalina, you can create this folder in the user’s root directory with the following command:
If you are on macOS Catalina or Big Sur (or any future release), you can not use the root folder for this purpose. macOS Catalina runs in a read-only system volume, separate from other files on the system.
Apple created a secondary volume on Catalina that you need to use for storing MongoDB data folder:
Installing MongoDB
You can install the MongoDB community edition with Homebrew. If Homebrew is not already installed, execute the following command first:
Now update Homebrew to the latest version:
Next, tap the MongoDB formulae into Homebrew:
Finally, execute the following command to install the MongoDB community edition:
That’s it. MongoDB is now installed on your macOS computer.
Managing MongoDB Service
To manage MongoDB on your macOS computer, you can use the brew services command.
First of all, install brew services by tapping homebrew/services :
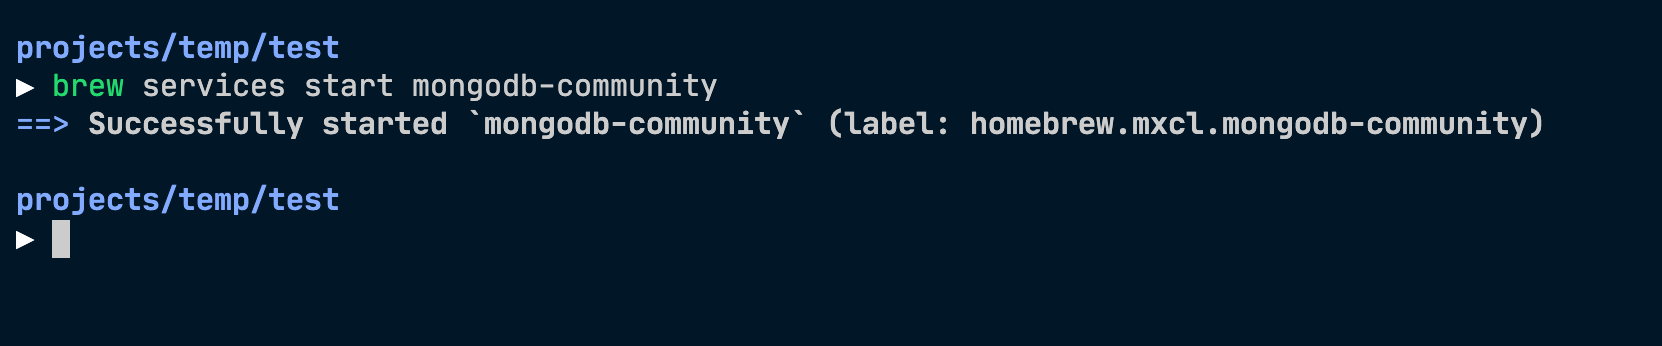
To start the MongoDB service, you use the following command:
The above command will start MongoDB as a background service. Here’s what you will see on the terminal:
Note: You can also use the run command instead of start . The start command will configure MongoDB to automatically start when you log into your Macbook. If you do not want to run MongoDB all the time, use the run command instead.
To check the current status of the MongoDB service, issue the following command:
The above command will output something like below:
You can stop the service anytime by typing:
If you want to restart the service, use the following command:
Creating Aliases
To make your life easier, you can also create aliases for managing MongoDB service. Just add the following to
Next source the
/.zshrc file to load aliases:
Now you can use aliases to manage your MongoDB service:
Conclusion
That’s all folks for today. In this article, we learned how to install the MongoDB community edition on macOS Catalina and higher.
We use the Homebrew package manager to install MongoDB binaries and to manage MongoDB service.
If you enjoy reading this article, don’t forget to share it with your friends and followers.
✌️ Like this article? Follow me on Twitter and LinkedIn. You can also subscribe to RSS Feed.
Источник
Installing MongoDB on Mac (Catalina and non-Catalina)
I had to reconfigure my Macbook after sending it for repairs. During the reconfiguration period, I noticed the instructions I linked to in “Setting up a local MongoDB connection” were outdated.
Here’s an updated version on how to install MongoDB on a Mac.
There are a few steps:
First, you install Homebrew. If you’re curious about what Homebrew is, read this article.
Second, find the MongoDB tap.
Third, install MongoDB.
MongoDB is now installed on your computer.
Preparations (Before MacOS Catalina)
Before you can use MongoDB, you need to create a /data/db folder on your computer to use MongoDB. You can create this folder with the following command:
You also need to give permissions to use it:
Now you can follow the rest of the article to set up your MongoDB connection.
Preparations (MacOS Catalina onwards)
Apple created a new Volume in Catalina for security purposes. If you’re on Catalina, you need to create the /data/db folder in System/Volumes/Data .
Use this command:
Then, use this command to give permissions:
Using MongoDB
In the past, I can run the mongod command to start MongoDB. This no longer works out for the box from MongoDB v4.2.3 onwards.
The best way to start MongoDB now is via brew services .
Starting MongoDB
Use this command:
MongoDB will start as a background service. Here’s what you’ll see:
You can use start instead of run . start will start MongoDB automatically when you login into your Macbook. I prefer run since I don’t want MongoDB to be running all the time.
Checking if MongoDB is running
Use this command:
Homebrew will list all running services. If MongoDB is running, mongodb-community will have a status set to started .

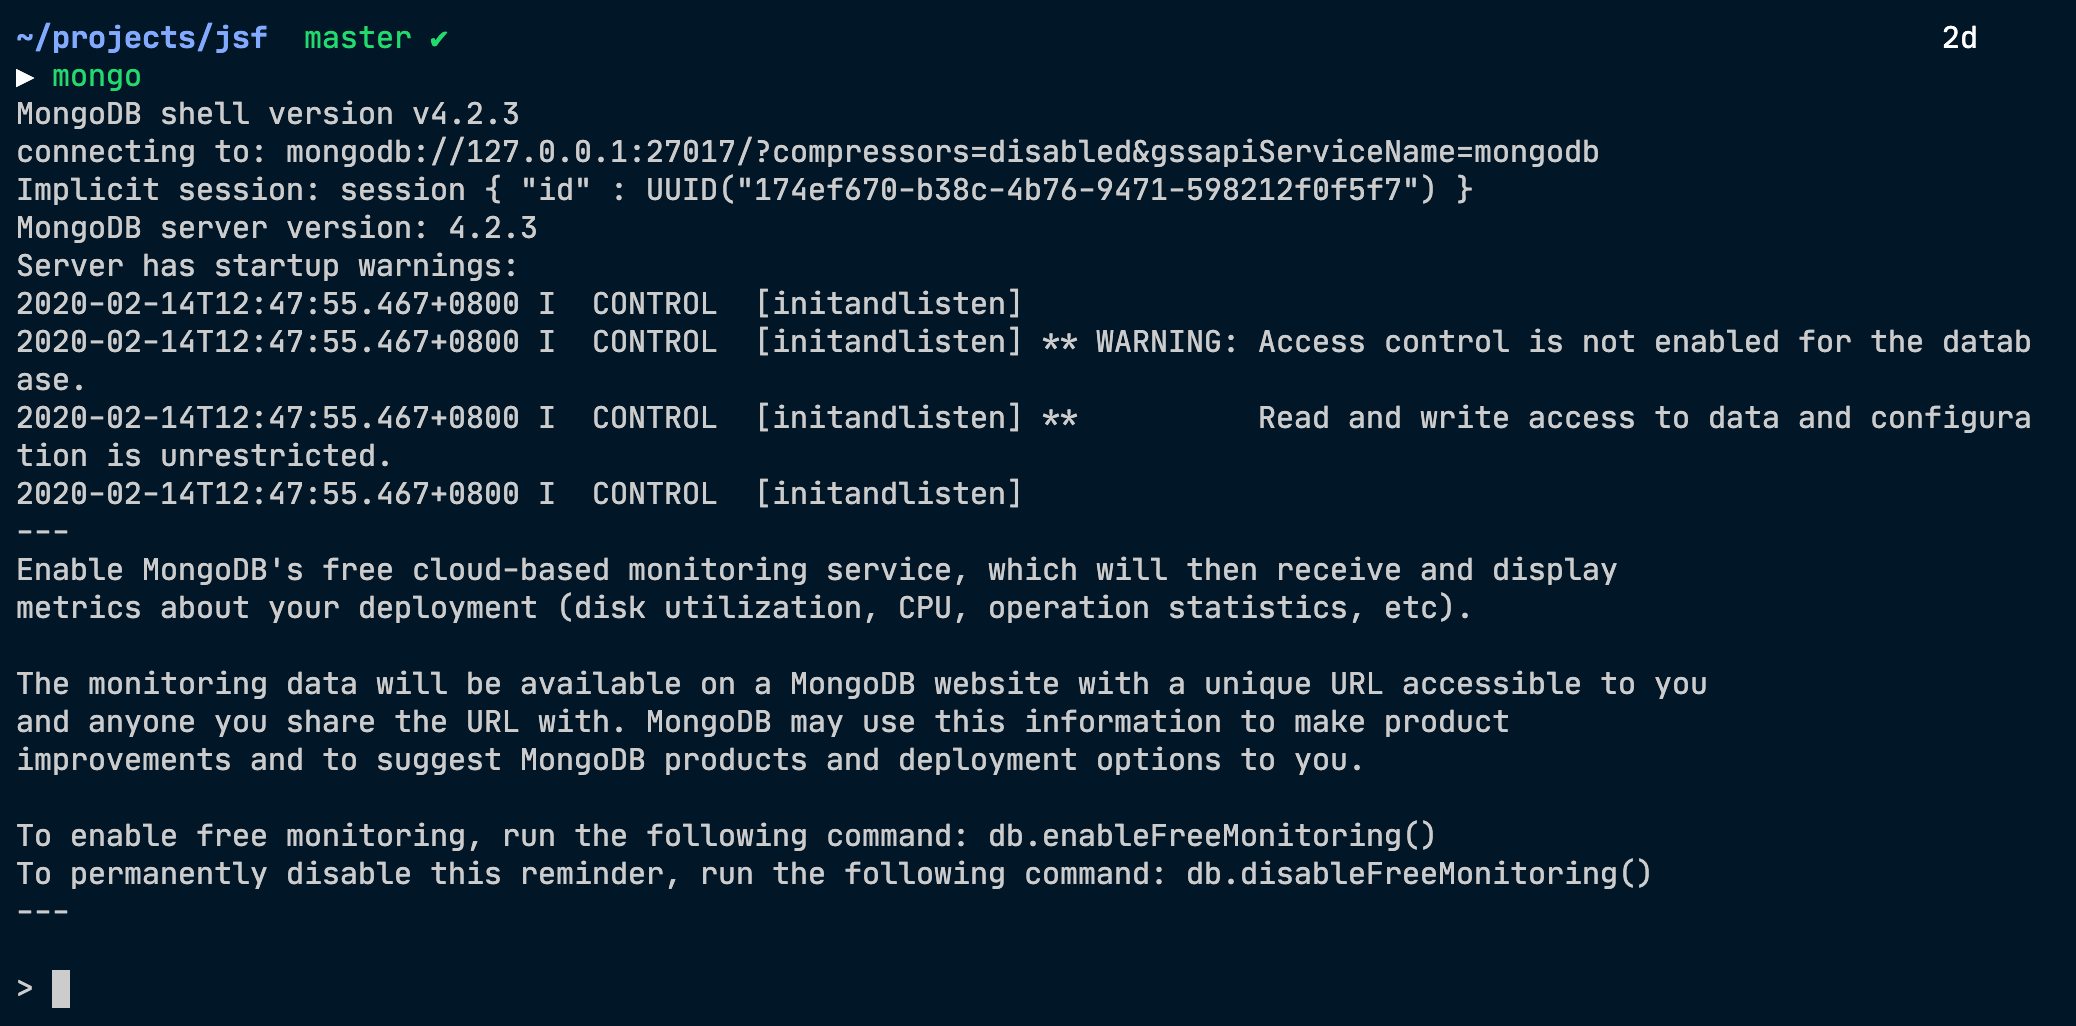
The Mongo Shell
If MongoDB is running, you should be able to access the Mongo shell with the mongo command.
Stopping MongoDB
Use this command:
Homebrew will stop MongoDB and let you know.

Aliases to make these easier
It’s a chore typing brew services run mongodb-community every time I want to start MongoDB.
I created some aliases to make things easier for me. Here are my aliases:
What’s next?
If you haven’t already, you should learn how to set up a local MongoDB connection.
If you enjoyed this article, please tell a friend about it! Share it on Twitter. If you spot a typo, I’d appreciate if you can correct it on GitHub. Thank you!
Источник
Install MongoDB Community Edition on macOS
MongoDB Atlas is a hosted MongoDB service option in the cloud which requires no installation overhead and offers a free tier to get started.
Overview
Use this tutorial to install MongoDB 5.0 Community Edition on macOS using the third-party Homebrew package manager.
Starting with MongoDB 4.4.1, installing MongoDB via Homebrew also installs the MongoDB Database Tools. See Using the MongoDB Database Tools for more information.
MongoDB Version
This tutorial installs MongoDB 5.0 Community Edition. To install a different version of MongoDB Community , use the version drop-down menu in the upper-left corner of this page to select the documentation for that version.
Considerations
Platform Support
- MongoDB 5.0 Community Edition removes support for macOS 10.13
MongoDB 5.0 Community Edition supports macOS 10.14 or later.
See Supported Platforms for more information.
Production Notes
Before deploying MongoDB in a production environment, consider the Production Notes document which offers performance considerations and configuration recommendations for production MongoDB deployments.
Install MongoDB Community Edition
Prerequisites
Ensure your system meets each of the following prerequisites. You only need to perform each prerequisite step once on your system. If you have already performed the prerequisite steps as part of an earlier MongoDB installation using Homebrew, you can skip to the installation procedure.
Install Xcode Command-Line Tools
Homebrew requires the Xcode command-line tools from Apple’s Xcode.
Install the Xcode command-line tools by running the following command in your macOS Terminal:
Install Homebrew
macOS does not include the Homebrew brew package by default.
Installing MongoDB 5.0 Community Edition
Follow these steps to install MongoDB Community Edition using Homebrew’s brew package manager. Be sure that you have followed the installation prerequisites above before proceeding.
Tap the MongoDB Homebrew Tap to download the official Homebrew formula for MongoDB and the Database Tools, by running the following command in your macOS Terminal:
If you have already done this for a previous installation of MongoDB, you can skip this step.
To install MongoDB, run the following command in your macOS Terminal application:
Alternatively, you can specify a previous version of MongoDB if desired. You can also maintain multiple versions of MongoDB side by side in this manner.
If you have previously installed an older version of the formula, you may encounter a ChecksumMismatchError. To resolve, see Troubleshooting ChecksumMismatchError.
The installation includes the following binaries:
- The mongod server
- The mongos sharded cluster query router
- The MongoDB Shell, mongosh
In addition, the installation creates the following files and directories at the location specified below, depending on your Apple hardware:
See Apple’s documentation for the current list of Apple hardware using the M1 processor. You can also run the following command to check where brew has installed these files and directories:
Starting with MongoDB 4.4.1, the installation also includes the MongoDB Database Tools. See Using the MongoDB Database Tools for more information.
Run MongoDB Community Edition
Follow these steps to run MongoDB Community Edition. These instructions assume that you are using the default settings.
You can run MongoDB as a macOS service using brew , or you can run MongoDB manually as a background process. It is recommended to run MongoDB as a macOS service, as doing so sets the correct system ulimit values automatically (see ulimit settings for more information).
To run MongoDB (i.e. the mongod process) as a macOS service, run:
To stop a mongod running as a macOS service, use the following command as needed:
To run MongoDB (i.e. the mongod process) manually as a background process, run:
For macOS running Intel processors:
To stop a mongod running as a background process, connect to the mongod using mongosh, and issue the shutdown command as needed.
Both methods use the mongod.conf file created during the install. You can add your own MongoDB configuration options to this file as well.
macOS may prevent mongod from running after installation. If you receive a security error when starting mongod indicating that the developer could not be identified or verified, do the following to grant mongod access to run:
- Open System Preferences
- Select the Security and Privacy pane.
- Under the General tab, click the button to the right of the message about mongod , labelled either Open Anyway or Allow Anyway depending on your version of macOS.
To verify that MongoDB is running, perform one of the following:
If you started MongoDB as a macOS service:
You should see the service mongodb-community listed as started .
If you started MongoDB manually as a background process:
You should see your mongod process in the output.
You can also view the log file to see the current status of your mongod process: /usr/local/var/log/mongodb/mongo.log .
Connect and Use MongoDB
To begin using MongoDB, connect mongosh to the running instance. From a new terminal, issue the following:
macOS may prevent mongosh from running after installation. If you receive a security error when starting mongosh indicating that the developer could not be identified or verified, do the following to grant mongosh access to run:
- Open System Preferences
- Select the Security and Privacy pane.
- Under the General tab, click the button to the right of the message about mongosh , labelled either Open Anyway or Allow Anyway depending on your version of macOS.
For information on CRUD (Create,Read,Update,Delete) operations, see:
Using the MongoDB Database Tools
Starting in MongoDB 4.4.1, installing MongoDB via brew also installs the MongoDB Database Tools.
The MongoDB Database Tools are a collection of command-line utilities for working with a MongoDB deployment, including data backup and import/export tools like mongoimport and mongodump as well as monitoring tools like mongotop .
Once you have installed the MongoDB Server in the steps above, the Database Tools are available directly from the command line in your macOS Terminal application. For example you could run mongotop against your running MongoDB instance by invoking it in your macOS Terminal like so:
It should start up, connect to your running mongod , and start reporting usage statistics.
See the MongoDB Database Tools Documentation for usage information for each of the Database Tools.
Additional Information
Localhost Binding by Default
By default, MongoDB launches with bindIp set to 127.0.0.1 , which binds to the localhost network interface. This means that the mongod can only accept connections from clients that are running on the same machine. Remote clients will not be able to connect to the mongod , and the mongod will not be able to initialize a replica set unless this value is set to a valid network interface.
This value can be configured either:
- in the MongoDB configuration file with bindIp , or
- via the command-line argument —bind_ip
Before binding to a non-localhost (e.g. publicly accessible) IP address, ensure you have secured your cluster from unauthorized access. For a complete list of security recommendations, see Security Checklist. At minimum, consider enabling authentication and hardening network infrastructure.
For more information on configuring bindIp , see IP Binding.
Troubleshooting ChecksumMismatchError
If you have previously installed an older version of the formula, you may encounter a ChecksumMismatchError resembling the following:
- Remove the downloaded .tgz archive.
Источник
How to Install MongoDB on a Mac

MongoDB is one of the most popular unstructured database management systems that can store a high volume of data. It is a document-oriented database system that belongs to the family of NoSQL (non-SQL). Here the data and records are stored as documents that behave more like JSON objects. Documents are a combination of key-value pairs that form the basic unit of data in MongoDB. This database system came into action in mid-2000.
What is NoSQL and why should we use NoSQL?
NoSQL stands for Not Only SQL or non-SQL and is an unstructured database that helps store and retrieve data. In the year 1998, Carl Strozz introduced NoSQL. It models the data by means other than the tabular relations. It means such databases do not have a fixed schema, but are intended explicitly for the distributed data that demands humongous data storage. We use NoSQL databases for real-time web apps, mobile apps, big data, etc. Websites like Google, Twitter, Amazon, Facebook, Instagram, etc., collect terabytes of data every day.
Earlier, web applications were simple and did not generate such huge amounts of data. But with the advent of big companies like Facebook, Google, Amazon, etc., huge volumes of data are generated, because of which NoSQL databases have become popular. Traditional RDBMS (like SQL) uses simple queries to store and retrieve textual data. But NoSQL database management systems embrace a wide range of file systems storing structured, unstructured, semi-structured, and polymorphic data.
Features of NoSQL
- NoSQL databases do not follow the relational model.
- They are schema-free, or they do not follow any specific schema.
- NoSQL renders heterogeneous data structures (graph, tree, column family, key-value pair, document, etc.) on the same domain.
- Data is not stored flat in rows and columns (table).
- NoSQL does not demand data normalization and object-relational mapping.
- NoSQL does not demand setting up complex concepts like joins, referential integrity, ACID properties, etc.
Who should use MongoDB?
Developers who want to deal with structured, semi-structured, or unstructured data need to use MongoDB for their applications. Those who are into Big data analysis can also use MongoDB. Again, if an application’s data needs agility, scaling, and high performance, MongoDB is the best solution.
It supports a broad spectrum of use cases , from real-time exploratory and predictive analytics to parallel data processing. MongoDB can provide high-performance data storage even when spread across multiple servers.
Prerequisites
Software Requirement:
- macOS 10.13 or later
- MongoDB 4.4 Community Edition (we will show the download procedure later)
- Install Xcode Command-Line Tools: Homebrew demands to install the Xcode command-line tool from Apple’s Xcode before using it. To install Xcode, you have to run the following command in your macOS Terminal:
- xcode-select —install
- Homebrew package manager: By default, macOS does not incorporate the Homebrew package. You can install Homebrew using the documentation given on their official website (https://brew.sh/#install).
Hardware Requirement:
- Intel Processor / Apple M1 Processor
- 4 GB RAM preferred
Installation Steps
Install Manually without Brew
Step 1: Let us now download MongoDB. For this, open your web browser and type: google.com
Step 2: From Google search, type: MongoDB and hopefully, the first link the search throws up would be the MongoDB link. From here, we have two ways of installing MongoDB. Follow these steps to install using the macOS terminal.
Step 3: Go to mongodb-community Select the version, platform, and package. Make sure you choose macOS as the platform and ‘tgz’ as the file format and click the download button.
Step 4: Once the tgz file gets downloaded, go to the macOS terminal to extract it.
Step 5: Mostly, your MongoDB will get downloaded in the Downloads folder. For this, type the following command in the terminal:
Step 6: Now, we have to move the MongoDB folder to our local binary storage.
- This will ask for your system password. Provide the password.
- You can change the directory to /usr/local/mongodb and see whether all the files exist or not using the ls command. Note that this step is optional. To change the directory, type the command
Next, you have to create the db folder. By default, MongoDB writes or stores the data in the folder called data/db. The command for this will be
The -p flag will allow us to create the directory structure. Now, to check whether this path and directory have been created or not, we use the command:
- To check whether we are on the right directory or not, just type the command:pwd
- For changing the permission, you need to know your username first. To know your username, type the command:whoami
Now change the permission of this directory. To do this, the command is: sudo chown /data/db
- Finally, you are eligible to directly run the mongo process.
Install using Brew –
If you want to install MongoDB through Homebrew manually, follow these steps –
Step 1: Homebrew helps in installing and managing applications on MacOS. If you haven’t downloaded or installed Homebrew, then click the link (https://github.com/mongodb/homebrew-brew) to download the official Homebrew formula for MongoDB, by running the command in your macOS Terminal:
Step 2: Once the Homebrew package resides in your system, you can download MongoDB using brew.
Step 3: Type the following command in your macOS Terminal:
Step 4: This installation will add the following binaries:
- The mongod server
- The mongo shell
- The mongos sharded cluster query router
Step 5: The installation will take a few seconds. Once done, you can create a directory to store MongoDB data using the following command.
Step 6: Now, you have to note that your data directory should have the appropriate permissions. To do this, execute the command:
Step 7: This will ensure that the data directory is ready and has all the proper permissions.
Step 8: Apart from that, the MongoDB installation will produce the following files and directories at the locations given below –
| Intel Processors | Apple M1 | |
|---|---|---|
| Log directory | /usr/local/var/log/mongodb | /opt/homebrew/var/log/mongodb |
| Configuration file | /usr/local/etc/mongod.conf | /opt/homebrew/etc/mongod.conf |
| Data directory | /usr/local/var/mongodb | /opt/homebrew/var/mongodb |
Step 9: Let us now run the MongoDB community Edition. You can use the brew command to run MongoDB as a macOS. A manual procedure is needed to run MongoDB services on macOS. To execute MongoDB daemon, which resides by the name mongod (process), use the following command:
brew services start mongodb-community
macOS will run this process as a macOS service.
Step 10: For stopping a mongod process running as a macOS service, apply the following command:
Step 11: For running MongoDB in the background manually and listening for connections on a given port, use the following command —
For Mac systems with Intel processors: mongod —config /usr/local/etc/mongod.conf —fork
For Mac systems with Apple M1 processors: mongod —config /opt/homebrew/etc/mongod.conf –fork
Step 12: Next, verify your MongoDB version. To do this, type the following command: mongo –version
Step 13: The command line will display the installed version of MongoDB on your Mac system. Developers recommend using the newest version of libraries and software whenever feasible. It will keep you away from any compatibility issues with client-side applications.
Step14: You can view the installation list by typing the command: mongodb
Step15: Use the command mongod —config /usr/local/etc/mongod.conf to start the MongoDB
Step 16: To connect to mongodb service, type the command: mongo
Step17: Use the ‘ show dbs’ command to see all databases.
You can learn more about the working of MongoDB and become an expert NoSQL database administrator by joining the course mongodb-administrator . This course covers features of MongoDB 4.0 and future releases.
Uninstall MongoDB on macOS X –
Uninstalling MongoDB from your system will entirely remove MongoDB along with its associated files.
- Before uninstalling MongoDB, check whether any mongo service is running by using the command:launchctl list | grep mongo
- If any running process exists before uninstallation, you should stop or kill it. To kill all the processes related to mongod , use the command:pkill -f mongod
- The command to uninstall MongoDB from your system is:
- If installed via brew:brew uninstall mongodb-community
- Or, if installed manually you can simply delete the folder: rm -rf
- If you have a separate folder for the database, use the command to remove that database directory:rm -rf /data/db
MongoDB is the leading NoSQL, document-based, open-source database system. It is a cross-platform system — licensed under the Server-Side Public License (SSPL). Due to its broad spectrum of features and benefits, it became popular very quickly. Hopefully, this article has helped you understand the basics of installing MongoDB in your Apple system.
In this article, we have walked you through the two ways to install MongoDB in a macOS. Also, this article explicitly talked about installing MongoDB in Apple systems with Intel processors and with Apple M1 processors. So, you can navigate this article as per your system. You can learn more about MongoDB installation and join the course from mongodb-administrator .

Gaurav Kr. Roy
Mr. Gaurav is a cybersecurity engineer, developer, researcher, and Book-Author who did his B.S.-Cybersecurity from EC-Council University & Masters from LPU. He is an India Book of Record holder, Guest speaker with 7+ years of experience in IT.
Join the Discussion
Your email address will not be published. Required fields are marked *
Trending blog posts
Suggested Blogs
How to Become a Successful Full Stack Web Developer?
By Nabendu Biswas
- by Nabendu Biswas
- 08 Jun 2021
- 29 mins read
Full stack developer roles are among the hottest c. Read More
How To Install and Setup React Native on Mac
By Rajesh Bhagia
/.bash_profile file or the
/.zshrc file to add the environment variables:For .bash_profile users, use the following command:source
/.bash_profileAfter configuration, restart the terminal, then execute the following command: adbThe correct result if all variables are successfully configured is:Android Debug Bridge Version 1.0.41 version 29.0.1-5644136 Installed as /Your Android SDK Directory Location/platform-tools/adbGit1.You can also use git, which comes with Xcode. However, if its unavailable, run the code below:brew install gitgit is a substitute for the Android Studio development environment.Gradle DaemonSometimes you may need to modify the java code, in which case, your development speed will be affected. Gradle Daemon is a tool that manages these changes to speed up your development.Other Installation MethodsExpo CLIExpo CLI is a tool built to install and manage react-native frameworks. However, its unsuitable feature is that it has numerous native features, which makes building an app tedious and also makes the app size more extensive than it needs to be. Additionally, incorporating elements in an app that are not available in Expo CLI is difficult, making the tool unsuitable for developers. Despite that, Expo CLI has many useful native tools, unlike React Native CLI, such as geolocation, camera, the microphone that can come in handy for most application needs. Expo CLI is a much easier route than the react-native CLI route.The installation process is as follows:1.Install the Expo CLI command line utility using:Npm install –g expo-cli2.Run the command below to create your first project:expo init my app3. Browse to the directory with the following command in the terminal:4. Finally, run the projectExpo start5. A development environment server will be started by these commands. Running the app requires installing the Expo client app to your device (iOS/Android) then connecting it to your computer. Android requires scanning the QR code on the terminal to authenticate the project, while iOS requires QR code scanning using the camera app. On the Android (emulator/real device), use the following command to initialize the app:npm run android6. While on the iOS emulator run:npm run iosExpo has docs that you can reference for solutions or even utilize the Expo Forums created for the Expo community to ask questions.Expo is mostly best suited for beginners as it does not include the use of native code thus cannot be used to develop complex applications with custom components.TestingProject structureReact Native project structure consists of a project directory with configuration files such as package.json, app.json, .watchman.json at the root; separate Android and iOS folders; a _tests_ folder with validation tests for the project; a nodes_module for housing smaller app modules; and an index.js file that maps the application and serves as the initialization point of the application. package.json specifies project dependencies and versions, while app.json contains the app name.The npm (node package manager) manages the node_modules folder, which stores all the project library dependencies. You should avoid modifying the files present in the folder since alterations performed cannot be assured to be stable from updates/installs. Assets in the public folder are to be shared publicly. The src folder contains all development work by the developer, including components and source codes.Developing an app1. First, you need to lock the version you build with to ensure the app still works even after updates, using the following command:npm config set save-exact=true2. Create a native project through the command:react-native init AwesomeProject cd AwesomeProject react-native run-iosYour new app will run successfully in the emulator.3. In iOS, execute the command below:cd SampleApp #react-native run ios npm run iosThe react-native app will show up on the emulator.4. On Android, run the following command:cd SampleApp #react-native run-android npm run androidYour Android emulator will output:Welcome to ReactSecond App VerificationHello World is a simple program for most development environments. Open index.ios.js for iOS or index.android.js for Android, then proceed to delete everything between the tags . Write Hello World and execute the emulator.The result will be Hello World on the screen.Modifying Your AppAfter successful testing, you can modify your app through the following steps:Open index.ios.js or index.android.js and edit some files.Click CommandX + R in the iOS Emulator and reload to see changes.Potential issuesYou might encounter problems while installing Cocoapods or React Native CLI — the most probable solution is entering a sudo command before the installation command, which will prompt you for your system password. Input the password, and your installation will go through just fine. You might also get this result [Broken AVD system path. Check your ANDROID_SDK_ROOT value]. Check if you installed android -sdk using homebrew; if you did, then uninstall it through the following command: brew uninstall android-sdk Another error is No ANDROID_HOME which means the bash files do not point to the ANDROID_HOME path. You can correct this through the following steps:Open and add the following code to the
/.bash_profile file or the
/.zshrc file to add the environment variables:#export ANDROID_HOME=$HOME/Library/Android/sdk export ANDROID_HOME=android SDK directory location/ Android/sdk export PATH=$PATH:$ANDROID_HOME/emulator export PATH=$PATH:ANDROID_HOME/tools export PATH=$PATH:$ANDROID_HOME/tools/bin export PATH=$PATH:$ANDROID_HOME/platform-toolsFor .bash_profile users, use the following command:source
/.bash_profileThen proceed to verify the correction using the following code:echo $ANDROID_HOME // default: /Users//Library/Android/sdkAndroid Emulator won’t run from Android Virtual Device Manager – Android Studio rarely shows an error that may occur in the Android Device Emulator; thus, you need to utilize the command line and run the commands below to check the name of the Android virtual device:Avdmanager list avdThen runEmulator –avd Wait for the device to boot up, then run your app in the emulatorReact-native run-androidYour app should run successfully.No Connected devices- you should run the following commandReact-native run-androidWrong Android emulator – you need to find the right emulator using the following code:find — -name emulator –type f /Users//Library/Android/sdk/emulator // this /Users//Library/Android/sdk/tools/emulator // not thisRestart the terminal and verify the error is gone.Avdmanager not found- write
/.bash_profile, then add the following code afterwards:PATH=$PATH:$ANDROID_HOME/tool s/bin export PATHthen runsource
Источник


