- Монтирование iso, nrg, mdf, bin, img образов в Linux
- Монтирование образов дисков
- Содержание
- Подключение стандартного ISO-образа
- Используя графический интерфейс
- Как устанавливать bin файлы в Linux
- Установка bin файлов в Linux
- Консольный вариант
- Графический вариант
- Ubuntu Documentation
- Introduction
- Mounting ISO Files
- Manipulating Other Formats
- CloneCD/IMG Images
- CUE/BIN Images
- MDF Images
- NRG Images
- DMG Images
- Installation
- To Convert to IMG
- To Mount
- Creating the ISO
- Disc Image Integration for Nautilus
- Archive Mounter
- See Also
- Going GNU
- My experiences with Free Open Source Software
- HowTo: Mount Bin/Cue files in Linux
- Rate this:
- Share this:
- Like this:
- Related
- 24 thoughts on “ HowTo: Mount Bin/Cue files in Linux ”
Монтирование iso, nrg, mdf, bin, img образов в Linux
Дата добавления: 21 мая 2010
-Эти команды смотрируют образ имя_образа в каталог /mnt/ (стандартный каталог для примонтированных устройств).
Для просмотра и работы с содержимом можно использовать команду:
cd /mnt && ls
Или зайти в коренная папка -> mnt через графический файловый менеджер. Также в качестве последнего аргумента команды mount можно указать свой путь для монтирования.
Монтируем nrg
Если у вас образ nrg, то рекомендую переконвертировать его в iso и смонтировать способом для iso, либо воспользоваться утилитой AcetoneISO.
Для переконвертирования в iso необходимо установить пакет (должен присутствовать в репозитории) nrg2iso .
После этого можно использовать эту утилиту в терминале:
nrg2iso имя_образа.nrg имя_переконвертированного_образа.iso
AcetoneISO — монтирование практически всех образов через графический интерфейс.
AcetoneISO предоставляет графический интерфейс для монтирования или создания образов.
Для получения программы установите пакет acetoneiso .
Программа проста в работе и не требует пояснений.
С ее помощью можно монтировать ISO BIN NRG MDF IMG.
Gmountiso
Также есть более легковесная утилита gmountiso которая позволяет монтировать iso образы через графический интерфейс.
P.S AcetoneISO на Qt; Gmountiso на GTK.
Автор: Sveolon, дата: 29 мая 2010 , время: 09:23:01 (MSK).
nrg можно смонтировать или сконвертить в iso безо всяких утилит.
mount -t udf,iso9660 -o loop,ro,offset=307200 file.nrg /каталог/монтирования
dd if=[твой .nrg образ] of=[выходной .iso образ] skip=307200 bs=1
Автор: mi, дата: 03 июня 2017 , время: 17:55:15 (MSK).
Чему вы учите людей? Бездумному тупому запоминанию никому непонятных символов?
что значит «-о», что значит «-t» может как-то будете разъяснять что это, что бы люди ронимали что это и зачем?
Источник
Монтирование образов дисков
Содержание
Подключение стандартного ISO-образа
Используя графический интерфейс
Для монтирования образов дисков в Gnome имеется множество графических утилит:
ISOmorphin — программа написанная на языке Python. Для работы необходимо закачать и распаковать архив в любое удобное место, а затем запустить файл isomorphin.py в папке.
Gmount-iso — Маленькая и довольно удобная программка, позволяющая монтировать ISO образы в произвольную папку, а также отмонтировать уже подключённые образы. Добавлена возможность расчета md5 суммы и объема образа. Интерфейс программы прост до безобразия и в пояснениях не нуждается.  Для установки используйте команду:
Данная программа будет доступна в меню: Приложения→Системные→gISOMountUsage.
Furius ISO Mount — автоматически создает точку монтирования в домашней папке пользователя и удаляет ее при размонтировании, позволяет записывать образы в форматах ISO и IMG. А так же рассчитывать контрольные суммы Md5 и SHA1. 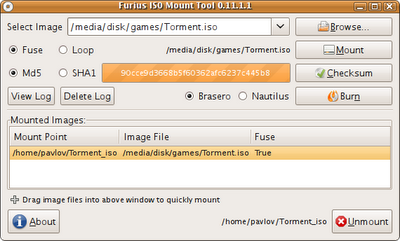
AcetoneISO — графическое приложение, написанное на Qt, для работы с образами CD/DVD дисков (клон Daemon Tools для Linux с новыми возможностями). На сайте заявлены следующие возможности:
Источник
Как устанавливать bin файлы в Linux
Не смотря, на то, что большинство программ в операционной системе Linux (в моем случае Ubuntu) можно установить из Центра приложений, тем самым обеспечивая совместимость с системой, иногда вам может понадобится установить новую версию программы или наоборот, старую, которой может не оказаться в списке.
Такие программы чаще всего распространяются, в формате .bin также известные как бинарные файлы. Бывает, что они запакованы в архив, а иногда как исполняемые файлы. Установка bin linux, может быть произведена через терминал либо же через графический интерфейс. Рассмотрим оба варианта.
Установка bin файлов в Linux
Консольный вариант
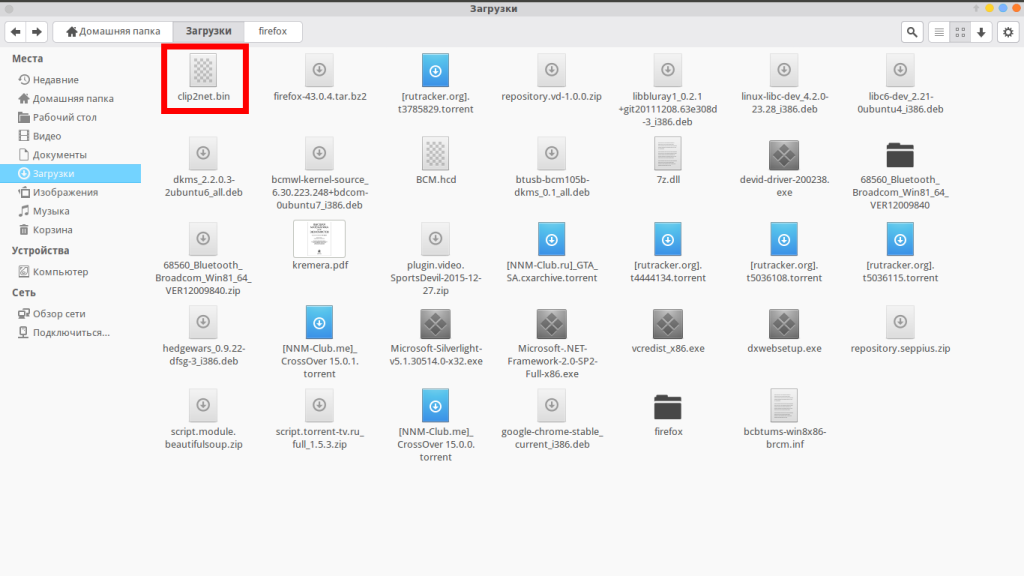
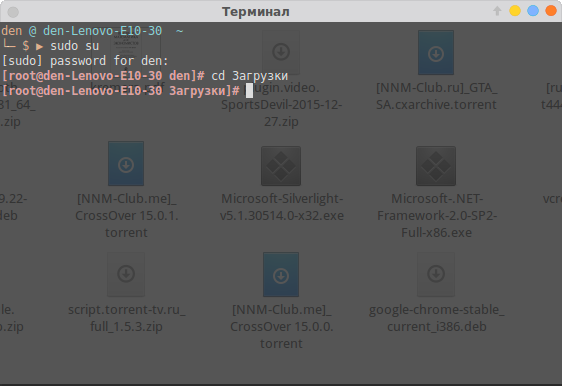
1. Для начала в файловом менеджере, нужно найти наш бинарник.
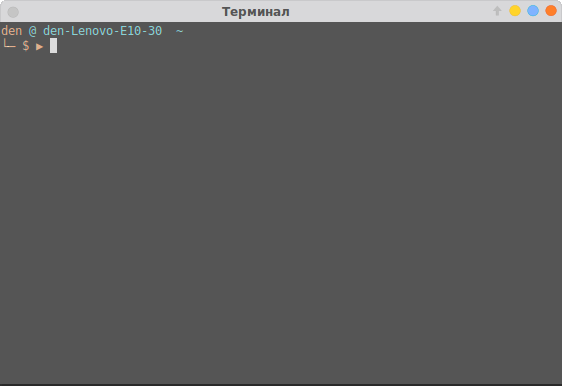
2. Откроем терминал, сочетанием клавиш Ctrl+Alt+T.
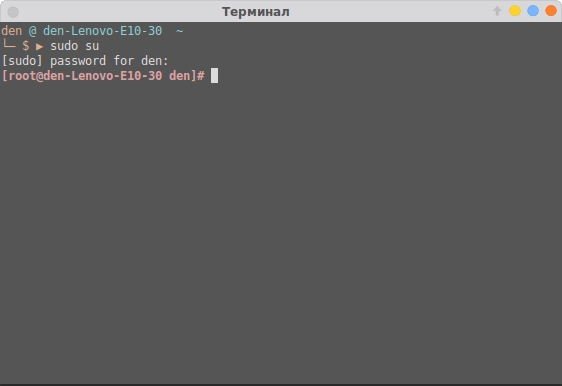
3. Зайдем в режим суперпользователя (под рутом). Для этого введем следующую команду в терминале:
Затем нужно ввести пароль.
4. Теперь, в терминале нам нужно зайти в ту директорию, где расположен наш бинарник. В моем случае это будет так:
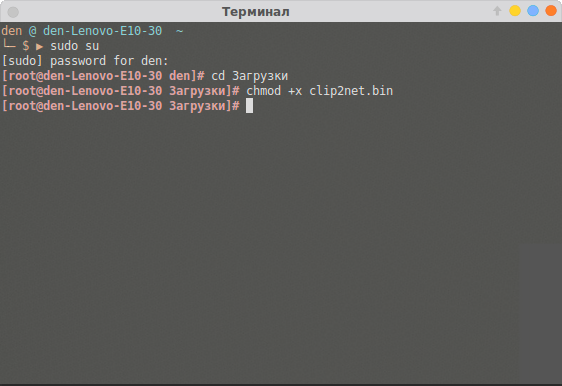
5. Дайте права на выполнение файла .bin, командой:
chmod +x thefile.bin
В моем случае это выглядит так:
chmod +x clip2net.bin
6. Теперь выполните его. Для этого находясь уже в той директории, где находится бинарный файл введем точку и слэш, затем имя файла. В случае со мной это выглядит так:
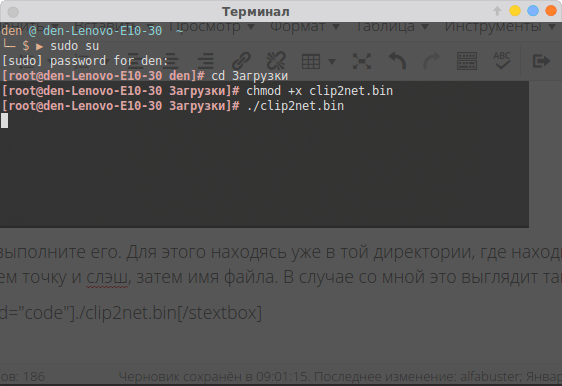
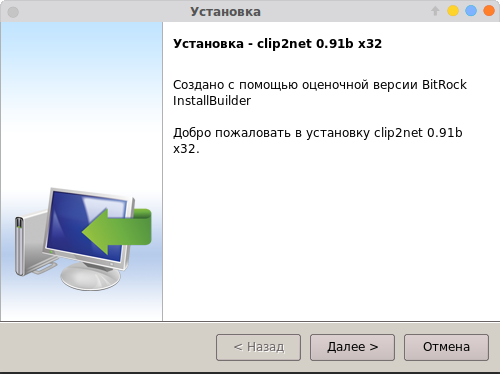
7. После этой команды, установщик программы запустился и спрашивает меня на каком языке я хотел бы установить bin файл в linux.
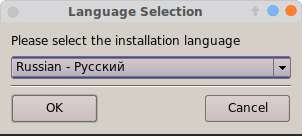
8. Далее устанавливаем программу как обычно это делается в ОС Windows.
Графический вариант
Он ненамного проще, но для новичков, которые недавно перешли с Windows будет понятнее. Первые 3 пункта из консольного варианта все же придется выполнить. Затем нужно выбрать файл, нажать правой кнопкой мыши, выбрать пункт «свойства». На вкладке права, нужно поставить галочку напротив пункта «Разрешить выполнение файла как программы».
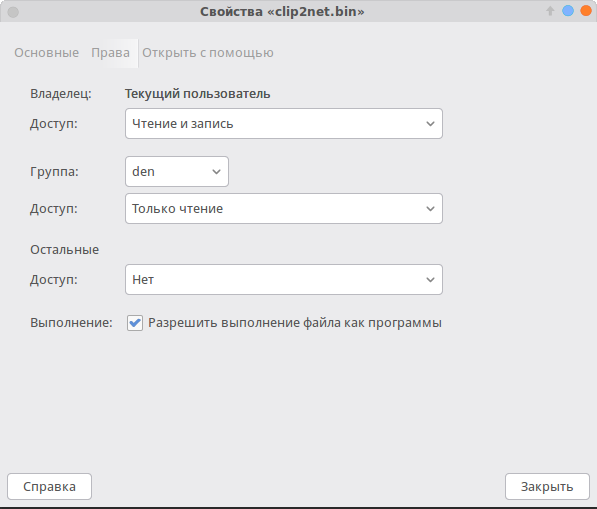
Закрываем окно. И перетаскиваем этот файл в терминал, запущенный от суперпользователя, имя файла и путь уже впишутся автоматически, остается лишь нажать на кнопку «Enter». Далее, вы можете установить bin файл, как и в первом варианте. На этом все.
Источник
Ubuntu Documentation
Introduction
For an introductory explanation of ISO images, instructions for creating and also burning them see IsoImage.
Mounting ISO Files
For instructions on how to mount an ISO, see MountIso.
Manipulating Other Formats
There are many other formats of archives that have been created over the years for numerous reasons. To mount them, it is usually necessary to convert them to ISO and then use your preferred means. Unless otherwise specified, these programs are available in the Universe repository and can be installed by numerous means. For convenience apturl links have been made, click the package names and they will install as long as the protocol is supported. None of these programs are installed by default.
The following exclusively deals with the command line.
CloneCD/IMG Images
This category covers images created primarily by CloneCD. There are usually several files: a IMG (.img) archive of the dics content, the SUB (.sub) file containing subchannel data and the CCD (.ccd) text descriptor a file used only by CloneCD for storing information about an image. The IMG file is the primary container of data, and as such the only one required for conversion with ccd2iso and mounting.
To Convert
To Mount
CUE/BIN Images
CUE/BIN (.cue/.bin) files must be converted to be of use. This can be done using the program bchunk. To use the program, it is necessary to note the path of both the bin and cue files, then the output file.
To Convert
MDF Images
MDF (.mdf) files are primarily created by Alcohol 120%. These can either be converted to ISO using mdf2iso or mounted directly.
To Convert
To Mount
NRG Images
Nero image (.nrg) files can either be converted to ISO using nrg2iso or can be mounted directly.
To Convert
To Mount
DMG Images
DMG (.dmg) images are primarily used by Apple, conversion of these files will allow data to be accessed. It will not allow the running of OSX programs on Linux without considerable effort not outlined in this guide. The following process will first convert to IMG and then to ISO, you may however stop at the first step if you wish and mount or burn.
Installation
For instructions on installation, see DMG2IMG.
To Convert to IMG
The following command will convert the example file from DMG to IMG.
Do NOT follow the instructions for mounting the file at the end of the conversion. It is not advisable to mount to the /mnt directory.
To Mount
As always a directory will be created in /media, the next step will ensure hfsplus support is available, lastly the IMG file mounted to the directory.
At this point, the image is available for browsing under the /media/example directory. These files can now be transferred to hard drive or elsewhere for storage. If you want an ISO file, continue to the next section.
Creating the ISO
The IMG file we now have is still an hfsplus archive, which cannot simply be converted into an ISO. As such, we will have to use an intermediary step to convert the data from its stored format to an ISO. Since we’ve already mounted it to a directory, the easiest way is simply to create a new ISO with any disc authoring program you are familiar with. Brasero, GnomeBaker and K3b are just a few options for this.
Simply open your software of choice and start a new data disc. Then add the files from the mounted archive to this new data disc project. Once satisfied, select Burn and instead of recording a CD or DVD, choose to make an ISO file.
For most users, Brasero will be available, for those inexperienced in it’s use the following is a guide.
If you’re using GNOME then you can run Brasero from Applications -> Sound & Video -> Brasero. Start a new data disc by selecting Data Project from the main Brasero window, or through the menu Project -> New Project. Ensure the side panel is enabled from View -> Enable Side Panel. From the side panel, navigate to the directory where the IMG was mounted, usually the name of the IMG will be listed in the Places pane. In our example, the location in Places would be called example located in the /media/example directory. Simply drag all the files and folders you want to the project.
Once ready, push Burn. and ensure you select to create Image File: at the new window so it creates an ISO. If you wish to change the default name or the location it is created, select Properties. Once satisfied, push Burn and the ISO will be created. Leave Increase compatibility with Windows systems checked unless you know better.
Disc Image Integration for Nautilus
Archive Mounter
By default in GNOME, Nautilus has support for mounting ISOs by simply right clicking on the file and selecting Open with Archive Mounter. This option still appears limited, mainly designed for archives and ISOs. This feature is still under development, thus the following guide will be preserved.
See Also
AcetoneISO is a feature rich program which let you mount and burn ISO, BIN, NRG, MDF, and IMG files through a graphical user interface. It’s available through Ubuntu’s universe repository.
Furius Iso Mount, available from the Ubuntu Software Center, enables you to mount ISO, BIN, NRG, MDF, and IMG files through a graphical user interface
cdemu is a kernel module for mounting Cue/Bin files directly. To install it you would have to setup linux headers, compile the module and modprobe it in. This is out of the scope of this page. There is a script under development in the Ubuntu forums for automating the building of cdemuLocated Here (Use this at your own risk.)
«Mount and Unmount ISO images without burning them» has a nice step-by-step explanation (with screen shots) showing how to mount and unmount ISO images.
clonezilla is an open source disk backup & restore distro
ManageDiscImages (последним исправлял пользователь Yanosh Kunsh 2015-11-30 18:17:47)
The material on this wiki is available under a free license, see Copyright / License for details
You can contribute to this wiki, see Wiki Guide for details
Источник
Going GNU
My experiences with Free Open Source Software
HowTo: Mount Bin/Cue files in Linux
Okay, so I I lied a little bit. I’m not sure how to mount a straight bin/cue file combination in Linux, but I do know that it’s really easy to convert them into an ISO file, and then mount the ISO in debian based linux.
sudo apt-get install bchunk
The syntax from bchunk is as follows:
bchunk [-v] [-p] [-r] [-w] [-s]
So if i wanted to convert image,bin and image.cue into image.iso, I’d run the command:
bchunk image.bin image.cue image.iso
Then to mount the ISO in linux you run the command:
mount -o loop -t iso9660 image.iso /mnt/image , where image.iso is the iso is the image that you want to mount and /mnt/image is the mount directory.
Rate this:
Share this:
Like this:
Related
24 thoughts on “ HowTo: Mount Bin/Cue files in Linux ”
Aaaaah man! Thanks a lot!
I couldn’t how to bin(raw data) convert to iso image but now look your blog… 🙂
/sorry my bad English/
Thank you bro’ …. It helped a lot…
If bchunk doesnot work for you, take look at ccd2iso 🙂
This info is good enough to mount. But you have bchunk install in your comp.
Thanks a lot. Very helpful post.
helps a lot… thanks guru..
“http://www.abaseenbattagram.com/community/blogs/viewstory/82 Thanks for that awesome posting. It saved MUCH time 🙂
Thank you so much..worked for me..
Thanks for the comment. Happy to know that this article helped you.
Just look at this – you are able to watch top quality movies
anytime, right in the comfort of one’s own home, without needing to go to a motion picture theatre. Today, though, it is a hot accessory that can make long car trips appear like a luxury. 1 receiver, you’ll be capable of
connect approximately seven speakers.
Hello, I would like to show you this amazing website which I’ve observed.
As his or her title states, they provides a cost-free
minecraft server hosting for all. I was somewhat
sceptical while i saw “Free” and particularly when there have got displayed any survey.
Many people don’t have confidence in to anything what eexactly is on-line marked seeing that “Free”, especially
in terms of such high priced services. Effectively, I’m very curious individual and My spouse and i can’t keep without trying, even ass
i saw the survey that a quite ofen points in order to scam but
iin such cases, it wasn’t deceptive.
Best onto it iss that yoou don’t must download something so you won’t need to get any virus or even something.
You can simply receive and e-mail message uusing youur server details.
First review I experimented with didn’t perform and When i thkught iit
had been another con. But I gqve it another possibility and
triend a diifferent survey that has been functional and so i was happy.
So while i first occasion completed some sort
of survey My spouse annd i receved a great e-mail concept where had been informations
about my brand-new created server as IP,security password, server label etc.
I’ve popped my Minecraft as soon as it was possible using joy i always can have my fre minecraft server
where I can play with my friend. So I’ve duplicated
IP deal wityh of my own new server towards the Minecraft, pressed “Join Server” and it also
really worked well. I was within the server using 1/50 players plus it was realloy my server.
Ihas been playing around the server around 12 hours and I didn’t receive any detachment.
I wrote my mate that I’ve a free minecraft
server hosting and all of us were taking parrt in another 5 hrs until My partner and i realized that i can create mmy tailor made plugins, mods, maps and also everything I can think connected with.
I was trying lenty of sites similar to this because I really
wanted to possess my personal free minecraft web hosting service and every single website We
tried seemed to be scam as well as fake.
So I can really say until this site is the foremost website
on the internet which can provide a totally free minecraft
server web hosting service.
Источник


