- How to Mount a Drive in Linux
- List Mounted File Systems and Linux Drives
- Reading mount options from a drive
- Mounting a Linux FileSystem
- Mounting Linux USB Drive
- Mounting a FileSystem using /etc/fstab file
- Mounting NFS Share
- Mounting ISO Files
- Unmounting a File System
- Lazy unmount
- Force unmount
- Conclusion
- Монтирование диска в Linux
- Что такое монтирование?
- Монтирование дисков в Linux
- Монтирование разделов с помощью mount
- Размонтирование устройств в Linux
- Выводы
- How To Automount File Systems on Linux
- Step 1: Get the Name, UUID and File System Type
- Step 2: Make a Mount Point For Your Drive
- Step 3: Edit /etc/fstab File
- Some Explanation
- Can’t Mount Your Disk Drive?
How to Mount a Drive in Linux

Mount is a command used in Linux to attached filesystems and drives and umount command is used to detach (unmount) any attached file systems or devices.
In this tutorial, we will learn how to mount (attach) a drive in Linux with the EXT Linux file system, FAT or NTFS using mount command. We can use the same command to mount the USB drive and ISO image as well.
On both Linux and UNIX like operating systems we can use mount/umount command to attach/detach devices.
List Mounted File Systems and Linux Drives
To display all currently attached file systems we will type:
By default, the output will include all of the file systems including the virtual ones such as cgroup, sysfs, and others. Each line contains information about the device name, the directory to which the device is mounted, the filesystem type and the mount options.
To list only certain types of file systems we will use -t option:
Listing only ext4 Linux file system will usually display our Linux drives.
You can use fdisk to have an idea of what kind of Linux partitions and devices you have, for example:
On my Fedora Linux computer, we can see a different drive configuration:
Now when I insert USB flash drive, we get another bit of information with fdisk -l :
This is important when we need to find which partition we wish to mount (attach) or detach. In this case, we see the USB drive is /dev/sdb1.
Reading mount options from a drive
We can use mount -t command to list the drive mount options. USB drive I inserted before was auto-mounted, and we saw that the filesystem is VFAT.
We see that the USB drive (partition) is mounted as /dev/sdb1 on /run/media/slax/tribal.
You can read about specific options in mount man page.
Mounting a Linux FileSystem
To mount a drive we need to assign it a root directory (mounting point) with mount command in the following format:
Usually, the mount command will auto-detect the filesystem type, but some filesystems are not recognized and need to be specified as a parameter.
Use the -t option to specify the file system type:
To specify additional mount options, you can use the -o option:
You can use multiple options by separating them with a comma (do not insert a space after a comma).
Mounting Linux USB Drive
So first we need to create a mount point (directory):
Next, we mount the drive to /media/myusb:
With dh -H we can see on the last line that our USB device is mounted successfully.
Mounting a FileSystem using /etc/fstab file
Mounting points and their options configured in /etc/fstab will automount upon system start.
The /etc/fstab file contains a list of entries in the following form:
Here is the sample /etc/fstab file from my computer:
So you can add an entry, and configure mounting point in /etc/fstab to have it always mounted on system boot.
Mounting NFS Share
NFS stands for Network File System. To mount an NFS share you’ll need to have the NFS client package installed on your Linux system.
To install NFS client on Ubuntu and Debian, type:
To install NFS client on CentOS and Fedora:
As we have seen in my sample /etc/fstab file entries before, I already have an NFS share configured on my computer:
You can add an entry to /etc/fstab on your computer using Nano or Vim, and enter the URL path to your remote NFS shared directory and a local mounting point (directory) which will be used to access the remote files.
Mounting ISO Files
You can mount an ISO file using the loop device which is a special pseudo-device that makes a file accessible as a block device.
Start by creating the mount point, directory to be used with ISO file:
Mount the ISO file to the mount point by typing the following command:
In the sample command above, path_to_image.iso is the path to your ISO file, of course.
Unmounting a File System
To detach a mounted filesystem, use the umount command followed by either the directory where it has been mounted (mount point) or the device name. If we use the USB drive from before as a sample, the commands would look like this:
If the file system is in use the umount command will fail to detach the file system.
Lazy unmount
Use the -l (—lazy) option to unmount a busy file system as soon as it is not busy anymore.
Force unmount
Use the -f (—force) option to force an unmount. This option is usually used to unmount an unreachable NFS system. In the case of my NFS Share, the command would be:
It is not a good idea to force unmount as it may corrupt the data on the file system.
Conclusion
By the end of this tutorial, you should have a good understanding of how to use the mount and umount command to attach and detach various file systems. We have also seen how to achieve that in various ways and with several media options like ISO file, NFS share and USB flash drive.
Источник
Монтирование диска в Linux
Разделы дисков в Linux подключаются к системе совсем не так, как в Windows. Здесь есть корневая файловая система, куда подключаются все другие разделы и устройства, которые вы будете использовать. Системные разделы монтируются автоматически при старте системы. Но если вам нужно подключить дополнительные разделы, в некоторых случаях, может понадобиться это делать вручную.
В этой статье мы рассмотрим как выполняется монтирование диска в Linux, поговорим о том, как правильно использовать утилиту mount, umount и посмотреть какие разделы куда примонтированы.
Что такое монтирование?
Как я уже сказал Linux имеет единую корневую файловую систему, куда подключаются все запоминающие устройства и другие ресурсы. На самом деле, в Windows происходит что-то подобное, только все это скрыто от пользователя.
Фактически смонтированный раздел становится частью корневой файловой системы и система старается сделать работу со всеми разделами, независимо от их файловых систем, прозрачной. Это значит, что если вы примонтируете участок оперативной памяти или удаленную сетевую папку, то сможете работать с ней в файловом менеджере точно так же, как и с локальным диском.
Например, вы хотите примонтировать флешку. Вы даете системе команду подключить ее в папку /run/media/имя_пользователя/UUID_флешки/. Система определяет файловую систему устройства, а затем, используя драйвера ядра подключает ее к указанной папке. Дальше вам остается работать с той папкой, как с любой другой. Больше ни о чем думать не нужно. Когда надумаете извлечь флешку, ее нужно отмонтировать.
Монтирование дисков в Linux
Обычно, монтированием занимаются специальные сервисы оболочки, но не всегда они доступны. А иногда нужно сделать все вручную, чтобы задать дополнительные опции монтирования или другие параметры. Для монтирования в Linux используется команда mount. Рассмотрим ее параметры:
$ mount файл_устройства папка_назначения
Или расширенный вариант:
$ mount опции -t файловая_система -o опции_монтирования файл_устройства папка_назначения
Опции задают различные дополнительные особенности работы утилиты. Опция -t необязательна, но она позволяет задать файловую систему, которая будет использована и иногда это очень полезно. С помощью опции -o вы можете задать различные параметры монтирования, например, монтировать только для чтения и т д. Последних два параметра — это файл устройства, например, /dev/sda1 и папка назначения, например, /mnt.
Перед тем как перейти к рассмотрению примеров работы утилитой, давайте рассмотрим ее основные опции:
- -V — вывести версию утилиты;
- -h — вывести справку;
- -v — подробный режим;
- -a, —all — примонтировать все устройства, описанные в fstab;
- -F, —fork — создавать отдельный экземпляр mount для каждого отдельного раздела;
- -f, —fake — не выполнять никаких действий, а только посмотреть что собирается делать утилита;
- -n, —no-mtab — не записывать данные о монтировании в /etc/mtab;
- -l, —show-labels — добавить метку диска к точке монтирования;
- -c — использовать только абсолютные пути;
- -r, —read-only — монтировать раздел только для чтения;
- -w, —rw — монтировать для чтения и записи;
- -L, —label — монтировать раздел по метке;
- -U, —uuid — монтировать раздел по UUID;
- -T, —fstab — использовать альтернативный fstab;
- -B, —bind — монтировать локальную папку;
- -R, —rbind — перемонтировать локальную папку.
Это не все, но основные опции, которые вам понадобятся во время работы с утилитой. Также, возможно, вы захотите знать список опций монтирования, которые могут быть полезными. Они все перечислены в статье автоматическое монтирование в fstab и писать их еще и здесь нет смысла. А теперь перейдем к примерам и рассмотрим как монтировать диск в linux.
Монтирование разделов с помощью mount
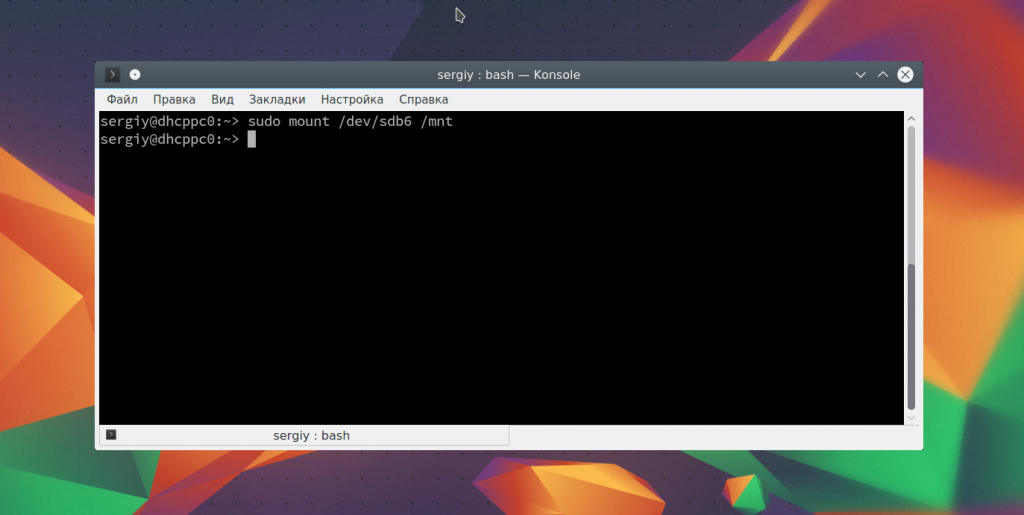
Монтирование разделов с помощью mount выполняется очень просто. Фактически в большинстве случаев будет достаточно упрощенной версии команды. Например, смонтируем раздел /dev/sdb6 в папку /mnt:
sudo mount /dev/sdb6 /mnt/
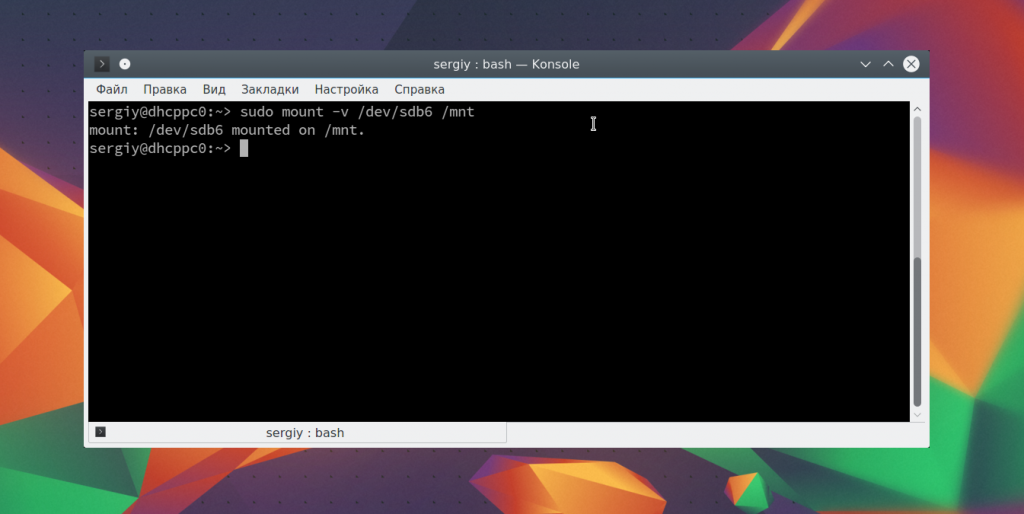
В большинстве случаев вы будете вынуждены выполнять команду mount с правами суперпользователя, если обратное не указано в fstab (опция монтирования users). Вы можете посмотреть информацию о процессе монтирования добавив опцию -v:
sudo mount -v /dev/sdb6 /mnt/
Если нужно, вы можете указать файловую систему с помощью опции -t:
sudo mount -v -t ext4 /dev/sdb6 /mnt
Если необходимо примонтировать файловую систему только для чтения, то вы можете использовать опцию -r или опцию монтирования -o ro, результат будет одинаковым:
sudo mount -t ext4 -r /dev/sdb6 /mnt
$ sudo mount -t ext4 -o ro /dev/sdb6 /mnt
Вы можете использовать и другие опции чтобы выполнить монтирование разделов linux, например, указать, что на этом разделе нельзя выполнять программы:
sudo mount -t ext4 -o noexec /dev/sdb6 /mnt
Обратите внимание, что вы не можете использовать опции uid, gid, fmask для файловых систем ext. Они поддерживаются только в FAT, vFAT, exFAT.
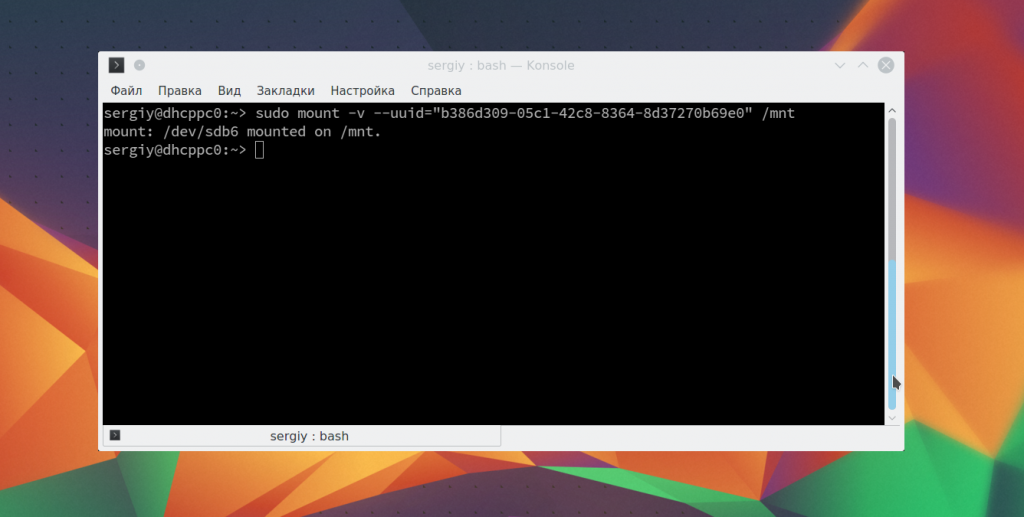
Вы можете использовать не только имена устройств чтобы выполнить монтирование диска в linux. Для этого можно применять UUID или метки, например, монтирование с помощью UUID:
sudo mount —uuid=»b386d309-05c1-42c8-8364-8d37270b69e0″ /mnt
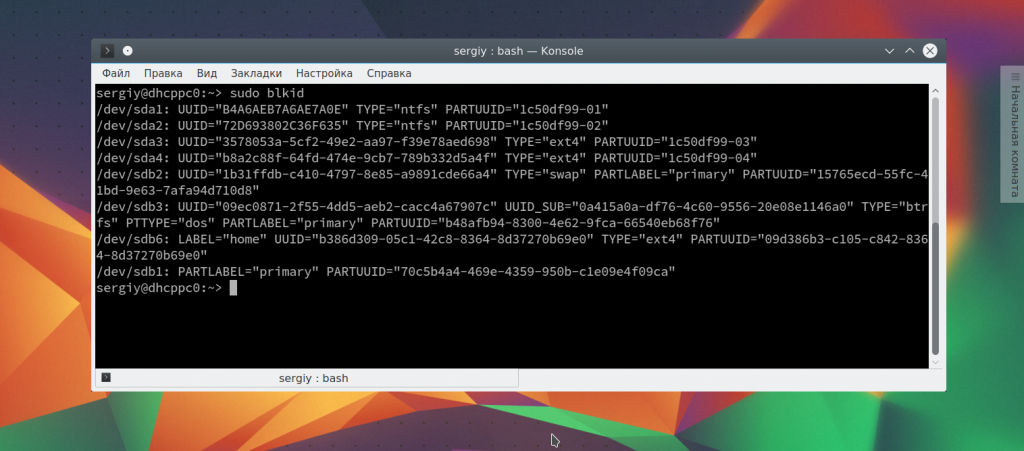
Посмотреть uuid для ваших разделов можно с помощью команды:
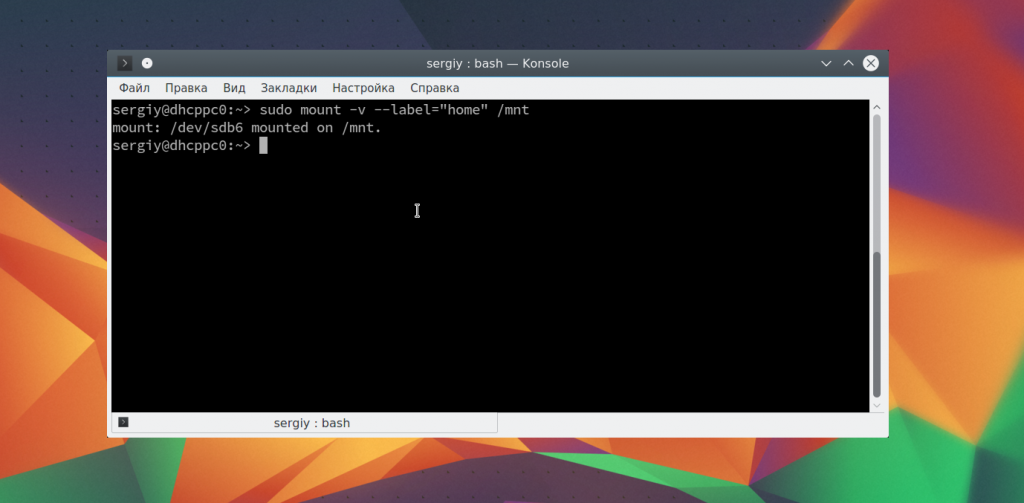
Точно так же вы можете использовать метки. Команда монтирования диска linux будет выглядеть так:
sudo mount —label=»home» /mnt/
Вы можете примонтировать одну папку в другую, для этого используйте опцию —bind
sudo mount —bind /mnt/ /media/
Возможно, не только монтирование разделов linux, но и монтирование файлов, если они содержат файловую систему, например, образов дисков. Монтирование образа диска linux работает точно так же:
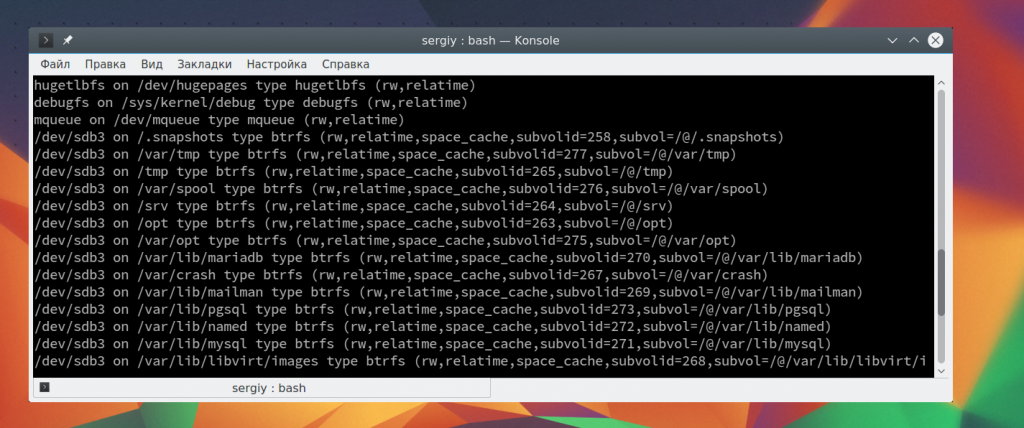
Посмотреть список всех примонтированных устройств можно просто выполнив mount без параметров:
Размонтирование устройств в Linux
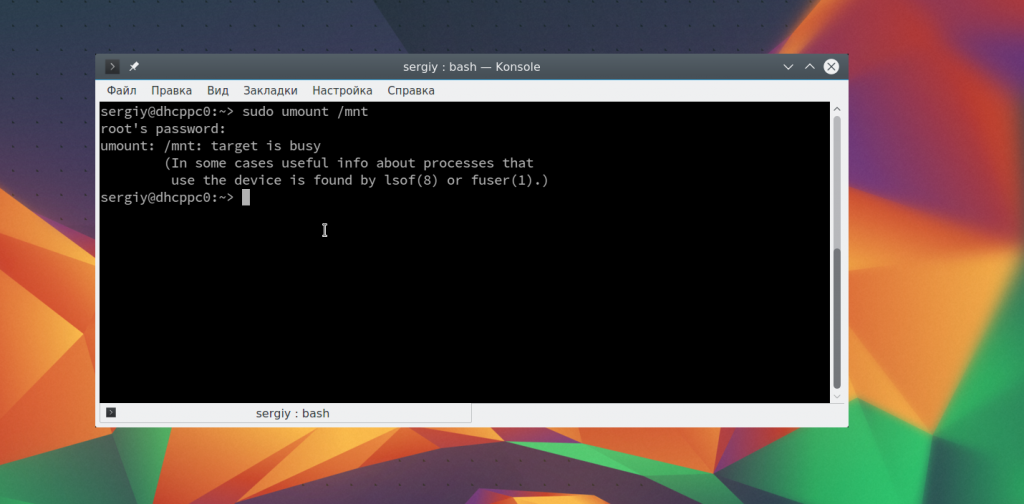
Когда вы хотите завершить работу с устройством, особенно с флешкой, его нужно размонтировать. Для этого существует утилита umount. В качестве параметров она принимает точку монтирования или устройство. Например:
sudo umount /mnt
Теперь ваше устройство не смонтировано. Но иногда может возникнуть ошибка размонтирования. Система сообщит, что устройство занято: umount: /mnt: target is busy.
Проблему можно решить закрыв все программы, которые могут использовать любой файл в этой папке. Какие именно это программы вы можете узнать с помощью команды lsof:
lsof -w /mnt
$ lsof -w /dev/sdb6
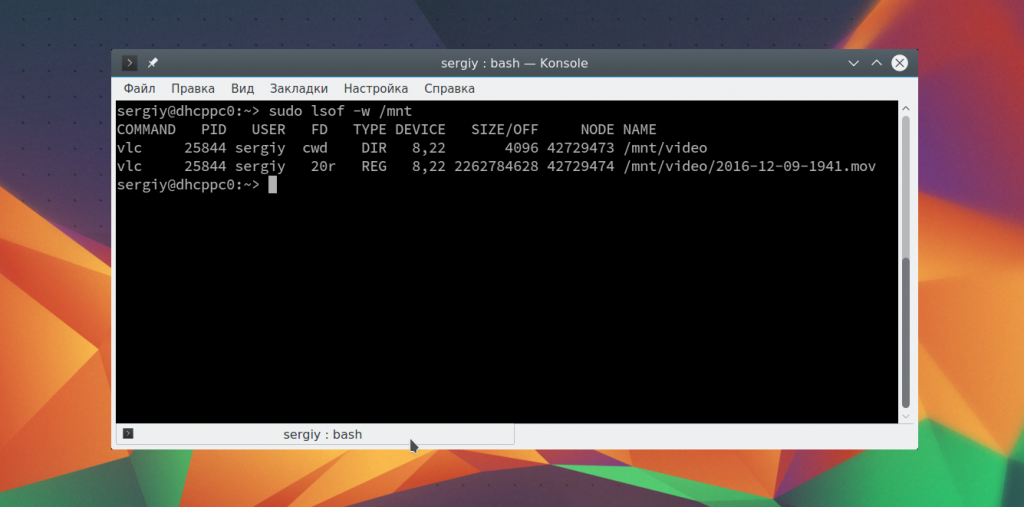
Здесь вы видите всю необходимую информацию, чтобы понять что происходит и что с этим делать. Утилита вывела название программы, ее PID, и даже файл, с которым она работает. Вы можете завершить все программы, а потом снова повторить попытку или используйте опцию -l, файловая система будет отключена немедленно, несмотря на то, что она занята:
sudo umount -l /mnt
Выводы
В этой статье мы рассмотрели как выполняется монтирование жестких дисков linux, а также разделов и даже образов. Вы знаете как правильно использовать опции mount и umount. Если у вас остались вопросы, спрашивайте в комментариях!
Источник
How To Automount File Systems on Linux
Today I’m going to show you how to automatically mount a drive at boot time in Linux. My laptop has one SSD and one mechanical drive. I install operating systems on SSD and store files on the mechanical drive. So oftentimes I need to mount the mechanical drive in the file manager manually to access my mp3 and video files. Mounting drive manually is just a waste of time. So I’m going to show you an easy way to automount drive in Linux.
Step 1: Get the Name, UUID and File System Type
Open your terminal, run the following command to see the name of your drive, its UUID(Universal Unique Identifier) and file system type.
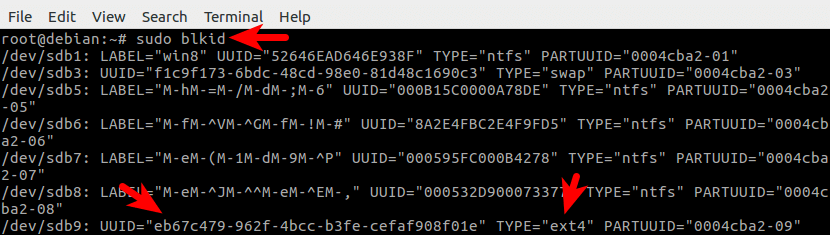
In the output of this command, the first column is the name of your drives. The second column is the label of the drive (if you set a label for it) and the third column is the UUID of your drives.
First, you need to know the name of the drive that is going to be automatically mounted. For example, the name of the drive that is going to be automatically mounted on my computer is /dev/sdb9 .
Then you need to know its UUID and file system type. As you can see the UUID of /dev/sdb9 is eb67c479-962f-4bcc-b3fe-cefaf908f01e and the file system of /dev/sdb9 is ext4 which is the standard file system in Linux.
Step 2: Make a Mount Point For Your Drive
We are going to make a mount point under /mnt directory. Enter the following command,
For example, I issued the following command:
Step 3: Edit /etc/fstab File
Run the following command to edit the /etc/fstab file. Nano is a command-line editor on Linux.
We need to append one line of code at the end of the file. The format of this line of code is as follows:
Note that you need to separate these items with Tab key. For example, I added the following line to the end of /etc/fstab .

If you want to automount an NTFS file system, here is an example.
If you want to automount a Btrfs file system, then change the file system type to btrfs.
Save and close the file. Then run the following command to see if it works.
So that’s how you automount a file system in Linux.
Some Explanation
For swap partitions, the mount point field should be specified as none.
The defaults mount option will give users read and write access to the file system.
The value of the dump field is usually zero.
The pass field is used by the fsck program to determine the order in which filesystem checks are done at reboot time. As you can see in this file, the value of the pass field for the root file system is 1. Swap partitions do not need to be checked and the value for them is zero. All other file systems should have a value of 2. So I set the pass value to 2 for my drive.
Can’t Mount Your Disk Drive?
If you see the “can’t read superblock” error when trying to mount your disk drive, please follow the tutorial below to fix this error.
Источник


