- Use an Azure file share with Windows
- Prerequisites
- Using an Azure file share with Windows
- Mount the Azure file share
- Mount the Azure file share with File Explorer
- Accessing share snapshots from Windows
- List previous versions
- Restore from a previous version
- Securing Windows/Windows Server
- Auditing SMB 1 usage
- Removing SMB 1 from Windows Server
- Removing SMB 1 from Windows client
- Disabling SMB 1 on legacy versions of Windows/Windows Server
- SMB resources
- Next steps
- How to Mount a Windows Share in Linux
- SMB vs CIFS vs SAMBA
- Mount a Windows Share Using GUI (Files / Nautilus)
- Mount A Windows Share Using Command Line
- Using the mount.cifs Command
- Automatically Mount CIFS Share at Boot
- Mount CIFS Share at Boot Using /etc/fstab
- Mount CIFS Share using AutoFS
- Installing autofs Package
- Create Credentials File
- Get UID for User
- Edit auto.master Map File
- Create the Shares File
- Restart the Service
- Test and Verify
- Conclusion
Use an Azure file share with Windows
Azure Files is Microsoft’s easy-to-use cloud file system. Azure file shares can be seamlessly used in Windows and Windows Server. This article discusses the considerations for using an Azure file share with Windows and Windows Server.
In order to use an Azure file share outside of the Azure region it is hosted in, such as on-premises or in a different Azure region, the OS must support SMB 3.0.
You can use Azure file shares on a Windows installation that is running either in an Azure VM or on-premises. The following table illustrates which OS versions support accessing file shares in which environment:
| Windows version | SMB version | Mountable in Azure VM | Mountable on-premises |
|---|---|---|---|
| Windows Server 2019 | SMB 3.0 | Yes | Yes |
| Windows 10 1 | SMB 3.0 | Yes | Yes |
| Windows Server semi-annual channel 2 | SMB 3.0 | Yes | Yes |
| Windows Server 2016 | SMB 3.0 | Yes | Yes |
| Windows 8.1 | SMB 3.0 | Yes | Yes |
| Windows Server 2012 R2 | SMB 3.0 | Yes | Yes |
| Windows Server 2012 | SMB 3.0 | Yes | Yes |
| Windows 7 3 | SMB 2.1 | Yes | No |
| Windows Server 2008 R2 3 | SMB 2.1 | Yes | No |
1 Windows 10, versions 1507, 1607, 1803, 1809, 1903, 1909, and 2004.
2 Windows Server, versions 1809, 1903, 1909, 2004.
3 Regular Microsoft support for Windows 7 and Windows Server 2008 R2 has ended. It is possible to purchase additional support for security updates only through the Extended Security Update (ESU) program. We strongly recommend migrating off of these operating systems.
We always recommend taking the most recent KB for your version of Windows.
Prerequisites
Ensure port 445 is open: The SMB protocol requires TCP port 445 to be open; connections will fail if port 445 is blocked. You can check if your firewall is blocking port 445 with the Test-NetConnection cmdlet. To learn about ways to work around a blocked 445 port, see the Cause 1: Port 445 is blocked section of our Windows troubleshooting guide.
Using an Azure file share with Windows
To use an Azure file share with Windows, you must either mount it, which means assigning it a drive letter or mount point path, or access it via its UNC path.
This article uses the storage account key to access the file share. A storage account key is an administrator key for a storage account, including administrator permissions to all files and folders within the file share you’re accessing, and for all file shares and other storage resources (blobs, queues, tables, etc.) contained within your storage account. If this is not sufficient for your workload, Azure File Sync may be used, or you may use identity-based authentication over SMB.
A common pattern for lifting and shifting line-of-business (LOB) applications that expect an SMB file share to Azure is to use an Azure file share as an alternative for running a dedicated Windows file server in an Azure VM. One important consideration for successfully migrating a line-of-business application to use an Azure file share is that many line-of-business applications run under the context of a dedicated service account with limited system permissions rather than the VM’s administrative account. Therefore, you must ensure that you mount/save the credentials for the Azure file share from the context of the service account rather than your administrative account.
Mount the Azure file share
The Azure portal provides you with a script that you can use to mount your file share directly to a host. We recommend using this provided script.
To get this script:
Navigate to the storage account that contains the file share you’d like to mount.
Select File shares.
Select the file share you’d like to mount.
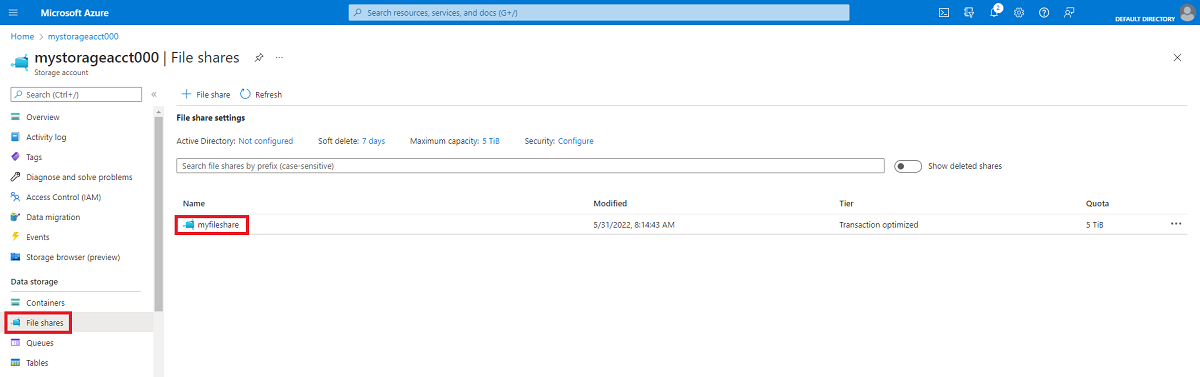
Select Connect.
Select the drive letter to mount the share to.
Copy the provided script.
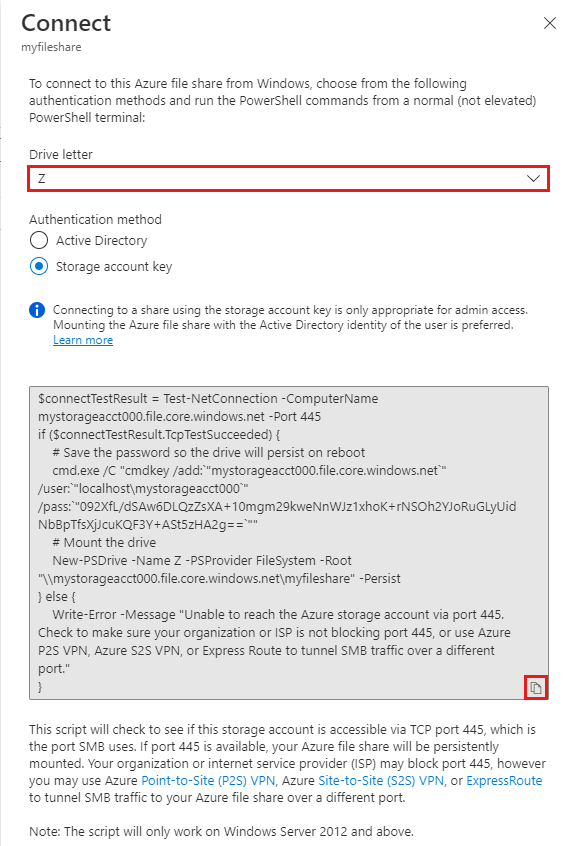
Paste the script into a shell on the host you’d like to mount the file share to, and run it.
You have now mounted your Azure file share.
Mount the Azure file share with File Explorer
Note that the following instructions are shown on Windows 10 and may differ slightly on older releases.
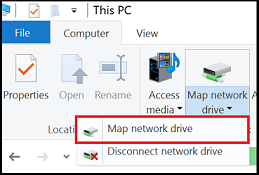
Open File Explorer. This can be done by opening from the Start Menu, or by pressing Win+E shortcut.
Navigate to This PC on the left-hand side of the window. This will change the menus available in the ribbon. Under the Computer menu, select Map network drive.
Select the drive letter and enter the UNC path, the UNC path format is \\ .file.core.windows.net\ . For example: \\anexampleaccountname.file.core.windows.net\example-share-name .

Use the storage account name prepended with AZURE\ as the username and a storage account key as the password.

Use Azure file share as desired.
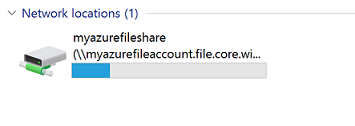
When you are ready to dismount the Azure file share, you can do so by right-clicking on the entry for the share under the Network locations in File Explorer and selecting Disconnect.
Accessing share snapshots from Windows
If you have taken a share snapshot, either manually or automatically through a script or service like Azure Backup, you can view previous versions of a share, a directory, or a particular file from file share on Windows. You can take a share snapshot using Azure PowerShell, Azure CLI, or the Azure portal.
List previous versions
Browse to the item or parent item that needs to be restored. Double-click to go to the desired directory. Right-click and select Properties from the menu.
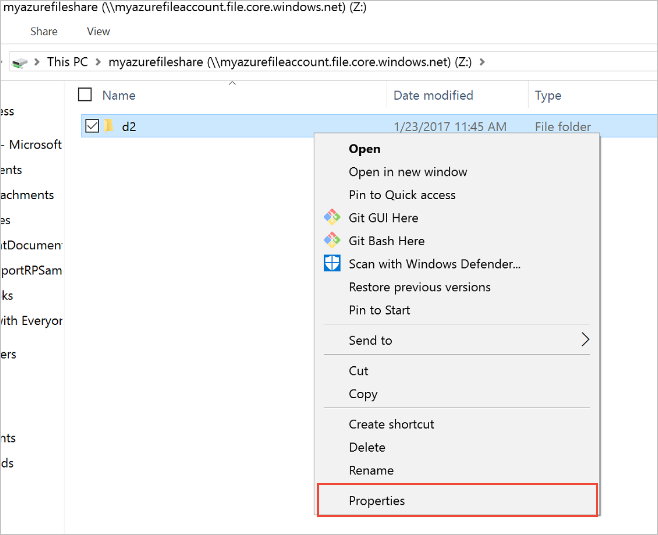
Select Previous Versions to see the list of share snapshots for this directory. The list might take a few seconds to load, depending on the network speed and the number of share snapshots in the directory.

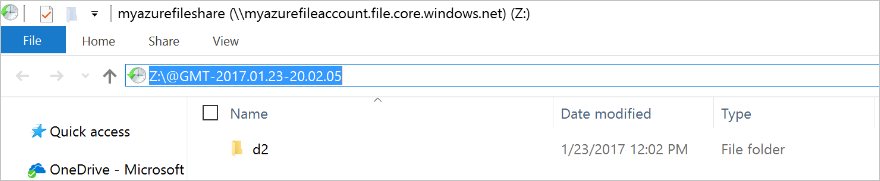
You can select Open to open a particular snapshot.
Restore from a previous version
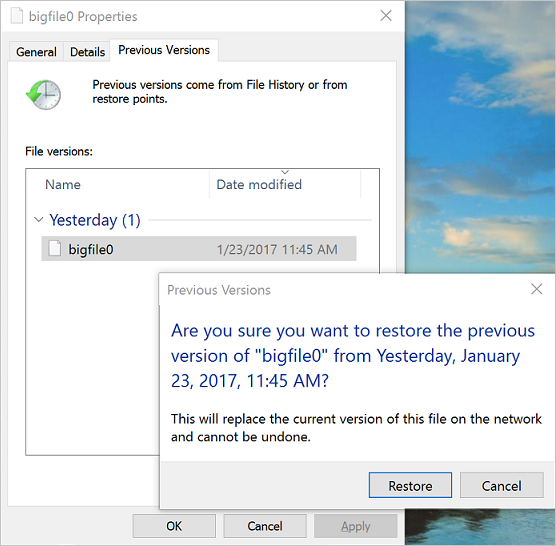
Select Restore to copy the contents of the entire directory recursively at the share snapshot creation time to the original location.
Securing Windows/Windows Server
In order to mount an Azure file share on Windows, port 445 must be accessible. Many organizations block port 445 because of the security risks inherent with SMB 1. SMB 1, also known as CIFS (Common Internet File System), is a legacy file system protocol included with Windows and Windows Server. SMB 1 is an outdated, inefficient, and most importantly insecure protocol. The good news is that Azure Files does not support SMB 1, and all supported versions of Windows and Windows Server make it possible to remove or disable SMB 1. We always strongly recommend removing or disabling the SMB 1 client and server in Windows before using Azure file shares in production.
The following table provides detailed information on the status of SMB 1 each version of Windows:
| Windows version | SMB 1 default status | Disable/Remove method |
|---|---|---|
| Windows Server 2019 | Disabled | Remove with Windows feature |
| Windows Server, versions 1709+ | Disabled | Remove with Windows feature |
| Windows 10, versions 1709+ | Disabled | Remove with Windows feature |
| Windows Server 2016 | Enabled | Remove with Windows feature |
| Windows 10, versions 1507, 1607, and 1703 | Enabled | Remove with Windows feature |
| Windows Server 2012 R2 | Enabled | Remove with Windows feature |
| Windows 8.1 | Enabled | Remove with Windows feature |
| Windows Server 2012 | Enabled | Disable with Registry |
| Windows Server 2008 R2 | Enabled | Disable with Registry |
| Windows 7 | Enabled | Disable with Registry |
Auditing SMB 1 usage
Applies to Windows Server 2019, Windows Server semi-annual channel (versions 1709 and 1803), Windows Server 2016, Windows 10 (versions 1507, 1607, 1703, 1709, and 1803), Windows Server 2012 R2, and Windows 8.1
Before removing SMB 1 in your environment, you may wish to audit SMB 1 usage to see if any clients will be broken by the change. If any requests are made against SMB shares with SMB 1, an audit event will be logged in the event log under Applications and Services Logs > Microsoft > Windows > SMBServer > Audit .
To enable auditing support on Windows Server 2012 R2 and Windows 8.1, install at least KB4022720.
To enable auditing, execute the following cmdlet from an elevated PowerShell session:
Removing SMB 1 from Windows Server
Applies to Windows Server 2019, Windows Server semi-annual channel (versions 1709 and 1803), Windows Server 2016, Windows Server 2012 R2
To remove SMB 1 from a Windows Server instance, execute the following cmdlet from an elevated PowerShell session:
To complete the removal process, restart your server.
Starting with Windows 10 and Windows Server version 1709, SMB 1 is not installed by default and has separate Windows features for the SMB 1 client and SMB 1 server. We always recommend leaving both the SMB 1 server ( FS-SMB1-SERVER ) and the SMB 1 client ( FS-SMB1-CLIENT ) uninstalled.
Removing SMB 1 from Windows client
Applies to Windows 10 (versions 1507, 1607, 1703, 1709, and 1803) and Windows 8.1
To remove SMB 1 from your Windows client, execute the following cmdlet from an elevated PowerShell session:
To complete the removal process, restart your PC.
Disabling SMB 1 on legacy versions of Windows/Windows Server
Applies to Windows Server 2012, Windows Server 2008 R2, and Windows 7
SMB 1 cannot be completely removed on legacy versions of Windows/Windows Server, but it can be disabled through the Registry. To disable SMB 1, create a new registry key SMB1 of type DWORD with a value of 0 under HKEY_LOCAL_MACHINE > SYSTEM > CurrentControlSet > Services > LanmanServer > Parameters .
You can easily accomplish this with the following PowerShell cmdlet as well:
After creating this registry key, you must restart your server to disable SMB 1.
SMB resources
Next steps
See these links for more information about Azure Files:
How to Mount a Windows Share in Linux
In this tutorial we will be discussing different ways to connect to a Microsoft share form Linux. Before we dive in I think it is important to understand the different terminology used when talking about Samba, SMB and CIFS shares.
Table of Contents
SMB vs CIFS vs SAMBA
SMB (Server Message Block) is a protocol used for network file sharing. It was originally designed at IBM in the 1980’s.
CIFS (Common Internet File System) is a implementation of SMB that was created by Microsoft.
SAMBA is an open source software suite and set of utilities used by UNIX/Linux to communicate with Microsoft Windows systems.
From the average user stand point SMB and CIFS can be used interchangeably. As you will see below, we will connect to the same share using both SMB and CIFS.
Mount a Windows Share Using GUI (Files / Nautilus)
You can easily connect to a Windows share using the Files application (formerly known as Nautilus) that ships with Gnome. For the sake of clarity, we will call it Nautilus.
Open the Nautilus application and select “Other Location” from the left places panel.
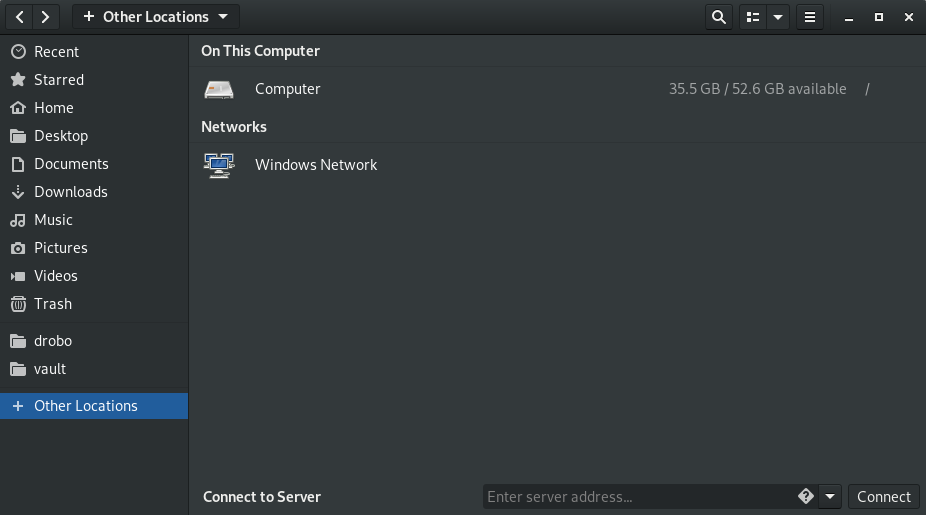
At the bottom of the screen you will see “Connect to Server” with a box asking for you to enter the server address. Inside that box is a diamond with a question mark in it that you can click for some help.
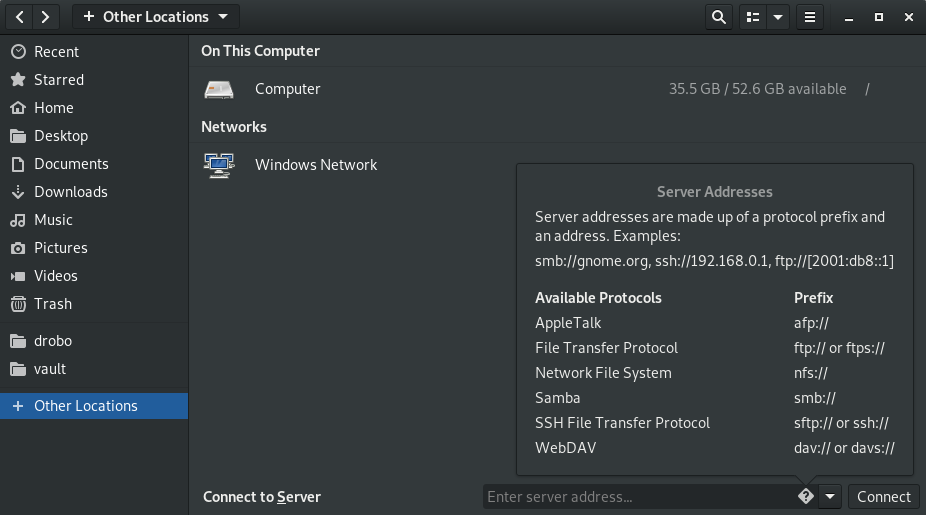
As you can see in the pop-up, server addresses are made up of a protocol prefix and an address. On my Windows machine named “MyMuse” I created a share called “SharedDocs”. So inside that entry box we will use:
We can also use the IP address:
This will bring up a dialog box asking for authentication credentials.
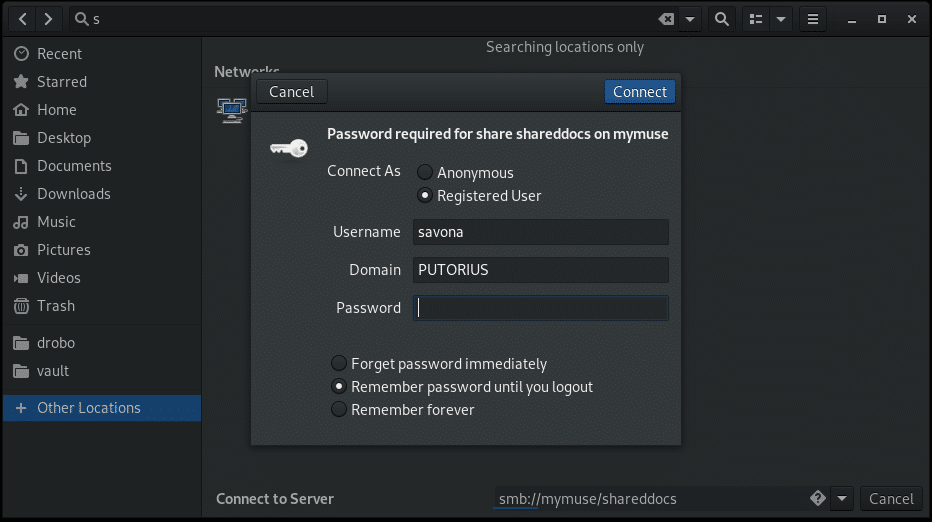
Select the “Registered User” radio button and enter your details. You have three options for storing your password.
- Forget password immediately – This will log you in and and soon as your session is over you will be required to provide your credentials again.
- Remember password until you logout – Remember your password until you explicitly logout.
- Remember forever – This option will store the credentials and allow you to easily return to the share.
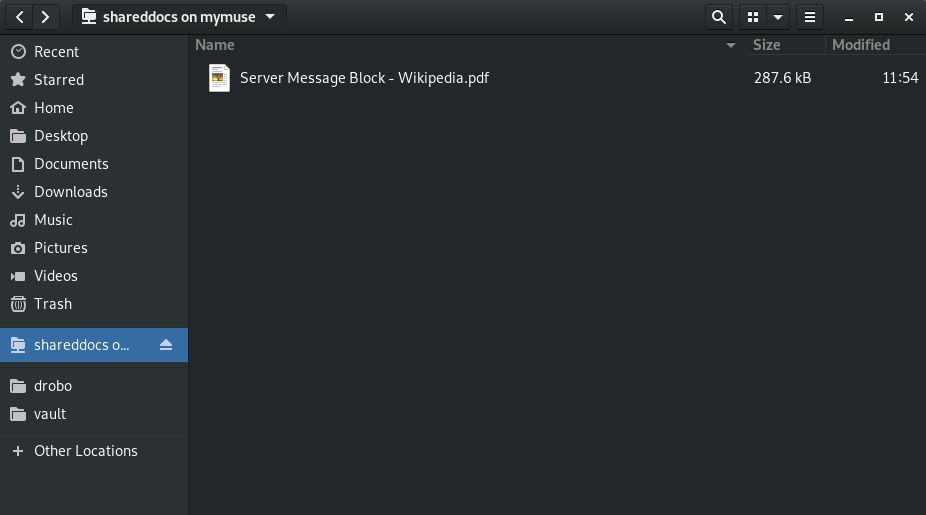
Once you are connected, Nautilus will show the location on the left panel allowing easy access to the share.
Be aware that once that connection is closed you will have to go back to “Other Locations” and use the drop down box to reconnect. If you want to make the share persistently accessible from the left menu you will need to add a bookmark.
NOTE: If you do not want to type your credentials every time ensure that you select “Remember Forever” when authenticating to the share.
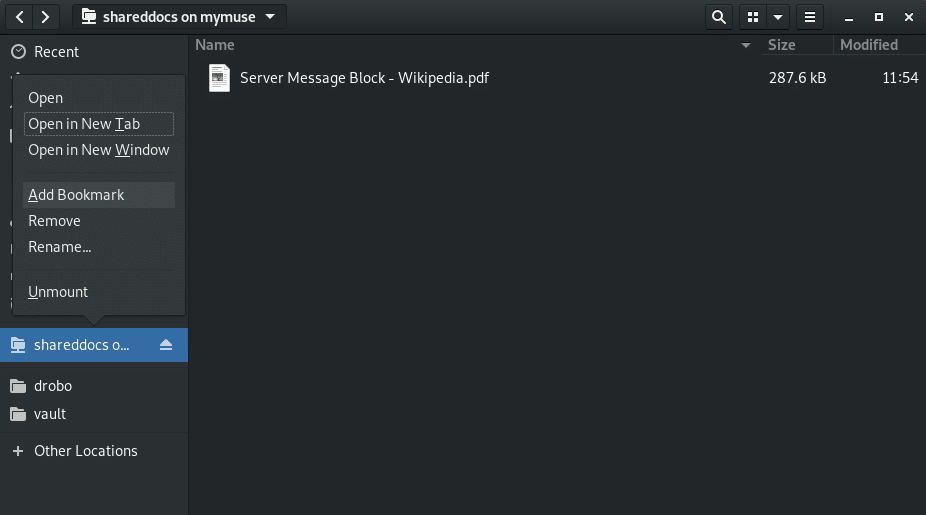
To add a bookmark, connect to the share then right click it in the left panel and select “Add Bookmark”.
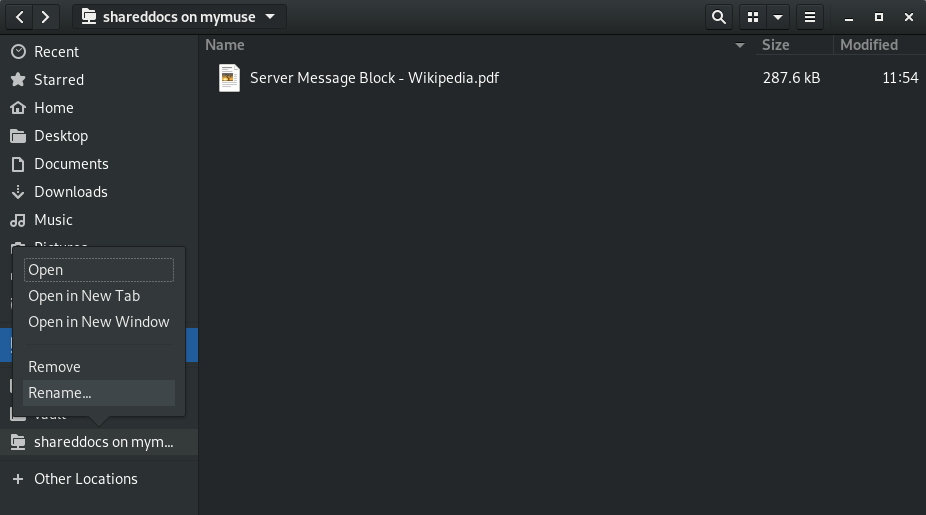
If you have a lot of shares, or multiple shares on the same device, it will be hard to differentiate them. You can rename them to something more user friendly by right clicking on the bookmark and selecting “Rename…”.
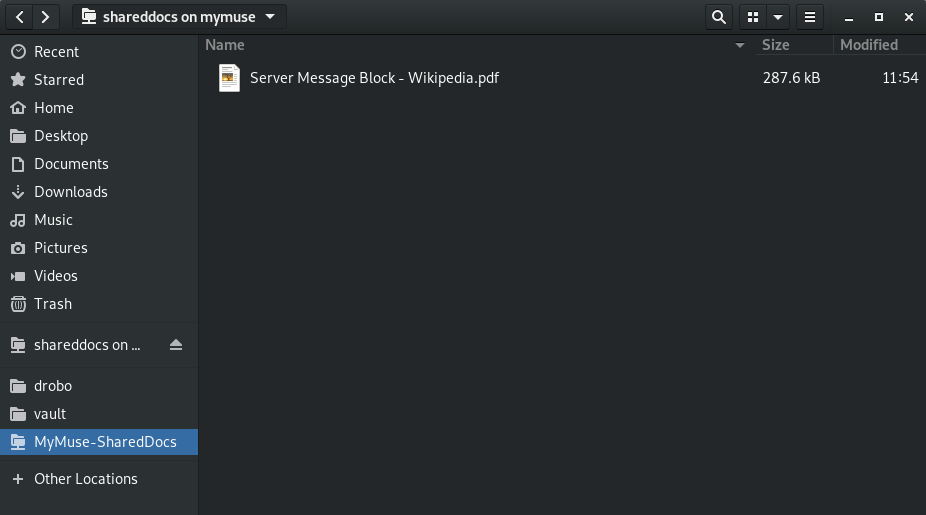
Now we can easily navigate to our share as the name is clearly visible and easy to identify.
Mount A Windows Share Using Command Line
Using the mount.cifs Command
You can easily mount a cifs share from the command line using the mount.cifs command. Using the mount command requires root privileges.
First, create a directory to mount the share:
Use the mount.cifs command to mount the share at the created directory.
You can use the IP address as well.
Alternatively, you can use mount -t cifs with the same syntax.
Automatically Mount CIFS Share at Boot
Mount CIFS Share at Boot Using /etc/fstab
You can add your CIFS mount point in /etc/fstab and have the system mount it during boot. However, there are some considerations to make. If the share is not available at boot time the system will hang until the mount attempt times out, or worse, refuse to boot. This will cause a delay in accessing the system. To avoid this you can use autofs (next section). Also mounting it via fstab requires you to put your credentials somewhere in plain text. You have two options when using fstab to mount a CIFS share.
- Put the credentials in the fstab file itself – This is a huge security risk as fstab is readable by any user. Someone can simply cat the file and see your credentials. IT IS NOT RECOMMENDED!
- Use a credentials file – This entails saving your credentials in a separate file which can then be protected by permissions. Although your credentials will still be saved in plain text, someone would need root permissions to read them.
Because of the high risk of the first option, we will not even discuss how to do it. It is easy enough to use a credentials file.
First, create a hidden file in root’s home directory (/root/). You can call this file whatever you like. Most people call it .smbcreds or similar. In this file you need two lines, one containing “username= ” and one containing “password= ”.
Now set the permissions so it is only readable by root:
Now edit the /etc/fstab file and add the following information:
- Remote server share address (//mymuse/shareddocs)
- Local mount point (/mnt/cifs)
- Filesystem type (cifs)
- options (credentials file=/root/.smbcreds)
- dump option (0)
- check option (0)
Example fstab, last line showing the CIFS mount point.
Mount CIFS Share using AutoFS
The most obvious benefit of using autofs is that the share is only mounted when being accessed. If it is unavailable it will not effect your system when it boots.
Using autofs has the same credentials issues described above with fstab. It is also necessary to store your password in plain text when using autofs for cifs shares.
Installing autofs Package
Install autofs in CentOS 7, or Red Hat 7:
Install autofs in Ubuntu 18:
Let’s configure autofs to mount our Windows share.
Create Credentials File
First, ensure you create the credentials file as described above:
DO NOT forget to set the permissions:
Get UID for User
Now, let’s get our user accounts uid so we can tell autofs to mount the share as our user instead of root.
Edit auto.master Map File
Edit the /etc/auto.master configuration file. In this file we will provide a map of directories to shares for autofs to use. Add the following line to the file:
The first part of the above line is the directory we are using as a mount point (you can create a custom directory if you wish). The second is the file that autofs should look in for instructions on how to connect to the resource and mount it.
Create the Shares File
Next edit or create the /etc/auto.shareddocs file and add the following:
Restart the Service
Now we must restart the autofs service so it reads the new configuration.
Test and Verify
Now, let’s look in the /mnt directory.
The shareddocs directory doesn’t exist until you try to access it (auto fs). If everything above was followed, we should be to cd into that directory even though we do not see it. The directory will be dynamically created as it is accessed.
Bob’s your uncle.
Conclusion
In this article we covered 3 different ways to mount your Windows shares in Linux. You should now be able to mount an SMB share via the GUI, manually on the command line, automatically on boot and with autofs.
An important point I would like to stress is make sure you protect your credentials. I hope you enjoyed this tutorial, please leave feedback or questions in the comments below.


