- How to mount VMDK-image in Linux
- Use the portal to attach a data disk to a Linux VM
- Find the virtual machine
- Attach a new disk
- Attach an existing disk
- Connect to the Linux VM to mount the new disk
- Find the disk
- Partition a new disk
- Mount the disk
- Verify the disk
- TRIM/UNMAP support for Linux in Azure
- Next steps
- How to mount Virtual Hard disk (VHD) file in Ubuntu Linux?
How to mount VMDK-image in Linux
Обращаюсь к вам за подсказкой, бородатые админы ..
Понадобилось мне Windows в эмуляторе VirtualBox поставить, выбрал VMDK. Теперь хочу вытащить файлы оттуда, подмонтировав VMDK-образ в Дебиане. Пока вижу такой путь: qemu-img convert . && mount -o ro,loop .
Есть ли какой-то другой способ? Утилита xmount, по-моему, такого не умеет.


у тебя qemu за сентябрь 2012 года.
В общем, я решил простым способом — конвертировал образ в raw, затем
Просто интересовали какие-то прямые способы без конвертации. Я нашёл упоминание, что есть проприетарные утилиты для этого под Windows, MacOS (от VMWare).

Странно, что ты не вбил заголовок треда в гугл, вопрос сформулирован абсолютно правильно. И самый первый линк в выдаче дал
Mount a VMware virtual disk (.vmdk) file on a Linux box
Assumes XP/2000/2003. For Server 2008+ try offset=105,906,176 You can find this number in the System Information utility under Partition Starting Offset. UEFI based boxes you want partition 2 since the first is just the boot files (and FAT). This works with (storage side) snapshots which is handy for single file restores on NFS mounted VMware systems
И кучу альтернативных вариантов, без ожидания кучи времени на конвертацию.
И кстати, за это я не люблю Дебиан, полный древними ископаемыми. Взглянув на версии софта, так и хочется заменить «ШГ» на «УГ» рядом со словом Debian на твоей аве.
Источник
Use the portal to attach a data disk to a Linux VM
Applies to: вњ”пёЏ Linux VMs вњ”пёЏ Flexible scale sets
This article shows you how to attach both new and existing disks to a Linux virtual machine through the Azure portal. You can also attach a data disk to a Windows VM in the Azure portal.
Before you attach disks to your VM, review these tips:
- The size of the virtual machine controls how many data disks you can attach. For details, see Sizes for virtual machines.
- Disks attached to virtual machines are actually .vhd files stored in Azure. For details, see our Introduction to managed disks.
- After attaching the disk, you need to connect to the Linux VM to mount the new disk.
Find the virtual machine
- Go to the Azure portal to find the VM. Search for and select Virtual machines.
- Choose the VM from the list.
- In the Virtual machines page, under Settings, choose Disks.
Attach a new disk
On the Disks pane, under Data disks, select Create and attach a new disk.
Enter a name for your managed disk. Review the default settings, and update the Storage type, Size (GiB), Encryption and Host caching as necessary.

When you are done, select Save at the top of the page to create the managed disk and update the VM configuration.
Attach an existing disk
On the Disks pane, under Data disks, select Attach existing disks.
Click the drop-down menu for Disk name and select a disk from the list of available managed disks.
Click Save to attach the existing managed disk and update the VM configuration:
Connect to the Linux VM to mount the new disk
To partition, format, and mount your new disk so your Linux VM can use it, SSH into your VM. For more information, see How to use SSH with Linux on Azure. The following example connects to a VM with the public IP address of 10.123.123.25 with the username azureuser:
Find the disk
Once connected to your VM, you need to find the disk. In this example, we are using lsblk to list the disks.
The output is similar to the following example:
In this example, the disk that I added is sdc . It is a LUN 0 and is 4GB.
For a more complex example, here is what multiple data disks looks like in the portal:
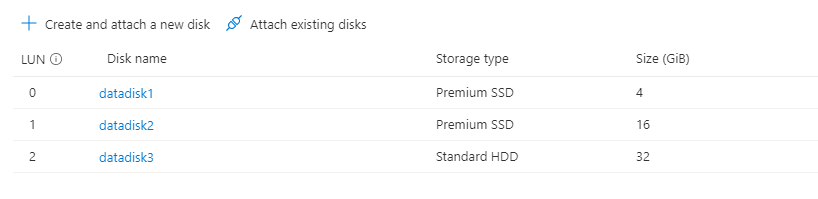
In the image, you can see that there are 3 data disks: 4 GB on LUN 0, 16GB at LUN 1, and 32G at LUN 2.
Here is what that might look like using lsblk :
From the output of lsblk you can see that the 4GB disk at LUN 0 is sdc , the 16GB disk at LUN 1 is sdd , and the 32G disk at LUN 2 is sde .
Partition a new disk
If you are using an existing disk that contains data, skip to mounting the disk. If you are attaching a new disk, you need to partition the disk.
The parted utility can be used to partition and to format a data disk.
It is recommended that you use the latest version parted that is available for your distro. If the disk size is 2 tebibytes (TiB) or larger, you must use GPT partitioning. If disk size is under 2 TiB, then you can use either MBR or GPT partitioning.
The following example uses parted on /dev/sdc , which is where the first data disk will typically be on most VMs. Replace sdc with the correct option for your disk. We are also formatting it using the XFS filesystem.
Use the partprobe utility to make sure the kernel is aware of the new partition and filesystem. Failure to use partprobe can cause the blkid or lslbk commands to not return the UUID for the new filesystem immediately.
Mount the disk
Create a directory to mount the file system using mkdir . The following example creates a directory at /datadrive :
Use mount to then mount the filesystem. The following example mounts the /dev/sdc1 partition to the /datadrive mount point:
To ensure that the drive is remounted automatically after a reboot, it must be added to the /etc/fstab file. It is also highly recommended that the UUID (Universally Unique Identifier) is used in /etc/fstab to refer to the drive rather than just the device name (such as, /dev/sdc1). If the OS detects a disk error during boot, using the UUID avoids the incorrect disk being mounted to a given location. Remaining data disks would then be assigned those same device IDs. To find the UUID of the new drive, use the blkid utility:
The output looks similar to the following example:
Improperly editing the /etc/fstab file could result in an unbootable system. If unsure, refer to the distribution’s documentation for information on how to properly edit this file. It is also recommended that a backup of the /etc/fstab file is created before editing.
Next, open the /etc/fstab file in a text editor as follows:
In this example, use the UUID value for the /dev/sdc1 device that was created in the previous steps, and the mountpoint of /datadrive . Add the following line to the end of the /etc/fstab file:
We used the nano editor, so when you are done editing the file, use Ctrl+O to write the file and Ctrl+X to exit the editor.
Later removing a data disk without editing fstab could cause the VM to fail to boot. Most distributions provide either the nofail and/or nobootwait fstab options. These options allow a system to boot even if the disk fails to mount at boot time. Consult your distribution’s documentation for more information on these parameters.
The nofail option ensures that the VM starts even if the filesystem is corrupt or the disk does not exist at boot time. Without this option, you may encounter behavior as described in Cannot SSH to Linux VM due to FSTAB errors
Verify the disk
You can now use lsblk again to see the disk and the mountpoint.
The output will look something like this:
You can see that sdc is now mounted at /datadrive .
TRIM/UNMAP support for Linux in Azure
Some Linux kernels support TRIM/UNMAP operations to discard unused blocks on the disk. This feature is primarily useful in standard storage to inform Azure that deleted pages are no longer valid and can be discarded, and can save money if you create large files and then delete them.
There are two ways to enable TRIM support in your Linux VM. As usual, consult your distribution for the recommended approach:
Use the discard mount option in /etc/fstab, for example:
In some cases, the discard option may have performance implications. Alternatively, you can run the fstrim command manually from the command line, or add it to your crontab to run regularly:
Ubuntu
RHEL/CentOS
Next steps
For more information, and to help troubleshoot disk issues, see Troubleshoot Linux VM device name changes.
You can also attach a data disk using the Azure CLI.
Источник
How to mount Virtual Hard disk (VHD) file in Ubuntu Linux?
Tutorial to mount a VHD image on Ubuntu or Debian using a tool Guestmount and then access the same via Command line or Graphical File manager.
Virtual Hard Disk- VHD is a common virtual drive format used on Windows systems. Generally, we use them to install Virtual Machine operating systems such as in VirtualBox or Hyper-V. However, we can also create and use VHDs just like a native drive partition on Windows 10 or 7 systems.
Furthermore, backup images also save in the.VHD format, thus to access them is really a need of the hours, in case you want some file resides in them. So, what would happen, if you need to extract some files from VHD on Linux; resides on the local or remote machine. And you don’t have a Windows system. Don’t worry we can mount them on Linux as well.
For carrying out the tutorial, we are using Ubuntu 20.04 LTS focal fossa, however, the steps given here are also applicable for Ubuntu 18.04/19.04/16.04; Linux Mint, Elementary OS, ZorinOS, Kali Linux, and other similar ones.
Here we are going to mount a VHD image on Ubuntu or Debian-based systems that have some information we need to extract; using a tool called guestmounts. Let’s see how to use it.
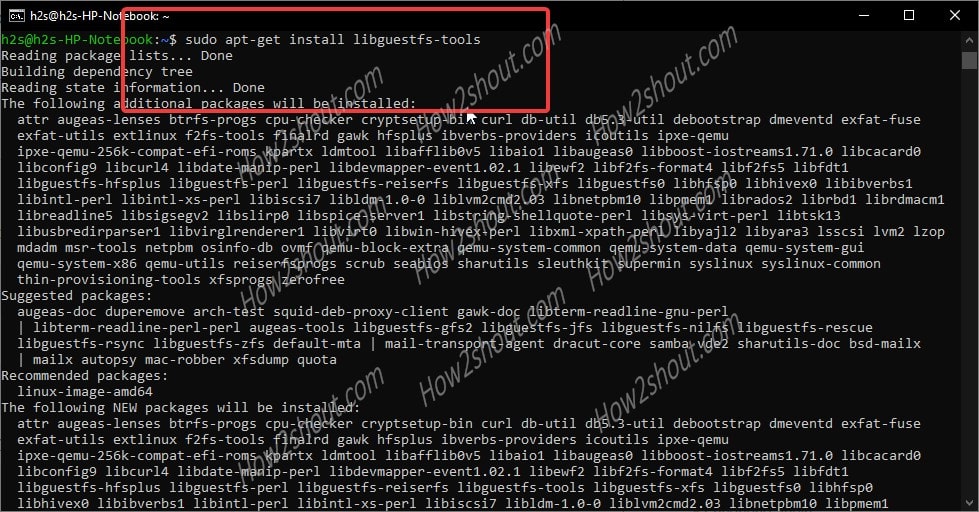
Step 1: The guestmounts tool comes in libguestfs package along with other tools, thus first we need to install the same. Here is the command to do that.

If you get any dependencies error then simply run:
After that again run the above installation command to get “guestmount” tool on your Ubuntu or Debian system.
Step 2: If the Virtual Hard disk.VHD is on your local system then we can mount it directly. However, on remote storage with SAMA/CISF shared protocol, we need to add its support to Ubuntu Linux first.
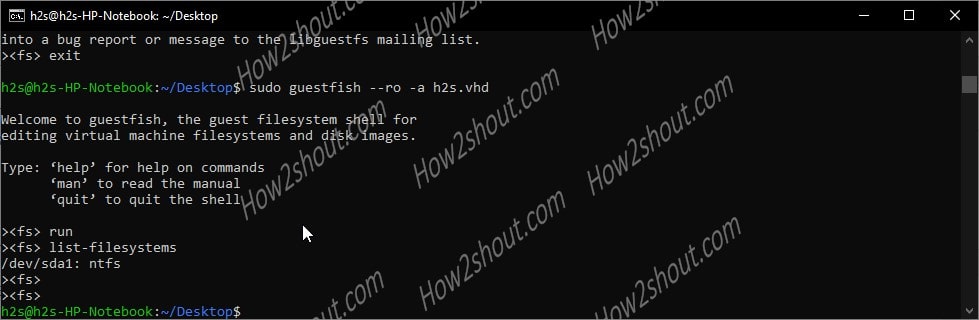
Step 3: Check the filesystem and available partitions on the Virtual Hard Disk image on Linux using “guestfish” command:
The guestfish is also a tool that comes along with the libguestfs-tools package.
Note: replace the VHD-file-path with the actual path where your VHD image located. For example: Here we have h2s.vhd located on the Desktop of Ubuntu, thus the command is:
sudo guestfish – -ro -a h2s.vhd
Once you dropped in the GuestFish Shell, type:
This will give you the partition details of the VHD image and the file system in which it has been formatted. Note down that.
As you can see that in the following image, our Virtual Disk image is in NTFS format.
Step 4: Switch to the root user. It is because we tried but couldn’t use the “guestmount” without sudo access. Thus, once you mount the VHD using under sudo rights, the mounted file image will only be accessible by the user root or the one that has the same access.
Read more: If you haven’t set the root password yet then please do that, here is the enable ubuntu root password tutorial.
Step 5: Run the guestmount command to mount the remotely or locally available.VHD image files.
*Replace: /path-to-demo.vhd with your VHD file image name and location path.
/dev/sda1: It is a device or partition of the Virtual Hard disk file system which we found with the help of guestfish command above. Replace it with yours.
–ro – It means read-only.
/path-of-the-directory-to-mount-VHD-image: Path where you want to mount your VHD image file on the system
You can see the below image for an idea:
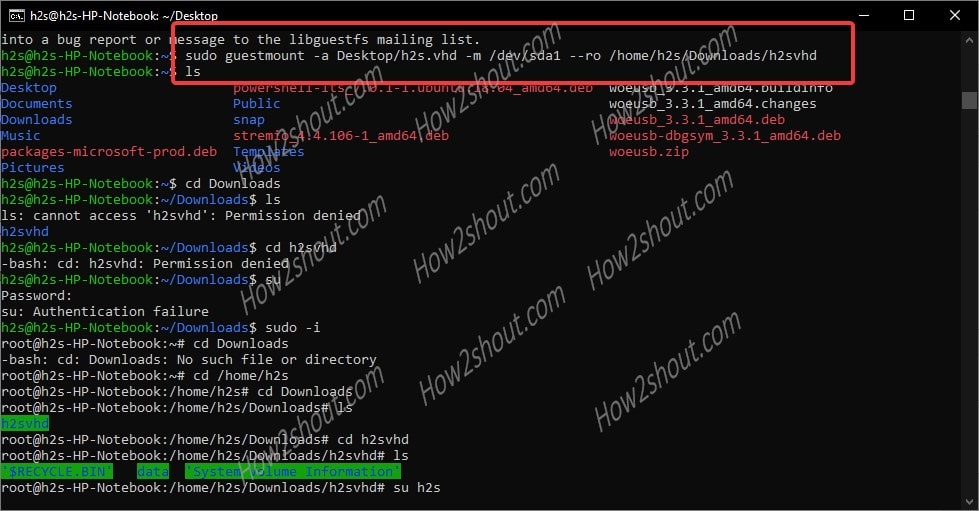
Step 6: Now, as we have mounted the VHD under sudo rights, thus only the root user can access the same. So, without exit the root shell environment, navigate to the directory where you have mounted the Virtual Hard disk file image. Afterward, you can easily access all this file inside that particular image.
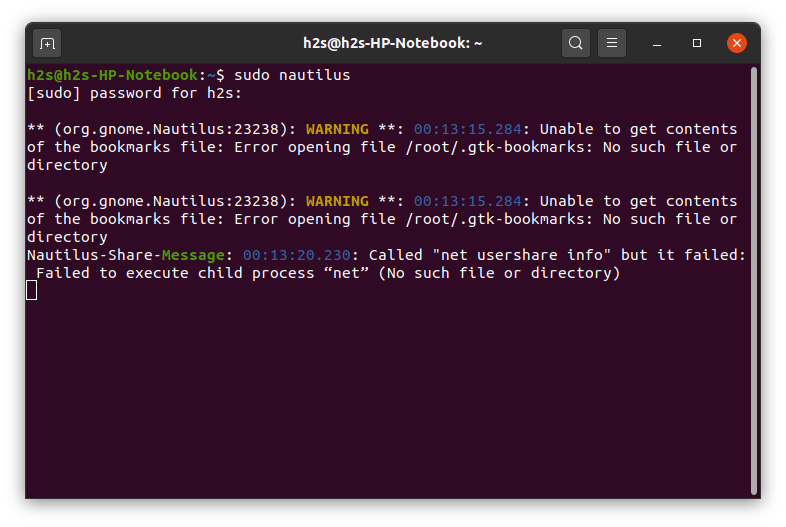
Step 7: Those who want to access the VHD images using the Graphical File manager of Ubuntu. They need to first access it under administrative rights. So, run nautilus as root:
This will ask for the root password.
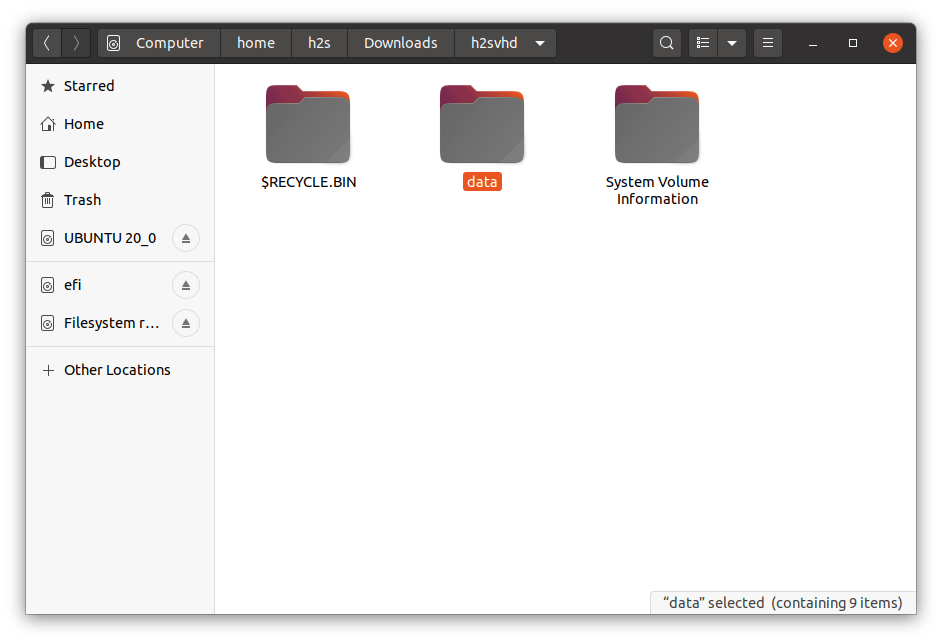
Now, the Ubuntu file manager will open under user root rights, navigate to the directory where VHD has been mounted by you. Click to open it.
Optional step:
In cases later, you want to unmount the VHD image from Ubuntu, then use the below command:
Replace: /mounted-directory-path with the path of the folder where you have actually mounted the image file.
Источник


