- How to Mount a Windows Share Folder on Linux
- Share Your Windows Folder
- Install CIFS-utils
- Mount Windows SMB Share on Linux
- Sharing Files Between Linux and Windows
- How to Mount a Windows Share in Linux
- SMB vs CIFS vs SAMBA
- Mount a Windows Share Using GUI (Files / Nautilus)
- Mount A Windows Share Using Command Line
- Using the mount.cifs Command
- Automatically Mount CIFS Share at Boot
- Mount CIFS Share at Boot Using /etc/fstab
- Mount CIFS Share using AutoFS
- Installing autofs Package
- Create Credentials File
- Get UID for User
- Edit auto.master Map File
- Create the Shares File
- Restart the Service
- Test and Verify
- Conclusion
- Как монтировать общие папки Windows в системах Linux
- How to Mount Windows Share on Linux using CIFS
- В этом руководстве мы расскажем, как вручную и автоматически монтировать общие папки Windows в системах Linux.
- Установка пакетов утилит CIFS
- Монтирование CIFS Windows Share
- Авто монтаж
- Размонтирование Windows Share
- Вывод
How to Mount a Windows Share Folder on Linux

Linux and Windows systems have major differences, with different file systems and protocols in use. Sharing files between them can be difficult, especially because they use two different sharing protocols.
That doesn’t mean it’s impossible to mount a Windows share folder on Linux, however. Follow along below to find out how.
Share Your Windows Folder
Before you do anything, you need to ensure that Windows has been correctly set up to allow for networking file sharing.
To enable this on Windows 10, right-click on the network icon in the notifications area of your Windows taskbar. From here, click “Open Network & Internet Settings.”
Under the “Status” category, click “Sharing options.”

In your Windows sharing options menu, make sure that “Turn on network discovery” and “Turn on file and printer sharing” are enabled.
Click the radio buttons next to both options to make sure this is the case.

Click “Save changes” to save your settings. Once this is done, open Windows File Explorer and locate the folder you’re looking to share with your Linux PC.
Right-click the folder and click “Properties.”

In your folder properties, click the “Sharing” tab, then click “Advanced Sharing.” Click to enable the “Share this folder” checkbox, then click “Permissions.”

Under the “Permissions” section, set the control rights for your folder. By default, Windows will grant read-only access to your files.
If you want to allow everyone to read or write to the folder, click “Allow” for the “Full Control” permissions set. Set these permissions to suit your own requirements.

Once you’re done, click “OK” three times to close each of the dialog boxes.
Your folder should now be shared on your network, ready for you to access from your Linux PC.
Install CIFS-utils
Depending on your Linux distribution, you may be able to mount your Windows-shared folder automatically in your distribution’s file explorer.
However, this may not work correctly. The safest way to mount Windows-shared folders on Linux is to use the CIFS-utils package and mount the folder using the Linux terminal.
This allows Linux machines to access SMB file shares used by Windows PCs.

To install CIFS-utils, open a new terminal window. For Ubuntu and Debian-based distributions, type:
For Arch users, type:
Once installed, you can then mount your Windows share folder from the Linux terminal.
Mount Windows SMB Share on Linux
You’ll need to create a mount directory before you can mount your Windows SMB-shared folder on Linux. This is where Linux will mirror the contents of your shared folder.
To do that, open a terminal window and type:
Once created, type the following:
Replace “Windows” with the IP address or hostname for your Windows PC and “SharedFolder” with your shared folder name. For the username, replace “account” with your Windows username or full Microsoft account email.

You’ll be asked to provide your Windows password before the mounting process is complete. Type this in, then click Enter. If you used the correct information, your Windows folder should now be mounted and accessible in the folder you created.
Sharing Files Between Linux and Windows
Mounting Windows and Linux shared folders gives you the freedom to access your most important files, no matter the operating system. The SMB protocol is well supported on Linux, so you shouldn’t find it difficult to continue accessing your Windows files and folders once you’ve installed the CIFS-utils package.
If you’d rather use a single system, here are five of the best Linux distros for Windows users you could use.
Ben is a UK based tech writer with a passion for gadgets, gaming, and general geekiness.
How to Mount a Windows Share in Linux
In this tutorial we will be discussing different ways to connect to a Microsoft share form Linux. Before we dive in I think it is important to understand the different terminology used when talking about Samba, SMB and CIFS shares.
Table of Contents
SMB vs CIFS vs SAMBA
SMB (Server Message Block) is a protocol used for network file sharing. It was originally designed at IBM in the 1980’s.
CIFS (Common Internet File System) is a implementation of SMB that was created by Microsoft.
SAMBA is an open source software suite and set of utilities used by UNIX/Linux to communicate with Microsoft Windows systems.
From the average user stand point SMB and CIFS can be used interchangeably. As you will see below, we will connect to the same share using both SMB and CIFS.
Mount a Windows Share Using GUI (Files / Nautilus)
You can easily connect to a Windows share using the Files application (formerly known as Nautilus) that ships with Gnome. For the sake of clarity, we will call it Nautilus.
Open the Nautilus application and select “Other Location” from the left places panel.
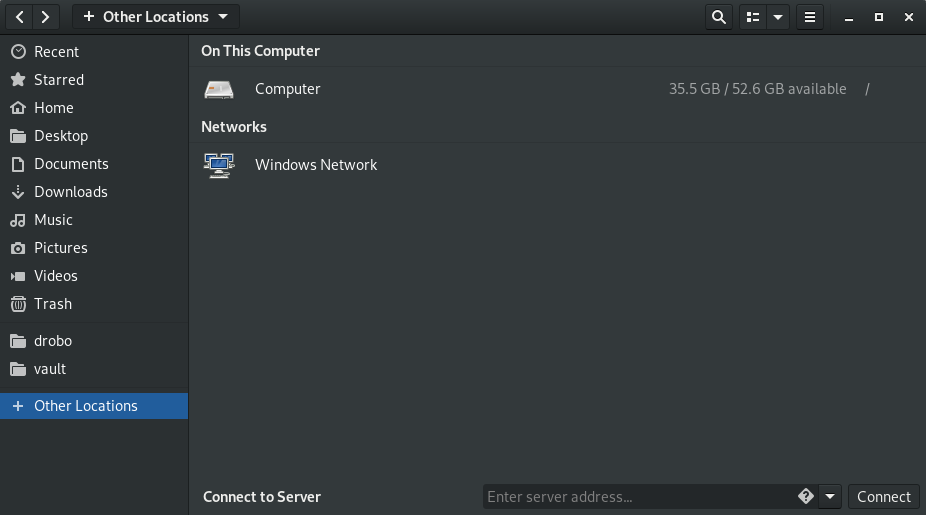
At the bottom of the screen you will see “Connect to Server” with a box asking for you to enter the server address. Inside that box is a diamond with a question mark in it that you can click for some help.
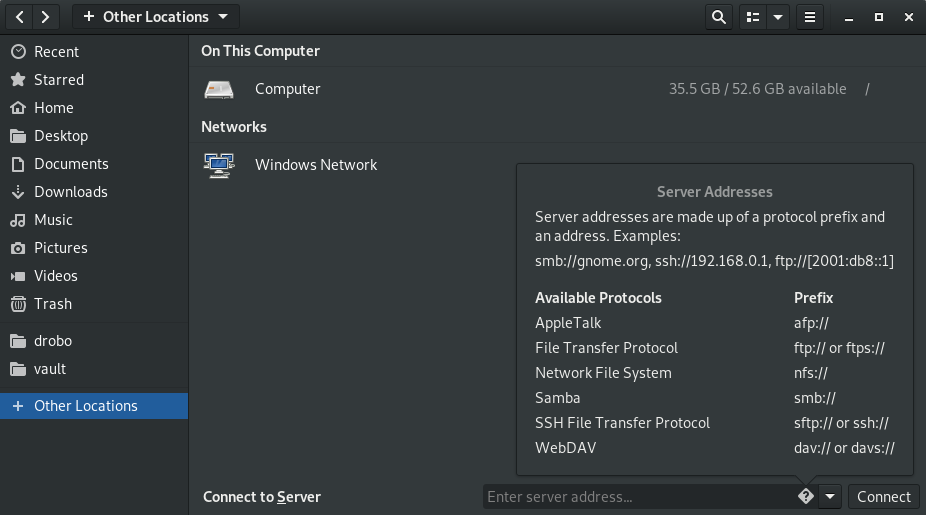
As you can see in the pop-up, server addresses are made up of a protocol prefix and an address. On my Windows machine named “MyMuse” I created a share called “SharedDocs”. So inside that entry box we will use:
We can also use the IP address:
This will bring up a dialog box asking for authentication credentials.
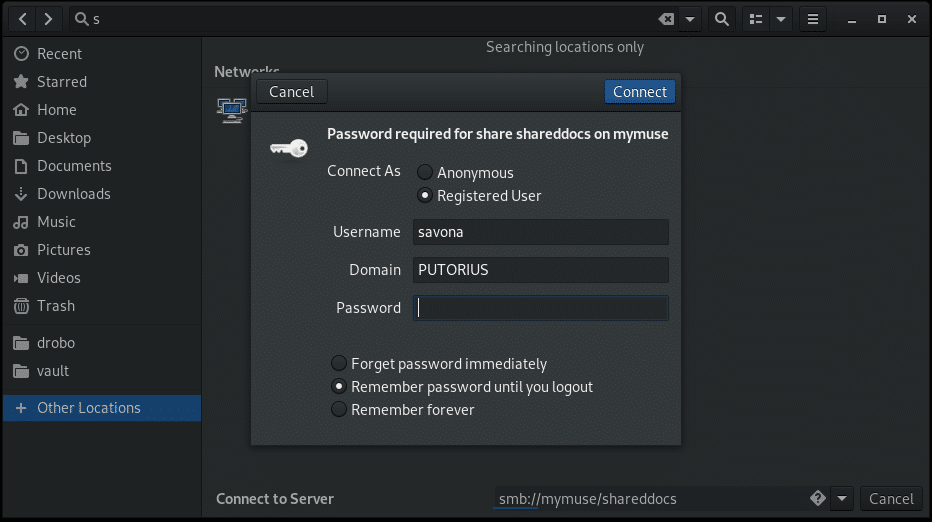
Select the “Registered User” radio button and enter your details. You have three options for storing your password.
- Forget password immediately – This will log you in and and soon as your session is over you will be required to provide your credentials again.
- Remember password until you logout – Remember your password until you explicitly logout.
- Remember forever – This option will store the credentials and allow you to easily return to the share.
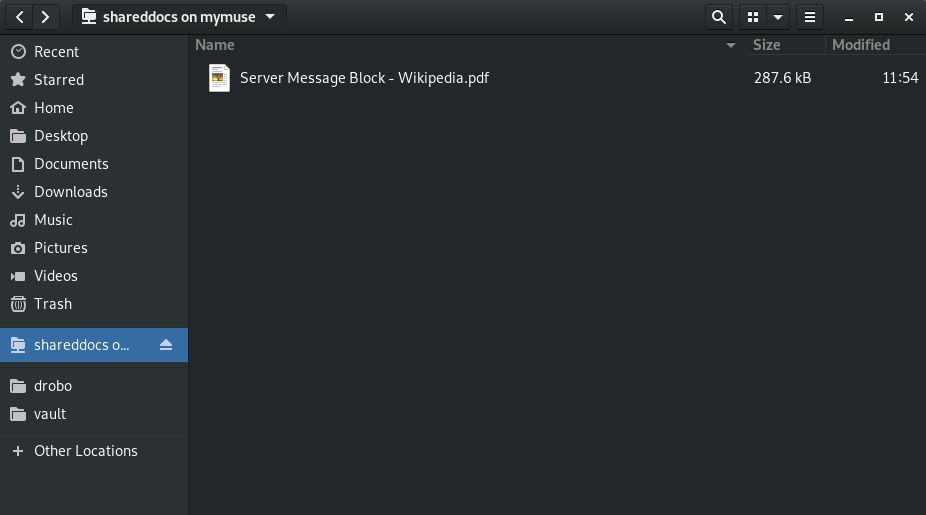
Once you are connected, Nautilus will show the location on the left panel allowing easy access to the share.
Be aware that once that connection is closed you will have to go back to “Other Locations” and use the drop down box to reconnect. If you want to make the share persistently accessible from the left menu you will need to add a bookmark.
NOTE: If you do not want to type your credentials every time ensure that you select “Remember Forever” when authenticating to the share.
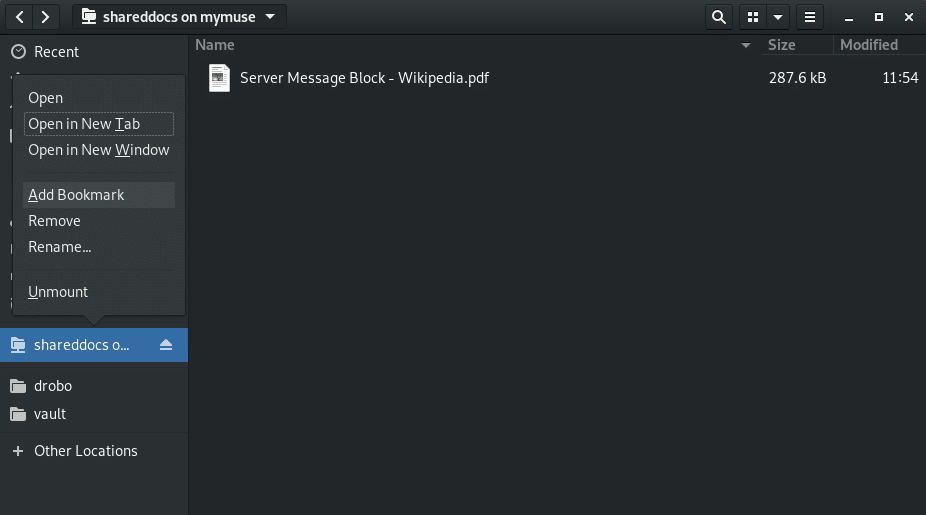
To add a bookmark, connect to the share then right click it in the left panel and select “Add Bookmark”.
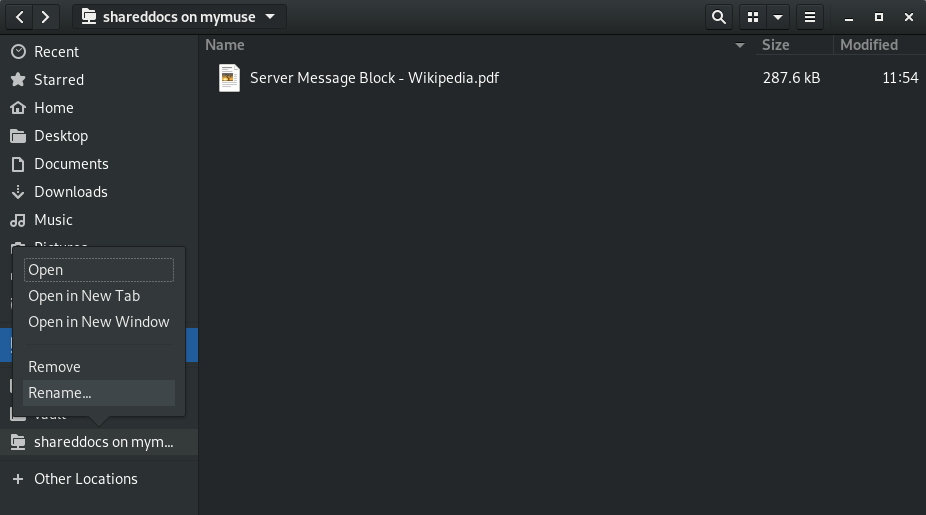
If you have a lot of shares, or multiple shares on the same device, it will be hard to differentiate them. You can rename them to something more user friendly by right clicking on the bookmark and selecting “Rename…”.
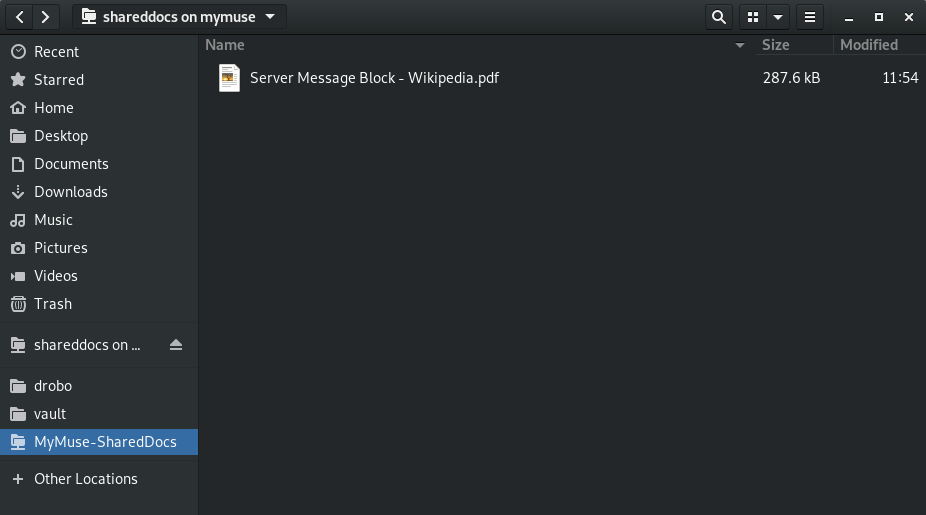
Now we can easily navigate to our share as the name is clearly visible and easy to identify.
Mount A Windows Share Using Command Line
Using the mount.cifs Command
You can easily mount a cifs share from the command line using the mount.cifs command. Using the mount command requires root privileges.
First, create a directory to mount the share:
Use the mount.cifs command to mount the share at the created directory.
You can use the IP address as well.
Alternatively, you can use mount -t cifs with the same syntax.
Automatically Mount CIFS Share at Boot
Mount CIFS Share at Boot Using /etc/fstab
You can add your CIFS mount point in /etc/fstab and have the system mount it during boot. However, there are some considerations to make. If the share is not available at boot time the system will hang until the mount attempt times out, or worse, refuse to boot. This will cause a delay in accessing the system. To avoid this you can use autofs (next section). Also mounting it via fstab requires you to put your credentials somewhere in plain text. You have two options when using fstab to mount a CIFS share.
- Put the credentials in the fstab file itself – This is a huge security risk as fstab is readable by any user. Someone can simply cat the file and see your credentials. IT IS NOT RECOMMENDED!
- Use a credentials file – This entails saving your credentials in a separate file which can then be protected by permissions. Although your credentials will still be saved in plain text, someone would need root permissions to read them.
Because of the high risk of the first option, we will not even discuss how to do it. It is easy enough to use a credentials file.
First, create a hidden file in root’s home directory (/root/). You can call this file whatever you like. Most people call it .smbcreds or similar. In this file you need two lines, one containing “username= ” and one containing “password= ”.
Now set the permissions so it is only readable by root:
Now edit the /etc/fstab file and add the following information:
- Remote server share address (//mymuse/shareddocs)
- Local mount point (/mnt/cifs)
- Filesystem type (cifs)
- options (credentials file=/root/.smbcreds)
- dump option (0)
- check option (0)
Example fstab, last line showing the CIFS mount point.
Mount CIFS Share using AutoFS
The most obvious benefit of using autofs is that the share is only mounted when being accessed. If it is unavailable it will not effect your system when it boots.
Using autofs has the same credentials issues described above with fstab. It is also necessary to store your password in plain text when using autofs for cifs shares.
Installing autofs Package
Install autofs in CentOS 7, or Red Hat 7:
Install autofs in Ubuntu 18:
Let’s configure autofs to mount our Windows share.
Create Credentials File
First, ensure you create the credentials file as described above:
DO NOT forget to set the permissions:
Get UID for User
Now, let’s get our user accounts uid so we can tell autofs to mount the share as our user instead of root.
Edit auto.master Map File
Edit the /etc/auto.master configuration file. In this file we will provide a map of directories to shares for autofs to use. Add the following line to the file:
The first part of the above line is the directory we are using as a mount point (you can create a custom directory if you wish). The second is the file that autofs should look in for instructions on how to connect to the resource and mount it.
Create the Shares File
Next edit or create the /etc/auto.shareddocs file and add the following:
Restart the Service
Now we must restart the autofs service so it reads the new configuration.
Test and Verify
Now, let’s look in the /mnt directory.
The shareddocs directory doesn’t exist until you try to access it (auto fs). If everything above was followed, we should be to cd into that directory even though we do not see it. The directory will be dynamically created as it is accessed.
Bob’s your uncle.
Conclusion
In this article we covered 3 different ways to mount your Windows shares in Linux. You should now be able to mount an SMB share via the GUI, manually on the command line, automatically on boot and with autofs.
An important point I would like to stress is make sure you protect your credentials. I hope you enjoyed this tutorial, please leave feedback or questions in the comments below.
Как монтировать общие папки Windows в системах Linux
How to Mount Windows Share on Linux using CIFS
В этом руководстве мы расскажем, как вручную и автоматически монтировать общие папки Windows в системах Linux.
В операционных системах Linux и UNIX общий ресурс Windows можно смонтировать в определенной точке монтирования в дереве локальных каталогов, используя cifs параметр mount команды.
Общая файловая система Интернета (CIFS) — это сетевой протокол обмена файлами. CIFS является формой SMB.
Установка пакетов утилит CIFS
Чтобы смонтировать общий ресурс Windows в системе Linux, сначала необходимо установить пакет утилит CIFS.
Установка утилит CIFS в Ubuntu и Debian:
Установка утилит CIFS в CentOS и Fedora:
Имя пакета может отличаться в разных дистрибутивах Linux.
Монтирование CIFS Windows Share
Монтирование удаленного общего ресурса Windows аналогично монтированию обычных файловых систем.
Сначала создайте каталог, который будет служить точкой монтирования для удаленного общего ресурса Windows:
Запустите следующую команду как пользователь root или пользователь с правами sudo для монтирования общего ресурса:
Вам будет предложено ввести пароль:
В случае успеха не выводится.
Чтобы убедиться, что удаленный общий ресурс Windows успешно смонтирован, используйте команду mount или df -h .
После монтирования общего ресурса точка монтирования становится корневым каталогом смонтированной файловой системы. Вы можете работать с удаленными файлами, как если бы они были локальными файлами.
Пароль также можно указать в командной строке:
Если пользователь находится в рабочей группе или домене Windows, вы можете установить его следующим образом:
Для большей безопасности рекомендуется использовать файл учетных данных, который содержит имя пользователя, пароль и домен общего ресурса.
Файл учетных данных имеет следующий формат:
Файл не должен быть доступен для чтения пользователям. Чтобы установить правильные разрешения и владельца , запустите:
Чтобы использовать файл учетных данных, определите его следующим образом:
По умолчанию подключенный общий ресурс принадлежит пользователю root, а разрешения установлены на 777.
Используйте dir_mode опцию, чтобы установить разрешение каталога и file_mode установить разрешение файла:
Пользователь по умолчанию и группа собственность могут быть изменены с uid и gid опциями:
Чтобы установить дополнительные параметры , добавьте их в виде списка через запятую после -o параметра. Чтобы получить список всех опций монтирования, введите man mount ваш терминал.
Авто монтаж
Когда общий ресурс монтируется вручную с помощью mount команды, он не сохраняется после перезагрузки.
/etc/fstab Файл содержит список записей , которые определяют , где , как и то , что файловая система будет смонтирована на старте системы.
Чтобы автоматически смонтировать общий ресурс Windows при запуске вашей системы Linux, определите монтирование в /etc/fstab файле. Строка должна содержать имя хоста или IP-адрес ПК с Windows, имя общего ресурса и точку монтирования на локальном компьютере.
Откройте /etc/fstab файл в текстовом редакторе :
Добавьте следующую строку в файл:
Выполните следующую команду для монтирования общего ресурса:
mount Команда, будет читать содержание /etc/fstab и установить долю.
При следующей перезагрузке системы общий ресурс Windows будет смонтирован автоматически.
Размонтирование Windows Share
Команда umount отсоединяет (размонтирует) смонтированную файловую систему от дерева каталогов.
Чтобы отсоединить подключенный общий ресурс Windows, используйте umount команду с указанием либо каталога, в котором он был подключен, либо удаленного общего ресурса:
Если в fstab файле CIFS есть запись в файле, удалите ее.
Команда umount не сможет отсоединить общий ресурс, когда он используется. Чтобы узнать, какие процессы обращаются к общему ресурсу Windows, используйте fuser команду:
Найдя процессы, вы можете остановить их с помощью kill команды и размонтировать общий ресурс.
Если у вас по-прежнему возникают проблемы с размонтированием общего ресурса, используйте параметр -l ( —lazy ), который позволяет размонтировать занятую файловую систему, как только она больше не будет занята.
Вывод
В Linux вы можете смонтировать общий доступ к Windows, используя mount команду с cifs параметром.


