- Как монтировать образы ISO на Windows 10
- Как монтировать образ ISO через проводник
- Двойной клик
- Контекстное меню
- Меню-лента
- Демонтирование образа
- Как монтировать образ ISO при помощи PowerShell
- Монтирование образа ISO в PowerShell
- Демонтирование образа ISO в PowerShell
- How to mount ISO images on Windows 10
- How to mount ISO image with File Explorer
- Mount image with double-click
- Mount image from context menu
- Mount image from ribbon menu
- Unmount image
- How to mount ISO image with PowerShell
- Mount ISO image command
- Unmount ISO image command
- More Windows 10 resources
- Halo: MCC’s live service elements make it better, not worse
- Microsoft’s Surface Duo is not ‘failing up’
- Here’s what you can do if Windows 10 update KB5001330 is causing issues
- These external monitors go perfectly with the Lenovo ThinkPad X1 Carbon
- Mounting iso images windows
- How do I mount ISO Image File In Windows 7?
Как монтировать образы ISO на Windows 10
Образ ISO представляет собой контейнер, созданный для хранения содержимого физических дисков (CD, DVD, Blu-ray). Программные компании обычно используют файлы этого формата как средство распространения приложений и утилит без необходимости поставлять физические носители, что может быть дорого и долго. Например, Microsoft использует контейнеры ISO для распространения предварительных версий Windows 10 среди тестировщиков.
Можно найти множество инструментов для работы с этими образами, а Windows 10 позволяет монтировать файлы ISO без использования дополнительного программного обеспечения. В этой статье мы поговорим о такой возможности при помощи проводника и команд PowerShell.
Как монтировать образ ISO через проводник
При помощи проводника Windows 10 можно получить доступ к содержимому контейнера как минимум тремя способами. Можно дважды кликнуть на файл, использовать контекстное меню или меню-ленту наверху окна проводника.
Двойной клик
- Откройте проводник.
- Откройте папку с образом ISO.
- Дважды кликните на файл формата .iso для его монтирования.
После этого файл откроется как любая другая папка, позволяя извлекать его содержимое.
Контекстное меню
- Откройте проводник.
- Откройте папку с образом ISO.
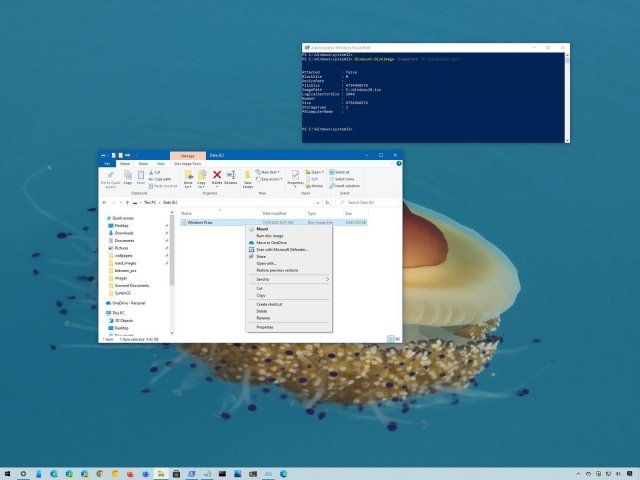
- Нажмите правой кнопкой мыши на файл формата .iso и выберите команду «Монтировать».
После этого вы сможете получать доступ к содержимому образа, выбрав виртуальный диск в левой панели навигации.
Меню-лента
- Откройте проводник.
- Откройте папку с образом ISO.
- Выделите файл .iso.
- Нажмите на вкладку «Инструменты образа диска».
- Нажмите на кнопку «Монтировать».
Если у вас есть сторонние инструменты открытия сжатых файлов в форматах вроде .zip, .tar, .rar, они могут быть настроены как приложение по умолчанию для открытия файлов ISO. В таком случае вы не увидите опцию «Монтировать образ». Вы можете кликнуть по файлу правой кнопкой мыши, перейти в подменю «Открыть с помощью» и выбрать вариант «Проводник» для монтирования ISO.
Демонтирование образа
Когда вы больше не пользуетесь образом, можно демонтировать его. Правой кнопкой мыши нажмите на виртуальный диск в разделе «Этот компьютер» в проводнике и выберите команду «Демонтировать».
- Откройте проводник.
- Выберите «Этот компьютер» в панели слева.
- Нажмите на виртуальный диск правой кнопкой мыши и выберите команду «Демонтировать».
После этого образ недоступен и нужно будет монтировать его снова, чтобы добраться до хранящихся на нём файлов.
Как монтировать образ ISO при помощи PowerShell
Монтирование образа ISO в PowerShell
- Откройте меню «Пуск».
- Введите в поиск PowerShell, правой кнопкой мыши нажмите на верхний результат и выберите команду «Запуск от имени администратора».
- Наберите следующую команду и нажмите ввод:
Mount-DiskImage -ImagePath «PATH\TO\ISOFILE»
Вместо «PATH\TO\ISOFILE» нужно указать путь к файлу формата .iso.
Например, следующая команда монтирует образ на виртуальном диске «E:\»:
Mount-DiskImage -ImagePath «E:\Windows10.iso»
После выполнения этих действий образ ISO смонтирован и вы сможете получить доступ к его содержимому. Для этого нужно открыть появившийся в разделе «Этот компьютер» новый диск.
Демонтирование образа ISO в PowerShell
- Откройте меню «Пуск».
- Введите в поиск PowerShell, правой кнопкой мыши нажмите на верхний результат и выберите команду «Запуск от имени администратора».
- Наберите следующую команду и нажмите ввод:
Dismount-DiskImage -ImagePath «PATH\TO\ISOFILE»
Вместо «PATH\TO\ISOFILE» нужно указать путь к файлу формата .iso.
Например, следующая команда демонтирует образ на виртуальном диске «E:\»:
Dismount-DiskImage -ImagePath «E:\Windows10.iso»
How to mount ISO images on Windows 10
 Source: Windows Central
An ISO image is a container format designed to store the contents of a physical disk (CD, DVD, or Blu-ray). Software companies usually use this file format as a medium to distribute the applications and tools without the need to ship physical media, which can be costly and time-consuming. For example, Microsoft uses this format to distribute previews of Windows 10 to testers and many other products.
Although you can find a lot of tools to work with images, Windows 10 includes the ability to mount and mount ISO files natively without the need for extra software.
In this Windows 10 guide, we’ll walk you through the steps to mount and unmount the ISO images using File Explorer as well as PowerShell commands.
How to mount ISO image with File Explorer
On Windows 10, you can access the content of an image in at least three different ways using File explorer. You can double-click the file, you can use the content menu option, or the option available in the ribbon menu.
Mount image with double-click
To quickly mount an ISO file on Windows 10, use these steps:
- Open File Explorer.
- Browse to the folder with the ISO image.
Double-click the .iso file file to mount it.
 Source: Windows Central
Once you complete these steps, the ISO file will open like any other folder, allowing you to access and extract the contents as necessary.
Mount image from context menu
To mount an ISO image with the File Explorer context menu, use these steps:
- Open File Explorer.
- Browse to the folder with the ISO image.
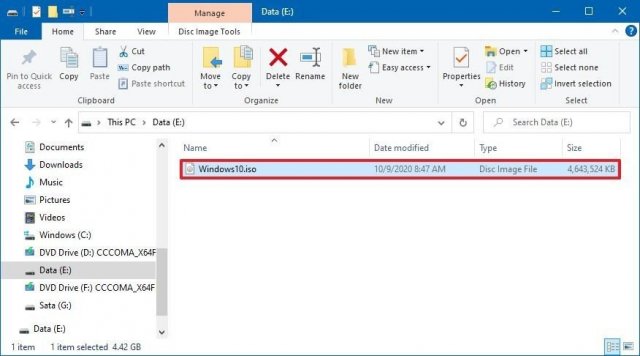
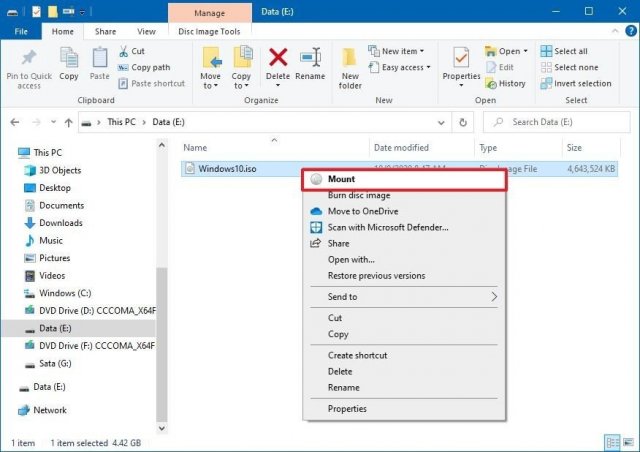
Right-click the .iso file and select the Mount option.
 Source: Windows Central
Once you complete the steps, you can access the contents of the image by selecting the virtual drive from the left navigation pane.
Mount image from ribbon menu
To mount an image with the ribbon menu, use these steps:
- Open File Explorer.
- Browse to the folder with the ISO image.
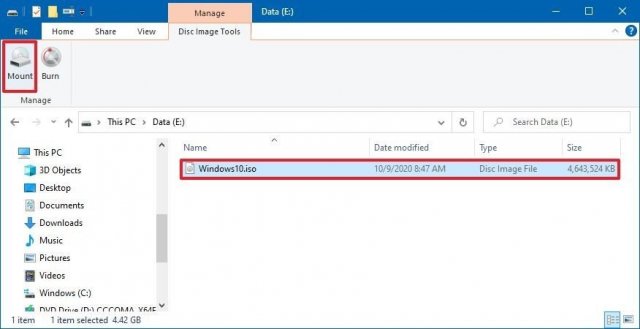
- Select the .iso file.
- Click the Disk Image Tools tab.
Click the Mount button.
 Source: Windows Central
If you have a third-party tool to open compressed files (such as .zip, .tar, .rar, etc.), it’s possible the tool may also be configured as the default application to open ISO images. When this happens, you won’t see an option to mount images. However, you can still right-click, select the Open with submenu, and select the Windows Explorer option to mount the ISO.
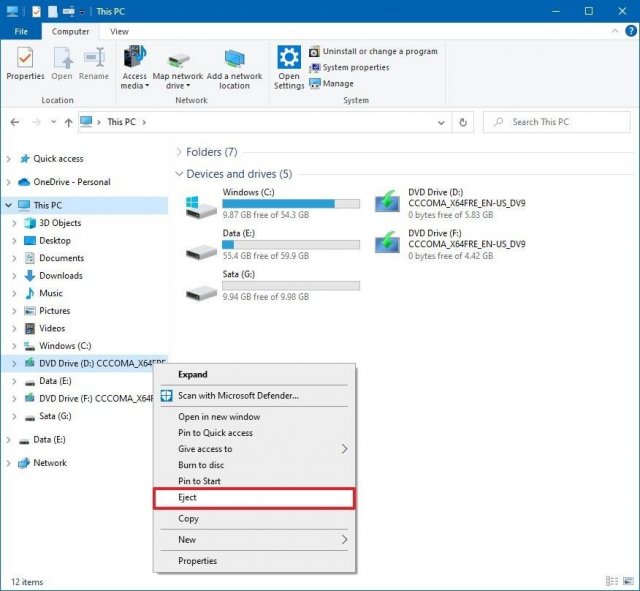
Unmount image
Once you are no longer using the image, you can quickly unmount the file by right-clicking the virtual drive under This PC in File Explorer and selecting the Eject option.
- Open File Explorer.
- Expand This PC from the left navigation pane.
Right-click the virtual drive and select the Eject option.
![]() Source: Windows Central
Source: Windows Central
After you complete these steps, the image will no longer be accessible until you mount it again.
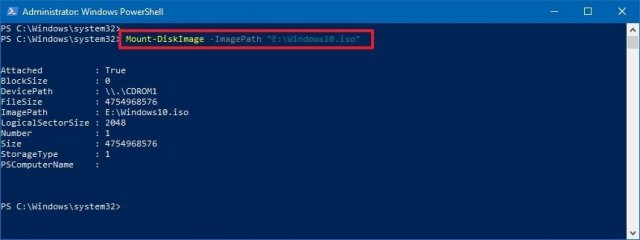
How to mount ISO image with PowerShell
It’s also possible to mount and unmount an image using commands with PowerShell.
Mount ISO image command
To mount an ISO image using a PowerShell command, use these steps:
- Open Start.
- Search for PowerShell, right-click the top result, and select the Run as administrator option.
Type the following command to mount an ISO image and press Enter:
Mount-DiskImage -ImagePath «PATH\TO\ISOFILE»
In the command, make sure to replace the «PATH\TO\ISOFILE» with the actual path of the .iso file.
For example, this command mounts an image in the «E:\» virtual drive:
Mount-DiskImage -ImagePath «E:\Windows10.iso»
 Source: Windows Central
Once you complete the steps, the ISO image will mount, and you will be able to access the contents to install the application or extract the image contents from the newly-available drive letter.
Unmount ISO image command
To unmount an image with PowerShell, use these steps:
- Open Start.
- Search for PowerShell, right-click the top result, and select the Run as administrator option.
Type the following command to mount an ISO image and press Enter:
Dismount-DiskImage -ImagePath «PATH\TO\ISOFILE»
In the command, make sure to replace the «PATH\TO\ISOFILE» with the actual path of the .iso file.
For example, this command removes the mount for an image in the «E:\» virtual drive:
Dismount-DiskImage -ImagePath «E:\Windows10.iso»
Source: Windows Central
After you complete the steps, the virtual drive will be removed, and the image will no longer be accessible until you mount it again.
More Windows 10 resources
For more helpful articles, coverage, and answers to common questions about Windows 10, visit the following resources:
![]()
Halo: MCC’s live service elements make it better, not worse
Halo: The Master Chief Collection is more popular than ever, but some fans don’t agree with the live service approach 343 Industries has taken with it. Here’s why those elements are, at the end of the day, great for the game and for Halo overall.
![]()
Microsoft’s Surface Duo is not ‘failing up’
Microsoft announced this week that it was expanding Surface Duo availability to nine new commercial markets. While Surface Duo is undoubtedly a work in progress, this is not a sign of a disaster. It’s also doesn’t mean that Surface Duo is selling a ton either. Instead, the reason for the expansion is a lot more straightforward.
![]()
Here’s what you can do if Windows 10 update KB5001330 is causing issues
In this guide, we’ll show you the steps to get rid of the update KB5001330 to fix profile, gaming, and BSoD problems with the Windows 10 October 2020 Update and May 2020 Update.
![]()
These external monitors go perfectly with the Lenovo ThinkPad X1 Carbon
The Lenovo ThinkPad X1 Carbon is an excellent laptop, but what if you want to project the display onto a larger screen? You’ll need an external monitor for that. Here are our favorite options.
Mounting iso images windows

How do I mount ISO Image File In Windows 7?
In Windows 7, to mount an ISO disk image for installing software or recover backup files, you need to install a third-party utility. Now here comes WinISO Standard 6 which will allow these older versions of Windows mount ISO files as virtual CD-ROM/ DVD-ROM drives.
Mount ISO is one of the main features of WinISO. It’s dead simple so that the novice can also handle it with ease.
Here we will show you the way to mount ISO image in Windows 7 step by step.
Step 1: Download and Run WinISO
Free Download WinISO from our official website and install it. It will just take you several seconds.

Step 2: Click «Mount»
Run WinISO, open the ISO file. Click «Mount» on the toolbar, or you can also click «Tools» on the menu, then choose «Mount Image».

Step 3: Click «Open in Explorer»
A few seconds later, you will get a message: Current image has been mounted to Drive H(as an example). Then click «Open in Explorer». The extracted file list will appear in the drive.

Furthermore, you can also stop mounting the image files by pressing «Unmount».
For more guides, please take closer look here:


