- Как смонтировать файл образа ISO в Linux
- How to Mount ISO File on Linux
- В этом руководстве мы объясним, как монтировать файлы ISO в Linux.
- Как смонтировать файлы ISO с помощью командной строки
- Монтирование файлов ISO с помощью Gnome
- Вывод
- How to Mount and Unmount an ISO Image in RHEL/CentOS/Fedora and Ubuntu
- How to Mount an ISO Image
- How to Unmount an ISO Image
- If You Appreciate What We Do Here On TecMint, You Should Consider:
- Mounting an ISO Image in Linux
- Create a Mount Point for ISO Image
- Mount an ISO File in Linux
- Verify that ISO File is Mounted
- Unmount an ISO File in Linux
- How to mount an ISO image on Linux
- Mounting more than one ISO image at the same time
- Монтирование образов дисков
- Содержание
- Подключение стандартного ISO-образа
- Используя графический интерфейс
Как смонтировать файл образа ISO в Linux
How to Mount ISO File on Linux
В этом руководстве мы объясним, как монтировать файлы ISO в Linux.
Файл ISO — это архивный файл, который обычно содержит полный образ CD или DVD. Например, большинство операционных систем, таких как Windows, Linux и macOS, распространяются как образы ISO.
Файлы ISO могут быть извлечены с использованием популярных архивных программ, смонтированы на петлевом устройстве и записаны на флэш-накопитель USB или чистый компакт-диск.
Как смонтировать файлы ISO с помощью командной строки
Команда mount позволяет прикреплять (монтировать) файлы ISO в определенной точке монтирования в дереве каталогов.
Инструкции в этом разделе должны работать с любым дистрибутивом Linux, включая Ubuntu, Debian и CentOS.
Начните с создания точки монтирования, это может быть любое место, которое вы хотите:
Смонтируйте файл ISO в точку монтирования, введя следующую mount команду:
Здесь важен -o loop вариант. Он сообщает команде для сопоставления устройства цикла с указанным файлом ISO и монтирует это устройство в указанной точке монтирования.
Не забудьте заменить /path/to/image.iso путь к файлу ISO.
Чтобы просмотреть содержимое ISO-образа, используйте ls команду:
Вы также можете открыть файловый менеджер для просмотра содержимого ISO.
Размонтируйте файл ISO с помощью umount команды, за которой следует каталог, куда был смонтирован образ:
Если файловая система используется, umount команда не сможет отсоединить файловую систему.
Монтирование файлов ISO с помощью Gnome
Если вы используете дистрибутив Linux, в котором в качестве среды рабочего стола используется Gnome, вы можете смонтировать файл ISO, используя приложение монтирования образа диска Gnome.
Найдите файл ISO, который вы хотите смонтировать, и щелкните по нему правой кнопкой мыши. В контекстном меню выберите опцию «Открыть с помощью образа диска».

После того, как образ смонтирован, на рабочем столе должен появиться значок устройства. Дважды щелкните по нему, и откроется файловый менеджер Gnome.
Чтобы демонтировать файл ISO, щелкните правой кнопкой мыши значок устройства и выберите «демонтировать».
Вывод
В Linux вы можете монтировать файлы ISO с помощью mount команды. Пользователи настольных компьютеров могут использовать графические инструменты, такие как Gnome Disk Image Mounter.
Источник
How to Mount and Unmount an ISO Image in RHEL/CentOS/Fedora and Ubuntu
An ISO image or .iso (International Organization for Standardization) file is an archive file that contains a disk image called ISO 9660 file system format. Every ISO file have .ISO extension has defined format name taken from the ISO 9660 file system and specially used with CD/DVD Rom’s. In simple words an iso file is a disk image.
![]() mount and unmount iso images in linux
mount and unmount iso images in linux
I have seen most of the Linux operating system that we download from the internet are .ISO format. Typically an ISO image contains installation of software’s such as, operating system installation, games installation or any other applications. Sometimes it happens that we need to access files and view content from these ISO images, but without wasting disk space and time in burning them on to CD/DVD.
This article describes how to mount and unmount an ISO image on a Linux Operating system to access and list the content of files.
How to Mount an ISO Image
To mounting an ISO image on Linux (RedHat, CentOS, Fedora or Ubuntu), you must be logged in as “root” user or switch to “sudo” and run the following commands from a terminal to create a mount point.
Once you created mount point, use the “mount” command to mount an iso file called “Fedora-18-i386-DVD.iso“.
After the ISO image mounted successfully, go the mounted directory at /mnt/iso and list the content of an ISO image. It will only mount in read-only mode, so none of the files can be modified.
You will see the list of files of an ISO image, that we have mounted in the above command. For example, the directory listing of an Fedora-18-i386-DVD.iso image would look like this.
How to Unmount an ISO Image
Simply run the following command from the terminal either “root” or “sudo” to unmount an mounted ISO image.
Where Options
- -t : This argument is used to indicate the given filesystem type.
- ISO 9660 : It describes standard and default filesystem structure to be used on CD/DVD ROMs.
- -o : Options are necessary with a -o argument followed by a separated comma string of options.
- loop: The loop device is a pseudo-device that often used for mounting CD/DVD ISO image and makes those files accessible as a block device.
If You Appreciate What We Do Here On TecMint, You Should Consider:
TecMint is the fastest growing and most trusted community site for any kind of Linux Articles, Guides and Books on the web. Millions of people visit TecMint! to search or browse the thousands of published articles available FREELY to all.
If you like what you are reading, please consider buying us a coffee ( or 2 ) as a token of appreciation.

We are thankful for your never ending support.
Источник
Mounting an ISO Image in Linux
You can easily access an ISO image of a CD or DVD (e.g. RHEL DVD) from the command line in Linux.
To access an ISO disc image, you have to create a mount point (empty folder that will be used as a root filesystem) and mount an ISO file to it.
In this article, i’ll show how to Mount and Unmount an ISO file from the Linux Command Line (CentOS, RHEL, Fedora, Ubuntu, Debian, Mint etc.).
To mount an ISO image in Linux, you must be a root or use sudo.
Create a Mount Point for ISO Image
A mount point – is a directory (typically an empty folder) from which the content of an ISO disc image will be accessible.
Create a mount point:
Mount an ISO File in Linux
Mount an ISO file /home/user/disk.iso to the mount point /mnt/mount_point :
After ISO disk is mounted, you will receive the following message: ‘mount: warning: /mnt/mount_point seems to be mounted read-only‘.
You can ignore it, because according to the ISO 9660 standard, ISO images are always mounted in read-only mode.
Verify that ISO File is Mounted
List mounted devices to verify that ISO image has successfully been mounted:
Below you should see a line like the following:
Now you can access the mount point and list the files stored on the ISO disk image:
Unmount an ISO File in Linux
Use the following command to unmount an ISO disc image:
Источник
How to mount an ISO image on Linux
An ISO image or .iso file contains the disk image of an ISO 9660 file system, which is used for storing data on CD-ROMs and DVD-ROMs. It is possible to take an ISO image and record it onto a CD or DVD using various applications for doing so, and it is also possible to mount the ISO image using Linux, so that you can access the files without having to actually burn it to disk first.
ISO images downloaded from the Internet typically contain operating system installation software, such as installing Linux (eg Fedora, Ubuntu, openSUSE, Mandriva, CentOS etc) or BSD (eg FreeBSD, OpenBSD and NetBSD). Sometimes you might need to access files on these ISO images but don’t want to actually waste a disk just to access them.
Mounting an ISO image on Linux is as simple as this, running the command from a terminal either as root or using sudo:
The /path/to/filename in the above example would be the path to and filename of the ISO image, eg /home/chris/temp/CentOS-5.1-i386-bin-1of6.iso , and /mnt/loop0 at the end of the command is a place to mount the file to and must be a directory that actually exists. If it does not exist, then you’ll get an error message like this:
I’m just using /mnt/loop0 as an example, but you could make it any directory that you would like to mount it to, as long as it exists.
After the ISO image has been successfully mounted, it’s just like accessing any directory on your regular filesystem, only it is read only and none of the files can be modified. For example, doing this:
will display the directory listing of the ISO image mounted at /mnt/loop0 that we have mounted in the earlier example above. In the example of the CentOS 5.1 CD, the listing would look like this:
To unmount the ISO image when you are done, simply do this, running the command from a terminal either as root or using sudo:
If you didn’t run it as root or using sudo, then you’ll see an error similar to this:
Just run it again using sudo or as the root user and it should work fine.
Mounting more than one ISO image at the same time
If you need to have more than one ISO image mounted at the same time so you can reference files on several ISO images at once, then just mount each one using a different /dev/loopX and different mount location. For example, to mount all 6 of the CentOS CD images used in the above example, you would do the following.
First of all make sure the directories we are going to mount them to have been created (we’ll mount CD 1 at /mnt/loop1, CD 2 at /mnt/loop2 and so on, so as not to cause confusion):
Using a little bit of BASH magic we can simplify the above to this:
And then mount each one. The following assumes we are in the same directory location as the ISO image files.
And using a little BASH magic again, we can simplify this as follows:
That will mount all 6 CD images to /mnt/loop0 through /mnt/loop6 . Note that the after $i is required, otherwise the for loop will think the variable name is $iof6. Escaping the o like $io fixes this.
Updated February 19th 2008
Thanks to Isaac Emesowum for letting me know that you don’t need to specify the «ro» option or the actual loop device because the system will assign it automatically, and will notify you if it runs out of loop devices. I have updated the above mount command examples accordingly.
Another update on February 19th…
I was just mounting an ISO image to checksum the contents just now, and decided to try not specifying the «-t iso9660» and that worked, so it looks like the mount command is smart enough to work out that it’s a CD image. This simplifies the mount command to this:
Источник
Монтирование образов дисков
Содержание
Подключение стандартного ISO-образа
Используя графический интерфейс
Для монтирования образов дисков в Gnome имеется множество графических утилит:
ISOmorphin — программа написанная на языке Python. Для работы необходимо закачать и распаковать архив в любое удобное место, а затем запустить файл isomorphin.py в папке.
Gmount-iso — Маленькая и довольно удобная программка, позволяющая монтировать ISO образы в произвольную папку, а также отмонтировать уже подключённые образы. Добавлена возможность расчета md5 суммы и объема образа. Интерфейс программы прост до безобразия и в пояснениях не нуждается.  Для установки используйте команду:
Данная программа будет доступна в меню: Приложения→Системные→gISOMountUsage.
Furius ISO Mount — автоматически создает точку монтирования в домашней папке пользователя и удаляет ее при размонтировании, позволяет записывать образы в форматах ISO и IMG. А так же рассчитывать контрольные суммы Md5 и SHA1. 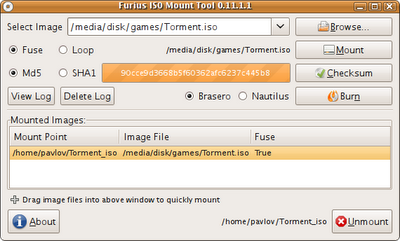
AcetoneISO — графическое приложение, написанное на Qt, для работы с образами CD/DVD дисков (клон Daemon Tools для Linux с новыми возможностями). На сайте заявлены следующие возможности:
Источник


