- Исправлено: USB Mouse не работает на Windows 10 —
- Способ 1: выключите машину
- Способ 2: включить USB-мышь
- Метод 3: Проверьте свою мышь USB
- Способ 4: переустановите драйвер мыши
- Способ 5: скачать драйвер мыши с официального сайта производителя
- Способ 6: изменить настройки управления питанием USB
- Метод 7: удалить MotioninJoy
- Способ 8. Сканирование жесткого диска на наличие вредоносных программ.
- Способ 9: изменить настройки BIOS или UEFI
- Способ 10: переустановите Windows
- Fix: USB Mouse Not Working on Windows 10
- Method 1: Turn off your machine
- Method 2: Enable USB mouse
- Method 3: Test your USB mouse
- Method 4: Reinstall mouse driver
- Method 5: Download mouse driver from official vendor’s website
- Method 6: Change USB Power Management settings
- Method 7: Uninstall MotioninJoy
- Method 8: Scan hard disk for malware
- Method 9: Change BIOS or UEFI settings
- Method 10: Reinstall Windows
- Method 11: Running Hardware Troubleshooter
- Method 12: Update Windows
Исправлено: USB Mouse не работает на Windows 10 —
Мышь — это устройство ввода, которое помогает нам работать через графический интерфейс пользователя на компьютерах с Windows. Работа без мыши с использованием единственной клавиатуры требует больше времени и знаний, и это может быть сложно для неопытного пользователя. Существуют разные типы мышек, включая проводную и беспроводную. Процедура установки мыши на Windows-машине очень проста, вам нужно подключить мышь к USB-порту и установить драйвер. Драйвер может быть установлен автоматически Windows или вы можете скачать драйвер с официального сайта поставщика.
Немногие пользователи поощряют проблемы с USB-мышью, потому что она перестала работать из-за различных проблем, включая проблемы с оборудованием и системой, проблемы с драйверами, неправильная конфигурация и другие.
Эта проблема возникает на компьютерах, ноутбуках и операционных системах от Windows XP до Windows 10. Мы создали десять методов, которые помогут вам решить эту проблему. Как вы решите проблему на компьютере с Windows, если USB-мышь не работает должным образом? Не волнуйтесь, мы создали методы, которые полностью совместимы с вашей клавиатурой. Итак, начнем.
Способ 1: выключите машину
В первом методе вам нужно будет выключить компьютер с Windows через командную строку. Мы покажем вам, как это сделать в Windows 10 с помощью клавиш клавиатуры. Этот метод совместим с предыдущими операционными системами.
- Держать Логотип Windows и нажмите р
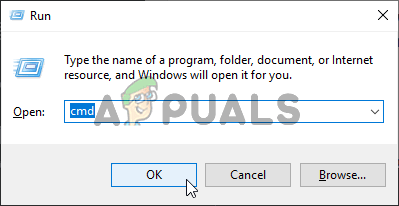
- Тип CMD и нажмите Войти открыть Командная строка
- Тип выключение / с / ф / т 0 и нажмите Войти в неисправность ваш компьютер с Windows
- Включить ваш компьютер с Windows
- Тестовое задание ваша USB мышь
Способ 2: включить USB-мышь
Если ваша USB-мышь отключена, вы не сможете использовать эту мышь. Вам нужно будет открыть диспетчер устройств и проверить, включена или отключена USB-мышь. Если ваша USB-мышь отключена, вам необходимо включить ее. Мы покажем вам, как это сделать в Windows 10 с помощью клавиш клавиатуры. Эта же процедура совместима с предыдущими операционными системами.
- Держать Логотип Windows и нажмите р
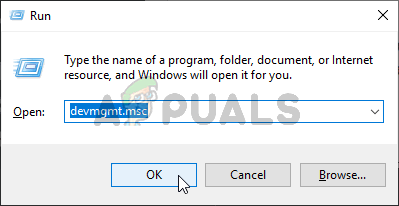
- Тип devmgmt.msc и нажмите Войти открыть Диспетчер устройств
- Нажмите табуляция выбрать имя компьютера. В нашем примере это DESKTOP-CLKH1SI
- Используя стрелка вниз перемещаться по Мыши и другие указательные устройства
- Нажмите Alt + стрелка вправо на клавиатуре, чтобы развернуть группу
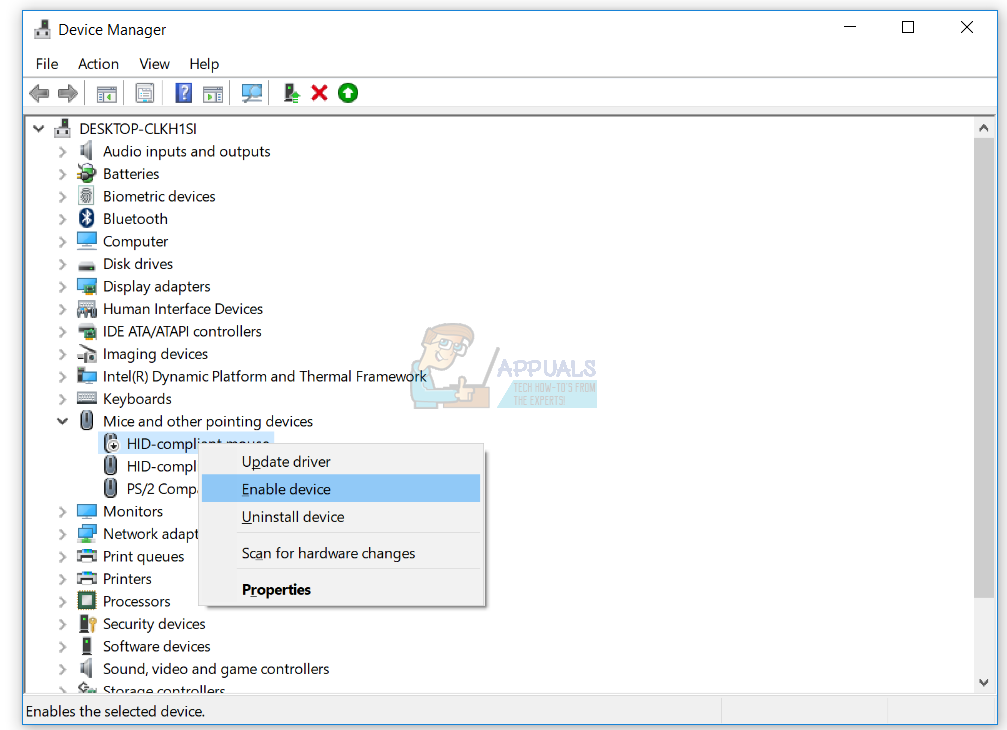
- Используя стрелка вниз перемещаться по HID-совместимая мышь. Это USB-мышь. В нашем примере это отключено и не может быть использовано на машине Windows
- Нажмите Shift + F10 или же Fn + Shift + F10 открыть список свойств. Эти комбинации клавиш имитируют щелчок правой кнопкой мыши
- Используя стрелка вниз выбирать включитьустройство и нажмите Войти на вашей клавиатуре
 Тестовое задание ваша USB мышь
- близко Диспетчер устройств
 Тестовое задание ваша USB мышь
Метод 3: Проверьте свою мышь USB
Настало время для тестирования мыши в качестве аппаратного компонента. Используя этот метод, мы проверим, есть ли аппаратная или программная проблема с USB-мышью и Windows. Сначала вам нужно будет протестировать порты USB на вашем компьютере с Windows. Пожалуйста, отключите мышь от текущего USB-порта и подключите другие USB-порты на той же машине. Если мышь работает правильно на другом порту USB, это означает, что с мышью проблем нет, есть проблема с портом USB.
Но, если проблема все еще существует, возможно, ваша мышь не работает должным образом, и вам нужно будет выполнить второй тест. Второй тест будет включать тестирование вашей мыши на другом компьютере, или вы тестируете другую мышь на вашем текущем компьютере, где мышь не работает должным образом. Если мышь не работает на другой машине, вам нужно будет купить другую.
Способ 4: переустановите драйвер мыши
Если некоторые аппаратные компоненты не работают должным образом, вам следует переустановить драйверы, которые обеспечивают связь между аппаратными компонентами и операционной системой. Исходя из этого, вам нужно будет переустановить мышь через диспетчер устройств. Драйвер мыши будет автоматически установлен через хранилище драйверов Microsoft. Мы покажем вам, как это сделать в Windows 10 с помощью клавиш клавиатуры. Эта же процедура совместима с предыдущими операционными системами.
- Держать Логотип Windows и нажмите р
- Тип devmgmt.msc и нажмите Войти открыть Диспетчер устройств
- Нажмите табуляция выбрать имя компьютера. В нашем примере это CLT
- Используя стрелка вниз перемещаться по Мыши и другие указательные устройства
- Нажмите Alt + стрелка вправо расширять Мыши и другие указательные устройства
- Используя стрелка вниз перемещаться по HID-совместимая мышь. Это USB-мышь.
- Нажмите Shift + F10 или же Fn + Shift + F10 открыть список свойств. Эти комбинации клавиш имитируют щелчок правой кнопкой мыши
- Используя стрелка вниз выбирать Удалитьустройство и нажмите Войти на вашей клавиатуре
- Нажмите Войти в подтвердить удаление драйвера мыши
- Нажмите Alt + F4 закрыть свойства мыши и диспетчер устройств
- Держать Логотип Windows и нажмите р
- Тип CMD и нажмите Войти открыть Командная строка
- Тип выключение / r / f / t 0 и нажмите Войти в запустить снова ваш компьютер с Windows
- Тестовое задание твоя мышь

Способ 5: скачать драйвер мыши с официального сайта производителя
Для профессиональных и игровых мышей требуется официальный драйвер, загружаемый с веб-сайта производителя. Исходя из этого, вам нужно будет загрузить и установить последнюю версию драйвера, совместимого с вашей операционной системой. Представьте, вы используете мышь Logitech G403. Чтобы загрузить и установить последнюю версию драйвера для этой мыши, вам необходимо открыть веб-сайт Logitech. Эта же процедура совместима с другими поставщиками.
Для этого метода вам понадобится доступ к другому компьютеру с Windows и USB-флеш-драйвер, чтобы перенести драйвер на ваш текущий компьютер.
Способ 6: изменить настройки управления питанием USB
В этом методе вам нужно будет изменить настройки управления питанием USB-портов на вашем компьютере с Windows. Мы покажем вам, как это сделать в Windows 10 с помощью клавиш клавиатуры. Эта же процедура совместима с предыдущими операционными системами.
- Держать Логотип Windows и нажмите р
- Тип devmgmt.msc и нажмите Войти открыть Диспетчер устройств
- Нажмите табуляция выбрать имя компьютера. В нашем примере это CLT
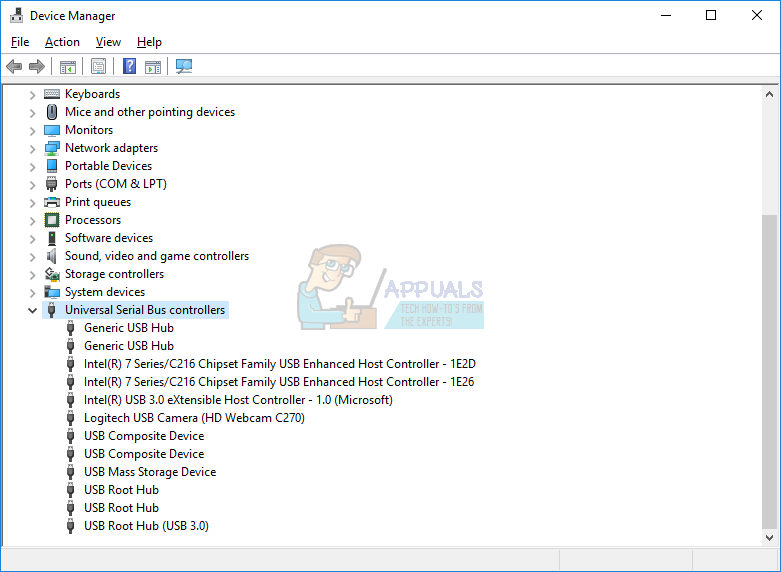
- Используя стрелка вниз перемещаться по Универсальные контроллеры последовательной шины
- Нажмите Alt + стрелка вправо расширять Универсальные контроллеры последовательной шины
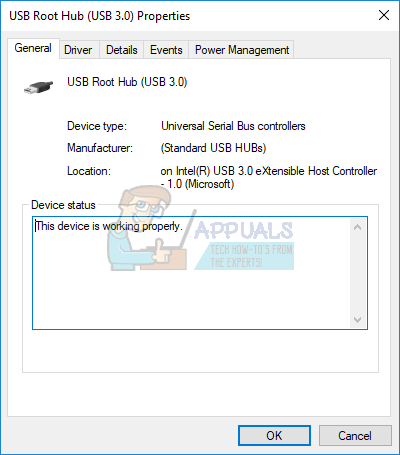
- Используя стрелка вниз перемещаться по USB Root Hub (USB 3.0). Это USB-порт, к которому подключена USB-мышь
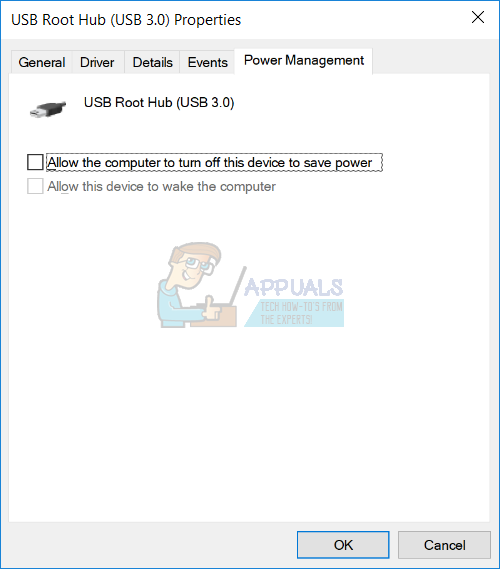
- Нажмите Войти на клавиатуре, чтобы открыть USB Root Hub (USB 3.0)свойства. Обратите внимание, что это пример на моей машине, на вашей машине он будет другим, но логика и терминология одинаковы.
- Используя табуляция клавиша навигации по генеральный табуляция
- Используя правая стрелка перемещаться по Управление энергопотреблением табуляция
- Используя табуляция Выбрать Разрешить компьютеру выключать это устройство для экономии энергии
- Нажмите Ctrl + Пробел отменить выбор Разрешить компьютеру выключать это устройство для экономии энергии
- Нажмите Войти
- Нажмите Alt + F4 закрыть диспетчер устройств
- Держать Логотип Windows и нажмите р
- Тип CMD и нажмите Войти открыть Командная строка
- Тип выключение / r / f / t 0 и нажмите Войти в запустить снова ваш компьютер с Windows
- Тестовое задание твоя мышь


Метод 7: удалить MotioninJoy
MotioninJoy — это небольшое приложение, которое позволяет вам использовать контроллер PlayStation 3, для многих пользователей один из самых удобных за все время, со всеми играми на вашем компьютере. Иногда MotioninJoy может заблокировать вашу USB-мышь, и вам нужно будет удалить это приложение, чтобы проверить, есть ли проблема между MotioninJoy и вашей мышью. Мы покажем вам, как это сделать в Windows 10 с помощью клавиш клавиатуры. Эта же процедура совместима с предыдущими операционными системами.
- Держать Логотип Windows и нажмите р
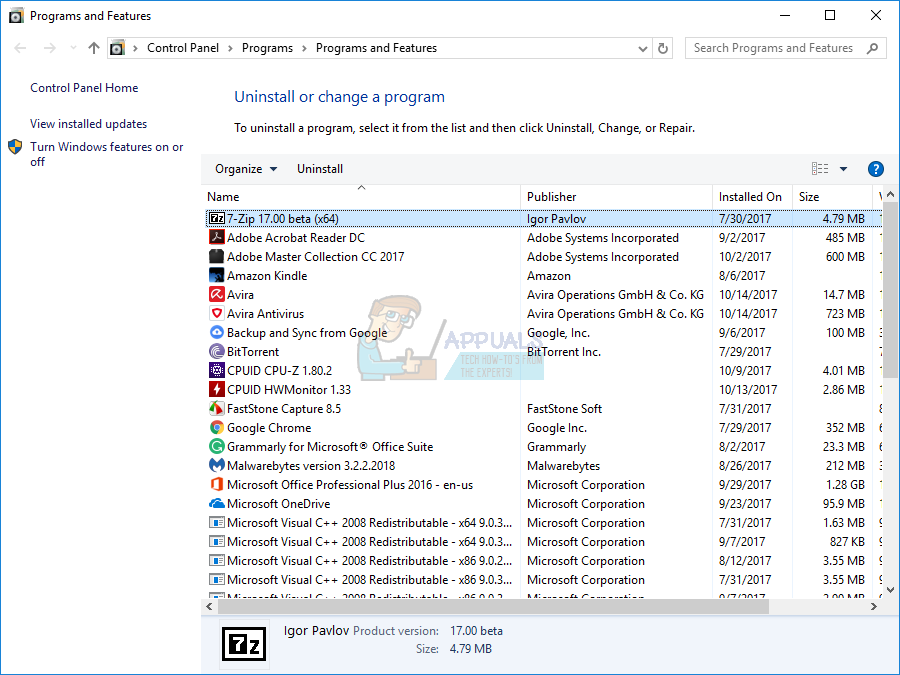
- Тип appwiz.cpl и нажмите Войти открыть Программа и особенности
- Используя табуляция Клавиша навигации по первому приложению в списке. В нашем примере это 7-Zip.
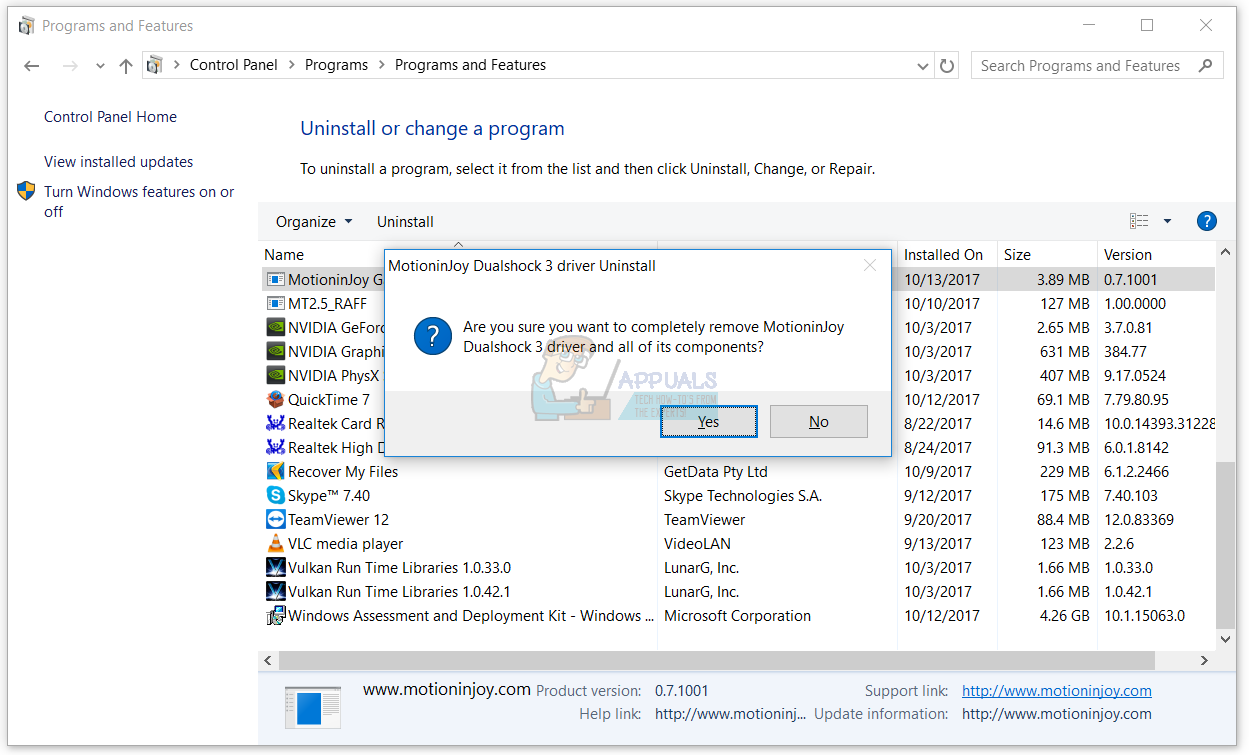
- Используя стрелка вниз перемещаться по MotioninJoy DualShock 3
- Нажмите Войти на вашей клавиатуре, чтобы деинсталляция MotioninJoy DualShock 3
- Нажав табуляция выбирать да подтвердить удаление MotioninJoy DualShock 3
- Нажмите Войти подтвердить процедуру удаления
- Нажмите Alt + F4 закрыть программы и функции
- Держать Логотип Windows и нажмите р
- Тип CMD и нажмите Войти открыть Командная строка
- Тип выключение / r / f / t 0 и нажмите Войти в запустить снова ваш компьютер с Windows
- Тестовое задание твоя мышь

Способ 8. Сканирование жесткого диска на наличие вредоносных программ.
Никому не нравится вредоносное ПО, потому что оно разрушительно и может быть очень мощным в уничтожении операционной системы, приложений, драйверов или данных. В этом методе вам нужно будет сканировать ваш жесткий диск на наличие вредоносных программ, используя Malwarebytes. Если вы не используете Malwarebytes, вам необходимо скачать и установить его на свой компьютер с Windows. Пожалуйста, прочитайте, как удалить вредоносные программы с помощью вредоносных байтов с https://appuals.com/remove-malwares-using-malwarebyte/.
Способ 9: изменить настройки BIOS или UEFI
Давайте сделаем некоторые изменения в вашем BIOS или UEFI. В этом методе мы включим поддержку USB Virtual KBC в BIOS. Мы покажем вам, как это сделать на Lenovo IdeaCentre 3000. Мало кто решил эту проблему с помощью этого метода. Процедура такая же или похожая на другой машине. Мы рекомендуем вам прочитать техническую документацию вашей материнской платы.
- Запустить снова или же очередьна ваша машина
- Нажмите F12 получить доступ к BIOS или UEFI
- выберите приборы а затем выберите Настройка USB
- Навигация на Поддержка USB Virtual KBC и выбрать Включено
- Сохранить Конфигурация BIOS и перезагрузите компьютер
- Тестовое задание твоя мышь
Способ 10: переустановите Windows
В этом методе вам нужно будет переустановить Windows. Сначала мы рекомендуем вам сделать резервную копию ваших данных на внешнем жестком диске, в сетевом хранилище или облачном хранилище. После этого вам нужно будет переустановить операционные системы, драйверы и приложения. Любые проблемы с системой, драйверами или приложениями станут историей после переустановки Windows.
Fix: USB Mouse Not Working on Windows 10
The mouse is an input device which helps us to work through GUI (Graphical User Interface) on Windows machines. Working without a mouse, by using the only keyboard require more time and knowledge, and it can be complicated for nonexperienced users. There are different types of mouse, including the wired and wireless mouse. The procedure of installing the mouse on a Windows machine is really simple, you need to plug the mouse into the USB port and install the driver. The driver can be installed automatically by Windows or you can download the driver from the official vendor website.
Few users encouraged problems with USB mouse because it stopped working due to the different issues, including hardware and system problems, driver problems, wrong configuration, and others.
This issue occurs on computers and notebooks and operating systems from Windows XP to Windows 10. We created ten methods that will help you to solve this issue. How will you solve the issue on your Windows machine, if your USB mouse is not working properly? Do not worry, we created methods that are fully compatible with your keyboard. So, let’s start.
Method 1: Turn off your machine
In the first method, you will need to turn off your Windows machine through Command Prompt. We will show you how to do it on Windows 10 by using keyboard keys. This method is compatible with previous operating systems.
- Hold Windows logo and press R
- Type cmd and press Enter to open Command PromptRunning the Command Prompt
- Type shutdown /s /f /t 0 and press Enter to shut down your Windows machine
- Power on your Windows machine
- Test your USB mouse
 Running the Command Prompt
Method 2: Enable USB mouse
If your USB mouse is disabled you will not be able to use that mouse. You will need to open Device Manager and check is USB mouse enabled or disabled. If your USB mouse is disabled, you will need to enable it. We will show you how to do it on Windows 10 by using keyboard keys. The same procedure is compatible with previous operating systems.
- Hold Windows logo and press R
- Type devmgmt.msc and press Enter to open Device ManagerRunning Device Manager
- Press Tab to select a computer name. In our example it is DESKTOP-CLKH1SI
- By using down arrow navigate on Mice and other pointing devices
- Press Alt + right arrow on your keyboard to expand the group
- By using a down arrow navigate on HID-compliant mouse. It is a USB mouse. In our example, it is disabled and can not be used on Windows machine
- Press Shift + F10 or Fn + Shift + F10 to open properties list. These combination keys are simulating right-click on your mouse
- By using down arrow choose Enabledevice and press Enter on your keyboard
- Test your USB mouse
- Close Device Manager
 Running Device Manager
 Test your USB mouse
Method 3: Test your USB mouse
It is time for the testing mouse as a hardware component. By using this method we will check is there hardware or software problem with USB mouse and Windows. At first, you will need to test USB ports on your Windows machine. Please, unplug your mouse from the current USB port and plug it on another USB ports on the same machine. If the mouse is working properly on another USB port, that means there is no issue with the mouse, there is an issue with the USB port.
But, if the issue is still there, probably your mouse is not working properly, and you will need to do the second test. The second test will include testing your mouse on another machine, or you-you test another mouse on your current machine where the mouse is not working properly. If the mouse is not working on another machine, you will need to purchase another one.
Method 4: Reinstall mouse driver
If some hardware components are not working properly, you should reinstall drivers which provide communication between your hardware components and operating system. Based on that, you will need to reinstall your mouse through Device Manager. Mouse drivers will be automatically installed through the Microsoft driver repository. We will show you how to do it on Windows 10 by using keyboard keys. The same procedure is compatible with previous operating systems.
- Hold Windows logo and press R
- Type devmgmt.msc and press Enter to open Device ManagerRunning Device Manager
- Press Tab to select a computer name. In our example it is CLT
- By using down arrow navigate on Mice and other pointing devices
- Press Alt + right arrow to expand Mice and other pointing devices
- By using a down arrow navigate on HID-compliant mouse. It is a USB mouse.
- Press Shift + F10 or Fn + Shift + F10 to open properties list. These combination keys are simulating right-click on your mouse
- By using down arrow choose Uninstalldevice and press Enter on your keyboard
- Press Enter to confirm uninstalling mouse driver
- Press Alt + F4 to close mouse properties and Device Manager
- Hold Windows logo and press R
- Type cmd and press Enter to open Command Prompt
- Type shutdown /r /f /t 0 and press Enter to restart your Windows machine
- Test your mouse
 Running Device Manager
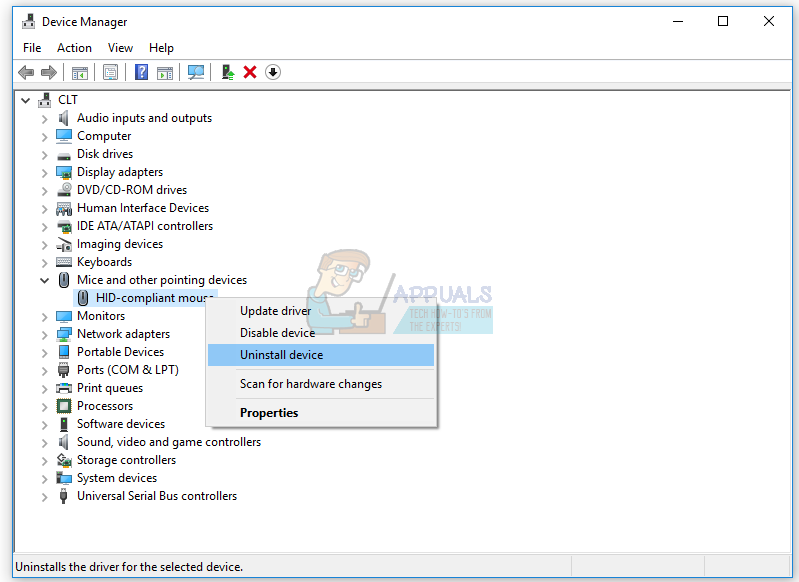
Method 5: Download mouse driver from official vendor’s website
Professional and gaming mice require official drivers downloaded from the vendor website. Based on that you will need to download and install the latest driver compatible with your operating system. Imagine, you are using mouse Logitech G403. To download and install the latest driver for this mouse you will need to open the Logitech website. The same procedure is compatible with other vendors.
For this method, you will need access to another Windows machine and USB flash driver to transfer driver to your current machine.
Method 6: Change USB Power Management settings
In this method, you will need to change the Power Management settings of USB ports on your Windows machine. We will show you how to do it on Windows 10 by using keyboard keys. The same procedure is compatible with previous operating systems.
- Hold Windows logo and press R
- Type devmgmt.msc and press Enter to open Device Manager
- Press Tab to select a computer name. In our example it is CLT
- By using down arrow navigate on Universal Serial Bus Controllers
- Press Alt + right arrow to expand Universal Serial Bus Controllers
- By using a down arrow navigate on USB Root Hub (USB 3.0). It is a USB port where the USB mouse is connected
- Press Enter on the keyboard to open USB Root Hub (USB 3.0)Properties. Please note, this is an example on my machine, on your machine, it will be different, but the logic and terminology are the same.
- By using Tab key navigate on the General tab
- By using the right arrow navigate on Power Management tab
- By using Tab select Allow the computer to turn off this device to save power
- Press Ctrl + Space to deselect Allow the computer to turn off this device to save power
- Press Enter
- Press Alt + F4 to close Device Manager
- Hold Windows logo and press R
- Type cmd and press Enter to open Command Prompt
- Type shutdown /r /f /t 0 and press Enter to restart your Windows machine
- Test your mouse

Method 7: Uninstall MotioninJoy
MotioninJoy is a small application that allows you to use the PlayStation 3 controller, for lots of users one of the most comfortable of all times, with all the games on your computer. Sometimes, MotioninJoy can block your USB mouse and you will need to uninstall this application to check is there a problem between MotioninJoy and your mouse. We will show you how to do it on Windows 10 by using keyboard keys. The same procedure is compatible with previous operating systems.
- Hold Windows logo and press R
- Type appwiz.cpl and press Enter to open Program and Features
- By using Tab key navigate on the first application in the list. In our example it is 7-Zip.
- By using down arrow navigate on MotioninJoy DualShock 3
- Press Enter on your keyboard to uninstall MotioninJoy DualShock 3
- By pressing Tab to choose Yes to confirm uninstalling MotioninJoy DualShock 3
- Press Enter to confirm uninstallation procedure
- Press Alt + F4 to close Programs and Features
- Hold Windows logo and press R
- Type cmd and press Enter to open Command Prompt
- Type shutdown /r /f /t 0 and press Enter to restart your Windows machine
- Test your mouse

Method 8: Scan hard disk for malware
No one likes malware because it is destructive and can be really powerful in destroying the operating systems, applications, drivers or data. In this method, you will need to scan your hard disk for malware using Malwarebytes. If you do not use Malwarebytes, you will need to download and install it on your Windows machine
Method 9: Change BIOS or UEFI settings
Let’s do some changes to your BIOS or UEFI. In this method, we will enable USB Virtual KBC Support in BIOS. We will show you how to do it on Lenovo IdeaCentre 3000. Few users solved their problem by doing this method. The procedure is the same or similar to another machine. We are recommending you to read the technical documentation of your motherboard.
- Restart or turnon your machine
- Press F12 to access BIOS or UEFI
- Choose Devices and then choose USB Setup
- Navigate on USB Virtual KBC Support and choose Enabled
- Save BIOS configuration and restart your computer
- Test your mouse
Method 10: Reinstall Windows
In this method, you will need to reinstall your Windows. At first, we are recommending you to backup your data to external hard disk, network-attached storage or cloud storage. After that, you will need to reinstall your operating systems, drivers and applications. Any system, driver or application issues will be history by reinstalling your Windows.
Method 11: Running Hardware Troubleshooter
In some cases, the error might be with the way the mouse is configured by the hardware drivers. It might be configured in such a way that it is not being able to function correctly. Therefore, in this step, we will be running the hardware troubleshooter and check to see if it can find and fix this particular error. For that:
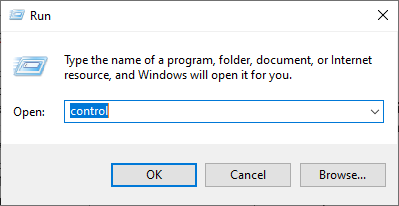
- Press “Windows” + “R” to open the Run prompt.
- Type in “Control Panel” and press “Enter” to open it. Accessing the Classic Control Panel interface
- Select “Large” in the “View as:” dropdown.
- Click on the “Troubleshooting” button. Troubleshooting – Control Panel
- Now select the “Hardware and Devices” option to initiate the troubleshooter.
- Check to see if the issue persists.
 Accessing the Classic Control Panel interface
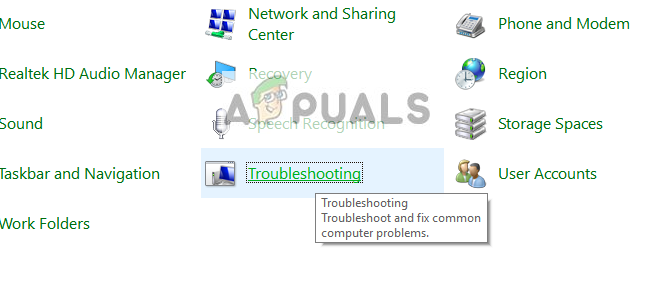 Troubleshooting – Control Panel
Method 12: Update Windows
In most cases, the issue went away only with an update that patched the USB mouse not working issue completely. Therefore, in this step, we will be initiating a full update of Windows’ Components. In order to do that follow the guide below.
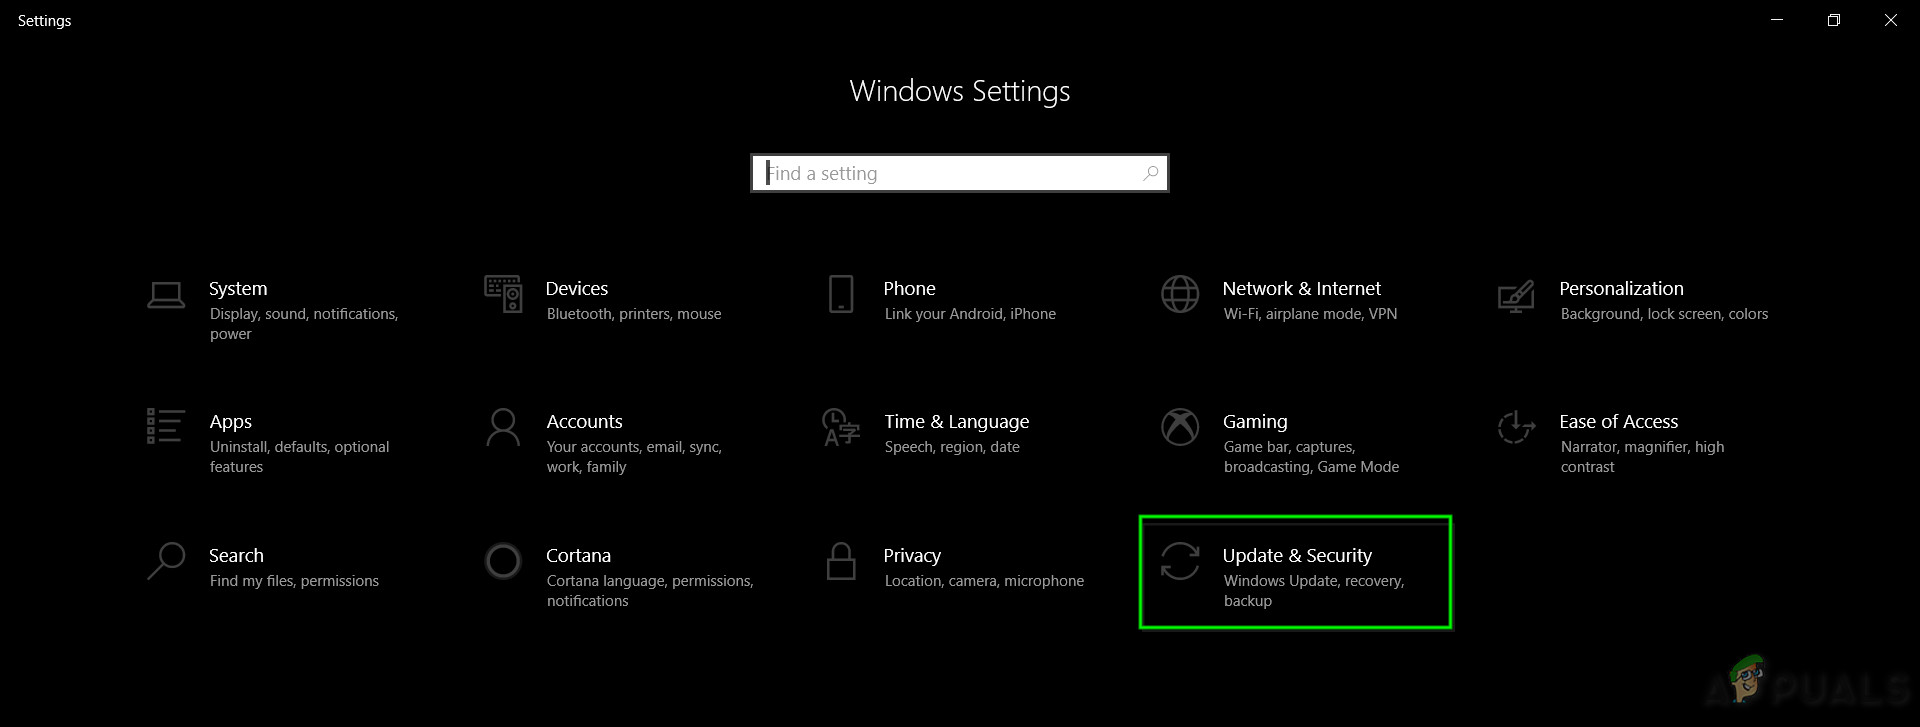
- Press “Windows” + “I” to open the settings.
- Click on the “Update&Security” option on the lower right side. Update & Security.in Windows Settings
- Select “Windows Update” from the left side.
- Click on the “Check for Updates” option and wait while Windows checks for updates.
- After the update check has proceeded, follow the on-screen instructions to download and install updates.
 Update & Security.in Windows Settings


