- Установка Microsoft ODBC Driver for SQL Server (macOS)
- Microsoft ODBC 17
- Предыдущие версии
- ODBC 13.1
- Файлы драйвера
- Загрузка файла ресурсов
- Устранение неполадок
- Дальнейшие действия
- Installing SQL Server on macOS
- Installing Docker
- Running SQL Server Container Image
- Handy Tips & Tools
- Create PHP apps using SQL Server on macOS
- Step 1.1 Install SQL Server
- Step 1.2 Install Homebrew, PHP and other required packages
- Step 1.3 Install the ODBC Driver and SQL Command Line Utility for SQL Server
- Have Questions?
- SQLPro for MSSQL 4+
- Hankinsoft Development Inc
- Снимки экрана
- Описание
- Database.Guide
- Categories
- Install SQL Server 2019 on a Mac
- Docker
- Install Docker
- Launch Docker
- Increase the Memory (optional)
- SQL Server
- Download SQL Server 2019
- Launch the Docker Image
- Password Strength
- Error – “Port already allocated”?
- Check Everything
- Check the Docker container (optional)
- Connect to SQL Server
- Run a Quick Test
- Azure Data Studio
- Another Free SQL Server GUI – DBeaver
Установка Microsoft ODBC Driver for SQL Server (macOS)
В этой статье объясняется, как установить Microsoft ODBC Driver for SQL Server в macOS. В ней также содержатся инструкции для необязательных средств командной строки для SQL Server ( bcp и sqlcmd ) и заголовков разработки unixODBC.
В этой статье приведены команды для установки драйвера ODBC из оболочки bash. Сведения о том, как загрузить пакеты напрямую, см. в разделе Скачивание драйвера ODBC Driver for SQL Server.
Драйвер Microsoft ODBC Driver for SQL Server в macOS поддерживается только в 64-разрядной архитектуре до версии 17.7. Apple M1 (ARM64) поддерживается начиная с версии 17.8. Будет обнаружена архитектура, и с помощью формулы Homebrew автоматически установится правильный пакет. Если командная строка работает в режиме эмуляции x64 на оборудовании M1, будет установлен пакет x64. Если командная строка не работает в режиме эмуляции, будет установлен пакет ARM64.
Microsoft ODBC 17
Чтобы установить Microsoft ODBC Driver 17 для SQL Server в macOS, выполните следующие команды:
Если вы установили пакет msodbcsql версии 17, который был доступен непродолжительное время, его следует удалить перед установкой пакета msodbcsql17 . Это позволит избежать конфликтов. Пакет msodbcsql17 можно установить параллельно с пакетом msodbcsql версии 13.
Предыдущие версии
В следующих разделах приведены инструкции по установке предыдущих версий драйвера Microsoft ODBC в macOS.
ODBC 13.1
Используйте следующие команды для установки драйвера Microsoft ODBC Driver 13.1 for SQL Server в OS X 10.11 (El Capitan) и macOS 10.12 (Sierra):
Файлы драйвера
Драйвер ODBC в macOS состоит из следующих компонентов.
| Компонент | Описание |
|---|---|
| libmsodbcsql.17.dylib или libmsodbcsql.13.dylib | Файл динамической библиотеки ( dylib ), содержащий все функциональные возможности драйвера. Этот файл устанавливается в папке /usr/local/lib/ . |
| msodbcsqlr17.rll либо msodbcsqlr13.rll | Сопутствующий файл ресурса для библиотеки драйвера. Этот файл устанавливается в папке [driver .dylib directory]../share/msodbcsql17/resources/en_US/ для версии 17 драйвера и в папке [driver .dylib directory]../share/msodbcsql/resources/en_US/ для версии 13. |
| msodbcsql.h | Файл заголовка, содержащий все новые определения, необходимые для использования драйвера. Примечание. Нельзя сочетать в одной программе ссылки на msodbcsql.h и odbcss.h. Файл msodbcsql.h устанавливается в папке /usr/local/include/msodbcsql17/ для версии 17 драйвера и в папке /usr/local/include/msodbcsql/ для версии 13. |
| LICENSE.txt | Текстовый файл с условиями лицензионного соглашения. Этот файл помещается в папку /usr/local/share/doc/msodbcsql17/ для версии 17 драйвера и в папку /usr/local/share/doc/msodbcsql/ для версии 13. |
| RELEASE_NOTES | Текстовый файл с заметками о выпуске. Этот файл помещается в папку /usr/local/share/doc/msodbcsql17/ для версии 17 драйвера и в папку /usr/local/share/doc/msodbcsql/ для версии 13. |
Загрузка файла ресурсов
Чтобы драйвер работал, он должен загрузить файл ресурсов. Этот файл имеет имя msodbcsqlr17.rll или msodbcsqlr13.rll в зависимости от версии драйвера. Файл .rll располагается по пути относительно расположения самого драйвера ( so или dylib ), указанного в таблице выше. Кроме того, начиная с версии 17.1 драйвер пытается загрузить файл .rll из каталога по умолчанию, если его не удалось загрузить по относительному пути. Путь к файлу ресурсов по умолчанию в macOS: /usr/local/share/msodbcsql17/resources/en_US/
Устранение неполадок
Некоторые пользователи столкнулись с проблемой при попытке подключения после установки драйвера ODBC и получили сообщение об ошибке следующего вида: «[01000] [unixODBC][Driver Manager]Can’t open lib ‘ODBC Driver 17 for SQL Server’ : file not found (0) (SQLDriverConnect)» . Возможно, это произошло потому, что не удалось найти зарегистрированные драйверы из-за неправильной настройки unixODBC. В таких случаях проблему можно устранить, создав пару символических ссылок.
Сведения о других ситуациях, в которых не удается установить подключение к SQL Server с помощью драйвера ODBC, см. в статье, посвященной устранению известных неполадок подключения.
Дальнейшие действия
После установки драйвера можно попробовать пример приложения C++ ODBC. Подробнее о разработке приложений ODBC см. в разделе Разработка приложений.
Дополнительные сведения см. в статьях с заметками о выпуске и требованиями к системе для драйвера ODBC.
Источник
Installing SQL Server on macOS


It’s a bit inconvenience when working on a project that uses the Microsoft SQL Server while your dev machine is either Linux or macOS. I always ended up setting up and using a remote test database.
But now it’s no longer the case. October last year, SQL Server 2017 for Linux finally went into general availability. It’s container images are also available on Docker hub for us to use. That means we can finally install SQL Server on macOS!
Installing Docker
First, you’re going to need Docker. If you haven’t had it installed, heads up to the Docker store website and download the community edition for Mac. Just follow the instructions, it’s super easy to install.
Once it’s installed, you’ll have a new Docker icon on your menu bar. Click this icon and make sure that Docker is already.

Running SQL Server Container Image
Once you have Docker installed and running, open the terminal and run the following command to pull the latest version of SQL Server 2017 container image from Docker hub:
If you want to pull another version, just replace the 2017-latest part with the desired tag. You can check all of the available tags on Docker hub. For example, if want to pull the GA (General Availability) version instead, use the following command:
Once the image is pulled, you can run it on a new container using the following command:
- -d : Detached mode, run the container in the background.
- -p : Publish a container’s port (second value) to the host (first value). In our case, SQL server is listening on port 1433 within the container and we expose it to the same port on the host.
- —name : Assign a name to the container, we named it awesome 😎.
- -e : Set environment variables. ACCEPT_EULA=Y to confirm your acceptance of the licensing agreement. MSSQL_SA_PASSWORD=P@55word set the password for the sa user (the default system administrator username). It must be at least 8 characters and contains three of the following categories: lowercase, uppercase, digits, and symbols.
To list all of the containers, run the following command:
You should see the output similar to this:
Locate your awesome container and make sure that its STATUS column is Up . If the status is Exited , checkout the troubleshooting guide.
Handy Tips & Tools
Congratulation! 🎉 You now have Microsoft SQL Server installed on your macOS machine! Here are some common Docker commands that might come in handy for you:
It’s a bit inconvenience to run the sqlcmd from within the container in order to work with the database. Luckily there are some tools that you can use for interfacing with SQL Server:
- TablePlus: This is my favorite one. A native macOS application that works not only with MySQL and SQL Server databases but also Postgres and Redis!
- SQL Operations Studio: This one is coming from Microsoft and can be run on Windows, macOS or Linux.
- mssql for VS Code: If you’re using Visual Studio Code, this extension might come in handy.
- sql-cli for Node: If you’re a fellow Javascript developer. You can install this sql-cli for Node globally. This way you’ll have the quite similar sqlcmd feel.
Источник
Create PHP apps using SQL Server on macOS
In this section, you will get SQL Server 2017 running on Docker. After that you will install the necessary dependencies to create PHP apps with SQL Server
Step 1.1 Install SQL Server
- In order to run SQL Server on your Mac, we are going to use the SQL Server on Linux Docker Image. For this, you need to install Docker for Mac.
- Configure at least 4GB of memory for your Docker environment, also consider adding multiple cores if you want to evaluate performance. You can do this in the Preferences — Advanced option on the menu bar.
- Next, start a new Terminal prompt and use the following commands to download and start the SQL Server on Linux Docker image. Make sure to use a strong password with special characters.
You now have SQL Server running locally in Docker! Check out the next section to continue installing prerequisites.
Step 1.2 Install Homebrew, PHP and other required packages
Restart the terminal session.
To install PHP 7.2 or 7.3, replace php@7.4 with php@7.2 or php@7.3 respectively in the following commands.
PHP should now be in your path – run php -v to verify that you are running the correct version of PHP. If PHP is not in your path or it is not the correct version, run the following:
- Install other required packages.
You have successfully installed PHP on your macOS!
Step 1.3 Install the ODBC Driver and SQL Command Line Utility for SQL Server
SQLCMD is a command line utility that enables you to connect to SQL Server and run queries.
After installing SQLCMD, you can connect to SQL Server using the following command:
This how to run a basic inline query. The results will be printed to the STDOUT.
You have successfully installed SQL Server Command Line Utilities on your macOS machine!
Have Questions?
Happy to help! You can find us on GitHub, MSDN Forums, and StackOverflow. We also monitor the #SQLServerDev hashtag on Twitter.
Источник
SQLPro for MSSQL 4+
Hankinsoft Development Inc
-
- 3,0 • Оценок: 4
-
- Бесплатно
- Включает встроенные покупки
Снимки экрана
![]()
![]()
![]()
Описание
SQLPro for MSSQL is a lightweight Microsoft SQL Server database client, allowing quick and simple access to MSSQL Servers, including those hosted via cloud services such as SQL Azure or Amazon RDS.
Features include:
+ Syntax highlighting (including customizable themes).
+ Intellisense.
+ Tabbed based interface.
+ Support for executing multiple queries at once.
+ Quick access to tables, columns and more.
+ Stored procedure execution.
+ NTLMv2 supported (but not required).
SQLPro for MSSQL can be used to connect with the following databases:
+ Microsoft SQL Azure
+ Microsoft SQL Server 2005
+ Microsoft SQL Server 2008
+ Microsoft SQL Server 2008 R2
+ Microsoft SQL Server 2012
+ Microsoft SQL Server 2014
+ Microsoft SQL Server 2016
Thanks to the FreeTDS project (http://www.freetds.org/) for their great library.
This SQL Client does NOT work with MySQL or Postgres. Please ensure that your server is a Microsoft SQL Server (2005 or above).
Note 1: SQL Server Express is supported, however using it makes me sad. Please confirm that the SQL Server Express installation has been configured properly for remote connections over TCP/IP, and that you can connect remotely from another windows pc before requesting support.
Note 2: SQLPro for MSSQL can connect to Microsoft SQL Server 2000 however it is not supported.
Terms of Use:
https://hankinsoft.com/termsofuse.html
Price:
SQLPro offers Premium subscriptions in order to interact with database result sets. Premium subscriptions are available as either a Monthly, or a Yearly duration. Subscriptions auto-renew within 24 hours of the expiration date unless auto-renewal is turned off in the iTunes account settings. Payment will be charged to your iTunes Account at confirmation of purchase.
Источник
Database.Guide
Categories
Install SQL Server 2019 on a Mac
I previously explained how to install SQL Server on a Mac via a Docker container. When I wrote that, SQL Server 2017 was the latest version of SQL Server, and it had just been made available for Linux and Docker (which means that you can also install it on MacOS systems).
In late 2018, Microsoft announced SQL Server 2019 Preview, and subsequently announced general release in late 2019. The installation process for SQL Server 2019 is exactly the same as for SQL Server 2017. The only difference is that you need to use the container image for SQL Server 2019 instead of the 2017 image. Here I show you how to do that.
Also, if you already have SQL Server 2017 installed, and you want to install SQL Server 2019 without removing the 2017 version, you’ll need to allocate a different port number on your host. I show you how to do that too.
But first… if you’re using a Mac with the M1 chip, see How to Install SQL Server on an M1 Mac (ARM64).
Docker
The first step is to install Docker. If you already have Docker installed you can skip this step (and jump straight to SQL Server).
Docker is a platform that enables software to run in its own isolated environment. Therefore, SQL Server 2019 can be run on Docker in its own isolated container.
Install Docker
To download, visit the Docker CE for Mac download page and click Get Docker .
To install, double-click on the .dmg file and then drag the Docker.app icon to your Application folder.
 Docker installation on a Mac.
Launch Docker
Launch Docker the same way you’d launch any other application (eg, via the Applications folder, the Launchpad, etc).
When you open Docker, you might be prompted for your password so that Docker can install its networking components and links to the Docker apps. Go ahead and provide your password, as Docker needs this to run.
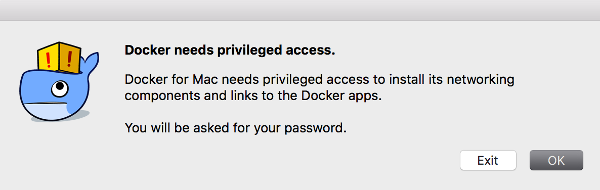 The password request dialog
Increase the Memory (optional)
By default, Docker will have 2GB of memory allocated to it. I’d suggest increasing it to 4GB if you can.
To do this, select Preferences from the little Docker icon in the top menu:
Then on the Resources > Advanced screen, slide the memory slider up to at least 4GB:
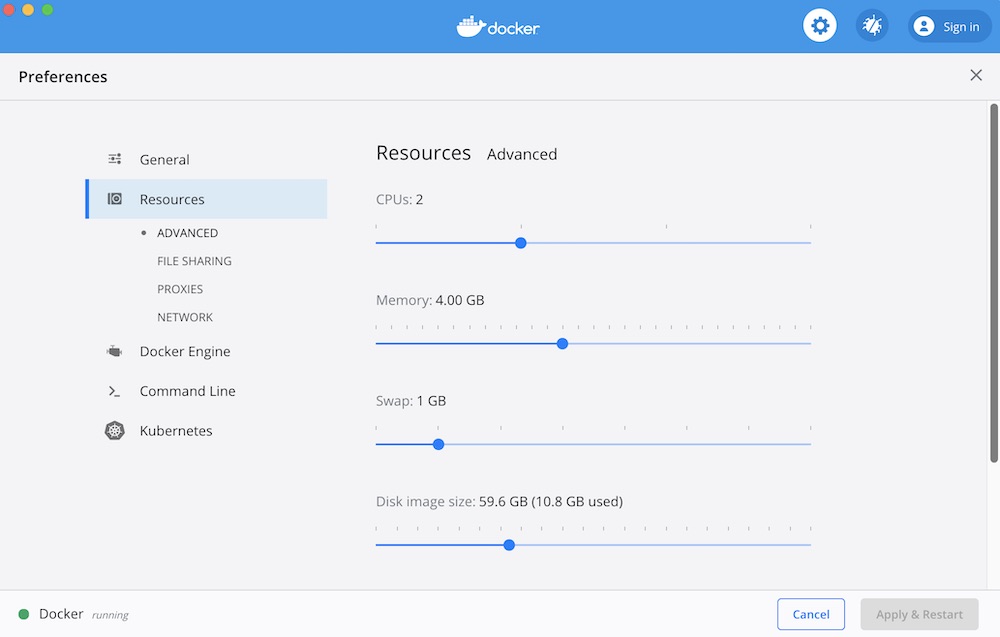
Then finish off by clicking Apply & Restart
SQL Server
Now that Docker has been installed and configured, we can download and install SQL Server 2019.
Download SQL Server 2019
Open a Terminal window and run the following command.
This downloads the latest SQL Server for Linux Docker image to your computer.
You can also check for the various container image options on the Docker website if you wish.
Launch the Docker Image
Run the following command to launch an instance of the Docker image you just downloaded:
Just change Bart to a name of your choosing, and reallyStrongPwd#123 to a password of your choosing.
If you get a “port already allocated” error, see below.
Here’s an explanation of the parameters:
-e ‘ACCEPT_EULA=Y’ The Y shows that you agree with the EULA (End User Licence Agreement). This is required. -e ‘SA_PASSWORD=reallyStrongPwd#123’ Required parameter that sets the sa database password. -p 1433:1433 This maps the local port 1433 to port 1433 on the container. The first value is the TCP port on the host environment. The second value is the TCP port in the container. —name Bart Another optional parameter. This parameter allows you to name the container. This can be handy when stopping and starting your container from the Terminal. You might prefer to give it a more descriptive name like sql_server_2019 or similar. -d This optional parameter launches the Docker container in daemon mode. This means that it runs in the background and doesn’t need its own Terminal window open. You can omit this parameter to have the container run in its own Terminal window. mcr.microsoft.com/mssql/server:2019-latest This tells Docker which image to use.
Password Strength
You need to use a strong password. Microsoft says this about the password:
The password should follow the SQL Server default password policy, otherwise the container can not setup SQL server and will stop working. By default, the password must be at least 8 characters long and contain characters from three of the following four sets: Uppercase letters, Lowercase letters, Base 10 digits, and Symbols.
Error – “Port already allocated”?
If you get an error that says something about “port is already allocated”, then perhaps you already have SQL Server installed on another container that uses that port. In this case, you’ll need to map to a different port on the host.
Therefore, you could change the above command to something like this:
In this case I simply changed -p 1433:1433 to -p 1400:1433 . Everything else remains the same.
You may now get an error saying that you need to remove the existing container first. To do that, run the following (but swap Bart with the name of your own container):
Once removed, you can try running the previous command again.
Note that if you change the port like I’ve done here, you will probably need to include the port number when connecting to SQL Server from any database tools from your desktop. For example, when connecting via the Azure Data Studio (mentioned below), you can connect by using Localhost,1400 instead of just Localhost . Same with mssql-cli, which is a command line SQL tool.
Check Everything
Now that we’ve done that, we should be good to go. Let’s go through and run a few checks.
Check the Docker container (optional)
You can type the following command to check that the Docker container is running.
In my case I get this:
This tells me that I have two docker containers up and running: one called Bart and the other called Homer .
Connect to SQL Server
Here we use the SQL Server command line tool called “sqlcmd” inside the container to connect to SQL Server.
Enter your password if prompted.
Now that you’re inside the container, connect locally with sqlcmd:
This should bring you to the sqlcmd prompt 1> .
Run a Quick Test
Run a quick test to check that SQL Server is up and running. For example, check the SQL Server version by entering this:
This will bring you to a command prompt 2> on the next line. To execute the query, enter:
If you see a message like this, congratulations — SQL Server is now up and running on your Mac!
If you prefer to use a GUI to manage SQL Server, read on.
Azure Data Studio
Azure Data Studio is a free GUI management tool that you can use to manage SQL Server on your Mac. You can use it to create and manage databases, write queries, backup and restore databases, and more.
Azure Data Studio is available on Windows, Mac and Linux.
Here are some articles/tutorials I’ve written for Azure Data Studio:
Another Free SQL Server GUI – DBeaver
Another SQL Server GUI tool that you can use on your Mac (and Windows/Linux/Solaris) is DBeaver.
DBeaver is a free, open source database management tool that can be used on most database management systems (such as MySQL, PostgreSQL, MariaDB, SQLite, Oracle, DB2, SQL Server, Sybase, Microsoft Access, Teradata, Firebird, Derby, and more).
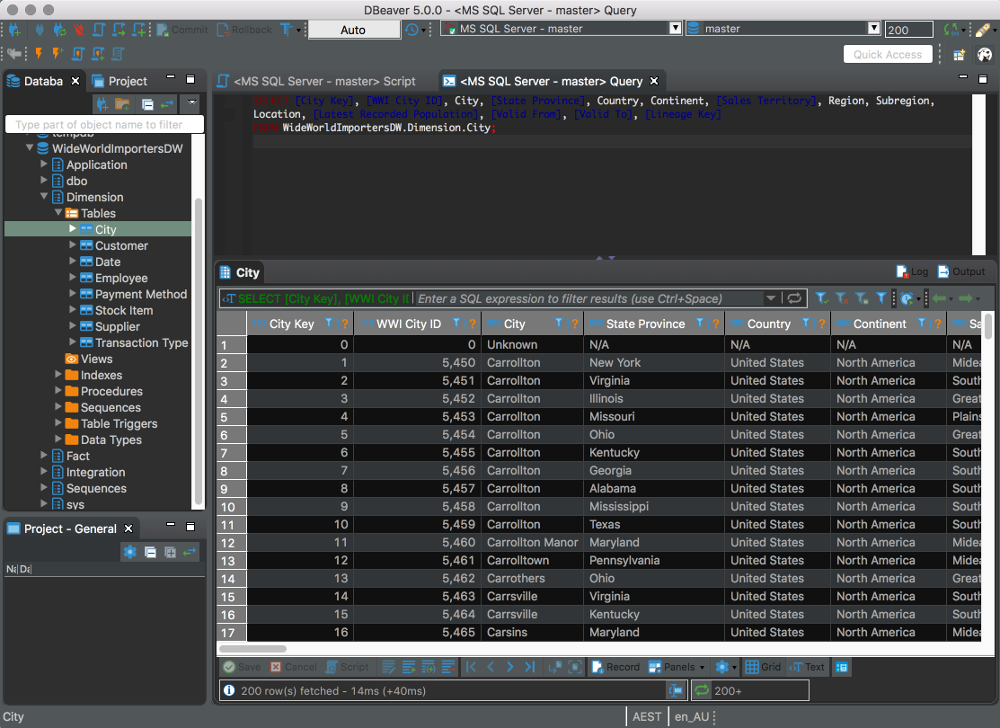 DBeaver using the “Dark” theme.
I wrote a little introduction to DBeaver, or you can go straight to the DBeaver download page and try it out with your new SQL Server installation.
Источник


