- How to Install SP Flash Tool on Ubuntu for MediaTek Android Flashing
- Troubleshooting
- Arch Linux User Repository
- Search Criteria
- Package Details: spflashtool-bin 6.2124-1
- Package Actions
- Dependencies (3)
- Required by (0)
- Sources (3)
- Latest Comments
- jasonbourne commented on 2020-05-21 03:56
- azurata commented on 2019-12-24 10:32
- RonnyD commented on 2019-10-10 20:43
- azurata commented on 2019-06-22 19:59
- Omar007 commented on 2019-06-22 19:32
- azurata commented on 2019-06-22 17:11
- Omar007 commented on 2019-06-22 13:01
- azurata commented on 2019-06-21 22:09
- Omar007 commented on 2019-06-21 09:47
- gsavchuk commented on 2019-06-18 19:33
- Download SP Flash Tool (all versions)
- SP Flash Tool Features
- SP Flash Tool Download for Windows
- Устанавливаем Flash Tool в Linux для прошивки смартфонов
- Подготовительный этап
- Установка зависимостей и запуск FlashTool
- Заключение
How to Install SP Flash Tool on Ubuntu for MediaTek Android Flashing
Many of Appual’s guides for rooting and flashing Mediatek-based Android devices rely on a tool called SP Flash Tool. For users of Windows PCs, this is usually no problem at all, as the SP Flash Tool runs flawlessly after installing all the proper Mediatek VCOM drivers.
However, the latest versions of Ubuntu (16.04 – 17.10) have made changes to certain dependencies, and getting SP Flash Tool to communicate with your Mediatek-based Android device can be somewhat of a headache if you’re running one of the latest Ubuntu versions.
This guide will show you how to properly set up the dependencies required for SP Flash Tool on Linux.
Requirements:
First you need to download and install the libpng12-0 package – SP Flash Tool is dependant on this package, but it was not included in the latest Ubuntu releases. So you will need to download and install it manually. Just right click on the .deb file and choose “Open with Software Install”.
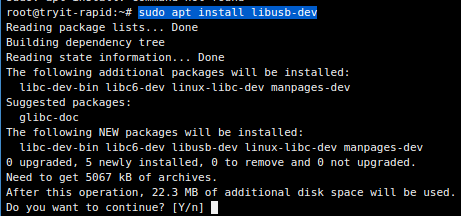
You also need to install install libusb-dev package, so run:
sudo apt-get update
sudo apt install libusb-dev
Now download the latest SP Flash Tool for Linux, and extract it anywhere on your computer. I just left it inside the Downloads folder, it works fine.
Now right click on the newly extracted SP Flash Tool folder and choose “Open in Terminal”.
In the terminal type the following commands:
chmod +x flash_tool
sudo adduser username dialout
newgrp – dialout
And now you can run SP Flash Tool by typing in the terminal:
Troubleshooting
Phone will not connect / USB port not found:
Open a terminal and run:
dmesg | grep usb

Now look for your MediaTek device entry, and copy the idProduct string. Now in the terminal, type:

And then add the following line (replacing the idProduct with yours) to the file, and save.
If the terminal displays dialogue about timing out while trying to find the USB port, it may help to keep disconnecting your phone and trying different USB ports.
If you receive the error “S_BROM_CMD_JUMP_DA_FAIL (2035)”
Make sure you installed libusb-dev as instructed earlier in this guide. If so, we will need to blacklist Ubuntu’s modem manager (because it controls port /dev/ttyACM0, which is disabling SP Flash Tool from running properly).
Type in the terminal:

Then insert these two lines into the text file:
Then in the terminal: sudo service udev restart
Источник
Arch Linux User Repository
Search Criteria
Package Details: spflashtool-bin 6.2124-1
Package Actions
| Git Clone URL: | https://aur.archlinux.org/spflashtool-bin.git (read-only, click to copy) |
|---|---|
| Package Base: | spflashtool-bin |
| Description: | SP Flash Tool is an application to flash your MediaTek (MTK) SmartPhone. |
| Upstream URL: | http://spflashtools.com/category/linux |
| Licenses: | unknown |
| Conflicts: | spflashtool |
| Provides: | spflashtool |
| Submitter: | Omar007 |
| Maintainer: | Omar007 |
| Last Packager: | Omar007 |
| Votes: | 29 |
| Popularity: | 0.37 |
| First Submitted: | 2016-05-21 15:48 |
| Last Updated: | 2021-08-02 15:34 |
Dependencies (3)
Required by (0)
Sources (3)
Latest Comments
jasonbourne commented on 2020-05-21 03:56
==> Validating source files with sha256sums. SP_Flash_Tool_v5.1952_Linux.zip . FAILED spflashtool.png . Passed 60-spflashtool.rules . Passed ==> ERROR: One or more files did not pass the validity check! /
azurata commented on 2019-12-24 10:32
Made a package without qt dependencies «spflashtool-noqtdeps»
RonnyD commented on 2019-10-10 20:43
I am getting the following error:
Am I missing something?
azurata commented on 2019-06-22 19:59
@Omar007 I’m doing this way so I don’t need to compile/install qtwebkit. Program works the same way, why compile qtwebkit from source ¯\_(ツ)_/¯
Omar007 commented on 2019-06-22 19:32
@azurata; I could already see that. But I can’t see why you would do so in the first place? For what reason are you doing this?
azurata commented on 2019-06-22 17:11
@Omar007 What I did was replace the need of qtwebkit dependency by using the lib files libQtWebKit.so.4 and libphonon.so.4 already included in the file SP_Flash_Tool_v5.1916_Linux.zip
This is my patch:
Omar007 commented on 2019-06-22 13:01
@azurata: I have no idea what you’re trying to do there but it’s also completely unrelated to what gsavchuk is saying.
This has been build and run with qt4 4.8.7-30 and qtwebkit 2.3.4-7 in a clean chroot. It is running fine against these versions. If you’re doing other stuff on your system (overriding libraries, building dependencies with components disabled, bypassing pacman with make install , partial updates, . ), that’s up to you but so is fixing any problems you may have.
If you can reproduce this on a clean setup then please let me know and I’ll take another look at it.
azurata commented on 2019-06-21 22:09
@Omar007 I tested an alternative to the qtwebkit dependency and it works.
Omar007 commented on 2019-06-21 09:47
@gsavchuck: In qt4-4.8.7-30.
You might want to verify the integrity of your qt4 installation and ensure it isn’t broken.
gsavchuk commented on 2019-06-18 19:33
Installed this package alongside with qt4-4.8.7-30. When I try to launch it I get the error:
/opt/spflashtool/flash_tool: error while loading shared libraries: libQtXmlPatterns.so.4: cannot open shared object file: No such file or directory
I think this library was included in past releases of qt4. Where am I supposed to get the missing dependency now?
Copyright © 2004-2021 aurweb Development Team.
AUR packages are user produced content. Any use of the provided files is at your own risk.
Источник
Download SP Flash Tool (all versions)
SP Flash Tool, also know as Smart Phone Flash Tool, is an application that allows you to flash or install the Stock Firmware ROM (Scatter Based) on the Devices powered by Mediatek Chipset, whether it’s a SmartPhone or a Tablet.
Here on this page, we have shared the latest and previous versions of the SP Flash Tool for Windows and Linux computers.
SP Flash Tool Features
Flash Stock ROM:
It allows you to flash Scatter Based Stock Firmware on devices powered by Mediatek Chipset. All you need to have the correct Scatter based Stock Firmware of your Device > Open SmartPhone Flash Tool > Click on Scatter Loading button > Locate the Scatter File from the Firmware Folder > Click on the Download button to begin the Flashing Process (Follow Complete Guide).
Flash Recovery:
It allows you to flash Stock Recovery or Custom Recovery on your Mediatek Device. Load the Scatter File in SmartPhone Flash Tool > Locate the recovery.img file and click on Download Button to Begin the Flashing Process.
Memory Test:
It allows you to test and verify the external memory devices, including RAM, eMMC, and NAND Flash. First, load the Scatter File of your Device in SmartPhone Flash Tool > Connect the Mediatek Device to the Computer > Go to the memory test menu in SmartPhone Flash Tool > Click on Start to begin the test.
Parameter Setting:
The parameter settings allow you to Read or Write the OTP parameter on MediaTek Devices. First, connect your Mediatek Device to the Computer > Go to the parameter menu in Flash Tool > Select Read or Write and Click on the Update button.
Format Device / Hard Reset:
It allows you to format your Android Smartphone and tablet. First, load the Scatter File of your device in SmartPhone Flash Tool > Go to Format Menu > Choose Auto Format Flash or Manual Format Flash and then Click on Start Button to Format the device.
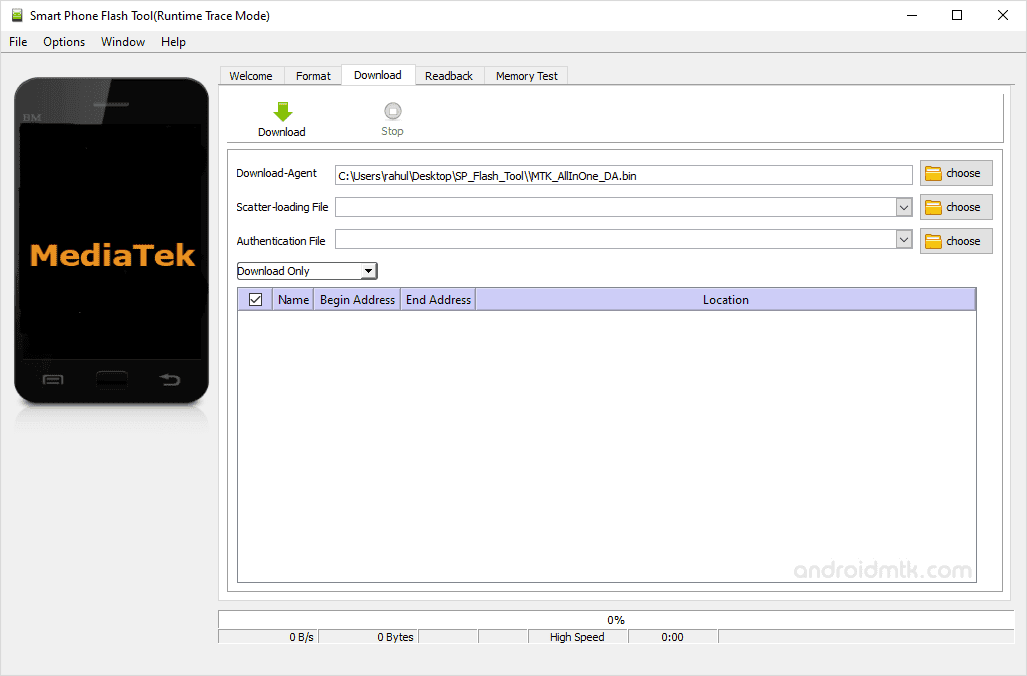
SP Flash Tool Download for Windows
SP Flash Tool is compatible with all versions of Windows OS, including Windows XP to Windows 11 (x32 or x64 bit). If in case you were looking for the latest version of the Flash Tool, then use the following links to get it on your computer:
Источник
Устанавливаем Flash Tool в Linux для прошивки смартфонов
Некоторые пользователи своих девайсов предпочитают перепрошить свой смартфон на Android кастомной прошивкой, самая популярная прошивка – LineageOS. В подавляющем большинстве прошиваются смартфоны в Windows, но, сегодня мы разберемся как прошить ваш девайс в Linux с помощью утилиты Flash Tool. Данная утилита прошивает Android смартфоны работающие на процессоре MTK. Утилита Flash Tool является одной из самых популярных утилит в своем роде, установить ее можно так же и в операционной системе Linux, все действия мы будем выполнять в Ubuntu 20.04, но, инструкция подойдет и для всех производных от Ubuntu, как вариант Pop OS, Linux Mint и так далее. Насчет Fedora и других RPM ориентированных систем, ничего сказать не могу, так как не проверял.
P.S. Все действия которые вы совершаете с телефоном, выполняются на ваш страх и риск. За не рабочий аппарат, в результате всех описанных действий в данной статье автор ответственности не несет. Данная инструкция проверена на телефоне Blackview BV5800, прошивался сей девайс в Ubuntu 20.04, а точнее в Kubuntu.
Подготовительный этап
Первым делом необходимо скачать саму утилиту Flash Tools для Linux, рекомендую скачивать именно с 4pda, а не с левых сайтов. Так же, если вдруг по какой-то причине 4pda не доступен, то Flash Tool версий 5.2020, 5.2016, 5.2012 вы можете скачать по ссылке ниже:
И так, после того как вы скачали архив с утилитой Flash Tool, его необходимо распаковать, предполагается, что вы его скачали в директорию загрузки и туда же распаковали.
Установка зависимостей и запуск FlashTool
Теперь необходимо открыть терминал, перейти в директорию с распакованным FlashTool и дать права на исполнение файлам flash_tool, flash_tool.sh, выполнив команды:
Как перемещаться по директория в терминале вы можете прочесть в этой статье.

Следующим шагом добавляем вашего пользователя в группу uucp, это делается для получения прав на запись в виртуальный COM-порт. Я буду добавлять пользователя “cyber-x”, вы же замените данное имя на имя вашего пользователя:

Когда все выше описанные действия сделаны, необходимо выйти из системы и снова зайти, либо, как вариант, перезагрузить компьютер. Следующем этапом будет установка пакета “51-android.rules”, данный пакет можно получить с GitHub. Это делается для того, что бы ваш Android девайс определился в системе Linux COM-порту. Для получения с GitHub мы воспользуемся утилитой git и клонируем данный репозиторий, предварительно сменив директорию на домашнюю, выполнив команду “cd”:
Если вдруг у вас не установлена утилита “git”, то выполните команду “sudo apt install git”.
Заходим в директорию “android-udev-rules” и тут нам нужно скопировать файл под названием “51-android.rules” в директорию вашей системы “/etc/udev/rules.d/”, копировать мы будем командой “cp”, о которой вы можете прочесть тут. И так, переходим в директорию и копируем данный файл, копировать необходимо с правами root пользователя:
Далее перезагружаем правила udev командой:

Выключаем ваш Android девайс и в выключенном состоянии подключаем его к компьютеру под управлением Linux. Нам необходимо, что бы телефон определился в системе, для этого выполним команду:
В конце вывода полученных данных должно быть примерно следующее, тут главное ttyACM0, если это значение имеется, значит все OK:
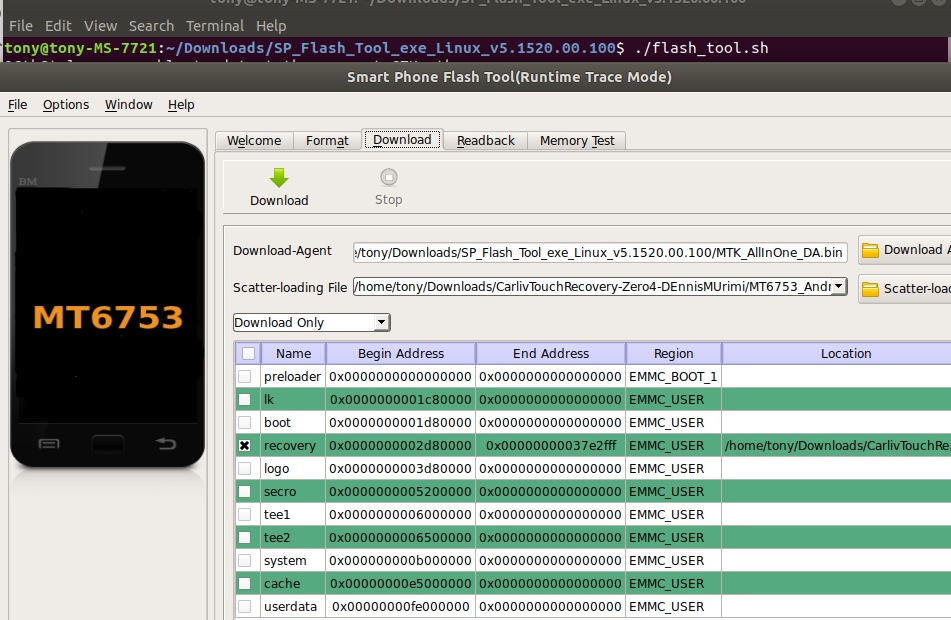
Возвращаемся к Flash Tool и запускаем из терминала скрипт от имени root пользователя выполнив команду:

Перед началом прошивки в утилите необходимо выставить настройки, заходим в Options- Download и ставим галочки напротив всех 2-х пунктов:

В строке “Scatter-loading File” указываем путь к scatter файлу, который прилагается к прошивкам. Выбираем один из режимов – Download Only или Firmware Upgrade и нажимаем кнопку Download:

Режим Download Only (прошивка без потери данных) – снимаем галочки с Preloader и Userdata в Flash Tool, при этом произойдёт обычное обновление прошивки. Если оставить галочку на пункте Userdata – все пользовательские данные будут стерты.
Режим Firmware Upgrade (прошивка всех разделов), при этом IMEI не слетает, используется в случае, если хотите получить чистый Android смартфон с новой прошивкой.
Заключение
Прошивка телефонов – рисковое занятие, при неправильно выбранной прошивке можно получить неработоспособный телефон. Зачем вообще прошивают телефоны? Хотя бы для того, что бы получить кастомную прошивку, или получить root права на телефоне.
Данная инструкция лишь воссоздает все действия, которые я проделывал прошивая свой Android смартфон в Linux, основана она на инструкции взятой с 4pda. Более подробно о работе с утилитой Flash Tool читайте все на том же форуме перейдя по ссылке.
Что касаемо остальных дистрибутивов Linux, то вероятней всего данную инструкцию придется адаптировать, в зависимости от вашего дистрибутива Linux. А так как я пользуюсь Kubuntu и Pop OS, то с уверенностью могу сказать, что все описанные действия работоспособны.
В любом случае читайте внимательно инструкцию которая прилагается к прошивке, так как в данной статье основной упор был сделан исключительно на установку Flash Tool в операционной системе Linux. Безусловно, перепрошить телефон в Linux можно и без Flash Tool, но, с ней это сделать намного удобней.
А на этом сегодня все, надеюсь, данная статья будет вам полезна.
Хотелось бы выразить огромную благодарность тем, кто принимает активное участие в жизни и развитии журнала, огромное спасибо вам за это.
Журнал Cyber-X
Источник


