- Thread: multi-user Linux — who around here does that?
- multi-user Linux — who around here does that?
- Re: multi-user Linux — who around here does that?
- Re: multi-user Linux — who around here does that?
- How to Create Multiple User Accounts in Linux
- If You Appreciate What We Do Here On TecMint, You Should Consider:
- Linux: How To Create Multiple Users Accounts in Batch
- Task: Set Password
- Task: Update and create new users in batch
- How to List Users in Linux
- Listing users
- Using user list
- Final thoughts
- About the author
- Sidratul Muntaha
Thread: multi-user Linux — who around here does that?
Thread Tools
Display
![]()
multi-user Linux — who around here does that?
i ran Ubuntu 14.04 and 16.04 and now Xubuntu 18.04 with multiple users concurrently logged on. this works under Unity and Xfce, which both use lightdm to manage the display. it’s a bit stronger security through compartmentalization. there may be other reasons people do this.
i’m wondering how many UbuntuForums participants do this in some way.
i want to look at boosting the security a bit and put each user in a container. or maybe i could use a virtual machine get even more security.
![]()
Re: multi-user Linux — who around here does that?
I was on a UNIX server 29 years ago, and no user had access to any other’s /home folder. Each user’s /home folder is pretty damn secure already with a password required to get access. Others might give you better advice, but that’s how I see it.
![]()
Re: multi-user Linux — who around here does that?
Like oldrocker said, Linux, like Unix and all its derivatives, provides ample security out of the box. Each user can only write to his or her home directory and to /tmp.
One thing that I would do is remove the group and other read and execute privileges from each person’s home directory so they are entirely private. Ubuntu has a «sharing» ethic and by default creates home directories that are listable and readable by all users. So instead of the default 755 privileges on /home/username, I’d make them all 700. (This is the default on «enterprise» distributions like RedHat.)
You can make that the default by editing (as root with sudo) /etc/adduser.conf and change the line
Then when you create new users with the adduser command, their home directories will have 700 privileges by default.
For even greater security you can change the default UMASK in /etc/login.defs from 022 to 077. Then all files a user creates will only be accessible by that user.
The downside to these changes is that it makes it difficult for users to share files with other users, especially if you change the umask. One solution is to change the DIR_MODE but leave the UMASK at 022, then create a directory where people can place files they want to let other users see. Suppose I create a directory called «/shared» with permissions similar to /tmp
The 1 in the permissions sets the «sticky bit,» which prohibits users from deleting or modifying files or directories created by another user.
You can make it easier for users to find the shared directory by including a symbolic link to it in /etc/skel, which contains the files copied to each new user’s home directory when it is created.
Now every new user will have a «shared» entry in his or her home directory.
If you do an «ls» on /etc/skel you won’t see anything by default. That’s because all the files there are «hidden» with a «.» prefix like .bash_profile. To see the contents of /etc/skel, use «ls -a».
For a discussion on why Ubuntu has a more open security ethic read this thread: https://bugs.launchpad.net/ubuntu/+s. ser/+bug/48734 with contributions from a variety of notables including Mark Shuttlesworth himself.
Last edited by SeijiSensei; August 10th, 2019 at 06:25 PM .
If you ask for help, do not abandon your request. Please have the courtesy to check for responses and thank the people who helped you.
Источник
How to Create Multiple User Accounts in Linux
The two utilities for adding or creating user accounts in Unix/Linux systems are adduser and useradd. These commands are designed to add a single user account in the system at a time. What if you have multiple users accounts to be created? That’s when you need a program such as newusers.
Newusers is a useful command line utility used to update and create new user accounts at a single time. It is intended to be used in IT environments with large systems where a system administrator needed to update or create multiple user accounts in batch. It reads information from stdin (by default) or a file to update a set of existing user accounts or to create new users.
In this article, we will explain how to create multiple user accounts in batch mode using Newusers utility in Linux systems.
To create users in a batch, you can provide their information in a file in the following format, same as the standard password file:
- pw_name: username
- pw_passwd: user’s password
- pw_uid: user’s ID
- pw_gid: user’s group ID
- pw_gecos: defines comments sections.
- pw_dir: defines the home directory of the user.
- pw_shell: defines user’s default shell.
Attention: You should protect the input file since it contains unencrypted passwords, by setting the appropriate permissions on it. It should only be readable and writable by root.
For example, to add the user accounts ravi and tecmint, you can create a files called users.txt as shown.
Next, add the user accounts details in the file in the following format.
![]() Create Multiple User Accounts in Linux
Create Multiple User Accounts in Linux
Save the file and set the required permissions on it.
Now run the newusers command with the input file to add the above user accounts at once.
First, newusers program tries to create or update the specified accounts, and then write these changes to the user or group databases. In case of any errors except in the final writes to the databases, no changes are committed to the databases. This is simply how the newusers command works.
If the previous command is successful, check the /etc/passwd and /etc/groups files to confirm that the user accounts have been added as shown.
![]() Verify User Accounts in Linux
Verify User Accounts in Linux
For more information, see the newuser man page.
You might also like to check these following related articles.
In this article, we’ve explained how to create multiple users in Linux using newusers program. Use the feedback form below to ask any questions or share your comments with us. If you know of any similar utilities out there, let us know as well.
If You Appreciate What We Do Here On TecMint, You Should Consider:
TecMint is the fastest growing and most trusted community site for any kind of Linux Articles, Guides and Books on the web. Millions of people visit TecMint! to search or browse the thousands of published articles available FREELY to all.
If you like what you are reading, please consider buying us a coffee ( or 2 ) as a token of appreciation.

We are thankful for your never ending support.
Источник
Linux: How To Create Multiple Users Accounts in Batch
The useradd command is used to create a new user or update default new user information from the command line. However, sometimes you need to create a large number of users or import usernames from a text file. You can use newusers command, which update and create new users in batch.
This is useful at universities or large corporate Linux networks. Adding users in batch saves the time.
Task: Set Password
Type the following command to change or set user password:
echo «username:password» | newusers
For example, change user password for vivek user:
echo «vivek:myUltraSecretPassword» | newusers
Task: Update and create new users in batch
newusers command reads a file of user name and clear-text password pairs and uses this information to update a group of existing users or to create new users. Each line is in the same format as the standard password file.
This command is intended to be used in a large system environment where many accounts are updated at a single time (batch mode). Since username and passwords are stored in clear text format make sure only root can read/write the file. Use chmod command:
# touch /root/batch-user-add.txt
# chmod 0600 /root/batch-user-add.txt
Create a user list as follows. Open file:
# vi /root/batch-user-add.txt
Append username and password:
user1:password:1001:513:Student Account:/home/user1:/bin/bash
user2:password:1002:513:Sales user:/home/user2:/bin/bash
user100:password:1100:513:Sales user:/home/user100:/bin/bash
tom:password:1110:501:Guest Account:/home/guest:/bin/menu
jerry:password:1120:501:Guest Account:/home/guest:/bin/menu
Источник
How to List Users in Linux
This guide demonstrates how to list users in Linux.
Listing users
The system stores the list of users in specific files and databases. We can access them using various tools. We can also filter the output to collect specific info.
List users from /etc/passwd
The /etc/passwd file is a plain-text-based database that contains info about all the users in the system. The file is owned by root with the file permission 644. For an in-depth explanation of file permissions, check out this guide on Linux file permission and ownership.
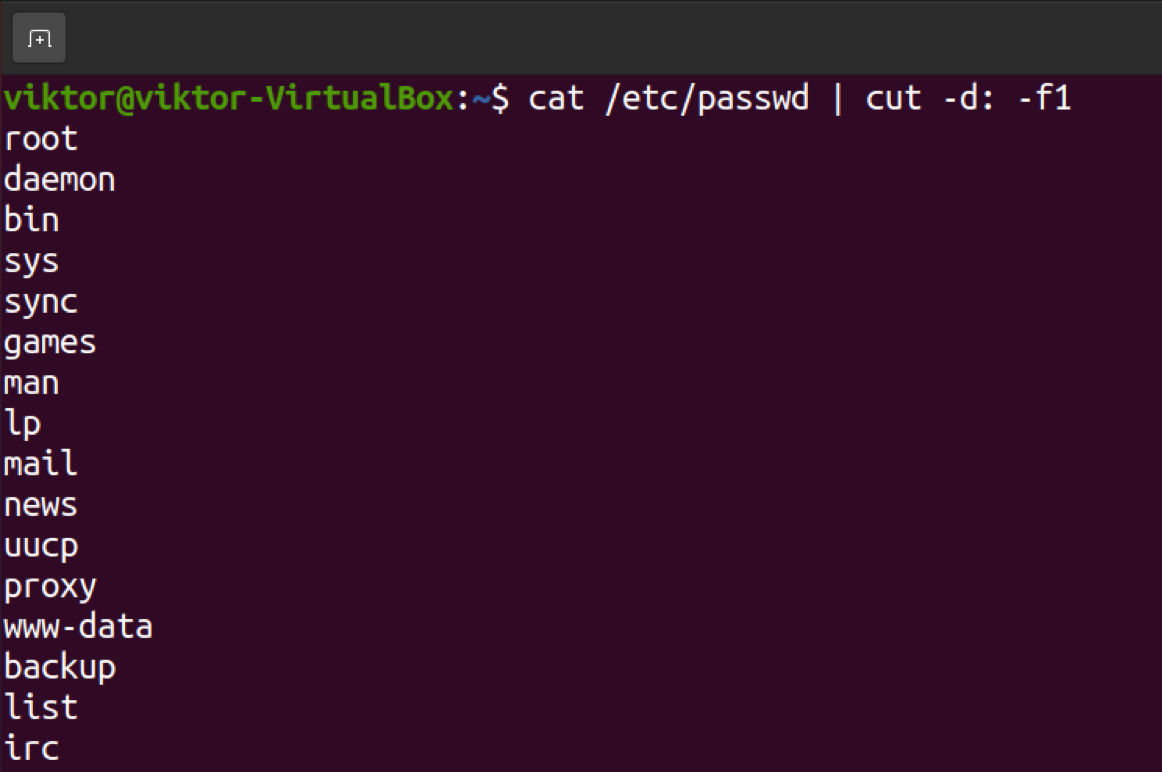
We can check the content of the file /etc/passwd to have a comprehensive list of all the users in the system.
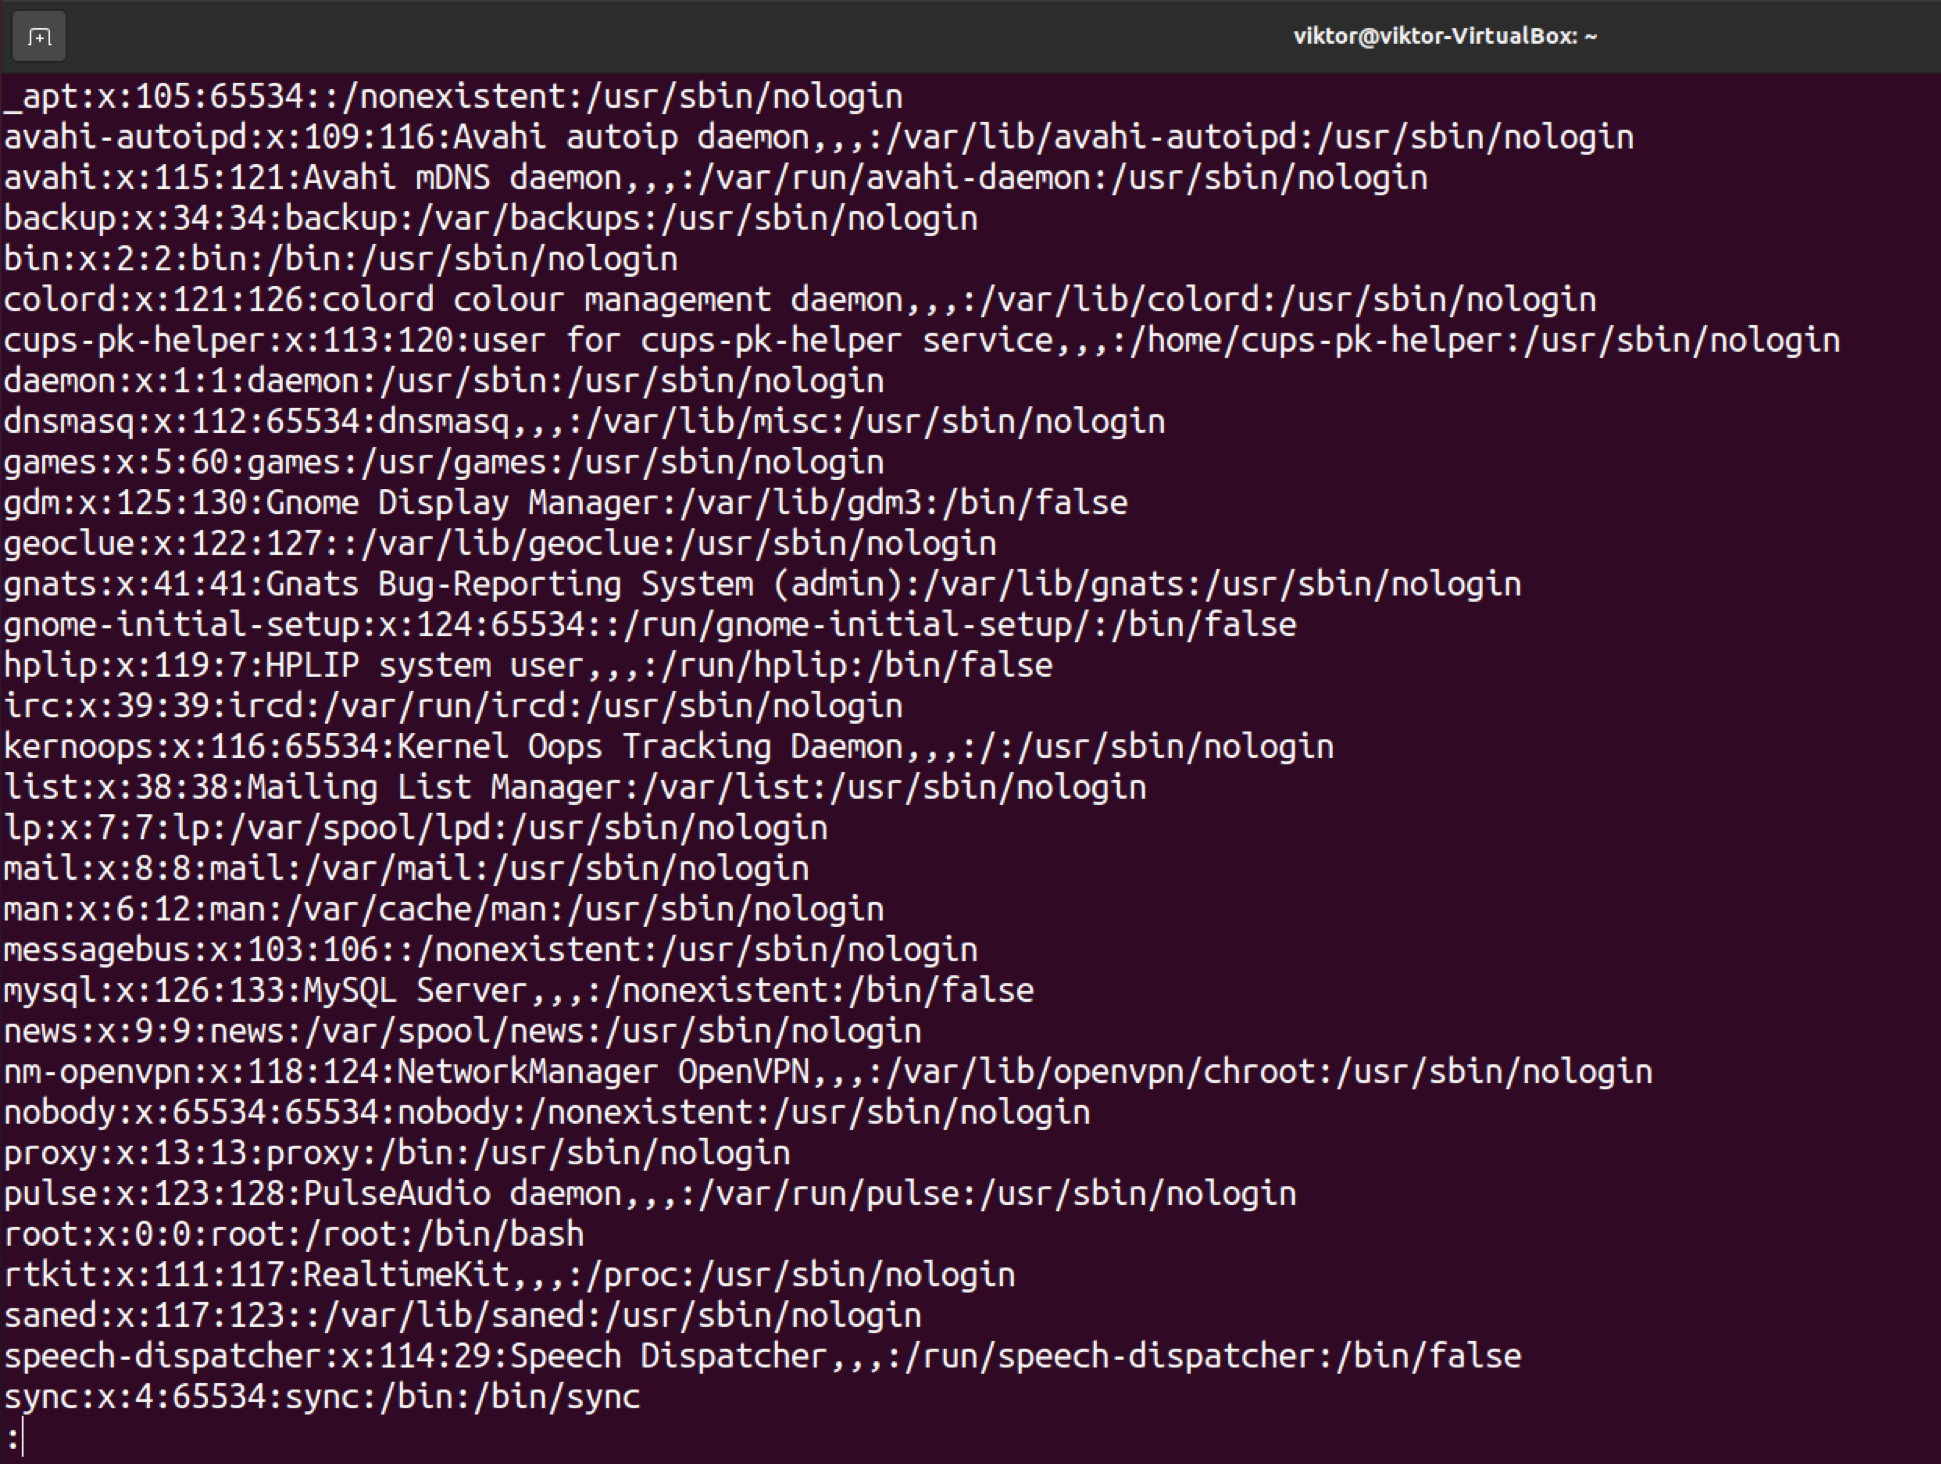
Each line in the file denotes a unique username and its associated info. The info is separated into seven fields, delimited by colons. Here’s a quick rundown of the fields.
- Field 1: The username of the user.
- Field 2: It describes if the user password is encrypted. If the value is “x,” it signifies that the password is stored at the text file “/etc/shadow.” It’s a system-protected file that requires sudo privilege to access.
- Field 3: The UID (user ID) of the user.
- Field 4: The GID (group ID) of the user.
- Field 5: Full User name (GECOS).
- Field 6: Home directory dedicated for the user.
- Field 7: The user login shell. By default, this value would be set to “/bin/bash.”
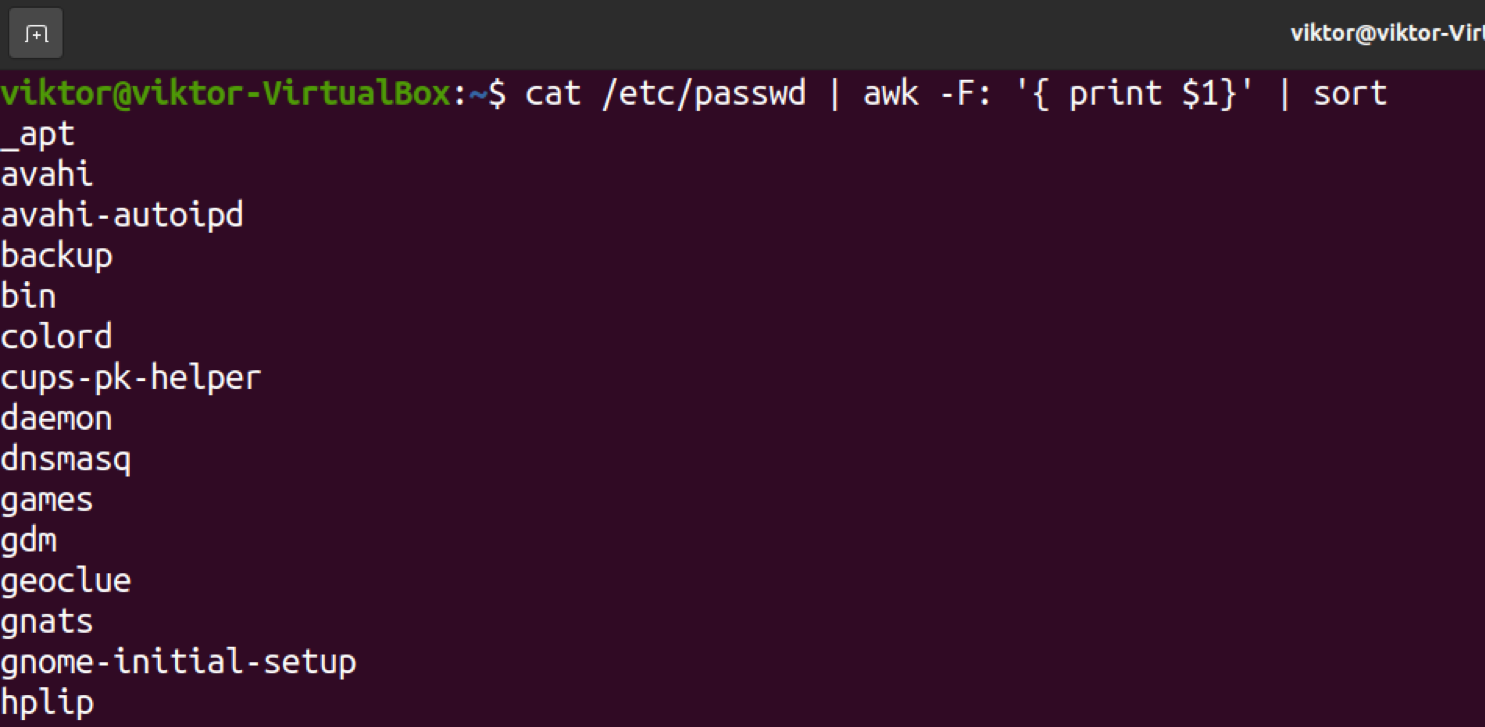
If the additional info is not necessary at the moment, we can omit them in the output.
Listing users using getent
The term “getent” is a short form for “get entries from the administrative database.” As it suggests, getent can work with various administrative databases. Check out all the supported administrative databases.
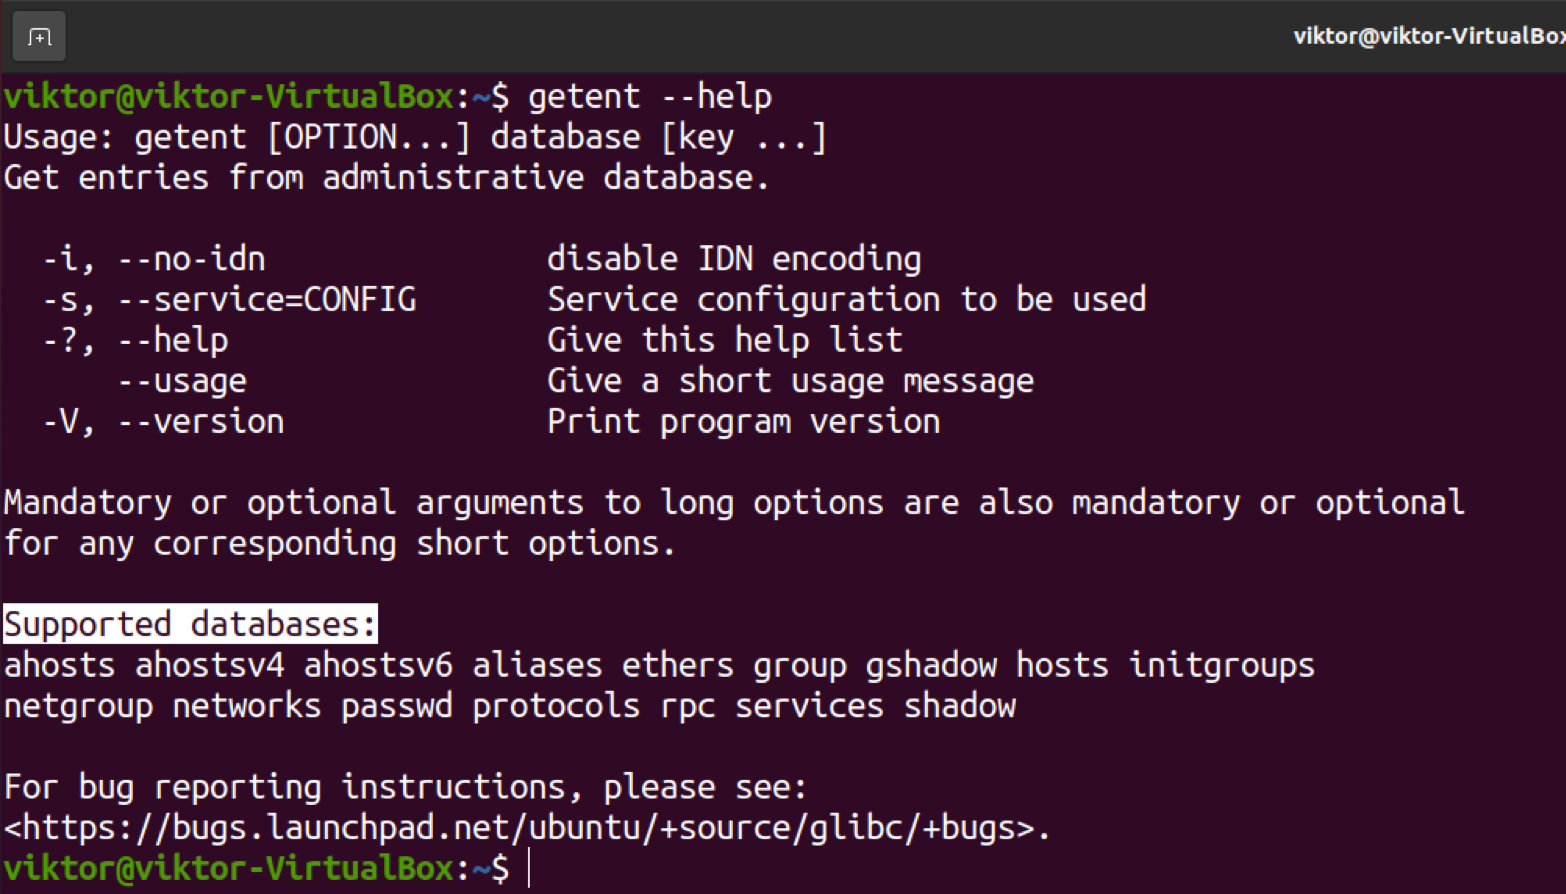
We’re interested in the “passwd” database as it contains info about all the users in the system. Check out the passwd database with getent.

The output is similar to the content of “/etc/passwd.” Note that this getent command will display users from both passwd and LDAP databases if the system is configured to use LDAP for user authentication. For more in-depth usage, check out this guide on Linux getent command.
We can remove all the additional info from the output, keeping the username only.
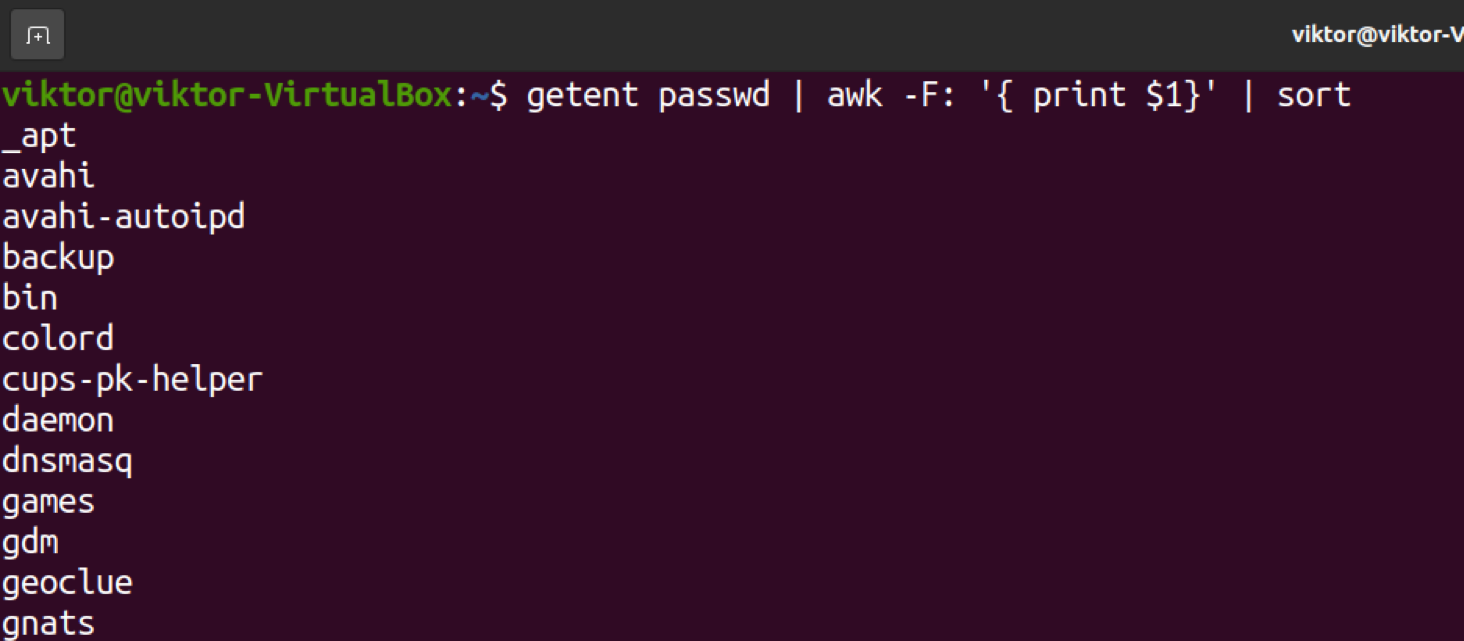
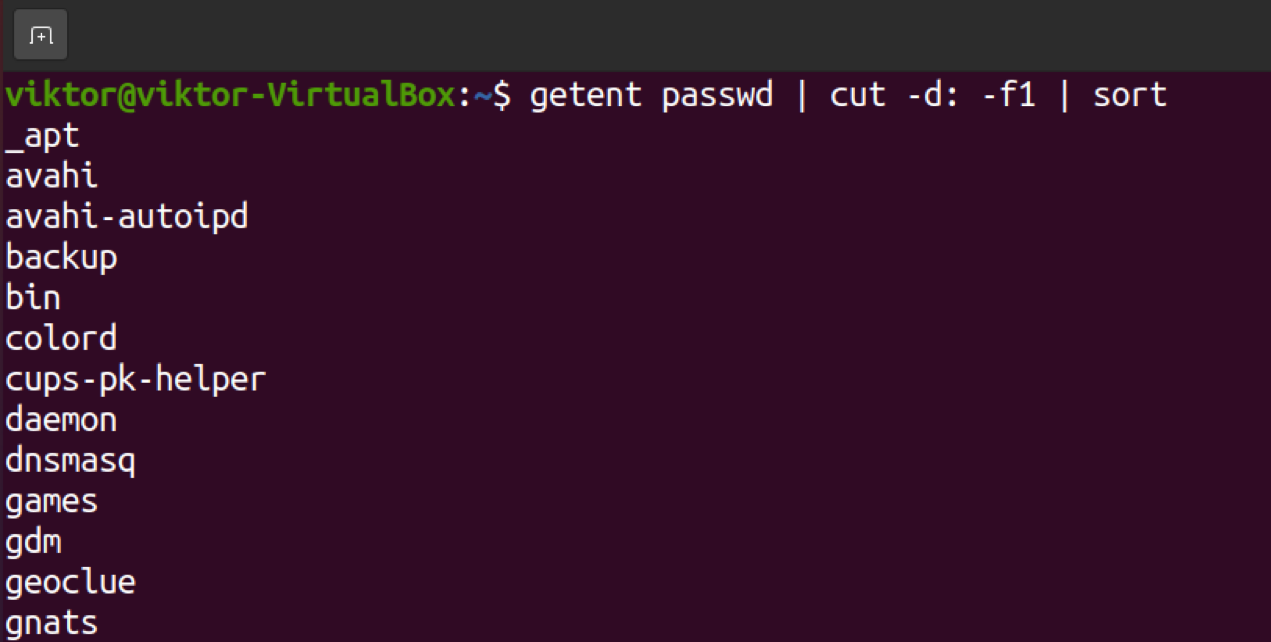
Listing user of a group
In Linux, groups are organization units to organize and administer user accounts. It helps to manage the various system and file permissions easier.
To list all the users from a particular user group, we can use getent.

Using user list
We now know how to list all the users in the system. Here are a few scenarios to apply this knowledge.
Checking user existence
From the user list, we can check if a user exists in the Linux system. The getent tool can check if the user exists in the system.

Another (albeit not-so-good) method is to use grep. We can simply filter the list of users using grep. As each user has its own unique entry, it won’t generate any collisions.

Number of user accounts
As we’ve seen so far, all methods report a unique user at each line of the output. By counting the line number, we can check how many users there are currently in the system.
To count the line number, we’ll use the wc tool. Pipe the getent output to the wc command.

Listing connected users
If multiple users logged in, we can check the list of connected users using the who command.

There are three different columns of information in the output.
- Column 1: The connected username.
- Column 2: The type of connection to the system.
- Column 3: The starting time and date of the session.
Final thoughts
In this tutorial, we demonstrated how to list and filter the users in the system. It also showcases some of the potential usages of the user list. These methods work irrespective of what Linux distro you’re using.
User management is a big part of the Linux ecosystem. To learn more, check out this in-depth guide on how to list and manage users in Linux.
About the author

Sidratul Muntaha
Student of CSE. I love Linux and playing with tech and gadgets. I use both Ubuntu and Linux Mint.
Источник


