- IT Blog. Code Inside
- MultiBoot USB: Создаем мультизагрузочную флешку с Windows, Linux и утилитами
- Подготовка к установке
- Процесс установки и создания мультизагрузочной флешки
- Для систем семейства Windows
- Для Linux-based образов
- Проверка работоспособности флешки
- Как сменить фоновую картинку под меню загрузки
- Multiboot, UEFI, NTFS или почти рецепт счастья
- Предисловие
- Начинаем
- Подготовка флешки
- Структура папок или куда же класть образы?
- Постой, а как же UEFI?
- Как все это выглядит?
- В сухом остатке
- 5 Apps to Create Multiboot USB – Linux & Windows ISOs Supported
- 1. SARDU MultiBoot USB and DVD Creator
- 2. MultiBootUSB
- 3 MultiSystem
- 4 YUMI (Your Universal Multiboot Installer)
- 5 WinSetupFromUSB
- Booting ISO Files Without a USB stick or DVD
- Wrapping Up
IT Blog. Code Inside

MultiBoot USB: Создаем мультизагрузочную флешку с Windows, Linux и утилитами
В этой статье приведена инструкция по созданию мультизагрузочной флешки с помощью программы MultiBoot USB. Программа работает с NTFS и FAT32, так что можно использовать не только флешку, но и внешний жесткий диск.
Подготовка к установке
1. Для начала возьмем флешку такого размера, чтоб на нее поместились все запланированные образы.
2. Скачиваем программу MultiBoot USB и устанавливаем.С программой в комплекте идет наглядная инструкция на русском языке: Readme.pdf.
В образе, создаваемом данной программой, предустановлены следующие программы:
- FreeDOS — Загрузка в режиме командной строки, включает DOS-Navigator и VC
- Универсальный загрузочный диск v3.7 — Работа с разделами NTFS в MS-DOS
- NT Password & Registry Editor — Смена пароля и редактирование реестра Windows XP
- Active@ Boot Disk Professional v2.1 — Восстановление удалённых файлов
- QuickTech Pro v5.8 — Тестирование и диагностика железа и его компонентов
- MemTest86 v4.20 — Тестирование и диагностика оперативной памяти
- MHDD v4.6 — Тестирование и диагностика жёстких дисков
- Victoria v3.52 — Тестирование и сервисное обслуживание IDE и Serial ATA HDD
- HDD Regenerator v2011 — Устранение физических повреждений на HDD
- Symantec Ghost v11.0 — Работа с разделами жёстких дисков.
Кроме перечисленных выше утилит, в состав пакета можно добавить ISO-образы (для них уже созданы необходимые пункты меню, и файлы-пустышки, которые нужно заменить на настоящие образы):
- Windows XPE — Мини версия
- Windows 7PE — Мини версия
- Acronis Disk Director & True Image — Работа с разделами жёстких дисков.
Процесс установки и создания мультизагрузочной флешки
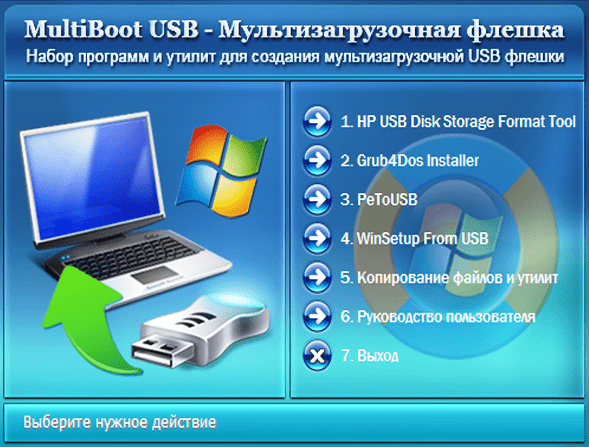
1. Для начала запускаем утилиту HP USB Disk Storage Format Tool, выбираем устройство, ставим галочку «QuickFormat» и форматируем (желательно под NTFS, чтобы в случае чего не возникло проблем с большими файлами образов).
2. Далее устанавливаем grub4dos. Запускаем Grub4Dos Installer, в поле «DeviceName» выбираем Disk, и своё устройство (название устройства не отображается, только размер в мегабайтах). Жмем «Install«.
3. Далее следует распаковать на флешку набор файлов и утилит. Через кнопку «Обзор…» указываем путь к флешке и нажимаем «Извлечь». На вопрос: «Вы хотите заменить существующий файл?» отвечаем «Да».
Технически флешка уже стала мультизагрузочной, но кроме утилит, которые мы распаковали, на ней ничего нет.
Дополним комплект образами операционных систем. Для удобства можно создать в корне папку «iso», где будут расположены все образы дисков.
Для систем семейства Windows
Для установки Windows 7, Windows 8, Windows 8.1, следуем пункту 4.1 инструкции, выбирая соответствующий (2й) чекбокс:

Для Linux-based образов
Открываем на флешке файл menu.lst (в корне) блокнотом и заменяем пункты по умолчанию на желаемые, например:
title Загрузка Ubuntu 11.10 — i386 // название пункта меню
find —set-root /iso/ubuntu1110i386.iso // где «/iso/ubuntu1110i386.iso» путь к образу
map /iso/ubuntu1110i386.iso (0xff) || map —mem /iso/ubuntu1110i386.iso (0xff)
Проверка работоспособности флешки
Для проверки работы запускаем WinSetupFromUSB, в поле с устройством выбираем созданную флешку, и ставим галочку «TestinQEMU». По нажатию на «GO» будет произведен запуск загрузки с флешки в вииртуальной среде без перезагрузки системы.
Как сменить фоновую картинку под меню загрузки
1. Вам понадобится макет фоновой картинки в PSD и архив для перепаковки скинов. Отредактируйте PSD файл и сохраните в BMP (возможно придется пересохранить сторонней программой).
2. Готовый файл копируем в папку «Files» из архива «SkinsRepack», и запускаем файл «Упаковать.cmd». Получаем файл Skins без расширения. Этот файл копируем на флешку, и в файлах menu.lst и /boot/menu_u.lst во второй строчке указываем путь к скину:
Проверить как выглядит ваш новый скин также можно в эмуляторе.
После всех действий на флешке будут две папки и четыре файла, впрочем их можно пометить как скрытые, что никак не отразится на работе устройства.
Проверка в эмуляторе не даёт 100% гарантии того, что конкретный образ заработает в реальных условиях. Проверки на виртуальных машинах VirtualBox или VMWare также не всегда могут сработать корректно, так что лучше всего проверять на реальном железе.
Для примера вы можете скачать готовый файл menu.lst с прописанными в загрузке:
- Microsoft Windows XP SP2 x86
- Microsoft Windows 7
- Windows 8
- Ubuntu 14.04
- Debian Live 7.5.0
- Linux Mint 17
- Fedora 20
- Acronis Disk Director & True Image
- Hirens BootCD 15.1
- Kaspersky Rescue LiveCD
Источник
Multiboot, UEFI, NTFS или почти рецепт счастья
Пост написан по мотивам публикации «Живительная флешка».
Предисловие
Доброго времени суток, Хабр. Совсем недавно, читая Хабр, наткнулся на статью Живительная флешка, где был описан способ создания мультизагрузочной флешки с набором полезных утилит, разнообразных систем и т.д. И все бы ничего, да вот и тут зарыта собака — обратим внимание на эту ветку комментариев, в которой обсуждается работоспособность мультизагрузки в системах с UEFI. Таким образом я начал собственное расследование искать универсальный способ решения этой проблемы.
Далеко ходить не пришлось — еще со времен безумной популярности сборки Windows XP Zver Edition ее разработчики использовали набор утилит под названием RMPrepUSB для записи сборки на USB-накопитель. Сборка ушла из памяти людей, ну а сам проект пакета утилит продолжает развиваться и крепнуть. Ну а сама основа — проект Easy2Boot. Изучая их сайт я нашел универсальный способ создания мультизагрузочной флешки, которая может содержать в себе любой дистрибутив, LiveCD или образы дискет, которые Вы только захотите добавить. Итак, приступим к созданию такой чудо-флешки.
Начинаем
Идем на сайт и качаем последний архив с Install_RMPrepUSB_Full в названии. Распаковываем и устанавливаем.
Внимание: для любителей переносимости — можно открыть установочник в 7-zip (к примеру) и распаковать его в папку без установки.
Далее идем на сайт Easy2Boot и качаем архив с самим E2B, распаковываем в любую папку на ПК.
Подготовка флешки
Заходим в папку с E2B и запускаем файл _ISO\docs\Make_E2B_USB_Drive.cmd.
Внимание: если Вы не устанавливали, а распаковывали RMPrepUSB, то на первом же этапе Вас попросят указать путь в папке RMPrepUSB.
Нас попросят указать номер накопителя из приведенного списка, спросят, действительно ли мы хотим форматировать накопитель и попросят выбрать ФС.
И вот тут внимание! Выбираем FAT32 — грузимся в UEFI без проблем, но нет поддержки файлов >4 Гб, и наоборот — NTFS без UEFI, но с поддержкой больших файлов. Если Ваши образы весять меньше 4 Гб каждый, то смело выбирайте FAT32. С NTFS немного сложнее, а именно — флешка в UEFI не загрузится, но если загрузить ее на обычном биосе, а потом выбрать образ для UEFI (об этом ниже), то Easy2Boot перепишет MBR флешки и она будет загружаться в UEFI, при условии, что в том образе есть его поддержка (наличие файлов efi\bootia32.efi и efi\boot\bootx64.efi)
Идем по сложному пути — пишем N (то есть форматируем в NTFS), вылезет окошко с подтверждением, жмем ОК и ждем. После форматирования будут скопированы файлы E2B и на зеленом фоне появится надпись «Нажмите любую клавишу».

Структура папок или куда же класть образы?
Заходим на накопитель, видим файлы и папку _ISO. Кратко опишу структуру (подробности есть на сайте):
- ANTIVIRUS — закидываем образы антивирусных LIveCD (Kaspersky, Dr.Web и иже с ними)
- AUTO — кидаем любой образ в подпапку с нужным названием (к примеру, по пути Ubuntu\My_Ubuntu_Distro.iso)
- LINUX — соответственно любой Лунксовый образ закидываем в эту папку.
- MAINMENU — закидываем образ в эту папку и он появится в главном меню Grub4DOS при загрузке (не в подменю, об этом позже)
- UTILITIES — образы дискет кидаем сюда
- UTILITIES_MEMTEST — то же самое, но, увы, точнее сказать не могу
- WIN — сюда мы будем складывать образы, подготовленные для загрузки в UEFI. Об этом позже
- WINDOWS — по структуре подпапок несложно понять, что для каждого семейства Windows нужно положить образ в соответствующую ему подпапку.
Далее запускаем RMPrepUSB, выбираем накопитель в списке и жмем Ctrl+F2, соглашаемся и ждем пару секунд. Программа пошаманит с файлами и можно грузиться с флешки.
Постой, а как же UEFI?
Ах, ну да. То, ради чего мы здесь и собрались. Для подготовки образа к загрузке в UEFI, скачаем архив, распакуем его. Устанавливаем файл ImDisk\imdiskinst.exe из папки, после чего перетаскиваем файл образа на скрипт MakePartImage_AutoRun_FAT32.cmd в основной папке. Данный скрипт переделает образ в формат .imgPTN, при монтировании которого E2B будет переписывать MBR и монтировать образ как раздел FAT32. Подробнее Вы можете прочитать тут.
Как все это выглядит?
Грузимся в биосе, выбираем нужный UEFI образ, переключаем UEFI обратно и получаем флешку с одним разделом, содержащим файлы этого образа. Соответственно, если данный образ поддерживает загрузку в UEFI — он появится в списке устройств, с которых можно загрузиться.
Внимание! Если Вы загружались с образов, подготовленных для UEFI, то Вы заметите, что при следующей загрузке с накопителя будет меню загрузки с того самого образа. А где же все те, что мы набросали на флешку? Да и файлы на флешке не те… Тут два варианта — из загрузчика выбрать верхний пункт EASY2BOOT или в ОС запустить с флешки скрипт e2b\RestoreE2B (run as admin).cmd.
В сухом остатке
Без минусов не обошлось и тут — приходится переключаться в биос для того, чтобы подключить нужный образ. Зато функционал данного набора утилит закрывает все мыслимые и немыслимые потребности в мультизагрузочной флешке.
Источник
5 Apps to Create Multiboot USB – Linux & Windows ISOs Supported
This article will be showing you 5 applications you can use to create a multiboot USB. All of them can write multiple Linux distribution ISOs to USB flash drive and most of them can even write both Windows and Linux ISOs into the same USB flash drive. These 5 apps are:
- SARDU MultiBoot USB and DVD Creator
- MultiBootUSB
- MultiSystem
- YUMI (Your Universal MultBoot Installer)
- WinSetupFromUSB
If you have created a bootable USB with another tool, it’s recommended that you reformat the USB flash drive with FAT32 or NTFS file system before you use the tools mentioned in this article.
1. SARDU MultiBoot USB and DVD Creator
SARDU is a freemium software that can be used to create multiboot USB and DVD.
- Runs on Linux and Windows.
- Can create a bootable USB containing both Linux and Windows ISO images (Windows 7, 8 and 10)
- A multitude of ISO images for you to select and download directly from the SARDU application.
- You can add additional ISO images to your USB without destroying previous ISO images in the USB flash drive.
- Supports persistent files for Linux distributions
- It can also be used to burn multiple ISO images to DVD.
- Supports both BIOS and UEFI firmware
- Test your USB with QEMU.
- SARDU uses the SYSLINUX boot loader by default, but can chainload to GRUB2 (premium feature)
- The Linux version of SARDU doesn’t support Windows ISOs. To add Windows ISO image to your bootable USB flash drive, you need to use the Windows version of SARDU.
- The persistent files function can cause the program to become unresponsive when using the Linux version. The Windows version works perfectly fine.
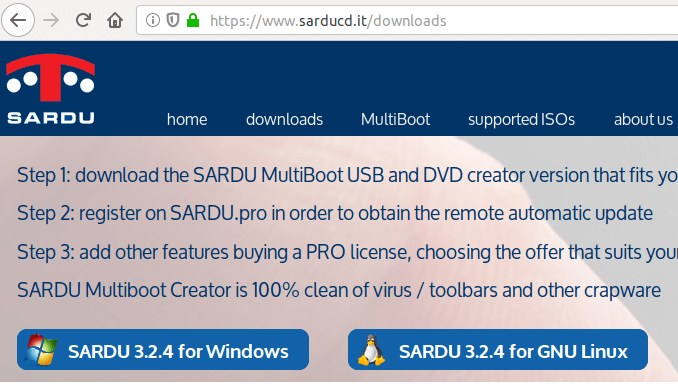
SARDU is a portable application. To use SARDU, go to the official download page and download the Linux version or Windows version, depending on your OS. I downloaded the Linux version.
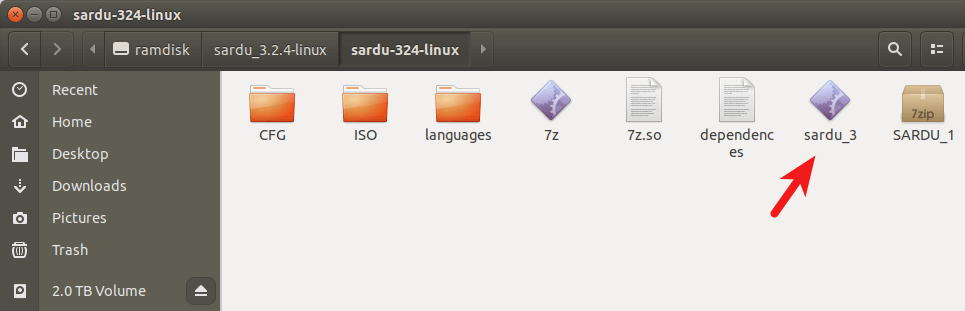
Once downloaded, open your file manager and go to the downloads directory. Extract the gzip archive.

Go to the extracted directory and double click the sardu_3 binary. The SARDU software will start.
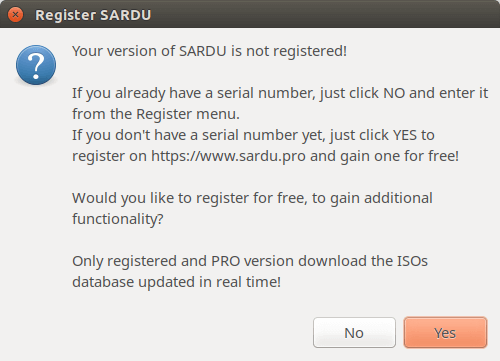
First, agree to the license.

Then it will tell you to register an account. Registered users can download updated ISOs from SARDU database. If you prefer to use your own downloaded ISO files, then choose No.
At the left sidebar, there are 4 categories of ISO images
- Anti-virus
- Utility
- Linux distributions
- Windows
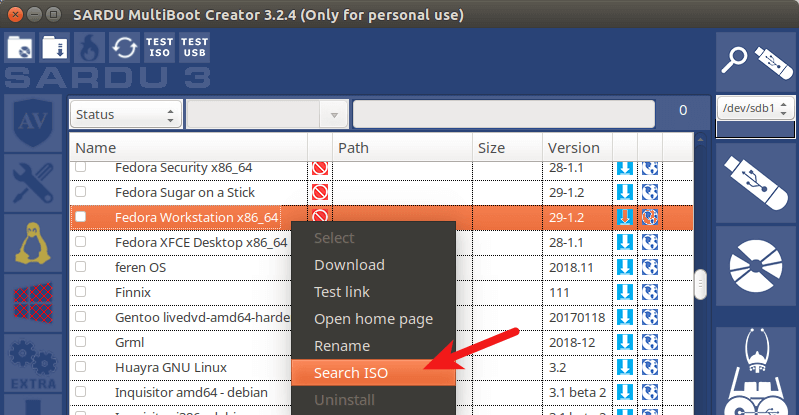
For example, you can click the penguin icon and right-click on an OS name and select search ISO . This will allow you to select an ISO image from your hard drive.
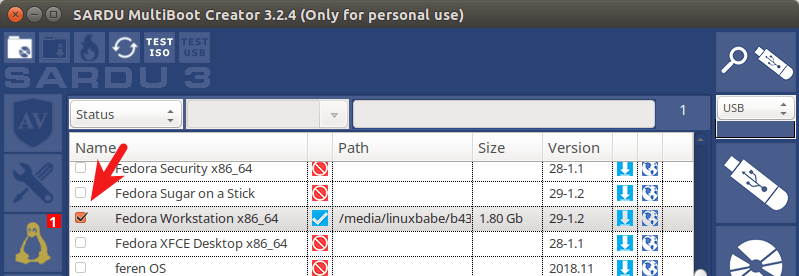
After that, tick on the OS name so that the ISO image will be written to USB flash drive.
It will also ask you if you want to enable persistent files. I found that if I choose Yes, the program would become unresponsive, so I choose No.
Then you can continue this process with another Linux distribution. After you select all your Linux distributions, insert your USB flash drive and click the USB icon on the upper-right corner to detect and select your USB flash drive.
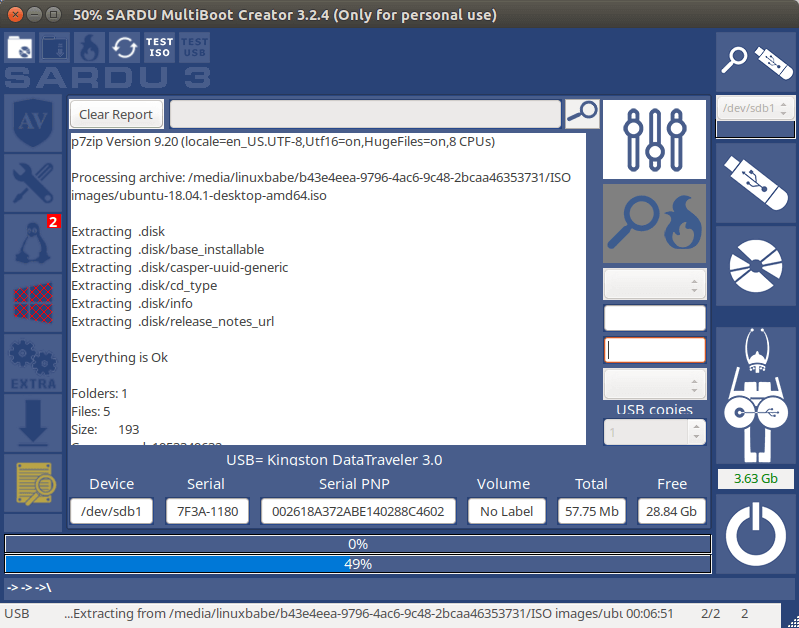
Next, click the big USB icon to create bootable USB.

This process can take some time if you selected several ISO images.
To add Windows 7, Windows 8, or Windows 10 ISO images to your USB flash drive, you need to use the SARDU Windows version. Click the Windows icon on the left bar, and select the first item in the list. Choose the ISO path, then tick on the name.

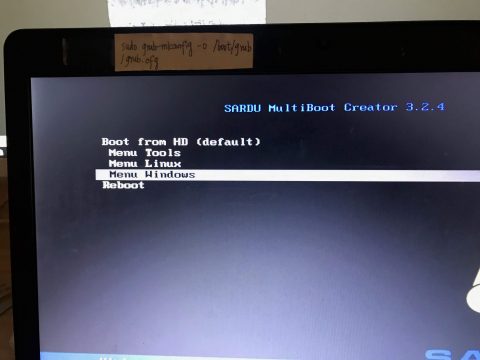
Please note that if your computer uses UEFI firmware, then you need to enable the legacy BIOS support in order to boot your computer from the SARDU USB flash drive. As you can see from the screenshot below, I can boot Linux or Windows ISOs from the SARDU boot menu.
2. MultiBootUSB
MultiBootUSB is an advanced cross-platform application for installing/uninstalling Linux operating systems onto a single USB flash drive.
MultiBootUSB Pros:
- Runs on Linux and Windows.
- Free and open Source. Released under General Public Licence (GPL).
- You can add additional ISO images to your USB without destroying previous ISO images in the USB flash drive.
- You can remove an ISO image from your bootable USB flash drive.
- Syslinux is used the default boot loader for making your USB Flash Drive bootable, can also chain load to GRUB2 if UEFI firmware is used.
- Supports both BIOS and UEFI firmware.
- Supports persistent files for distros that are based on Debian, Ubuntu, and Fedora.
- Test your ISO and USB with QEMU.
- Has a command-line interface.
- You need to write ISO images to your USB flash drive one by one.
- It doesn’t support writing Windows ISO image to USB flash drive.
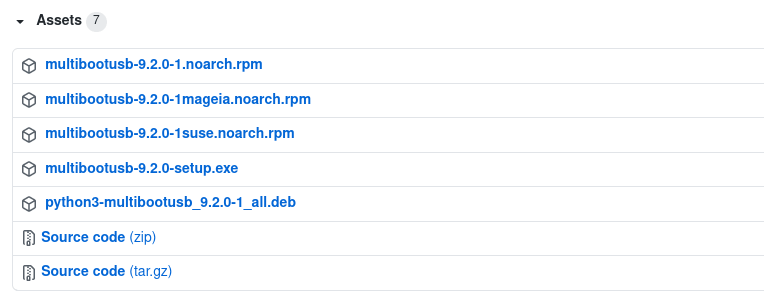
To use MultiBootUSB, go to the official download page and select the installer package according to your OS.
- Debian, Ubuntu users select the .deb package.
- Fedora, Redhat, OpenSUSE users select the .rpm package.
- Windows users select the .exe package.
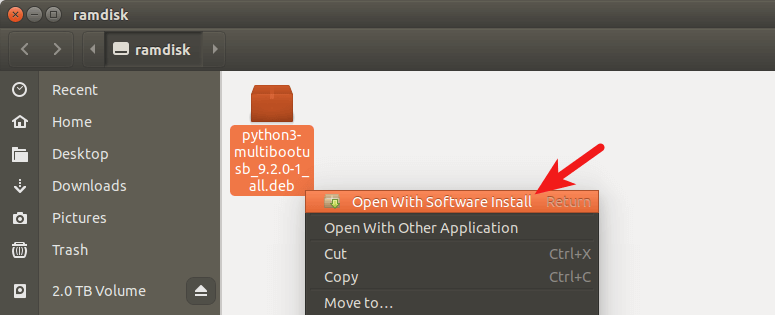
Once downloaded, open your file manager and go to the download directory and install the package.
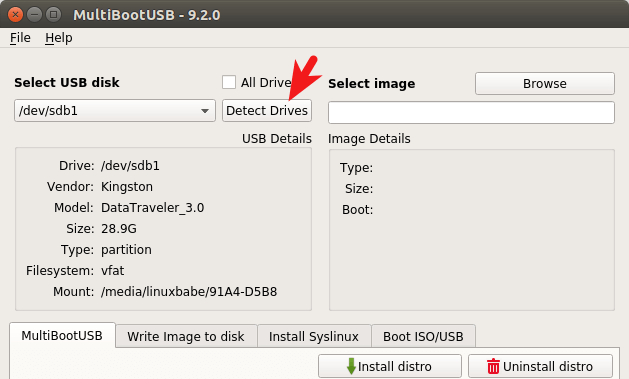
After it’s installed, open it from your application menu. To create a multiboot usb, first insert your USB flash drive. Next, click the Detect Drives button in MultiBootUSB and select a partition on the USB flash drive.
Then select a Linux distro ISO image from your hard drive. After that, you can specify the persistent file size.
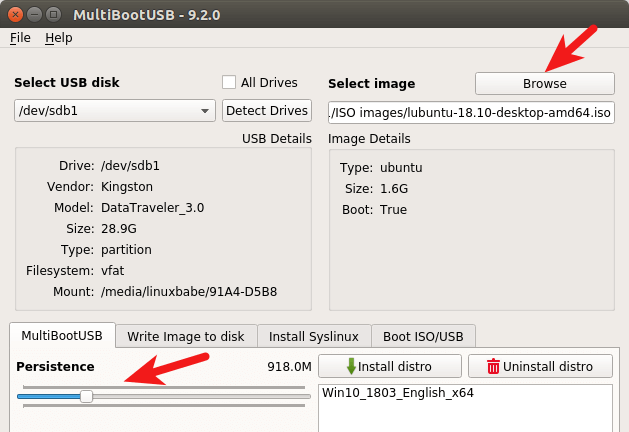
Finally, click the Install distro button to write the ISO image to your USB flash drive.
Once that’s done, you can click the Browse button again to select another Linux distro ISO image and click the Install distro button to write it to USB flash drive.
3 MultiSystem
MultiSystem is Linux-only application that allows you to create a multiboot Linux live USB.
- A multitude of ISO images for you to select and download directly from the application.
- Supports persistent files
- Can create a bootable USB containing both Linux and Windows ISO images.
- Test your live USB in QEMU or VirtualBox
- Only works in Debian and Ubuntu-based Linux distros.
- You need to write ISO images to your USB flash drive one by one.
- The Linux distro ISO images written to the USB flash drive can’t be booted in UEFI mode, you need to enable legacy BIOS support in order to boot them.
To install MultiSystem on Debian and Ubuntu-based Linux distros, open up a terminal and run the following command.
Import the repository public key.
Then add the official software repository to your system.
Update software repository index and install MultiSystem.
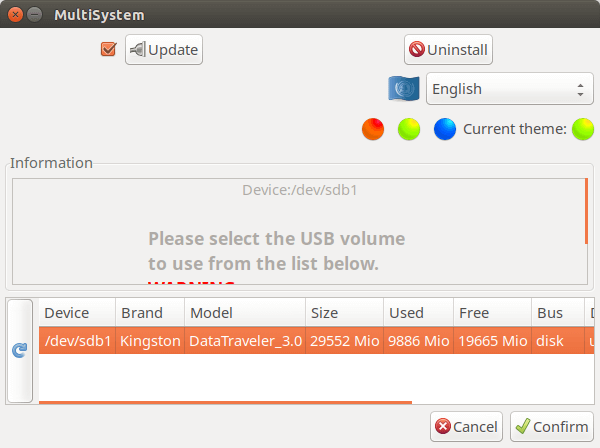
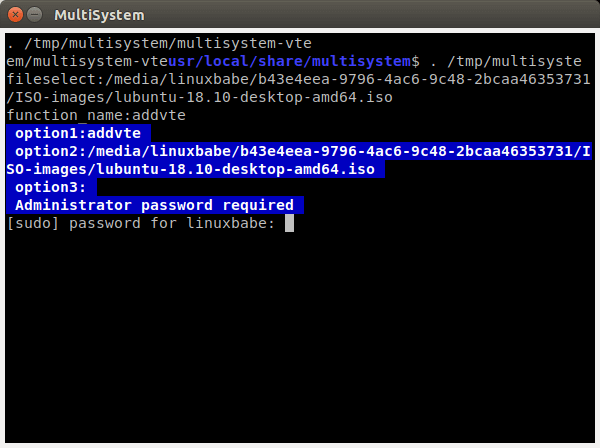
Once installed, open it from your application menu. Then insert your USB flash drive and click the refresh button in MultiSystem for it to detect your drive. (Make sure the USB flash drive is mounted). Once it finds your USB flash drive, select the device and click confirm button.
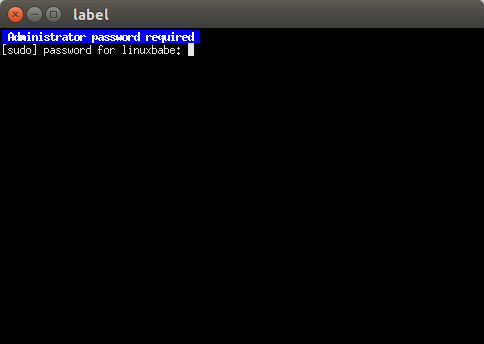
It will ask you to enter your password.
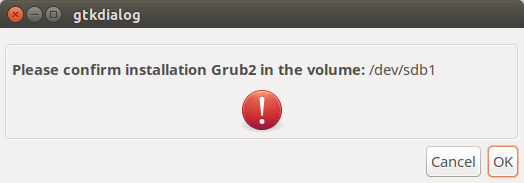
Then it will ask you if it’s Ok to install the Grub2 boot loader to your USB flash drive. Click OK.
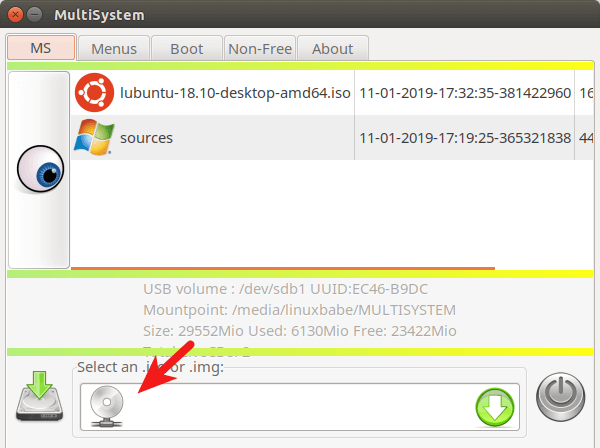
Once that’s done, click the DVD icon to select an ISO image from your hard drive.
Then enter your password to write the ISO image for your USB flash drive.
Repeat this process to add additional ISO images to your USB flash drive.
4 YUMI (Your Universal Multiboot Installer)
YUMI can be used to create a Multiboot Bootable USB Flash Drive containing multiple operating systems, antivirus utilities, disc cloning, diagnostic tools, and more.
- Supports both BIOS and UEFI firmware.
- Can create a bootable USB containing both Linux and Windows ISO images (Windows 7, 8 and 10)
- A multitude of ISO images for you to select and download directly from the application.
- You can add additional ISO images to your USB without destroying previous ISO images in the USB flash drive.
- Supports persistent files for Linux distributions.
- You can remove an ISO from USB flash drive.
- There’s no Linux version, although you can try running YUMI on Linux through WINE.
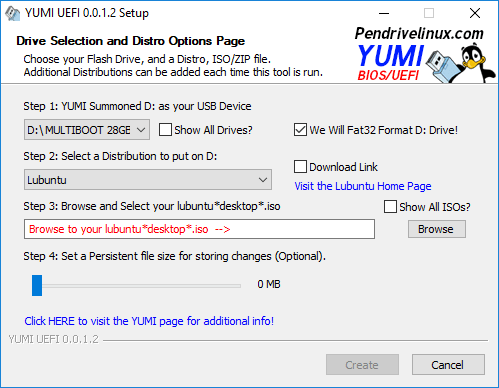
YUMI can be downloaded from the official download page. There are two versions of YUMI: one is for BIOS system and the other is for UEFI system. YUMI is a portable application. Once the .exe file is downloaded, you can double click it to start the application. Insert your USB flash drive and select it in YUMI user interface.
Then select the name of the OS you want to put into the USB. Next, select the ISO image file from your hard drive. In step 4, you can choose the persistent file size.
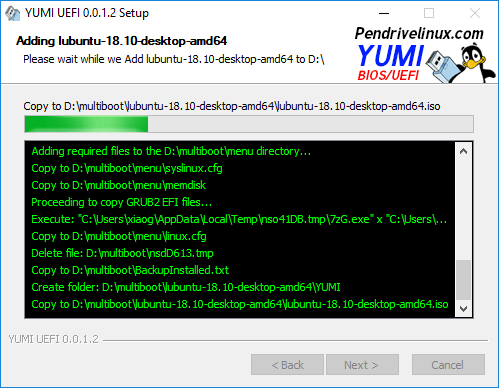
After that, click the create button to write the ISO image file to your USB flash drive.
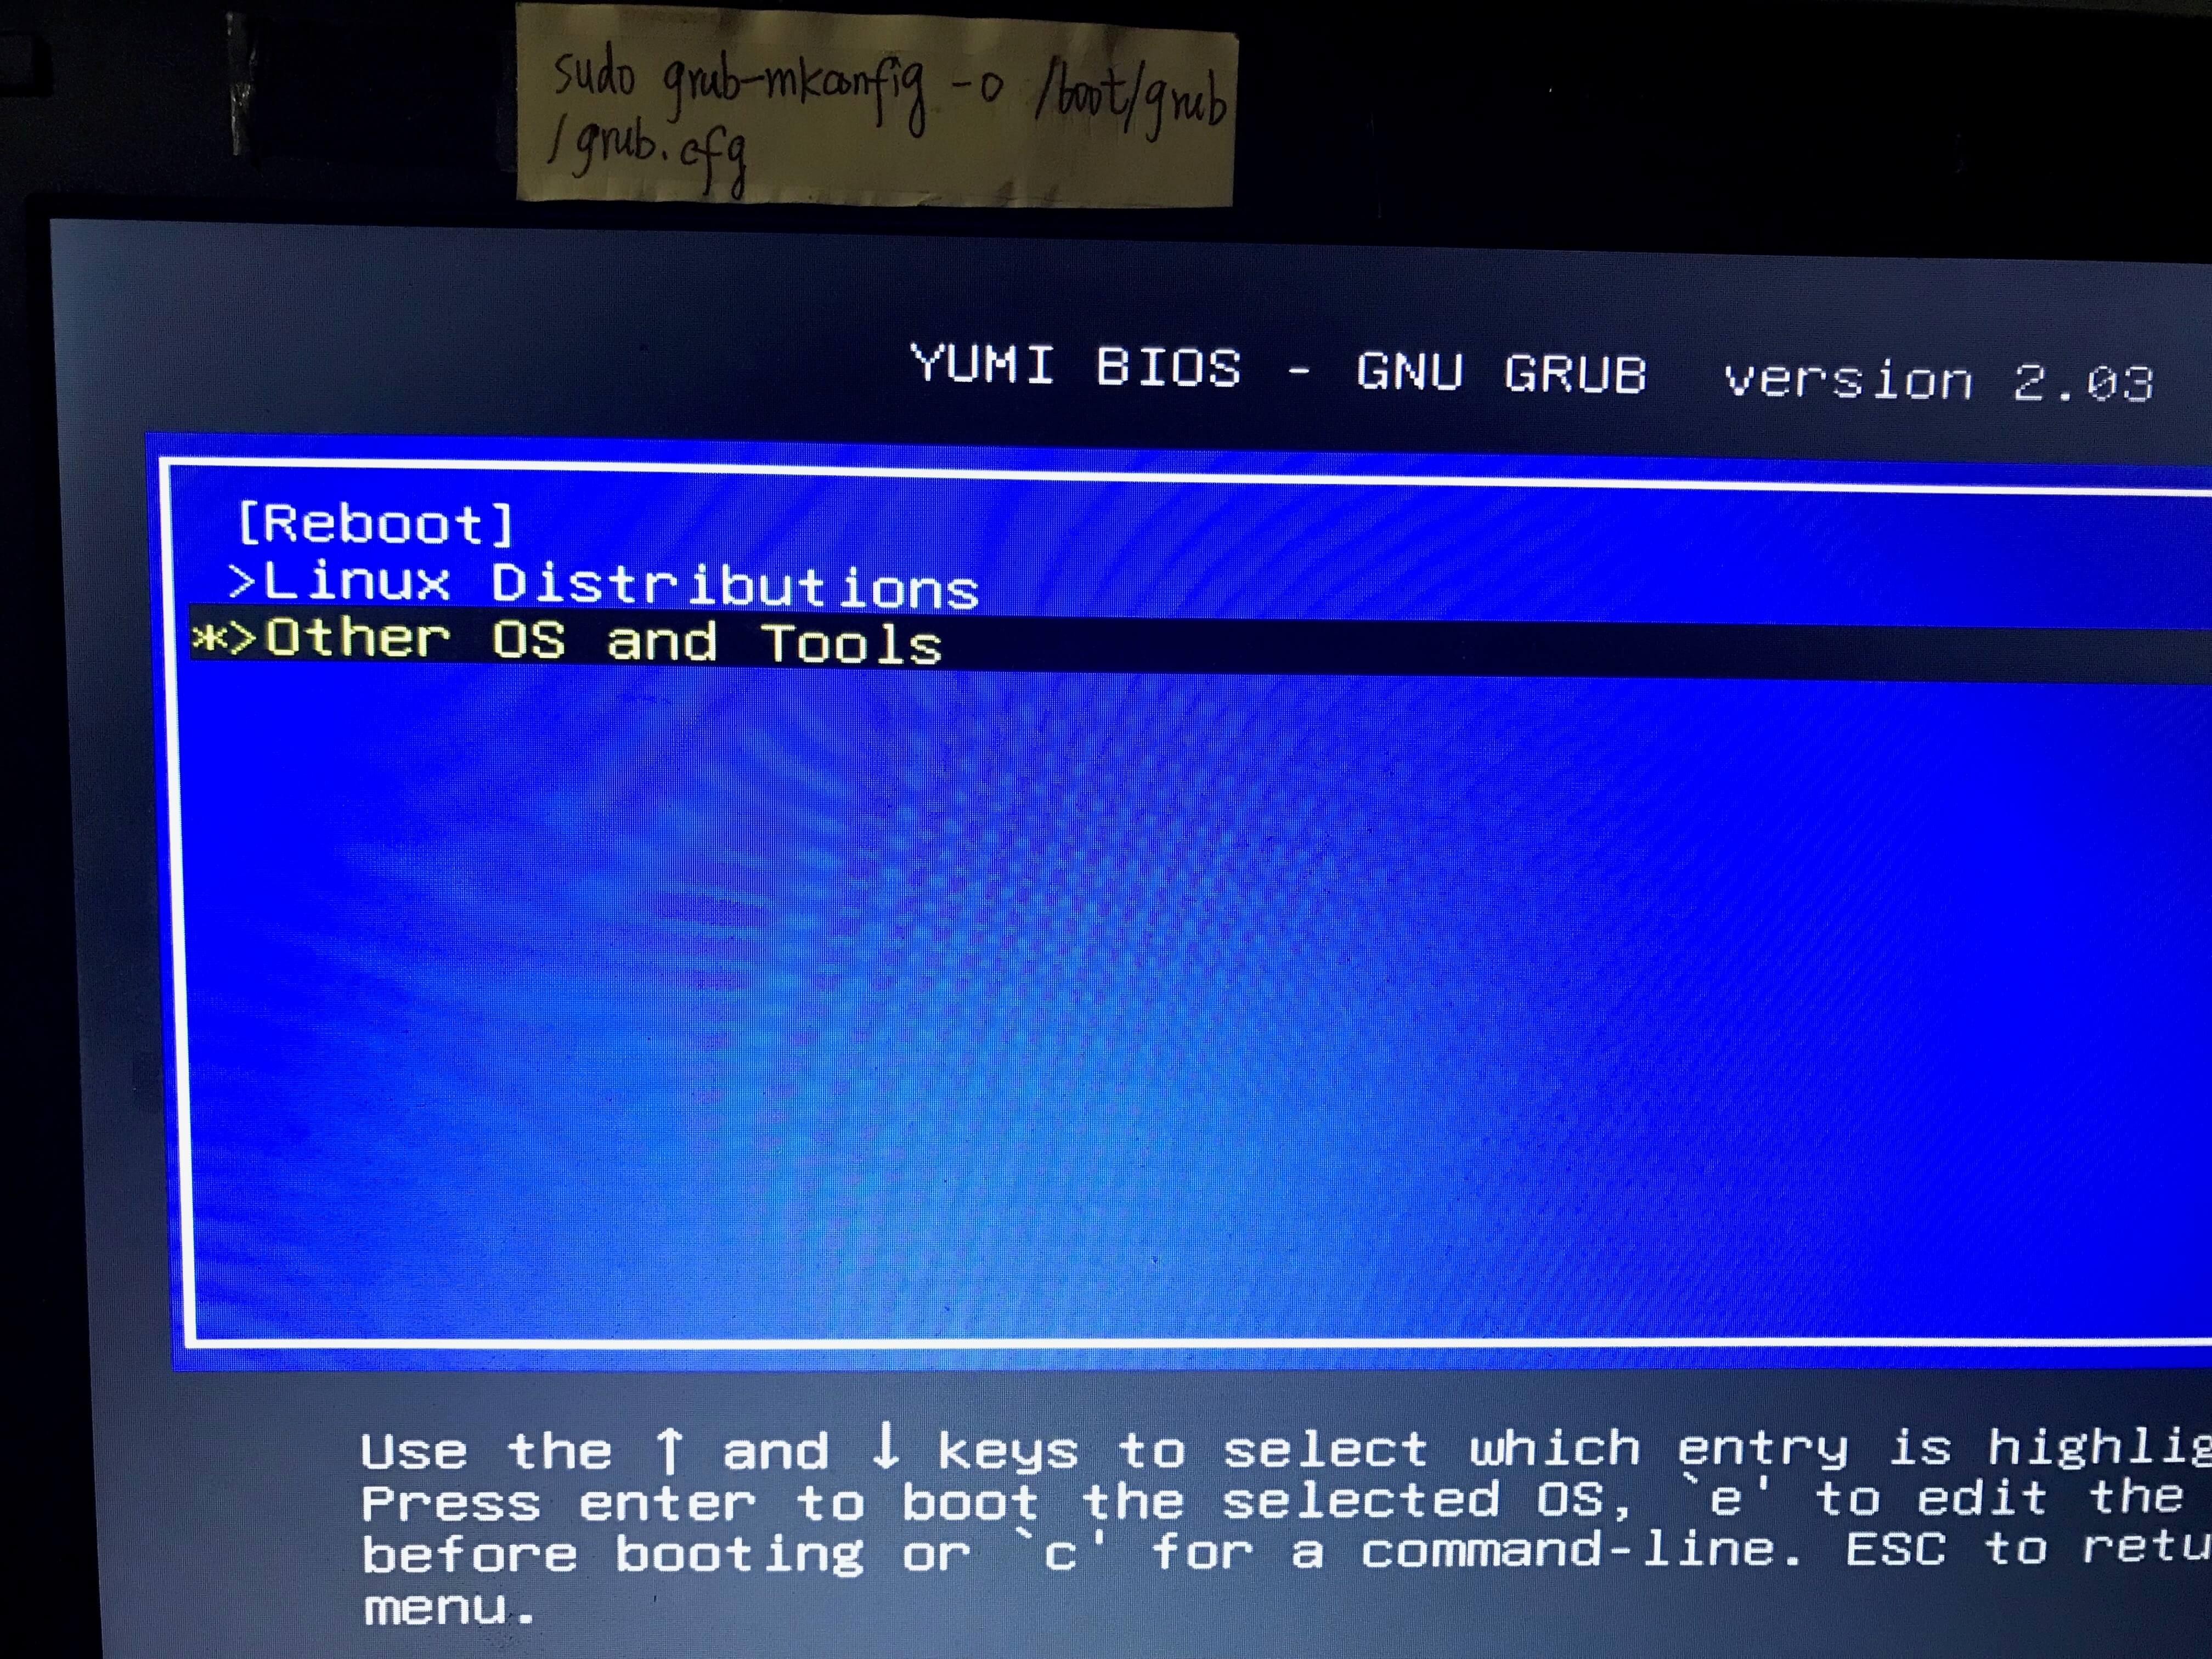
Once done, repeat the same process add additional ISO images files to your USB flash drive. You can also add Windows ISO images. The Windows ISO will be put in Other OS and Tools in the Grub boot menu.
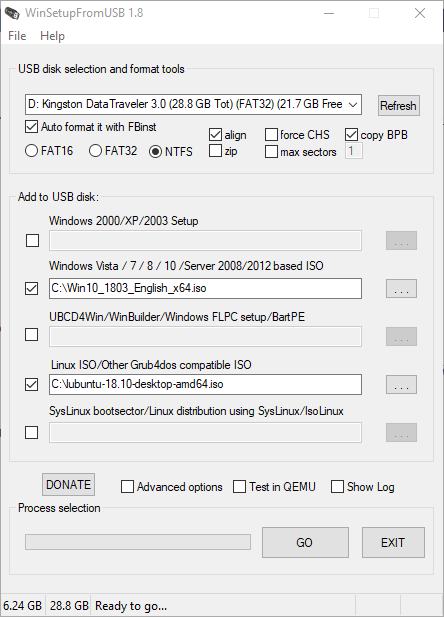
5 WinSetupFromUSB
WinSetupFromUSB is a Windows program that can create a multiboot USB flash drive to install any Windows versions since 2000/XP, boot various Linux and *BSD flavors.
- Supports both BIOS and UEFI firmware.
- Can create a bootable USB containing both Linux and Windows ISO images (Windows 7, 8 and 10)
- You can add additional ISO images to your USB without destroying previous ISO images in the USB flash drive.
- Supports persistent mode
- Test your live USB in QEMU.
- There’s no Linux version, although you can try running WinSetupFromUSB on Linux through WINE.
WinSetupFromUSB can be downloaded from the official download page. Once it’s downloaded and installed, start it from the start menu. Insert your USB flash drive. WinSetupFromUSB will automatically select it.
Then you can choose to format it with FBinst. Next, select your Windows and Linux ISO image files.
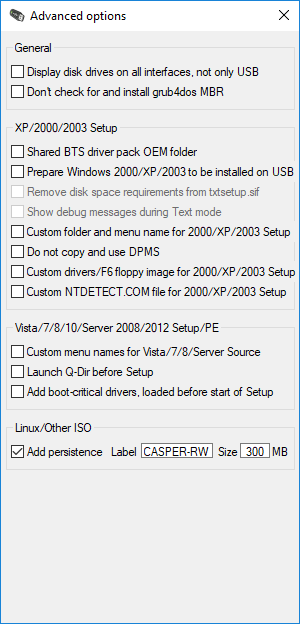
In the advanced options window, you can choose the persistent file size for Linux distributions.
Once you are ready, click the Go button to start creating the multiboot USB. After all your ISO images are written to USB flash drive. Restart your computer and boot from the USB drive.
Booting ISO Files Without a USB stick or DVD
Ever wondered if you can boot an ISO file without creating a live USB or live CD? Please read the following tutorial:
Wrapping Up
That’s it! I hope this tutorial helped you create a multiboot USB flash drive. As always, if you found this post useful, then subscribe to our free newsletter to get more tips and tricks. Take care 🙂
Источник


