- How to launch multiple programs with one shortcut in Windows 10
- Launch multiple programs with one shortcut
- 1] Get the programs’ target paths
- 2] Create a batch file
- 3] Create a shortcut with the batch file
- Windows 10 —
- Tips for Managing Multiple Windows
- Windows 10: Tips for Managing Multiple Windows
- Lesson 5: Tips for Managing Multiple Windows
- Tips for managing multiple windows
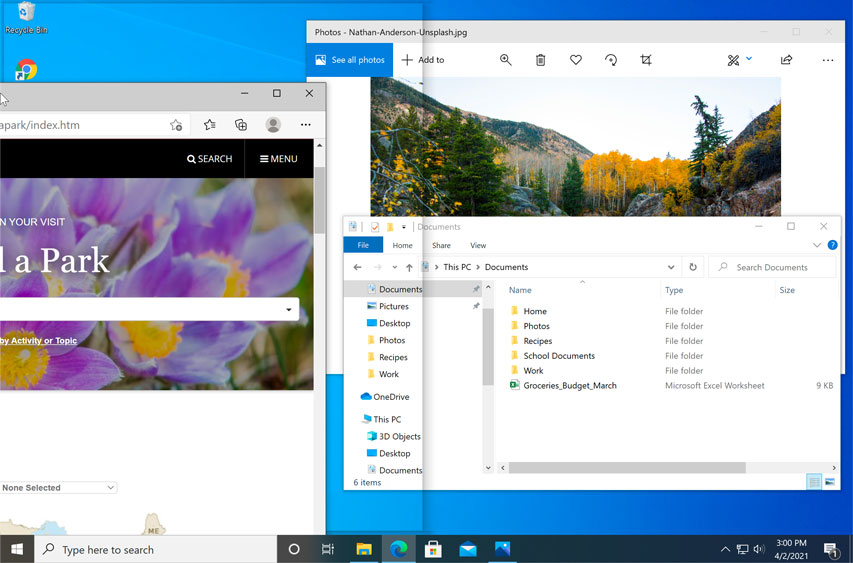
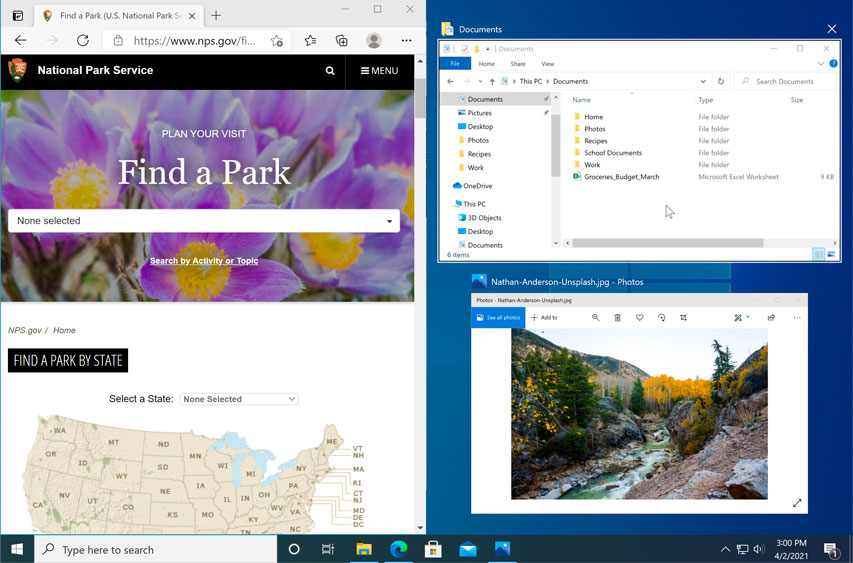
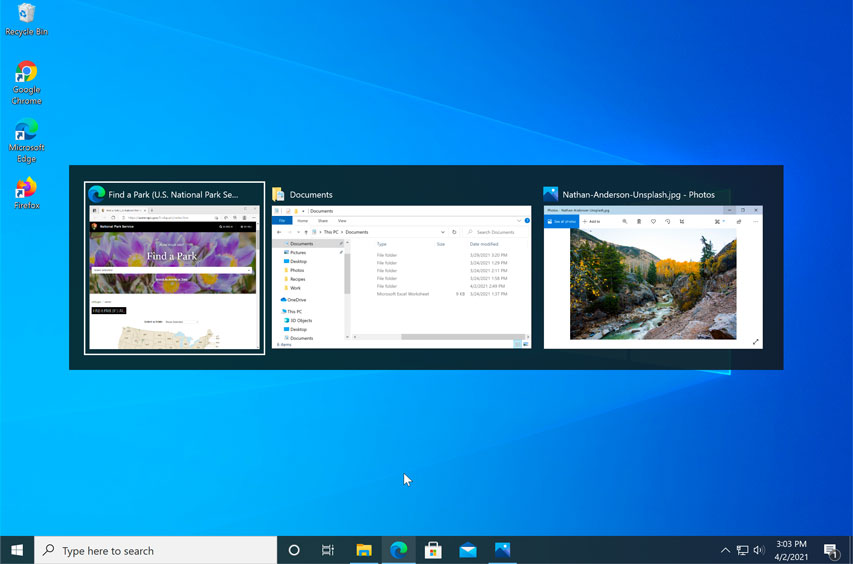
- Task view
- Virtual desktops
- Showing the desktop
- How to Get Multiple Virtual Desktops in Windows 7/8.1 with Free Tools
- Get Virtual Desktops by Microsoft Desktops
- Open source Free Tool – mDesktop
- What is Missing?
- Multiple simultaneous downloads using Wget?
- 17 Answers 17
How to launch multiple programs with one shortcut in Windows 10
Want to learn a simple tip that saves 2 seconds of your time? I’ll show you how to launch multiple programs from a single shortcut. Some apps go together naturally. For instance, Steam and Raptr, Winamp and Last.fm, MS-Word and Photoshop, etc.
Depending on what you do on your PC, you’ll notice that you are constantly using two or more programs at the same time always. After reading this guide, you’ll learn how to bundle these apps to launch when you double-click one shortcut.
Launch multiple programs with one shortcut
We’ll categorize the process into three easy steps:
- Get the programs’ target paths.
- Create a batch file.
- Create a shortcut with the batch file.
Read on, as we go through the detailed steps for configuring a shortcut that opens multiple windows programs at once.
1] Get the programs’ target paths
The first step to opening multiple programs with one shortcut is to get the target paths of all the programs. Here’s how to find the program paths.
Press the Windows button and search for the programs. When the application shows up in the search results, right-click on it and select the Open file location option. This takes you to the directory in which the application’s executable file resides.
Right-click on the shortcut and go to the Properties option. In the Properties window, switch to the Shortcut tab. Copy out everything in the Target field and paste in a Notepad note in the format below:
Enter cd, paste the full path to the application, and hit ENTER. This changes the directory to that of the program. Example:
Enter start and the name of the file. It’s always the last part of the path after the last slash (\). Start launches the executable file. Example:
Carry out the above steps for all the programs that you want to open with the shortcut. Hit ENTER after the paths to each of the applications.
2] Create a batch file
With the application paths saved in your Notepad, you now have to create the batch file from which we can run both programs at once.
Open the Notepad on which you saved the paths to all the applications you want to open with a single click. Modify the content of the note following the guide below:
- Add @echo off to the top of the note. With this, commands won’t display in the Command Prompt while executing the batch file.
- Add exit at the bottom of the note to quit the batch file after executing the batch file.
The content of your Notepad should now look like this:
The script above is an example of one done for starting Google Chrome and Wunderlist at the same time.
Finally, go to File > Save as, and in the Save as type, choose All files. Append .bat at the end of the File name. For example, we used batchfile.bat.
Note where you save the batch file. You’ll need to path to this batch file when creating the shortcut in the next step.
3] Create a shortcut with the batch file
Launch File Explorer and go to the directory in which you want the shortcut that opens multiple apps. You can do it on your desktop. Right-click on the white space and select New > Shortcut from the context menu.
Enter the path to the newly created batch file in the Type the location of the item field. Alternatively, hit Browse to find the file. After getting the location, click on the Next button below.
Give the shortcut a name that you’ll remember and hit the Finish button.
That’s all it takes! On double-clicking the new shortcut, your computer will open all the programs whose shortcuts are in the batch file.
Windows 10 —
Tips for Managing Multiple Windows


Windows 10: Tips for Managing Multiple Windows
Lesson 5: Tips for Managing Multiple Windows
Tips for managing multiple windows
Windows 10 has several features that make it easier to multi-task and work with multiple windows at the same time.
Note: This lesson will focus on using Windows 10 with a desktop or laptop computer. If you’re using a tablet computer with a touchscreen, some of the instructions below will work differently (and some features won’t be available at all). Check out our lesson on Using Windows 10 on a Tablet to learn more.
Snap allows you to resize windows quickly, which is especially convenient when you want to see two windows side by side. To do this, click and drag the desired window to the left or right until the cursor reaches the edge of the screen, then release the mouse. The window will snap into place. To unsnap a window, simply click and drag the window down.
Note: If you have more than one window open when snapping, you’ll be able to choose a window to snap to the other side of the screen automatically.
You can use Flip to switch between open windows. To do this, press and hold the Alt key on your keyboard, then press the Tab key. Continue pressing the Tab key until the desired window is selected.
Task view
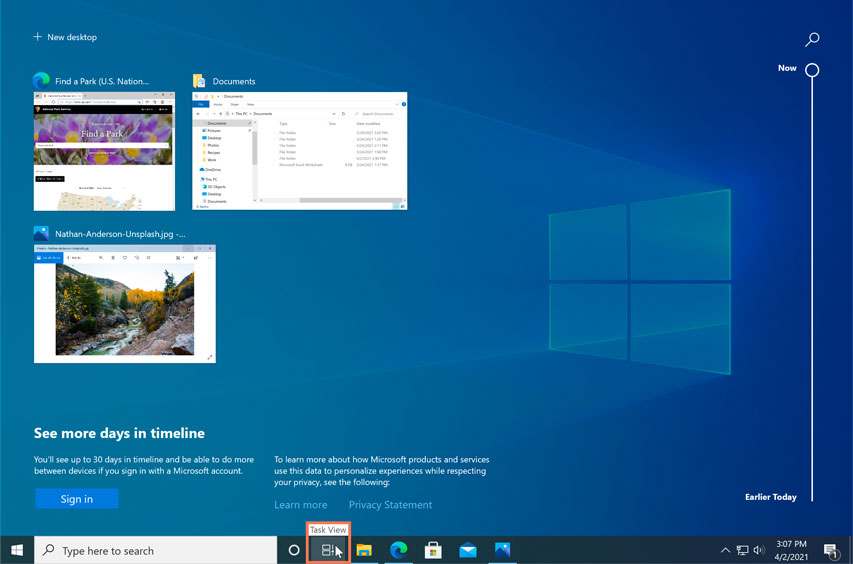
The Task view feature is similar to Flip, but it works a bit differently. To open Task view, click the Task view button near the bottom-left corner of the taskbar. Alternative, you can press Windows key+Tab on your keyboard. All of your open windows will appear, and you can click to choose any window you want.
Virtual desktops
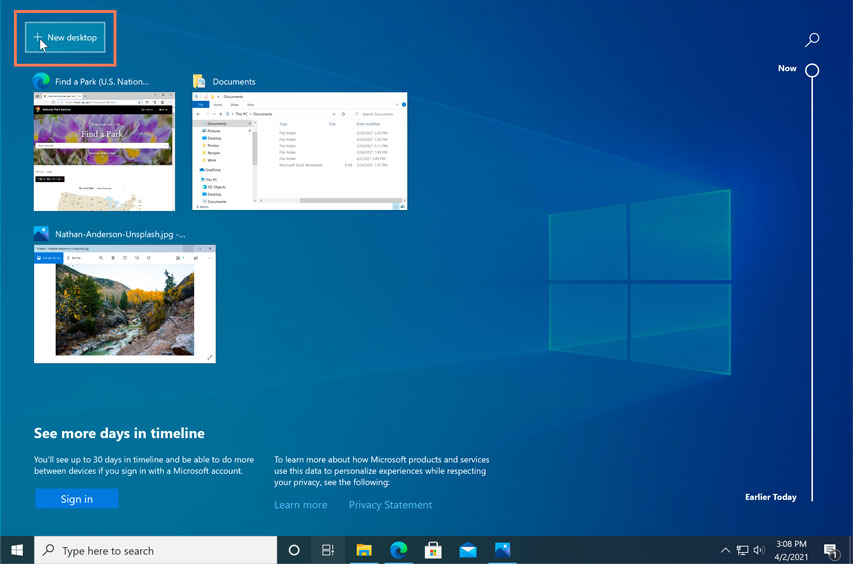
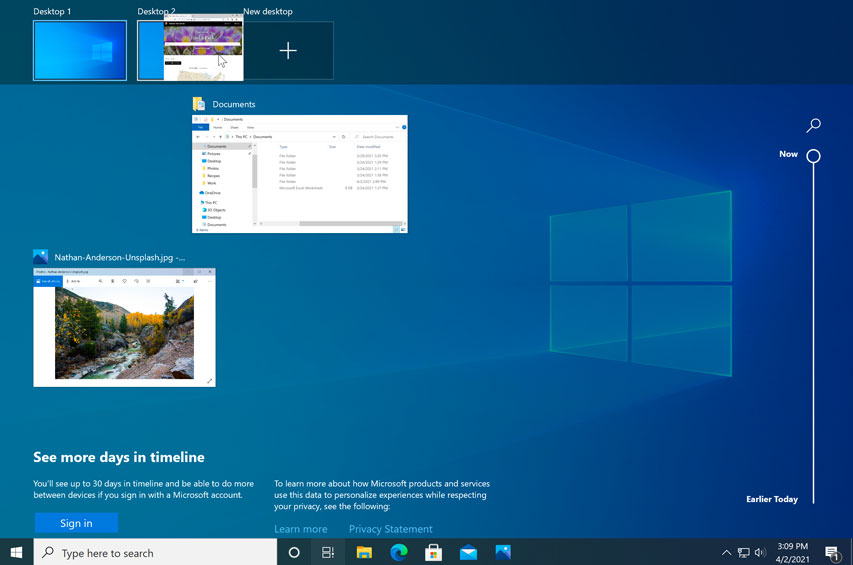
Instead of keeping everything open on the same desktop, you can move some of your windows to a virtual desktop to get them out of the way. This feature wasn’t available in previous versions of Windows, and it’s especially helpful for managing a lot of windows at the same time. To create a new desktop, open Task view, then select New desktop near the bottom-right corner.
Once you’ve created multiple desktops, you can use Task view to switch between them. You can also move windows between desktops. To do this, open Task view, then click and drag a window to the desired desktop.
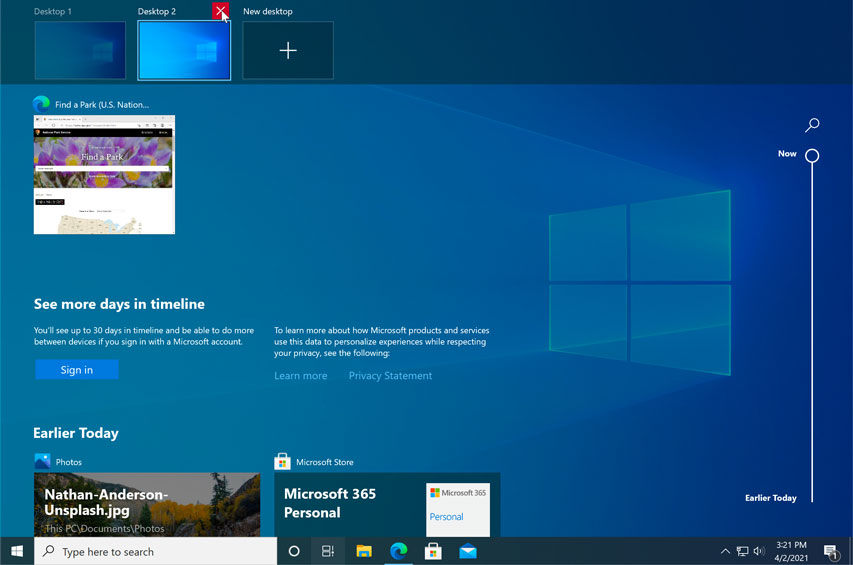
To close a virtual desktop, open Task view and click the X in the upper-right corner of any desktop you want to close.
Showing the desktop
If you have a lot of windows open at the same time, it can be difficult to see the desktop. When this happens, you can click the bottom-right corner of the taskbar to minimize all open windows. Just click it again to restore the minimized windows.
How to Get Multiple Virtual Desktops in Windows 7/8.1 with Free Tools
Having multiple virtual desktops is one of the cool ways to organize your computer while working. If you are Linux or Mac OS user, you must be knowing the built-in feature of virtual desktops. Unfortunately, Windows 7 or Windows 8/8.1 do not have this feature. Anyhow, we can get it easily by using the free Microsoft tool and some other tools. This small guide shows how to get multiple virtual desktops in Windows 7/8.1.
If you are using Windows 10, the virtual desktop is already part of Windows feature. You can read this guide about enabling virtual desktops and managing them in Windows 10.
Multiple virtual desktops in Windows 7 basically helps to organize opened programs and files easily and separately. It is very similar to have another three monitors with ‘Extended Desktop’ feature. But, here you will have all four desktops (sometimes more) on the same monitor and access them easily by switching among them.
For example, you can browse the internet in one desktop and do office work on another and play games on the next one. So, it helps to group similar work or activities among the virtual desktops on the same computer monitor.
Though there are free and paid products available for this purpose, here we will see three free products.
Get Virtual Desktops by Microsoft Desktops
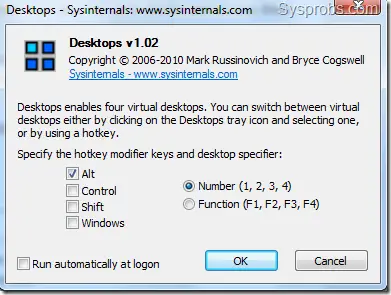
This free tool is available under the Sysinternals site from Microsoft. When reliability comes to consideration, this product is better than the second one because of official support of Microsoft. You can create a maximum of 4 multiple desktops in Windows 7/8.1 by this tool.
Installation is very simple. I have Windows 7 64 bit and the same package was installed inside 32bit program folder and worked fine.
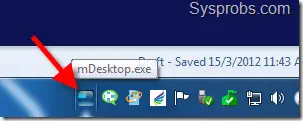
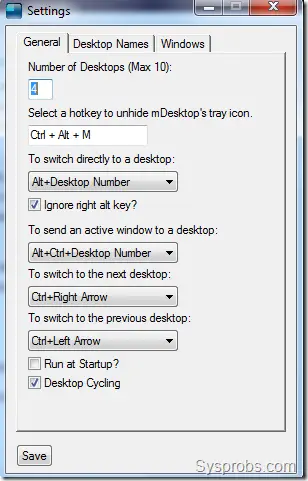
Once you installed the application, a new icon will appear in the notification area. Right-clicking this icon will bring the settings of Desktops v2.0. The hotkeys can be customized here to switch among different desktops by keyboard shortcuts.
The original desktop will be marked as Desktop 1. Other three desktops will be created when you try to access them for the first time either by using keyboard hotkeys or accessing from the notification area.
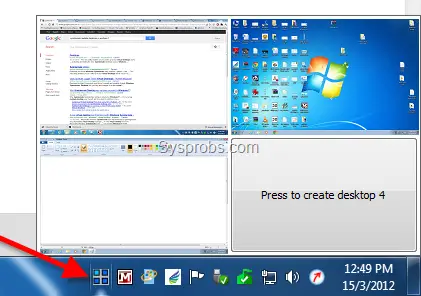
The above screen shows the working 3 virtual desktops in Windows 7. I do not have the fourth virtual desktop at the moment, but that can be created by clicking the Desktop 4.
This small video shows how to use MS Desktops v2.0 in Windows 7. All credits go to the video creator.
Open source Free Tool – mDesktop
This is developed by an individual person. mDesktop is doing a similar job as Desktops v2.0. Both tools are very lightweight which do not consume more resources from the computer. Also, they do not require complex setup.
More discussion about this product available at Microsoft site here.
Installation is very easy and you will see a new icon in the notification area after the installation.
Right-click the icon to get more options. With mDesktop you can have 10 virtual desktops in Windows 7 or 8.1.
These both tools are a very small piece of software and do the job easier to get multiple virtual desktops. But both are having few drawbacks and missing features, let’s look at them.
What is Missing?
- These tools should allow users to have different wallpaper, icons set, appearance, taskbar and gadgets in each virtual desktop. But that is not possible at the moment.
- If you add or remove an icon/file on a Desktop, it will be applied to all other desktops. It is almost faking to get multiple virtual desktops. These tools really do not create separate working space on the computer. Also, the theme and appearance remain the same in all virtual desktops.
- If you are looking to have customizable multiple virtual desktops in Windows 7 with a free tool, then Dexpot can be a good solution. Dexpot allows having multiple desktops which can have separate settings and options. Dexpot is free for private use. It is not a lightweight application like other free two tools. It consumes more resources and extra settings required to work with multiple desktops.
Here is a good and complete guide available at How-to-geek to customize Dexpot settings.
I hope this guide is helpful to get multiple virtual desktops in Windows 7 or Windows 8.1 with free tools. The first two tools can fulfil the basic requirements and the third one is a good choice for advanced users.
Dinesh
Dinesh is the founder of Sysprobs and written more than 400 articles. Enthusiast in Microsoft and cloud technologies with more than 15 years of IT experience.
Multiple simultaneous downloads using Wget?
I’m using wget to download website content, but wget downloads the files one by one.
How can I make wget download using 4 simultaneous connections?

17 Answers 17
Wget does not support multiple socket connections in order to speed up download of files.
I think we can do a bit better than gmarian answer.
The correct way is to use aria2 .
Since GNU parallel was not mentioned yet, let me give another way:
I found (probably) a solution
In the process of downloading a few thousand log files from one server to the next I suddenly had the need to do some serious multithreaded downloading in BSD, preferably with Wget as that was the simplest way I could think of handling this. A little looking around led me to this little nugget:
Just repeat the wget -r -np -N [url] for as many threads as you need. Now given this isn’t pretty and there are surely better ways to do this but if you want something quick and dirty it should do the trick.
Note: the option -N makes wget download only «newer» files, which means it won’t overwrite or re-download files unless their timestamp changes on the server.

Another program that can do this is axel .
For baisic HTTP Auth,
A new (but yet not released) tool is Mget. It has already many options known from Wget and comes with a library that allows you to easily embed (recursive) downloading into your own application.
To answer your question:
mget —num-threads=4 [url]
UPDATE
Mget is now developed as Wget2 with many bugs fixed and more features (e.g. HTTP/2 support).
—num-threads is now —max-threads .
I strongly suggest to use httrack.
ex: httrack -v -w http://example.com/
It will do a mirror with 8 simultaneous connections as default. Httrack has a tons of options where to play. Have a look.
As other posters have mentioned, I’d suggest you have a look at aria2. From the Ubuntu man page for version 1.16.1:
aria2 is a utility for downloading files. The supported protocols are HTTP(S), FTP, BitTorrent, and Metalink. aria2 can download a file from multiple sources/protocols and tries to utilize your maximum download bandwidth. It supports downloading a file from HTTP(S)/FTP and BitTorrent at the same time, while the data downloaded from HTTP(S)/FTP is uploaded to the BitTorrent swarm. Using Metalink’s chunk checksums, aria2 automatically validates chunks of data while downloading a file like BitTorrent.
You can use the -x flag to specify the maximum number of connections per server (default: 1):
If the same file is available from multiple locations, you can choose to download from all of them. Use the -j flag to specify the maximum number of parallel downloads for every static URI (default: 5).


