- ridbowt.blogspot.com
- METRIKA
- четверг, 12 мая 2016 г.
- Установка MultiSystem LiveUSB Multiboot в Debian
- Установка MultiSystem на Linux
- Установка MultiSystem
- Установка необходимых библиотек
- Ошибки
- Линукс в школе
- 16 декабря 2015 г.
- Установка MULTISYSTEM
- Установка MultiSystem LiveUSB Multiboot
- (проверено мной в Kubuntu 15.10) :
- 5 Apps to Create Multiboot USB – Linux & Windows ISOs Supported
- 1. SARDU MultiBoot USB and DVD Creator
- 2. MultiBootUSB
- 3 MultiSystem
- 4 YUMI (Your Universal Multiboot Installer)
- 5 WinSetupFromUSB
- Booting ISO Files Without a USB stick or DVD
- Wrapping Up
ridbowt.blogspot.com
METRIKA
четверг, 12 мая 2016 г.
Установка MultiSystem LiveUSB Multiboot в Debian

___________________________________________________________________
1. Скачайте и установите пакет gtkdialog_0.8.3-2_ARCH.deb (выберете правильный пакет для вашей архитектуры):
amd64: Яндекс.Диск | Mediafire.com (до 1 МБ);
___________________________________________________________________
2. В Synaptic найдите пакет gtkdialog, далее избор (меню) «Пакет» -> «Заблокировать версию». Закройте Синаптик.
(Наверное, можно сделать тоже самое при помощи команды — sudo apt-mark hold gtkdialog — я не испытал это в полной мере, так что на ваш страх).
Если не заморозить «версию» пакета gtkdialog, то при работе программы MultiSystem возникнет ошибка «The terminal (vte Terminal) widget requires a version of gtkdialog built with libvte»;
deb http://liveusb.info/multisystem/depot all main
Я добавлял вручную (в MX Linux) в файл — /etc/apt/sources.list.d/various.list
В вашей сборке Дебиана путь скорее всего будет отличаться;
___________________________________________________________________
4. Прикажите в терминале:
- wget -q http://liveusb.info/multisystem/depot/multisystem.asc -O- | sudo apt-key add — && sudo apt-get update && sudo apt-get install multisystem -y
___________________________________________________________________
5. Добавьте вашего пользователя в группу «adm»:
- groups $USER — узнать членство пользователя в группах,
- su
- adduser $USER adm
___________________________________________________________________
Если ничего не забыл, то это всё. Можно запускать MultiSystem и работать!
Источник
Установка MultiSystem на Linux
Установка утилиты MultiSystem на операционные системы Ubuntu/Debian и им производные.
В сегодняшней статье разберемся, каким образом можно в операционных системах Ubuntu/Debian создать мультизагрузочную USB флешку
В качестве подопытной ОС будет выступать MX Linux 19.2 основанной на Debian 10
MultiSystem — это утилита с открытым исходным кодом предназначенная для создания мультизагрузочных USB-носителей.
Установка MultiSystem
Для начала давайте добавим репозиторий разработчика
Обновим и установим MultiSystem:
Также если у Вас Debian, то необходимо добавить вашего пользователя в группу adm:
Установка необходимых библиотек
Для нормального функционирования MyltiSystem ей необходима библиотека gtkdialog_0.8.3-2:
Скачиваем библиотеку с официального сайта разработчика по ссылке или же с помощью wget командой в терминале:
Установим скачанный пакет в нашу систему:
Ошибки
При установке пакета gtkdialog могут вылезти некоторые ошибки:
Для исправления в терминале набираем:
Если при установки появляется вот такое окно с предупреждением:
Необходимо проделать следующее:
Вот и всё. Теперь можете запустить MyltiSystem.
Если есть вопросы, то пишем в комментариях.
Также можете вступить в Телеграм канал, ВК или подписаться на Twitter. Ссылки в шапки страницы.
Заранее всем спасибо.
Источник
Линукс в школе
личный опыт внедрения ОС Линукс в образовательный процесс
16 декабря 2015 г.
Установка MULTISYSTEM
Установка MultiSystem LiveUSB Multiboot
(проверено мной в Kubuntu 15.10) :
Скопируйте и выполните в терминале следующие команды:
sudo apt-add-repository ‘deb http://liveusb.info/multisystem/depot all main’
wget -q -O — http://liveusb.info/multisystem/depot/multisystem.asc | sudo apt-key add —
sudo apt-get update
sudo apt-get install multisystem
Использование:
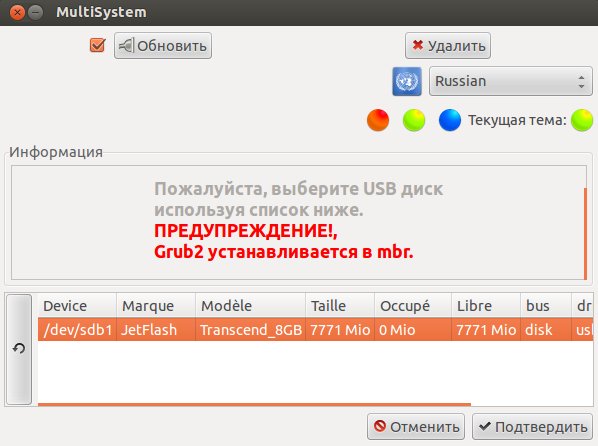
Вставьте USB-носитель и убедитесь что устройство смонтировано. При запуске программы подключенное устройство должно отобразиться в окне.
Выберите нужное устройство в списке (если их несколько) и нажмите кнопку «Подтвердить».
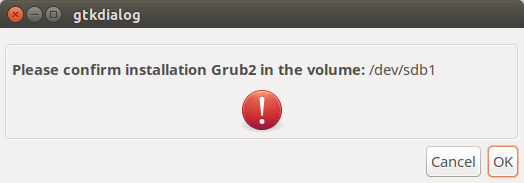
Примечание: Программа может выдать сообщение о необходимости сменить метку USB-носителя на «Multisystem». Для этого носитель будет отмонтирован, и затем придется его переподключить (вытащить/вставить). Далее появится окно для подтверждения записи Grub2 на носитель, нажмите «Ок».
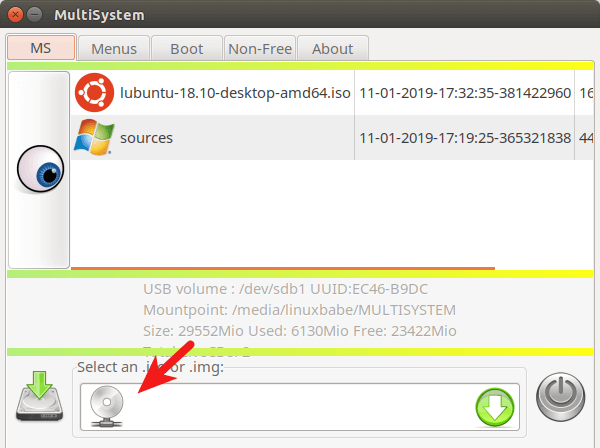
Когда установка загрузчика завершится, увидим главное окно программы (большая кнопка с глазом вызывает панель дополнительных функций):
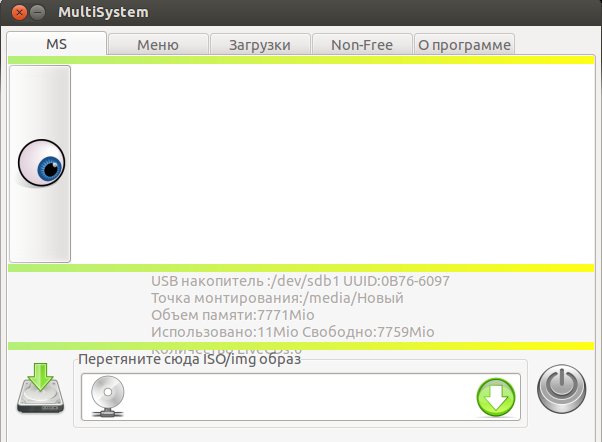
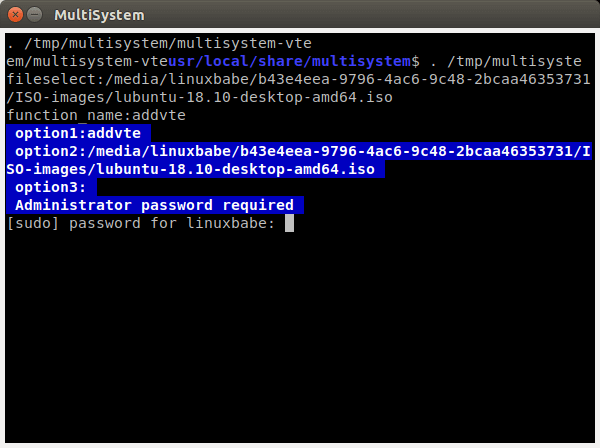
Перетяните файл образа в нижнюю часть окна (с соответствующей надписью) или нажмите на зеленый значок со стрелкой, чтобы указать его местонахождение. После этого, в окошке терминала, будет запрошен Ваш пароль в системе. Введите его и начнется запись.
Внимание! Для записи образов Windows перейдите во вкладку Non-Free и установите все предложенные компоненты (они не могут быть включены в программу сразу по юридическим соображениям). При этом, может потребоваться время на скачивание соответствующих «официальных» архивов. После автоматического извлечения из них нужных файлов эти архивы будут удалены. При загрузке компьютера с USB-носителя, пункты, относящиеся к Windows XP , будут находиться в подменю Grub4Dos , а пункты Windows 7 — в подменю Syslinux .
UPD: На случай возможных проблем ВОТ ССЫЛКА на статью о том, как правильно отформатировать флешку. При форматировании не забываем ставить флаги boot и lba , желательно указать не пустую метку диска.
Источник
5 Apps to Create Multiboot USB – Linux & Windows ISOs Supported
This article will be showing you 5 applications you can use to create a multiboot USB. All of them can write multiple Linux distribution ISOs to USB flash drive and most of them can even write both Windows and Linux ISOs into the same USB flash drive. These 5 apps are:
- SARDU MultiBoot USB and DVD Creator
- MultiBootUSB
- MultiSystem
- YUMI (Your Universal MultBoot Installer)
- WinSetupFromUSB
If you have created a bootable USB with another tool, it’s recommended that you reformat the USB flash drive with FAT32 or NTFS file system before you use the tools mentioned in this article.
1. SARDU MultiBoot USB and DVD Creator
SARDU is a freemium software that can be used to create multiboot USB and DVD.
- Runs on Linux and Windows.
- Can create a bootable USB containing both Linux and Windows ISO images (Windows 7, 8 and 10)
- A multitude of ISO images for you to select and download directly from the SARDU application.
- You can add additional ISO images to your USB without destroying previous ISO images in the USB flash drive.
- Supports persistent files for Linux distributions
- It can also be used to burn multiple ISO images to DVD.
- Supports both BIOS and UEFI firmware
- Test your USB with QEMU.
- SARDU uses the SYSLINUX boot loader by default, but can chainload to GRUB2 (premium feature)
- The Linux version of SARDU doesn’t support Windows ISOs. To add Windows ISO image to your bootable USB flash drive, you need to use the Windows version of SARDU.
- The persistent files function can cause the program to become unresponsive when using the Linux version. The Windows version works perfectly fine.
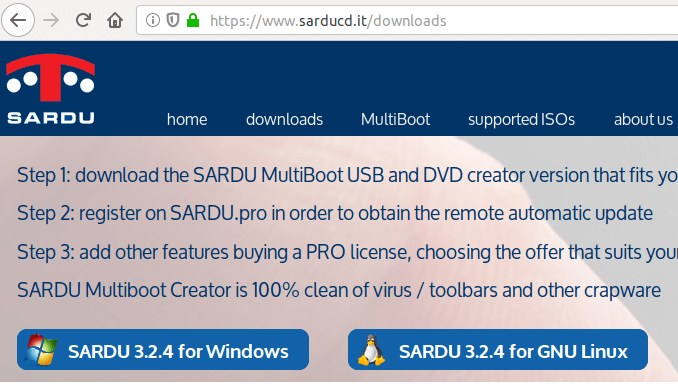
SARDU is a portable application. To use SARDU, go to the official download page and download the Linux version or Windows version, depending on your OS. I downloaded the Linux version.
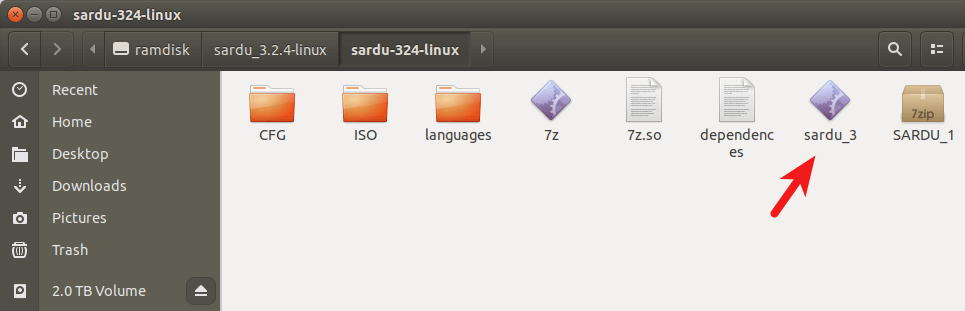
Once downloaded, open your file manager and go to the downloads directory. Extract the gzip archive.

Go to the extracted directory and double click the sardu_3 binary. The SARDU software will start.
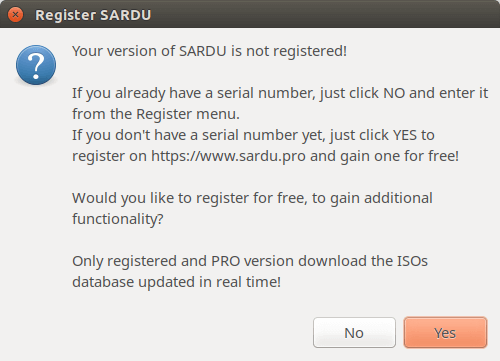
First, agree to the license.

Then it will tell you to register an account. Registered users can download updated ISOs from SARDU database. If you prefer to use your own downloaded ISO files, then choose No.
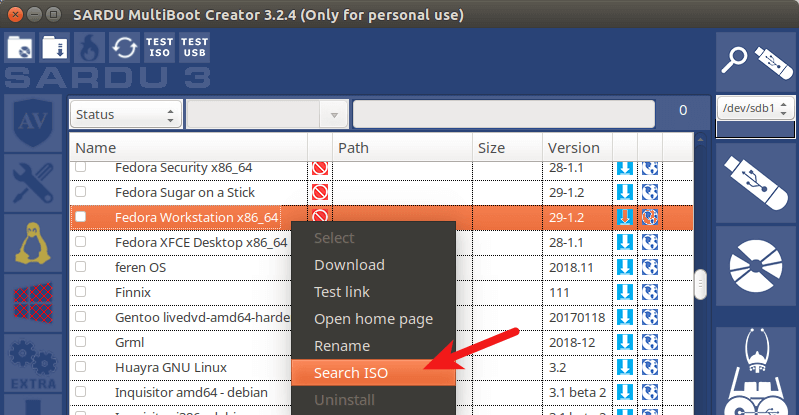
At the left sidebar, there are 4 categories of ISO images
- Anti-virus
- Utility
- Linux distributions
- Windows
For example, you can click the penguin icon and right-click on an OS name and select search ISO . This will allow you to select an ISO image from your hard drive.
After that, tick on the OS name so that the ISO image will be written to USB flash drive.
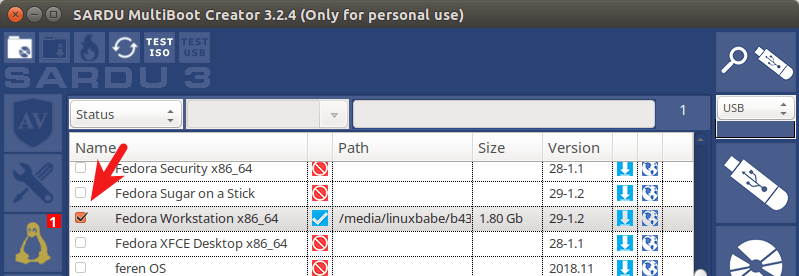
It will also ask you if you want to enable persistent files. I found that if I choose Yes, the program would become unresponsive, so I choose No.
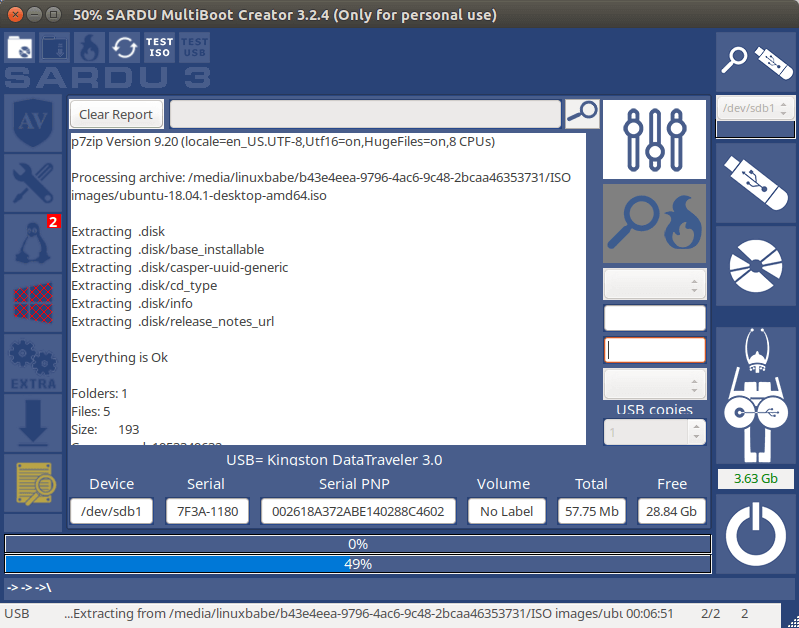
Then you can continue this process with another Linux distribution. After you select all your Linux distributions, insert your USB flash drive and click the USB icon on the upper-right corner to detect and select your USB flash drive.
Next, click the big USB icon to create bootable USB.

This process can take some time if you selected several ISO images.
To add Windows 7, Windows 8, or Windows 10 ISO images to your USB flash drive, you need to use the SARDU Windows version. Click the Windows icon on the left bar, and select the first item in the list. Choose the ISO path, then tick on the name.

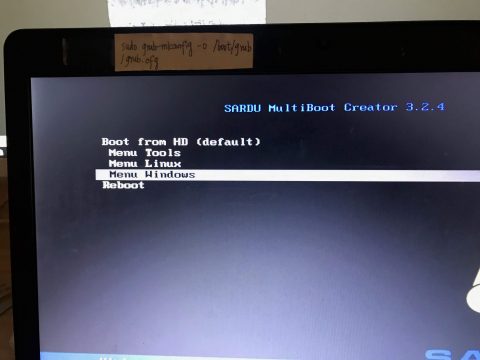
Please note that if your computer uses UEFI firmware, then you need to enable the legacy BIOS support in order to boot your computer from the SARDU USB flash drive. As you can see from the screenshot below, I can boot Linux or Windows ISOs from the SARDU boot menu.
2. MultiBootUSB
MultiBootUSB is an advanced cross-platform application for installing/uninstalling Linux operating systems onto a single USB flash drive.
MultiBootUSB Pros:
- Runs on Linux and Windows.
- Free and open Source. Released under General Public Licence (GPL).
- You can add additional ISO images to your USB without destroying previous ISO images in the USB flash drive.
- You can remove an ISO image from your bootable USB flash drive.
- Syslinux is used the default boot loader for making your USB Flash Drive bootable, can also chain load to GRUB2 if UEFI firmware is used.
- Supports both BIOS and UEFI firmware.
- Supports persistent files for distros that are based on Debian, Ubuntu, and Fedora.
- Test your ISO and USB with QEMU.
- Has a command-line interface.
- You need to write ISO images to your USB flash drive one by one.
- It doesn’t support writing Windows ISO image to USB flash drive.
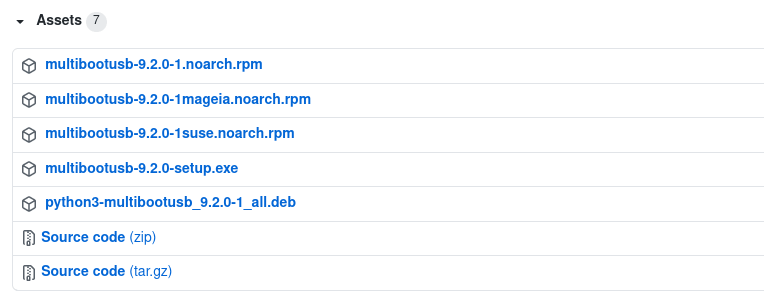
To use MultiBootUSB, go to the official download page and select the installer package according to your OS.
- Debian, Ubuntu users select the .deb package.
- Fedora, Redhat, OpenSUSE users select the .rpm package.
- Windows users select the .exe package.
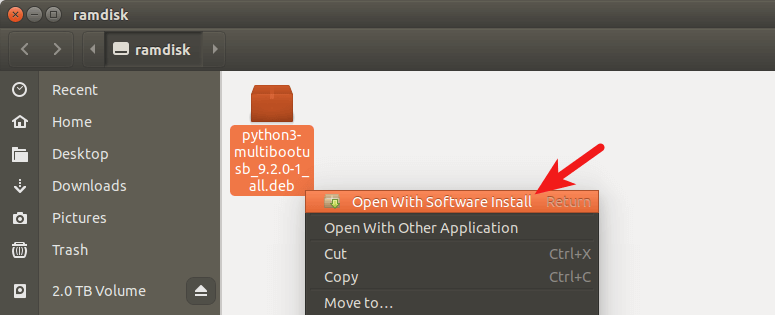
Once downloaded, open your file manager and go to the download directory and install the package.
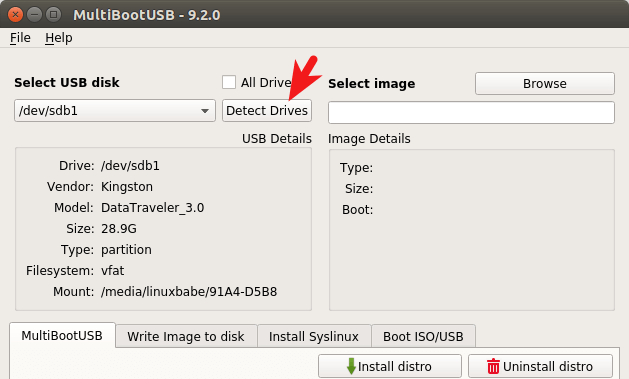
After it’s installed, open it from your application menu. To create a multiboot usb, first insert your USB flash drive. Next, click the Detect Drives button in MultiBootUSB and select a partition on the USB flash drive.
Then select a Linux distro ISO image from your hard drive. After that, you can specify the persistent file size.
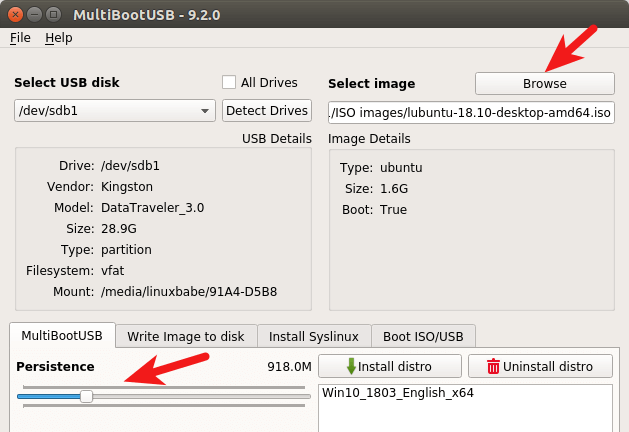
Finally, click the Install distro button to write the ISO image to your USB flash drive.
Once that’s done, you can click the Browse button again to select another Linux distro ISO image and click the Install distro button to write it to USB flash drive.
3 MultiSystem
MultiSystem is Linux-only application that allows you to create a multiboot Linux live USB.
- A multitude of ISO images for you to select and download directly from the application.
- Supports persistent files
- Can create a bootable USB containing both Linux and Windows ISO images.
- Test your live USB in QEMU or VirtualBox
- Only works in Debian and Ubuntu-based Linux distros.
- You need to write ISO images to your USB flash drive one by one.
- The Linux distro ISO images written to the USB flash drive can’t be booted in UEFI mode, you need to enable legacy BIOS support in order to boot them.
To install MultiSystem on Debian and Ubuntu-based Linux distros, open up a terminal and run the following command.
Import the repository public key.
Then add the official software repository to your system.
Update software repository index and install MultiSystem.
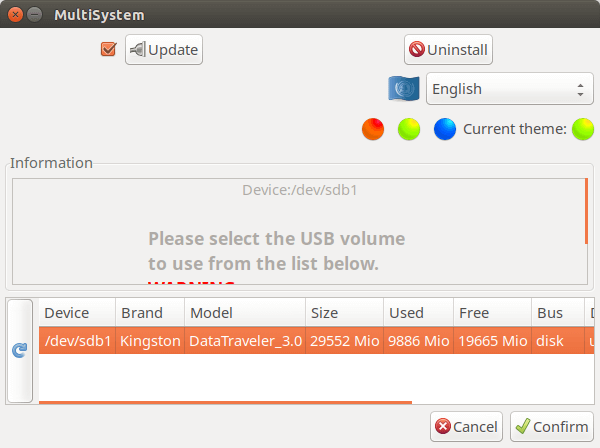
Once installed, open it from your application menu. Then insert your USB flash drive and click the refresh button in MultiSystem for it to detect your drive. (Make sure the USB flash drive is mounted). Once it finds your USB flash drive, select the device and click confirm button.
It will ask you to enter your password.
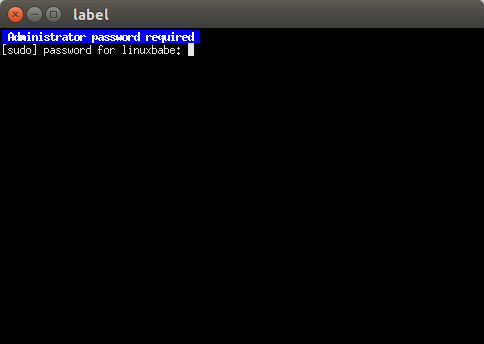
Then it will ask you if it’s Ok to install the Grub2 boot loader to your USB flash drive. Click OK.
Once that’s done, click the DVD icon to select an ISO image from your hard drive.
Then enter your password to write the ISO image for your USB flash drive.
Repeat this process to add additional ISO images to your USB flash drive.
4 YUMI (Your Universal Multiboot Installer)
YUMI can be used to create a Multiboot Bootable USB Flash Drive containing multiple operating systems, antivirus utilities, disc cloning, diagnostic tools, and more.
- Supports both BIOS and UEFI firmware.
- Can create a bootable USB containing both Linux and Windows ISO images (Windows 7, 8 and 10)
- A multitude of ISO images for you to select and download directly from the application.
- You can add additional ISO images to your USB without destroying previous ISO images in the USB flash drive.
- Supports persistent files for Linux distributions.
- You can remove an ISO from USB flash drive.
- There’s no Linux version, although you can try running YUMI on Linux through WINE.
YUMI can be downloaded from the official download page. There are two versions of YUMI: one is for BIOS system and the other is for UEFI system. YUMI is a portable application. Once the .exe file is downloaded, you can double click it to start the application. Insert your USB flash drive and select it in YUMI user interface.
Then select the name of the OS you want to put into the USB. Next, select the ISO image file from your hard drive. In step 4, you can choose the persistent file size.
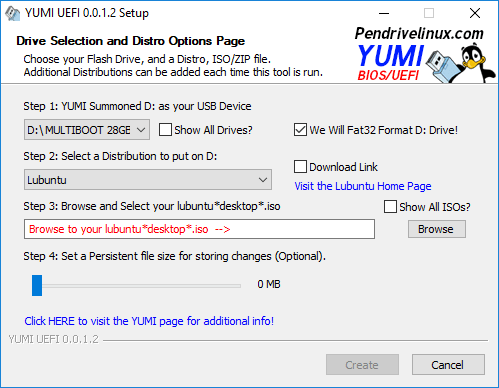
After that, click the create button to write the ISO image file to your USB flash drive.
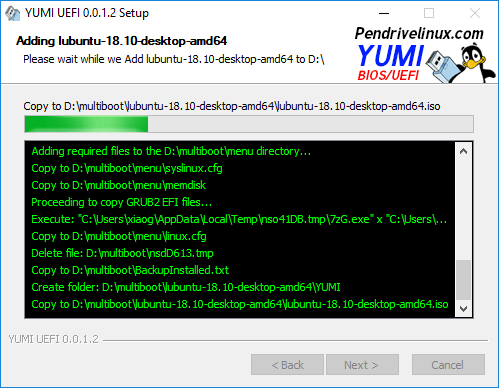
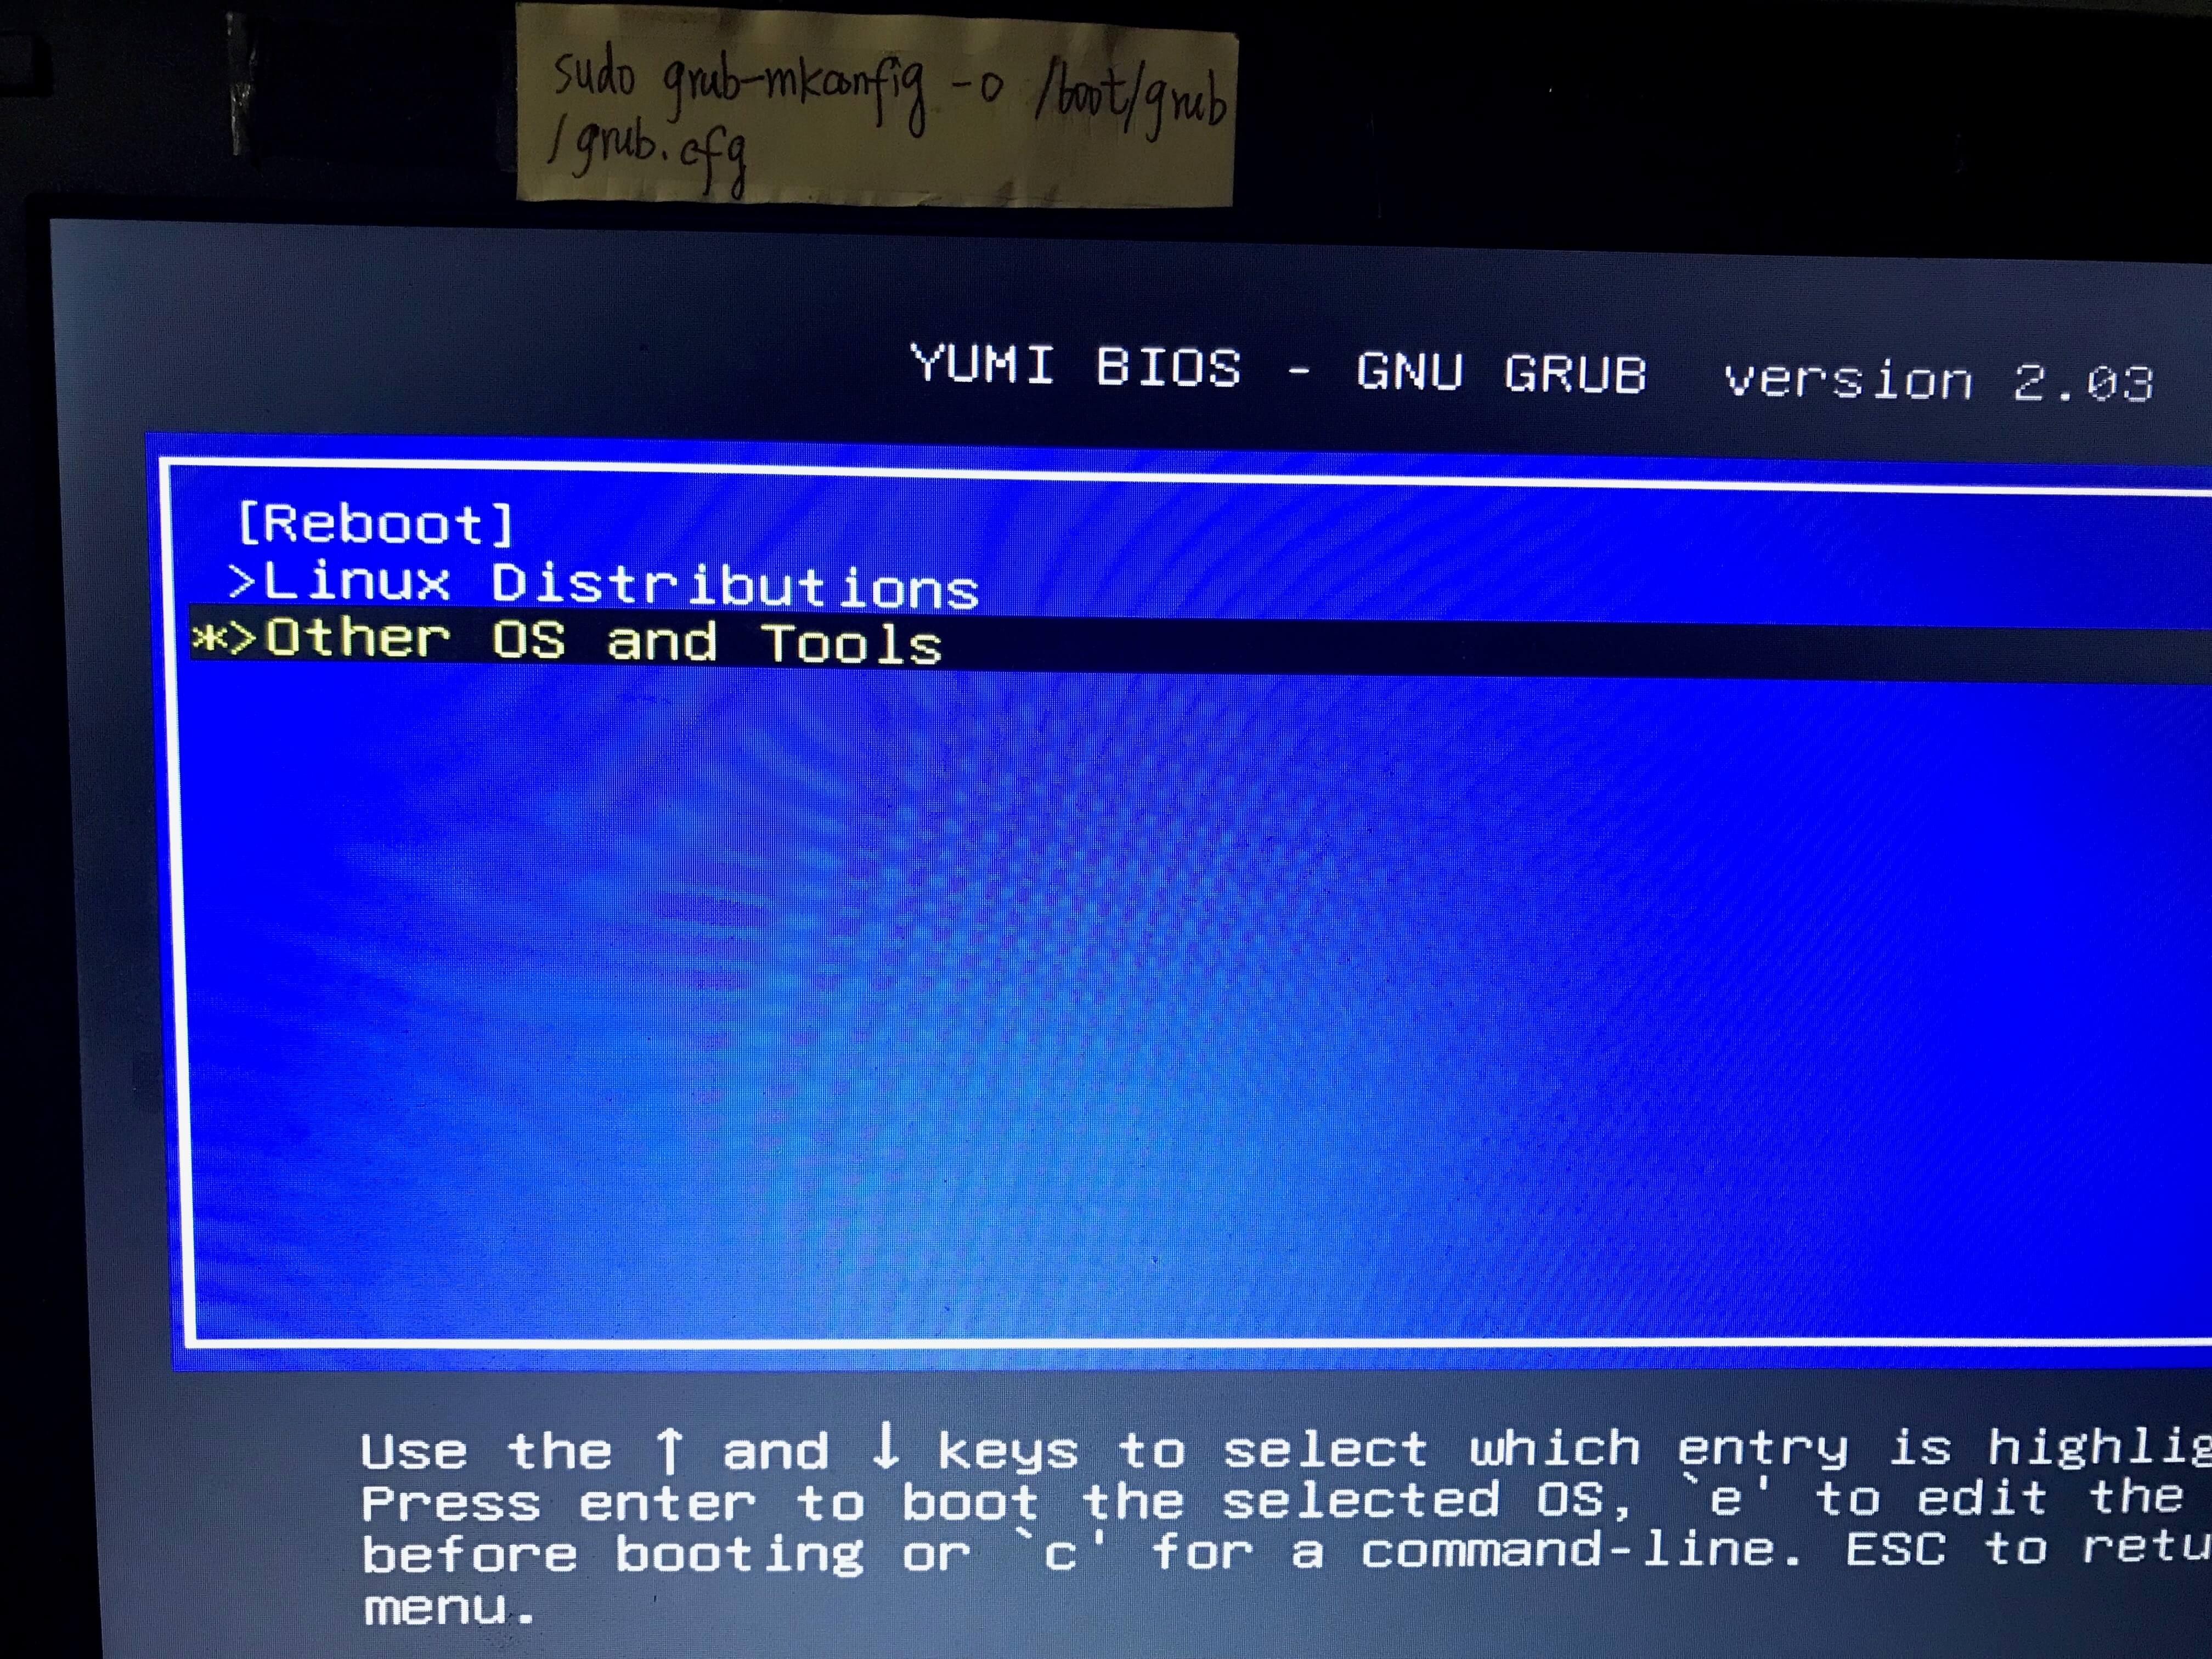
Once done, repeat the same process add additional ISO images files to your USB flash drive. You can also add Windows ISO images. The Windows ISO will be put in Other OS and Tools in the Grub boot menu.
5 WinSetupFromUSB
WinSetupFromUSB is a Windows program that can create a multiboot USB flash drive to install any Windows versions since 2000/XP, boot various Linux and *BSD flavors.
- Supports both BIOS and UEFI firmware.
- Can create a bootable USB containing both Linux and Windows ISO images (Windows 7, 8 and 10)
- You can add additional ISO images to your USB without destroying previous ISO images in the USB flash drive.
- Supports persistent mode
- Test your live USB in QEMU.
- There’s no Linux version, although you can try running WinSetupFromUSB on Linux through WINE.
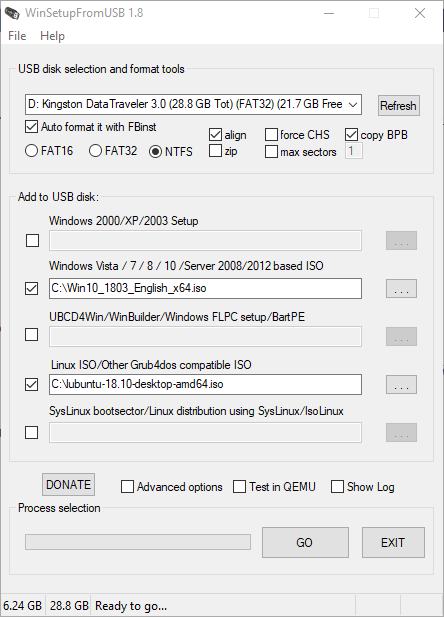
WinSetupFromUSB can be downloaded from the official download page. Once it’s downloaded and installed, start it from the start menu. Insert your USB flash drive. WinSetupFromUSB will automatically select it.
Then you can choose to format it with FBinst. Next, select your Windows and Linux ISO image files.
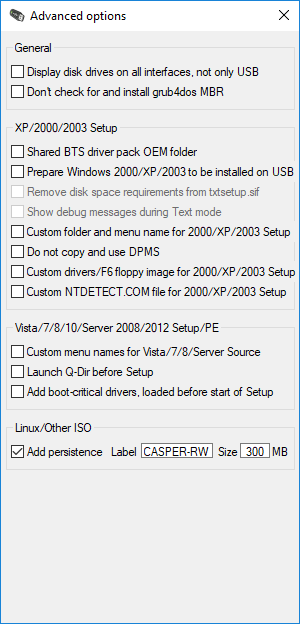
In the advanced options window, you can choose the persistent file size for Linux distributions.
Once you are ready, click the Go button to start creating the multiboot USB. After all your ISO images are written to USB flash drive. Restart your computer and boot from the USB drive.
Booting ISO Files Without a USB stick or DVD
Ever wondered if you can boot an ISO file without creating a live USB or live CD? Please read the following tutorial:
Wrapping Up
That’s it! I hope this tutorial helped you create a multiboot USB flash drive. As always, if you found this post useful, then subscribe to our free newsletter to get more tips and tricks. Take care 🙂
Источник


