- How to install Maven on macOS
- 1. Homebrew install Maven on macOS
- 2. Install Maven Manually
- References
- Comments
- Maven on MacOS (OSX)
- Mated with Java
- Default in Jenkins
- Install latest
- Install previous version
- Configure Path
- Change Default Configurations
- Using Maven
- Maven lifecycle phases
- Maven plug-in goals by lifecycle phase
- Maven plug-ins by lifecycle phase
- Dependencies
- Mirror
- How to Install Maven on Mac OS
- Install Maven with Homebrew
- Install Maven From a Downloaded Archive
- Install Maven on Mac
- 1. Install Maven using brew on Mac
- 2. Install Maven using Terminal on Mac
- 3. Conclusion
How to install Maven on macOS
By mkyong | Last updated: January 19, 2021
Viewed: 541,671 (+2,159 pv/w)
This article shows how to install Maven (3.6.3) on macOS Big Sur (version 11.1).
Related Articles
1. Homebrew install Maven on macOS
1.1 Install Homebrew, a package manager on macOS.
1.2 The command brew install maven will install the latest Maven.
1.3 Done. The Maven is installed on macOS.
P.S At the time of writing, the latest Maven version is 3.6.3
1.4 Where does Homebrew installed the Maven?
The brew will install the Maven packages at /usr/local/Cellar/maven/$
The brew also creates shortcut or symbolic links at /usr/local/opt/maven/
1.5 Where does Homebrew put the Maven configuration file, settings.xml ?
The settings.xml is available at /usr/local/opt/maven/libexec/conf
1.6 Where does Homebrew put the core mvn executable file?
The mvn is at /usr/local/bin/
1.7 brew info maven to show the detail of the Maven package.
1.8 brew list maven
1.9 Useful commands:
- brew upgrade maven to upgrade Maven.
- brew uninstall maven to uninstall Maven.
2. Install Maven Manually
If Homebrew failed you or you don’t want the black-box magic, try to install the Maven manually.
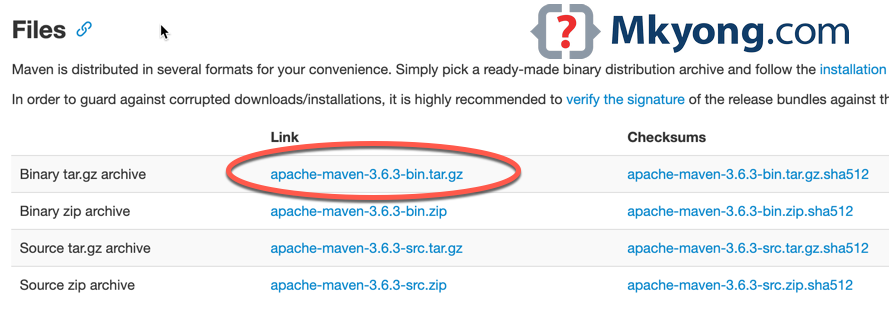
2.1 Download the Maven, for example apache-maven-3.6.3-bin.tar.gz
2.2 The below command extracts the downloaded .tar.gz file to the current user’s home directory
2.3 Now, the Maven folder is at this path /Users/mkyong/apache-maven-3.6.3
2.4 On macOS 10.5 Catalina or later, the default shell is zsh, and we can create the environment variables MAVEN_HOME and update the PATH in
/.zshenv and append the following content.
Note
For macOS 10.14 Mojave and before, the default Terminal shell is bash , and we can create the environment variables in
/.bash_profile and append the following content.
/.zshenv to reflect the changes.
References
mkyong
Founder of Mkyong.com, love Java and open source stuff. Follow him on Twitter. If you like my tutorials, consider make a donation to these charities.
Comments
Perhaps, you have to add ‘source
/.bash_profile’. Otherwise is a good article.
Article is updated with source
Now the macOS default shell is zsh.
I would recommend Homebrew for installing maven – it should almost always be the install method of choice. ‘$ brew install maven’
Article is updated with brew install
I came here because Homebrew install failed. Agreed that Homebrew should be added as first choice but rest of this article was incredibly useful. Also good if you want to install a previous version of Maven.
How to set environment variables for Maven when maven installed using “brew install maven” ?
My Default folder path on mac for mvn is —> /usr/local/bin/mvn
macOS 10.5 Catalina and later
for the zsh shell, puts the environment variables at
macOS 14 Mojave and before
for the bash shell, puts the environment variables at
MAVEN came pre installed since version 10.6.8 MacOSx Snow Leopard.
Not anymore, latest macOS doesn’t come with Maven pre-installed.
It’s working slightly differently way on my system. I have macOS bigSur v11.3.1 and I installed maven v3.6.3 manual way.
I put the path in
/.zshenv but it would only work in same terminal. In new terminal “mvn -version” wouldn’t work (I had saved using “source
Finally i had to put the path in “
/.bash_profile” as well. Then it worked even after closing terminal.
Источник
Maven on MacOS (OSX)
for Java, Jenkins, etc.
This describes how to install Maven using Homebrew, the configure and use it.
Ant was originally created (using Java) to replace the make utility for cross-platform use. With Ant, everything needs to be coded explictly in XML. Its files are difficult to reuse.
Unlike Ant, Maven also provides dependency management, standard project layout, and project management.
Mated with Java
Maven is written in Java, and grew up supporting Java builds by creating from Java source and resources for deployment deliverables like JAR file or WAR files.
Default in Jenkins
Maven is the default build tool in the Jenkins continuous integration tool to perform builds when code is committed.
Unlike shell script procedural code, Maven files enable declarative statements.
Maven adopts the principle of “Convention over configuration”, which means less coding work. However, it operates as a “black box”.
Install latest
PROTIP: Rather than downloading directly from https://maven.apache.org/download.cgi, use a package manager.
To install the latest version on MacOS:
the response I got on Dec 29, 2017:
Install previous version
Then, to switch among versions:
Configure Path
I got this response:
Confirm the path:
NOTE: Before OSX Mavericks, Maven was installed by default in:
/usr/share/maven/bin/mvn
Confirm the path. Substitute the version (3.5.2) with the version you just installed:
mvn files should be listed:
Open using a text editor, substituting subl (for Sublime) with atom or vim:
Add the following to under export PATH=, changing the version (3.5.2) to whatever appears above:
On Windows, define environment variable M2_HOME with a path such as:
Within environment variable PATH , add:
View changed environment variables. On a Mac:
The response if installed by Homebrew on Mac:
/usr/local/Cellar/maven/3.5.2/libexec
The response if installed by Homebrew on Mac:
/usr/local/Cellar/maven/3.5.2/libexec/bin
In a Terminal, verify changes:
The reply is, for example:
Change Default Configurations
Navigate to the hidden folder Maven installed to house packages installed (junit, commons-cli, commons-lang, etc).
Some prefer to change Maven’s local repository to another location.
There is a settings.xml file containing:
Using Maven
Maven allows use of a central maven repository.
The pom.xml (Project Object Model) file describes project dependencies which Maven resolves by downloading them.
NOTE: Some prefer to install and use the Cargo plugin (from Codehaus) to Maven in order to eliminate use of pom.xml. In a folder that contains a pom.xml:
mvn clean verify org.codehaus.cargo:cargo-maven2-plugin:run
The vast majority of Maven-built projects can be built with this command:
The “clean” cleans out results from the prior build before starting with install.
During the first full run, testing jars are installed in your local maven repository.
Maven is said to also act as project management tool because it can generate reports etc.
build.xml
Maven enforces a standard naming convention for artifacts defined using groupId, artifactId, and version.
After the first run, builds can skip tests with this additional parameter:
Maven lifecycle phases

Here are sub-commands for mvn:
| Sub-command | Description |
|---|---|
| validate | Validate the project is correct and all necessary information is available |
| initialize | initialize build state, (for example : set properties, create directories,… etc) |
| generate-sources | generate any source code for inclusion in compilation |
| process-sources | process the source code (for example : filter any values) |
| generate-resources | generate resources for inclusion in the package. |
| process-resources | copy and process the resources into the destination directory, ready for packaging. |
| compile | compile the source code of the project. |
| process-classes | post-process the generated files from compilation (for example : to do bytecode enhancement on Java classes) |
| generate-test-sources | generate any test source code for inclusion in compilation. |
| process-test-sources | process the test source code (for example : to filter any values) |
| generate-test-resources | create resources for testing. |
| process-test-resources | copy and process the resources into the test destination directory. |
| test-compile | compile the test source code into the test destination directory. |
| process-test-classes | post-process the generated files from test compilation (for example : to do bytecode enhancement on Java classes) |
| test | run tests using a suitable unit testing framework. These tests should not require the code be packaged or deployed. |
| prepare-package | perform any operations necessary to prepare a package before the actual packaging. This often results in an unpacked, processed version of the package. |
| package | Take the compiled code and package it in its distributable format (for example : jar, war, …etc) |
| pre-integration-test | perform actions required before integration tests are executed. This may involve things such as setting up the required environment. |
| integration-test | process and deploy the package if necessary into an environment where integration tests can be run. |
| post-integration-test | perform actions required after integration tests have been executed. This may including cleaning up the environment. |
| verify | run any checks to verify the package is valid and meets quality criteria. |
| install | install the package into the local repository, for use as a dependency in other projects locally. |
| deploy | done in an integration or release environment, copies the final package to the remote repository for sharing with other developers and projects. |
| Sub-command | Description |
|---|---|
| pre-clean | Executes processes needed prior to the actual project cleaning |
| clean | Remove all files generated by the previous build |
| post-clean | Execute processes needed to finalize the project cleaning |
| Sub-command | Description |
|---|---|
| pre-site | Executes processes needed prior to the actual project site generation. |
| site | Generates the project’s site documentation. |
| post-site | Executes processes needed to finalize the site generation, and to prepare for site deployment. |
| site-deploy | Deploys the generated site documentation to the specified web server. |
Maven plug-in goals by lifecycle phase
Each unit of execution work in Maven is called a goal.

Maven C/C++ Plugin http://duns.github.io/maven-nar-plugin/
Maven plug-ins by lifecycle phase

The graphic at Empeccableweb includes “Archetype”:

Dependencies
Mirror
The Maven Central Repository provides a UI to
the mirror website where Maven pulls files from. In the US it is:
Источник
How to Install Maven on Mac OS
In this short tutorial, you will learn a couple of ways you can install maven on your Mac OS computer.
- Install maven with Homebrew,
- Install maven by downloading Maven archive.
Install Maven with Homebrew
Perhaps the easiest way to install Maven on your Mac OS machine is to use Homebrew. Homebrew is a free and open-source software package management system that simplifies the installation of software on Apple’s macOS operating system and Linux.
If for some reason you do not have Homebrew installed on your Mac machine, you can quickly install Homebrew by running the following command:
To install Maven with Homebrew, open terminal window on your Mac OS and type the following command:
If all is good you should maven downloading to your computer:
Once the download is complete, verify the installation by running the following command:
This will print the current version of maven install on your computer, together with some additional details. For example:
Maven is now installed on your computer!
Install Maven From a Downloaded Archive
To install Maven from an archive, you will need to first download Maven archive. Once you have Maven archive downloaded, extract it to a folder which you want to be Maven Home.
Once you have extracted Maven from a downloaded archive to a folder on your computer, add Maven to an Environment PATH.
Once you have added Maven /bin folder to an Environment Path, verify Maven installation by running the following command:
If all is good, you should see Maven version printed together with some additional information. You should now have Maven installed and working on your computer.
I hope this tutorial was helpful to you. If you are interested to learn more about Maven, have a look at the below list of online video lessons. One of them might greatly speed up your learning progress.
Источник
Install Maven on Mac

This is installation guide on How to install Maven in Mac OSX using Home Brew and from Mac’s Command Line Terminal.
Some of the Mac OS X versions comes with Maven 3 built in, installation located at /usr/share/maven . To test Maven installed or not in your Mac issue command mvn -v in Terminal, it shows you installed version if already installed otherwise error.
Before Maven setup make sure already Java JDK or GraalVM setup done on your Mac Machine.
1. Install Maven using brew on Mac
1. The simplest way to install Maven on your Mac OS is using brew command (brew install maven), if already Homebrew installed on your machine. Check if Homebrew installation using brew -v, you will get version if installed, otherwise you get ‘command not found’.
2. If not installed, issue following command in your terminal to quickly install Homebrew on your Mac OS.
3. To Install Maven using brew on Mac, issue following command.
4. If everything goes fine, you will see following lines in terminal.
5. Finally set Maven paths using following commands.
6. Test the installation using mvn -v .
2. Install Maven using Terminal on Mac
1. Download Maven and extract in Local Mac
Download binary tar archive from apache-maven-3.xxx-bin.tar.gz, extract it in your local system. In my case binary downloaded /Downloads/apache-maven-3.6.3-bin.tar.gz . Extract the archive file to specific location.
Move to specific folder.
2. Set MAVEN_HOME and $MAVEN_HOME/bin to PATH on Mac
Open .bash_profile using TextEdit or nano and include MAVEN_HOME and $MAVEN_HOME/bin to PATH.
Add the following lines and save .bash_profile file.
Refresh the settings from .bash_profile .
3. Test Maven Installation on Mac
Maven setup is done on Mac OS, to test the setup run mvn -version or mvn -v command.
3. Conclusion
In this guide we have seen how to install Maven on Mac operating system using brew and from Terminal Command line. Did it work for you or any issue comment below.
Источник


