ProtonVPN macOS manual IKEv2 VPN setup
Note: We have released a ProtonVPN app for macOS! If your device uses macOS version 10.12 and above, you can download the ProtonVPN macOS app . The tutorial for our macOS app is here . With the ProtonVPN macOS app, you can connect to ProtonVPN directly without any additional setups.
You can also connect to the ProtonVPN servers by either using TunnelBlick (it uses OpenVPN), or connect manually via IKEv2 protocol.
The manual connection won’t have additional features and this connection method is only available on Mac OS X 10.11 (El Capitan) or newer macOS versions.
MacOS IKEv2 VPN setup for ProtonVPN
1. Download ProtonVPN IKEv2 certificate and open it from your Downloads folder: https://protonvpn.com/download/ProtonVPN_ike_root.der
2. If you are using macOS 10.13.x, the certificate will be added automatically. Otherwise, click on Add in order to add it to the keychain.

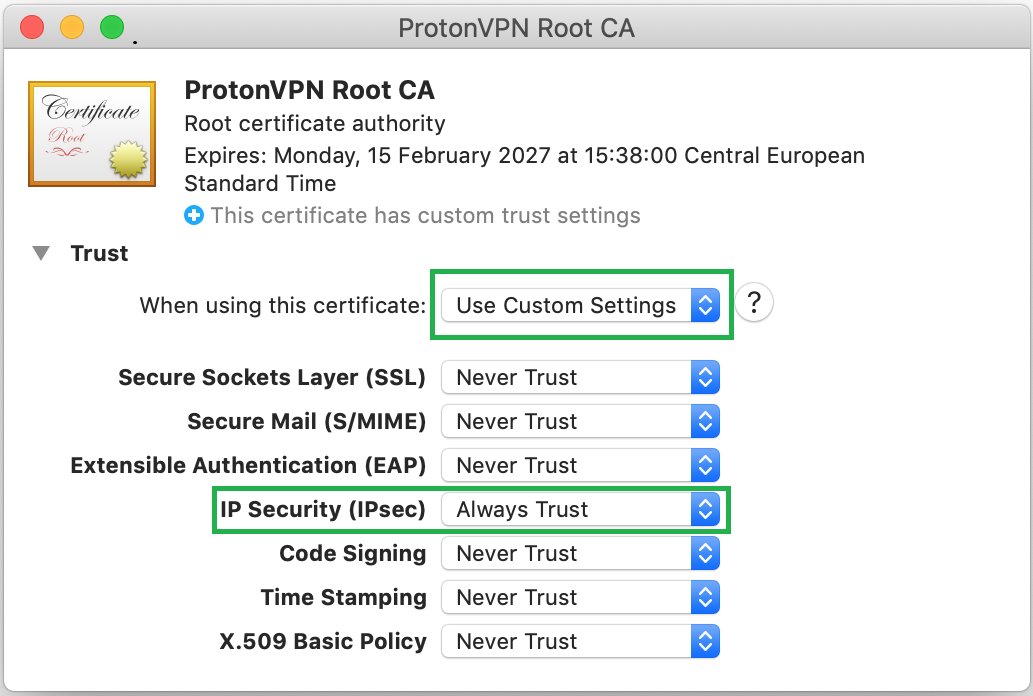
3. Right click on ProtonVPN Root CA certificate and then click on Get Info.

4. At this step, it’s enough to select Use Custom Settings and Always Trust only the IP Security (IPsec) for the ProtonVPN connection. Enter your Mac password when prompted and close the keychain window.
5. Open System Preferences and then open Network.

6. In the Network window, click on the Plus icon at the bottom-left corner.
7. A new network setup window will appear. Select VPN in the Interface field, IKEv2 in the VPN Type field, name Service however you like and click Create.
8. You will be prompted to enter server information. In the Server Address and Remote ID fields, type in the hostname of the server you wish to connect to (for example us-nj-01.protonvpn.com). Server hostnames can be found in the Downloads category in your account, under Server Configs section. Each server is named according to its server number and first two letters: https://account.protonvpn.com/downloads
9. Click on the Authentication Settings… and enter your OpenVPN/IKEv2 credentials, you can check them in the Account section: https://account.protonvpn.com/settings. Afterward, click OK.

10. Click Connect and Apply once this screen is prompted.

11. You should get connected now. You can disconnect from the Network screen or VPN status bar at the top right of your screen.

Related articles:
ProtonVPN macOS OpenVPN setup
ProtonVPN iOS IKEv2 manual setup
Источник
Настройка подключения VPN по IKEv2 на MacOS
Инструкция по настройке подключения VPN по протоколу IKEv2 на macOS
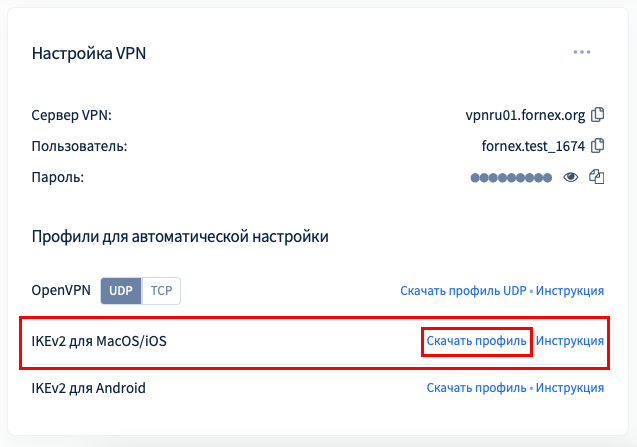
Для настройки VPN подключения по технологии «IKEv2» необходимо сначала скачать файл конфигурации с биллинга.
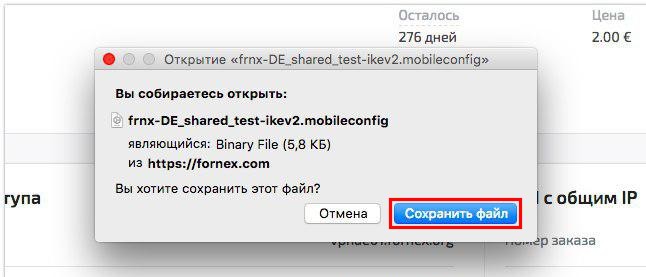
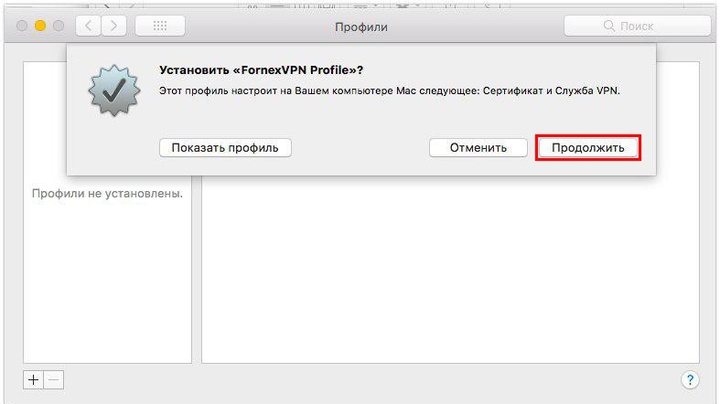
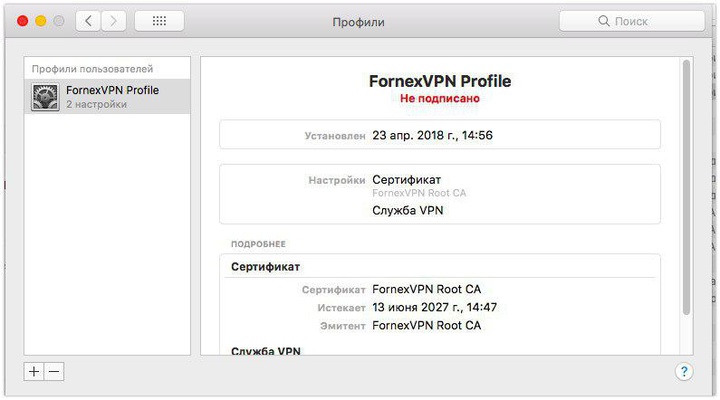
Далее зайдите в загрузки и найдите скачанный файл конфигурации, откройте его и нажмите кнопку «Продолжить» для установки профиля.
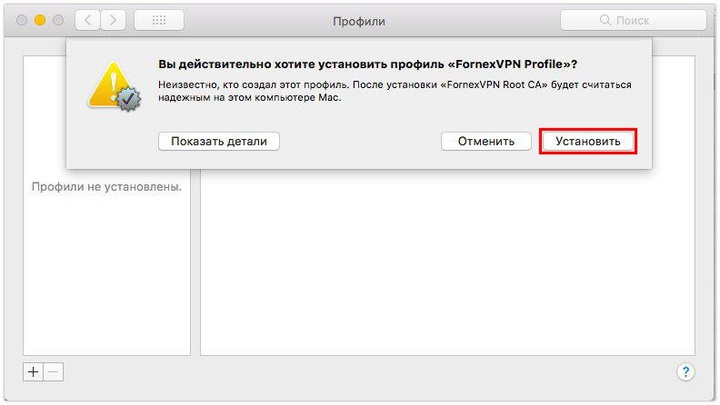
Нажимаем кнопку «Установить».
После ввода пароля Профиль VPN с необходимыми настройками будет установлен.
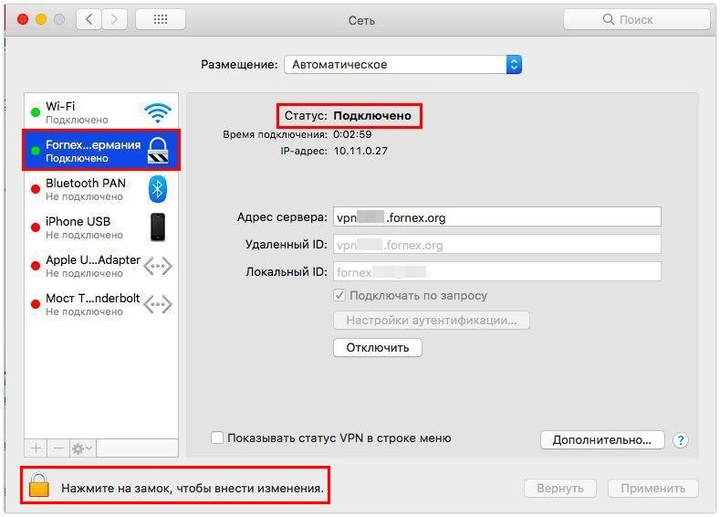
VPN будет автоматически запущен.
Вы можете управлять своим VPN-соединением в настройках сети.
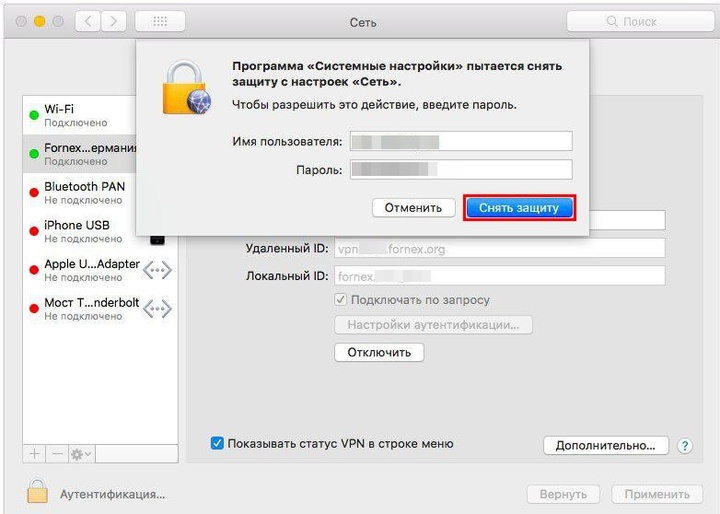
Чтобы отключить автоматическое подключение к VPN, нажмите на замок для выбранного подключения, введите пароль и нажмите снять защиту.
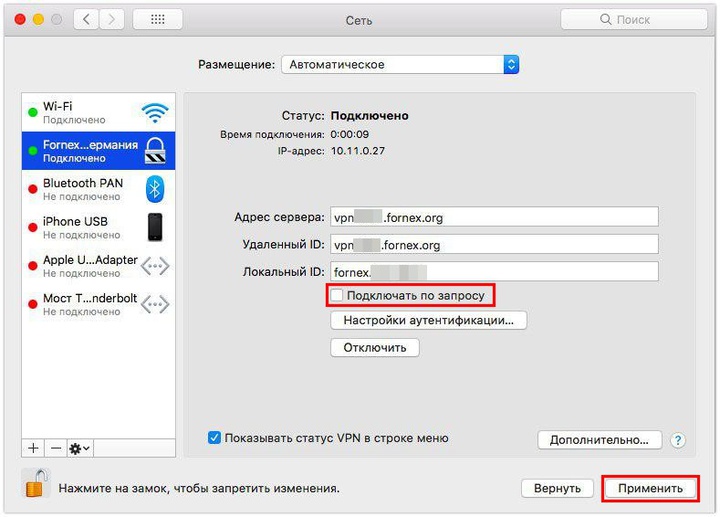
Далее уберите галочку напротив «Подключать по запросу» и нажмите кнопку «Применить».
При использовании подключения по протоколу ikev2, возможно только одно активное соединение.
Если у Вас возникли трудности в настройке или появились дополнительные вопросы, вы всегда можете обращаться в нашу службу поддержки через систему тикетов.
Источник
Настройка ikev2 mac os
IKEv2 на сегодняшний день считается самым безопасным протоколом подключения, принцип его настройки похож на L2TP.
Если у вас уже есть тестовый или премиум код доступа, введите его на странице VPN
и нажмите Подключиться, далее в личном кабинете выберите Компьютер > Mac OS > IKEv2
Откройте Системные настройки > Сеть далее нажмите на «+» (в нижней части окна) и у вас появится окно.
Во всплывающем окне вам нужно указать:
Интерфейс — выберите VPN ;
Тип VPN — выберите IKEv2 ;
Имя службы можете поставить произвольное описание.
После того как вы нажмёте Создать , у вас появится еще одно всплывающие окно в котором так же необходимо заполнить данные для подключения. Для этого зайдите в личный кабинет и введите ваш код, выберитеа Компьютер > MacOS > IKEv2.
Адрес сервера (адрес сервера из общего списка серверов)
Удаленный ID (указываем тоже что и в разделе адрес сервера)
Локальный ID (поле оставляем пустым)
После того как вы все указали, нажимаем на кнопку Настройка аутентификации и вводим:
Имя пользователя — Ваш код доступа;
Пароль — указываем ваши данные (пароль по умолчанию служит ваша почта, на которую вы приобретали покупку);
Нажимаем на Применить и после Подключиться .
После подключения, открываем страницу в браузере и проверяем изменился ли IP адрес. Если IP-адрес изменился,
значит вы все сделали правильно и VPN корректно работает.
Если вы не смогли самостоятельно подключиться или возникли трудности, напишите нам.
Инструкции использования сервиса: VPN , MacOS
Ответы на самые частые вопросы пользователей > Подключение через IKEv2 для пользователей услуги VPN.
Источник
Настройка IKEv2 VPN соединения на macOS
Выберите логотип Apple и затем Системные настройки.
Выполните следующие шаги:
- Нажмите на знак +
- Выберите VPN
- Выберите IKEv2
- Введите любое название подключения
- Нажмите Создать
В разделе Подписки посмотрите домены IKEv2 VPN серверов, Логин и Пароль VPN.
Выполните следующие шаги:
- Укажите домен IKEv2 VPN сервера
- Аналогично пункту 1
- Нажмите Настройки аутентификации
- Аутентификация через Имя пользователя
- Логин VPN
- Пароль VPN
- Поставьте галку Показывать статус VPN в строке меню
- Подключитесь к VPN серверу
VPN подключение успешно установлено.
Также можно подключиться к VPN из верхнего меню.
Источник
How to connect to NordVPN with IKEv2/IPSec on macOS
The IKEv2/IPSec connection method is one of the alternative ways to connect to NordVPN servers on your macOS. This connection method is preferred by privacy enthusiasts as well as Apple itself, as the IKEv2/IPSec security protocol is currently one of the most advanced on the market. That said, this manual set-up lacks the additional features of the native NordVPN app and is a bit more complicated to set up. Alternatively, you can use the IKEv2 application, which you can download from the App Store.
Manual connection setup
1. First, download the NordVPN IKEv2 certificate to your macOS. The easiest way is to click this link on your macOS device.
Once downloaded, open the certificate file in the Downloads folder.
2. The Add Certificates window will appear. Click Add to add the certificate to the login keychain.
3. Right-click the NordVPN Root CA certificate in the login keychain and select Get Info.
4. Under When using this certificate, set the IP Security (IPSec) and Extensible Authentication (EAP) fields to Always Trust. Leave all other fields as Never Trust. You will have to enter your Mac password to make these changes. Once done, close the keychain.
5. Click on the Apple logo in the upper-right corner of the screen and select System Preferences. .
6. In the System Preferences, click on Network.
7. When the network window opens, click on the + icon in the lower-left corner (you must have administrator privileges).
8. A new window will pop up. For Interface, select VPN from the drop-down menu. For VPN Type, select IKEv2. In the Service Name field, type any name you want. We recommend that you name the service NordVPN (IKEv2). Click Create.
9. The settings for the new VPN connection will now be displayed. In the Server Address and Remote ID fields, type the hostname of a NordVPN server.
For the sake of this tutorial, we used the hostname of server NL#37, but you should connect to a server suggested to you at https://nordvpn.com/servers/tools/. You will find the server hostname right under the server title.

10. Click on Authentication Settings…. Select Username as the Authentication method, then type in your NordVPN service username and password. Click OK and then Apply.
You can find your NordVPN service credentials (service username and password) in the Nord Account dashboard. Copy the credentials using the “Copy” buttons on the right.
11. Check the Show VPN status in menu bar box (optional), click Connect and then Apply.
12. That’s it! You should now be connected. If you have checked the Show VPN status in menu bar box, you’ll be able to connect to your VPN from the status bar
Tip: Your VPN connection safety depends on your account password too. Don’t forget to use a strong password on your account, as it will help you to avoid credential stuffing attacks and will keep your connections safe and uninterrupted.
As generating and remembering strong and secure passwords is not an easy task, we recommend downloading our free password manager — NordPass. It generates secure passwords for you and stores them safely, letting you avoid time-wasting password resets in the future.
Источник


