- Настройка phpstorm для linux
- 1. Установка пакетов
- 2. Скачиваем PhpStorm и устанавливаем его
- 3. Создаём ссылку для запуска PhpStorm на рабочем столе Ubuntu
- Install PhpStorm
- System requirements
- Install using the Toolbox App
- Install the Toolbox App
- Install the Toolbox App
- Install the Toolbox App
- Standalone installation
- Silent installation on Windows
- Silent configuration file
- Install as a snap package on Linux
- Lunux. Установить xdebug + phpstorm
- Configuring the IDE
- Restore IDE settings
- Back up your settings and restore the defaults
- Как установить PhpStorm на Ubuntu 20.04 LTS
- Как установить PhpStorm на Ubuntu 20.04 LTS
- Установите PhpStorm на Ubuntu 20.04 LTS Focal Fossa
- Шаг 1. Во-первых, убедитесь, что все ваши системные пакеты обновлены, выполнив следующие команды apt в терминале.
- Шаг 2. Установка PhpStorm на Ubuntu 20.04.
- Шаг 3. Запустите PhpStorm.
Настройка phpstorm для linux

Программисты в своей профессиональной деятельности используют IDE для разработки приложений. Я, как веб-разработчик, использую для работы IDE PhpStorm. Однако, установка PhpStorm в Ubuntu не столь тривиальна как в Windows. И поэтому я подготовил небольшую статью о том, как установить IDE PhpStorm для разработки в Ubuntu.
1. Установка пакетов
Первым делом нам нужно установить пакет Oracle (Sun) JDK. А перед этим желательно бы удалить все варианты данной надстройки, чтобы избежать проблем в работе приложения:
Теперь добавим репозиторий с Oracle (Sun) JDK и обновим список репозиториев на машине:
После того, как пакет oracle java был установлен, можем проверить была ли установка успешной, выполнив такую команду:
У меня вывод консоли такой был:
2. Скачиваем PhpStorm и устанавливаем его
Качаем последнюю актуальную версию с официального сайта:
После того как файл скачался, распаковываем его и копируем в директорию для пользовательских приложений /opt/. Затем переходим в каталог bin в директории с PhpStorm, в моём случае команда имела такой вид:
делаем исполняемым файл:
Запускаем установку следующей командой из каталога bin:
3. Создаём ссылку для запуска PhpStorm на рабочем столе Ubuntu
Теперь для запуска IDE PhpStorm нужно будет каждый раз использовать вышеуказанную команду, которой мы только что его установили. Но чтобы всё время не запускать приложение из консоли — предлагаю сделать на рабочем столе новый значок запуска, указав там команду:
Спасибо за внимание! надеюсь, что информация была полезна.
Источник
Install PhpStorm
PhpStorm is a cross-platform IDE that provides consistent experience on the Windows, macOS, and Linux operating systems.
System requirements
| Requirement | Minimum | Recommended |
|---|---|---|
| RAM | 2 GB of free RAM | 8 GB of total system RAM |
| CPU | Any modern CPU | Multi-core CPU. PhpStorm supports multithreading for different operations and processes making it faster the more CPU cores it can use. |
| Disk space | 2.5 GB and another 1 GB for caches | SSD drive with at least 5 GB of free space |
| Monitor resolution | 1024×768 | 1920×1080 |
| Operating system | Latest 64-bit version of Windows, macOS, or Linux (for example, Debian, Ubuntu, or RHEL) |
You do not need to install Java to run PhpStorm because JetBrains Runtime is bundled with the IDE (based on JRE 11).
Install using the Toolbox App
The JetBrains Toolbox App is the recommended tool to install JetBrains products. Use it to install and manage different products or several versions of the same product, including Early Access Program (EAP) and Nightly releases, update and roll back when necessary, and easily remove any tool. The Toolbox App maintains a list of all your projects to quickly open any project in the right IDE and version.
Install the Toolbox App
Download the installer .exe from the Toolbox App web page.
Run the installer and follow the wizard steps.
After you run the Toolbox App, click its icon in the notification area and select which product and version you want to install.
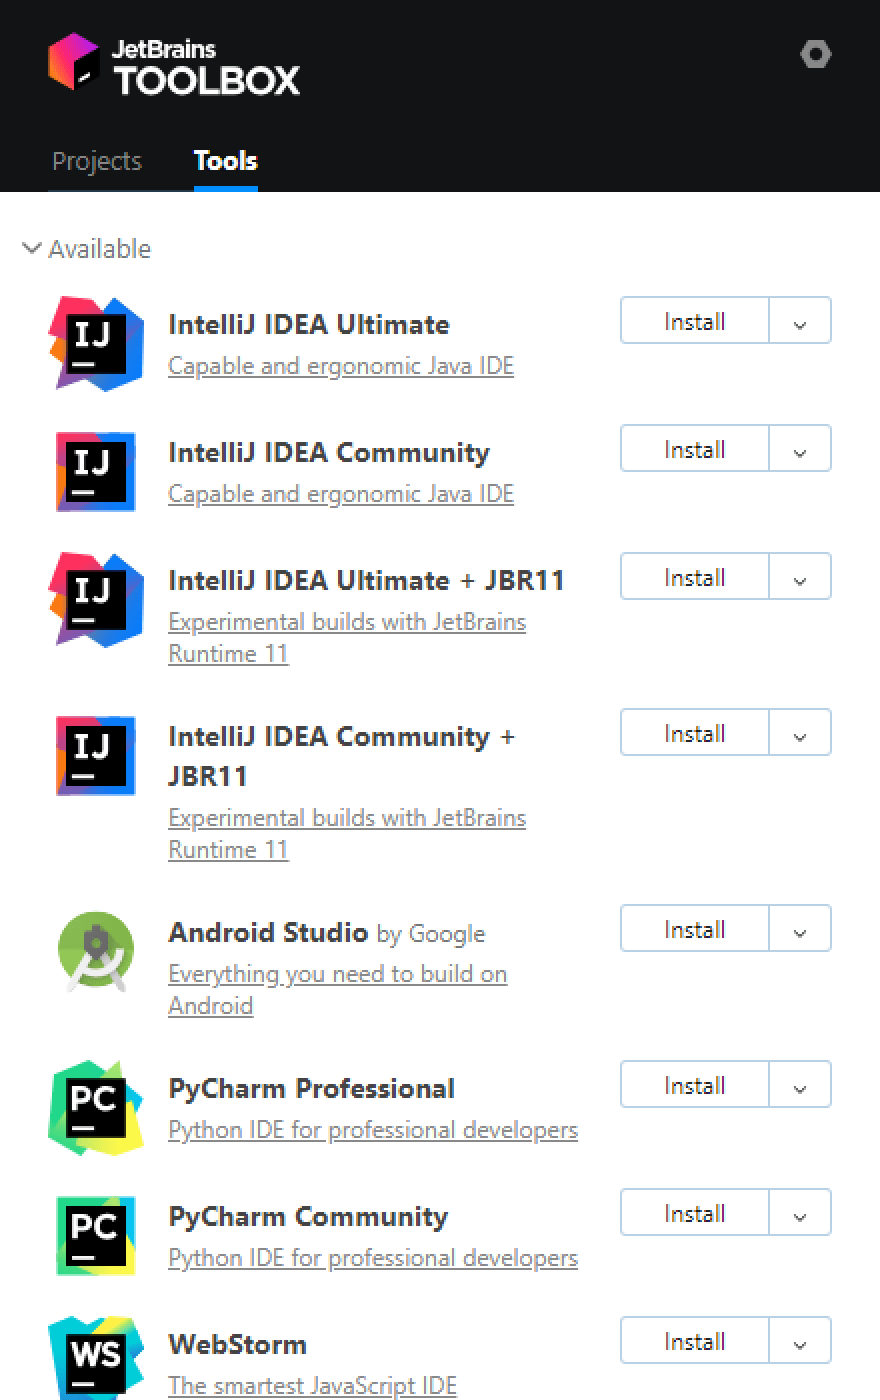
Log in to your JetBrains Account from the Toolbox App and it will automatically activate the available licenses for any IDE that you install.
Install the Toolbox App
Download the disk image .dmg from the Toolbox App web page.
There are separate disk images for Intel and Apple Silicon processors.
Mount the image and drag the JetBrains Toolbox app to the Applications folder.
After you run the Toolbox App, click its icon in the main menu and select which product and version you want to install.
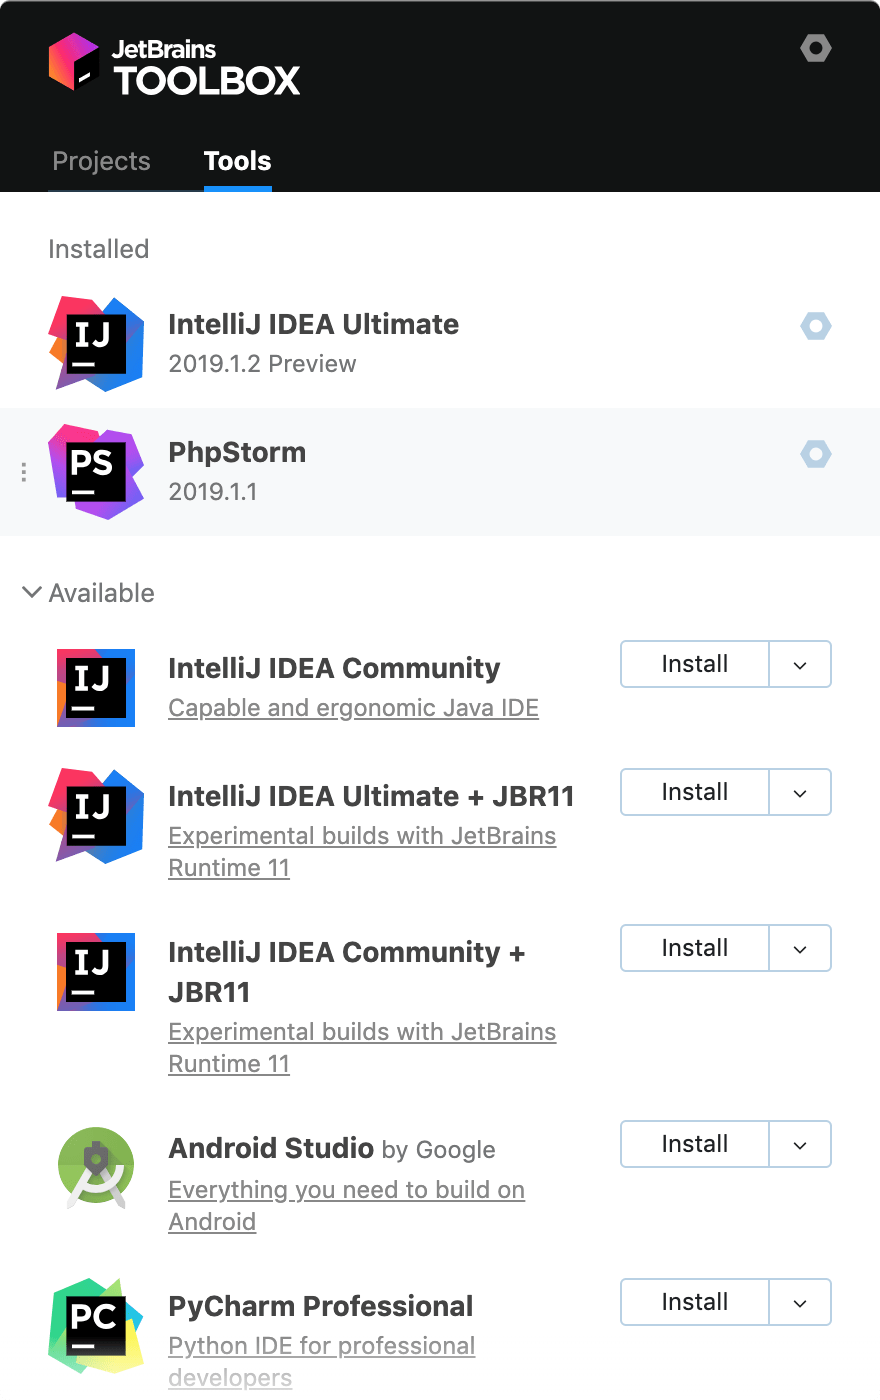
Log in to your JetBrains Account from the Toolbox App and it will automatically activate the available licenses for any IDE that you install.
Install the Toolbox App
Download the tarball .tar.gz from the Toolbox App web page.
Extract the tarball to a directory that supports file execution.
For example, if the downloaded version is 1.17.7391, you can extract it to the recommended /opt directory using the following command:
Execute the jetbrains-toolbox binary from the extracted directory to run the Toolbox App and select which product and version you want to install. After you run the Toolbox App for the first time, it will automatically add the Toolbox App icon to the main menu.
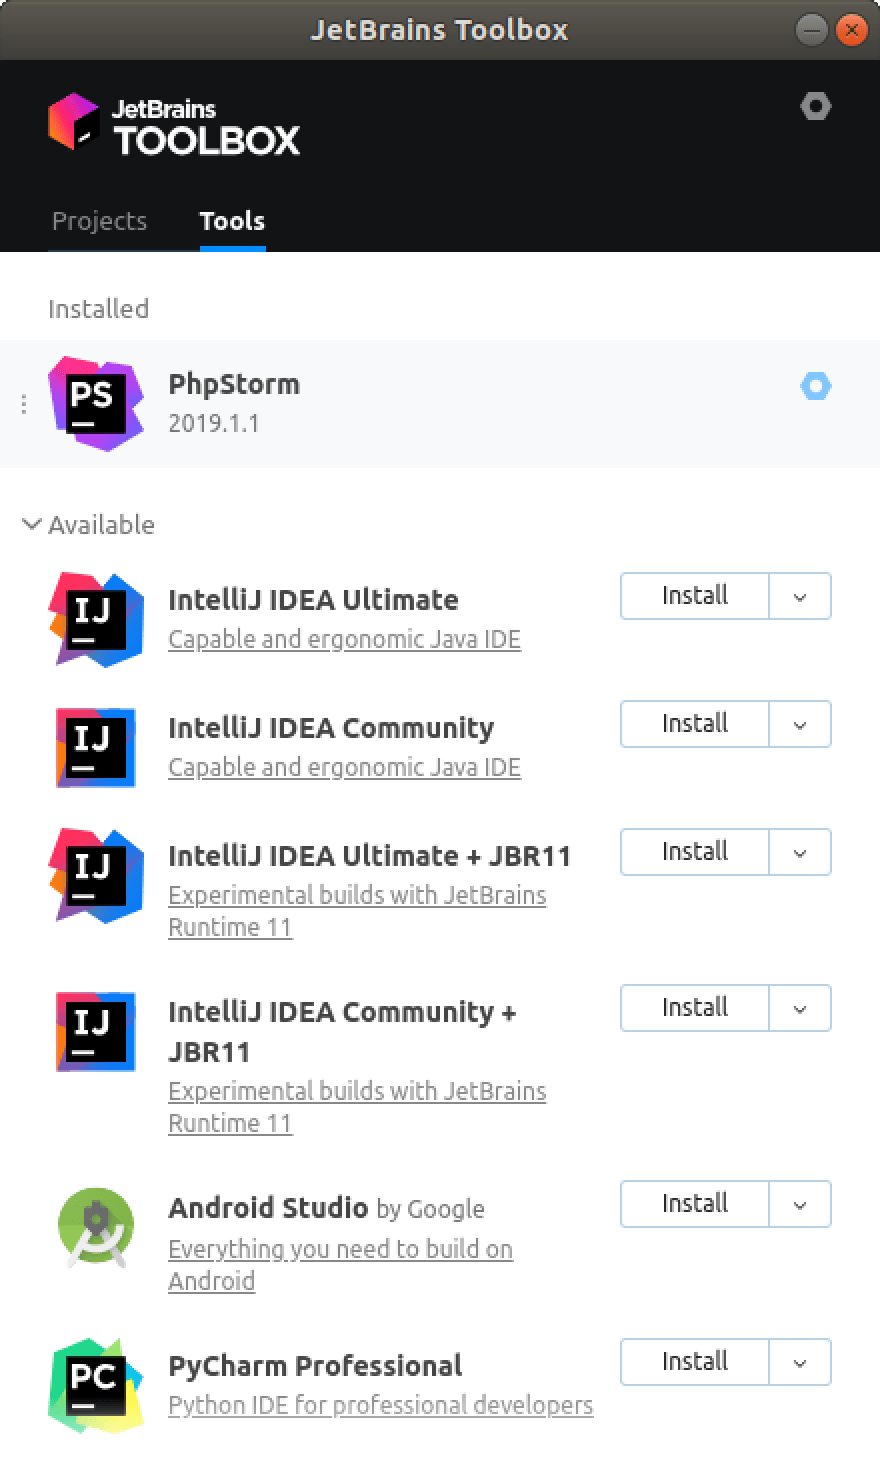
Log in to your JetBrains Account from the Toolbox App and it will automatically activate the available licenses for any IDE that you install.
You can use this shell script that automatically downloads the tarball with the latest version of the Toolbox App, extracts it to the recommended /opt directory, and creates a symbolic link in the /usr/local/bin directory.
Standalone installation
Install PhpStorm manually to manage the location of every instance and all the configuration files. For example, if you have a policy that requires specific install locations.
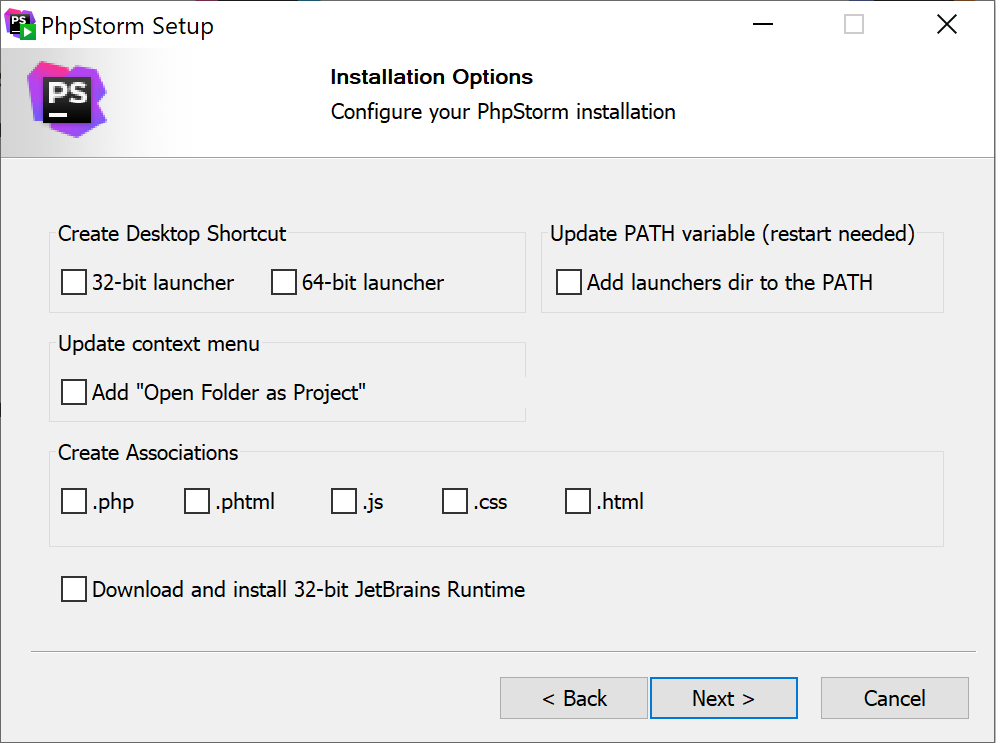
Run the installer and follow the wizard steps.
On the Installation Options step, you can configure the following:
Create a desktop shortcut for launching PhpStorm.
Add the directory with PhpStorm command-line launchers to the PATH environment variable to be able to run them from any working directory in the Command Prompt.
Add the Open Folder as Project action to the system context menu (when you right-click a folder).
Associate specific file extensions with PhpStorm to open them with a double-click.
To run PhpStorm, find it in the Windows Start menu or use the desktop shortcut. You can also run the launcher batch script or executable in the installation directory under bin .
There are separate disk images for Intel and Apple Silicon processors.
Mount the image and drag the PhpStorm app to the Applications folder.
Run the PhpStorm app from the Applications directory, Launchpad, or Spotlight.
Extract the tarball to a directory that supports file execution.
For example, to extract it to the recommended /opt directory, run the following command:
Do not extract the tarball over an existing installation to avoid conflicts. Always extract it to a clean directory.
Execute the PhpStorm.sh script from the extracted directory to run PhpStorm.
To create a desktop entry, do one of the following:
On the Welcome screen, click Configure | Create Desktop Entry
From the main menu, click Tools | Create Desktop Entry
When you run PhpStorm for the first time, some steps are required to complete the installation, customize your instance, and start working with the IDE.
For information about the location of the default IDE directories with user-specific files, see Directories used by the IDE.
Silent installation on Windows
Silent installation is performed without any user interface. It can be used by network administrators to install PhpStorm on a number of machines and avoid interrupting other users.
To perform silent install, run the installer with the following switches:
/S : Enable silent install
/CONFIG : Specify the path to the silent configuration file
/D : Specify the path to the installation directory
This parameter must be the last in the command line and it should not contain any quotes even if the path contains blank spaces.
To check for issues during the installation process, add the /LOG switch with the log file path and name between the /S and /D parameters. The installer will generate the specified log file. For example:
Silent configuration file
You can download the default silent configuration file for PhpStorm at https://download.jetbrains.com/webide/silent.config
The silent configuration file defines the options for installing PhpStorm. With the default options, silent installation is performed only for the current user: mode=user . If you want to install PhpStorm for all users, change the value of the installation mode option to mode=admin and run the installer as an administrator.
The default silent configuration file is unique for each JetBrains product. You can modify it to enable or disable various installation options as necessary.
It is possible to perform silent installation without the configuration file. In this case, omit the /CONFIG switch and run the installer as an administrator. Without the silent configuration file, the installer will ignore all additional options: it will not create desktop shortcuts, add associations, or update the PATH variable. However, it will still create a shortcut in the Start menu under JetBrains .
Install as a snap package on Linux
You can install PhpStorm as a self-contained snap package. Since snaps update automatically, your PhpStorm installation will always be up to date.
To use snaps, install and run the snapd service as described in the installation guide.
On Ubuntu 16.04 LTS and later, this service is pre-installed.
PhpStorm is distributed via two channels:
The stable channel includes only stable versions. To install the latest stable release of PhpStorm, run the following command:
The —classic option is required because the PhpStorm snap requires full access to the system, like a traditionally packaged application.
The edge channel includes EAP builds. To install the latest EAP build of PhpStorm, run the following command:
When the snap is installed, you can launch it by running the phpstorm command.
To list all installed snaps, you can run sudo snap list . For information about other snap commands, see the Snapcraft documentation.
Источник
Lunux. Установить xdebug + phpstorm

Xdebug — это расширение для PHP, которое представляет разработчику функционал для отладки.
В данной публикации будет описан процесс установки xdebug + php7.2 на операционной системе linux и будет описана интеграция с IDE PhpStorm.
Данный мануал подходит для большей части различных типов операционных систем Linux.
Таких как: Ubuntu, Mint, Debian, Elementary OS и др.
В данной статье установка xdebug происходила на операционной системе Linux Ubuntu 19.04.
Будем считать, что у вас уже установлен и настроен веб сервер и есть как минимум php-fpm.
Приступим к установке и настройке:
- Устанавливаем xdebug
Настройка xdebug.ini конфигурационного файла
Отредактируйте файл любым текстовым редактором (В примере используется nano)
И отредактируйте файл следующим образом:
Выполните перезагрузку php-fpm:
Откройте IDE PhpStorm и выполните настройки:
- Выберите вкладку File в верхней панели и нажмите: Settings/Languages & Frameworks/PHP


Далее необходимо выполнить настройку Debug.
Для этого перейдите в настройках: Settings/Languages & Frameworks/PHP/Debug
- Заполните поле
Остальные поля отмечайте на ваше усмотрение.
Источник
Configuring the IDE
In PhpStorm, you can configure the settings on two levels: the project level and globally.

Global settings apply to all projects of a specific installation, or version, of PhpStorm. Such settings include IDE appearance (themes, color schemes, menus and toolbars), notification settings, the set of the installed and enabled plugins, debugger settings, code completion, and so on.
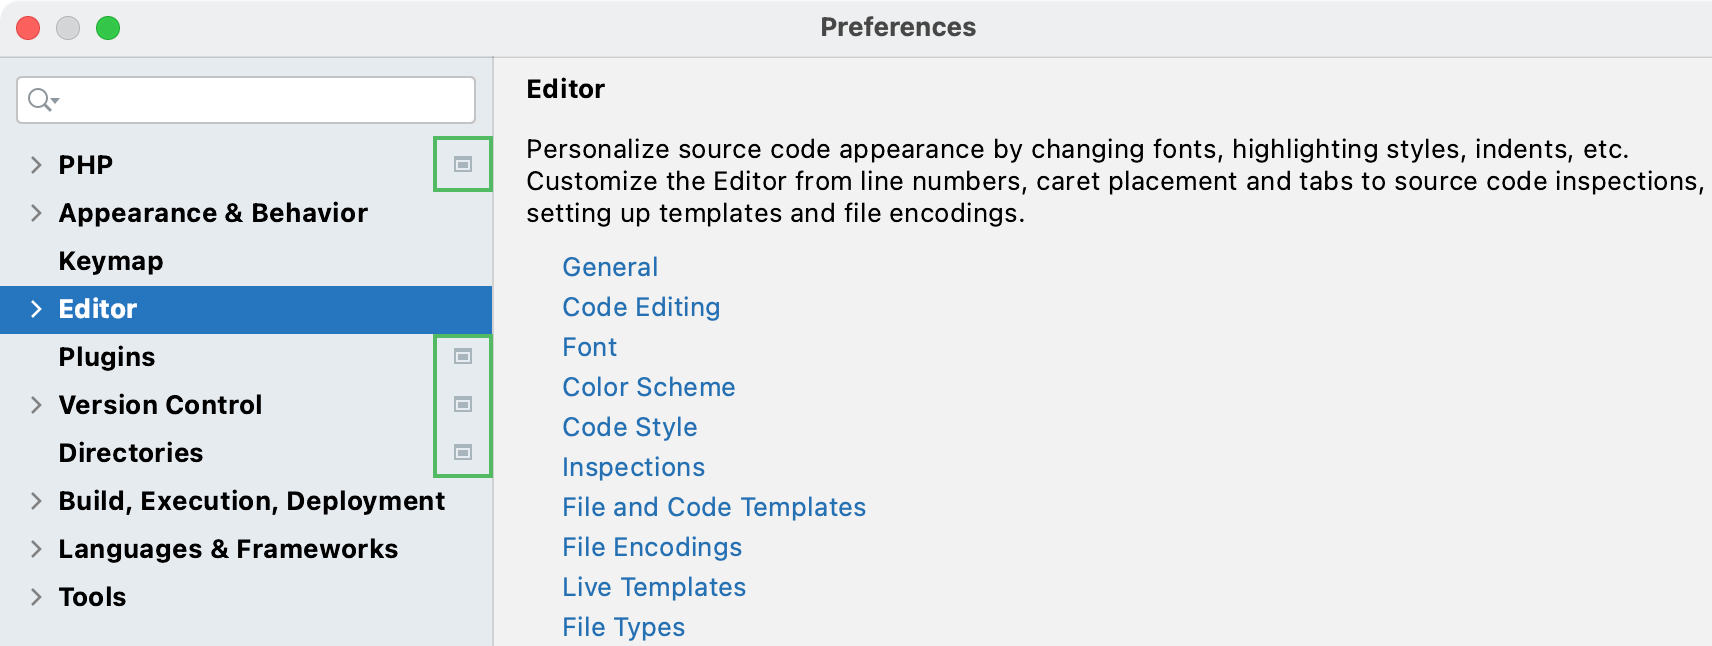
To configure your IDE, select PhpStorm | Preferences for macOS or File | Settings for Windows and Linux. Alternatively, press Ctrl+Alt+S or click on the toolbar.
Settings that are NOT marked with the icon in the Settings/Preferences dialog are global and apply to all existing projects of the current PhpStorm version.
Restore IDE settings
When you restore the default IDE settings, PhpStorm backs up your configuration to a directory. You can always restore your settings from this backup.
Back up your settings and restore the defaults
From the main menu, select File | Manage IDE Settings | Restore Default Settings .
Alternatively, press Shift twice and type Restore default settings .
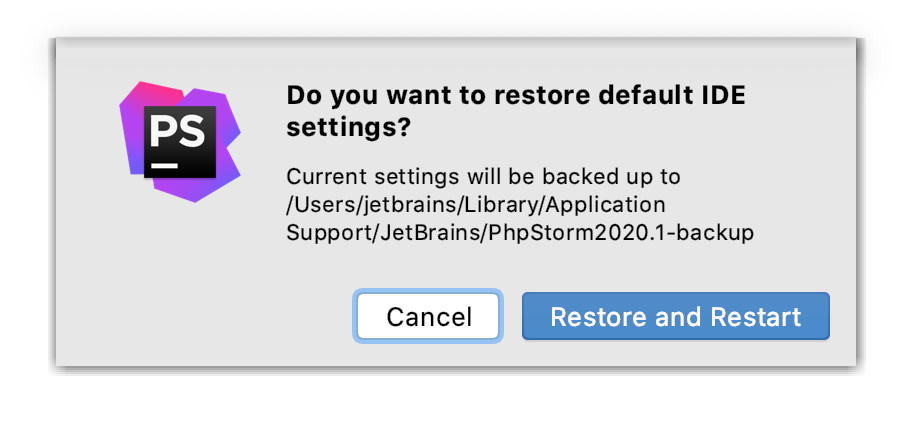
Click Restore and Restart . The IDE will be restarted with the default configuration.
When PhpStorm restores the default IDE settings, it creates a backup directory with your configuration in:
-backup Example C:\Users\JohnS\AppData\Roaming\JetBrains\PhpStorm2021.2-backup
Источник
Как установить PhpStorm на Ubuntu 20.04 LTS

Как установить PhpStorm на Ubuntu 20.04 LTS
В этом руководстве мы покажем вам, как установить PhpStorm на Ubuntu 20.04 LTS. Для тех из вас, кто не знал, PHPStorm — одна из лучших IDE от JetBrains для веб-разработки PHP. Он также обеспечивает поддержку Javascript, Typescript и CSS и т. Д. Вы также можете расширить возможности PhpStorm с помощью плагинов. Используя плагины PhpStorm, вы также можете получить поддержку таких фреймворков, как Laravel, CodeIgniter. Мы также можем использовать PhpStrom для других языков программирования, таких как HTML, SQL, Javascript, CSS и многих других.
В этой статье предполагается, что у вас есть хотя бы базовые знания Linux, вы знаете, как использовать оболочку, и, что наиболее важно, вы размещаете свой сайт на собственном VPS. Установка довольно проста и предполагает, что вы работаете с учетной записью root, в противном случае вам может потребоваться добавить sudo к командам для получения привилегий root. Я покажу вам пошаговую установку PhpStorm на сервере Ubuntu 20.04 (Focal Fossa).
Установите PhpStorm на Ubuntu 20.04 LTS Focal Fossa
Шаг 1. Во-первых, убедитесь, что все ваши системные пакеты обновлены, выполнив следующие команды apt в терминале.
Шаг 2. Установка PhpStorm на Ubuntu 20.04.
Установите PHPStorm, используя следующую команду:
По умолчанию, PHPStorm IDE должна быть установлена по пути. Затем добавьте разрешение на выполнение в файл рабочего стола PHPStorm следующим образом: $HOME /. local / umake / ide / phpstorm
Наконец, перезагрузите компьютер, чтобы изменения вступили в силу:
Шаг 3. Запустите PhpStorm.
После загрузки компьютера вы можете получить доступ к PHPStorm из меню приложений Ubuntu 20.04 LTS или запустить PhpStorm с помощью следующей команды:
Поздравления! Вы успешно установили PhpStorm . Благодарим за использование этого руководства по установке PhpStorm на Ubuntu 20.04. Для получения дополнительной помощи или полезной информации мы рекомендуем вам посетить официальный сайт PhpStorm .
Источник


